Convert WAV to MP3 through Online, Windows, Mac, and Mobile Devices
WAV files are great for capturing high-quality audio. Although these files can be awesome, they take up a lot of space. Some even complained that they could not play it on certain apps or devices they have. As a result, many look for ways to resolve it. The best method is to convert it to the most popular audio format, which is MP3. They usually won’t take up as much room on your phone, computer, or MP3 player. Plus, they are compatible with almost all devices and players. Begin learning how to change WAV to MP3 as you scroll through this step-by-step guide.

PAGE CONTENT
Part 1. Best Way to Convert WAV to MP3
If you want a reliable converter tool, Vidmore Video Converter is the perfect software for you. It has been a popular choice for many due to its versatility and easy-to-operate interface. Even though it is famous for its widely supported video formats, it also stands out as an audio converter. It means that you can convert your audio file to another format you need. It supports MP3, WAV, AAC, WMA, FLAC, AIFF, M4A, and much more. That said, it ensures that you can turn WAV to MP3 with ease! Aside from these files, you can convert your file to be compatible with other devices. Furthermore, it also lets you edit or trim your audio before exporting it. Finally, you can use this whether you’re a Mac or Windows PC user. If you’re excited to learn about how this tool works, view our easy guide below.
Step 1. First off, download the Vidmore Video Converter on your computer and install it. Once done with the installation, the tool will launch in an instant.
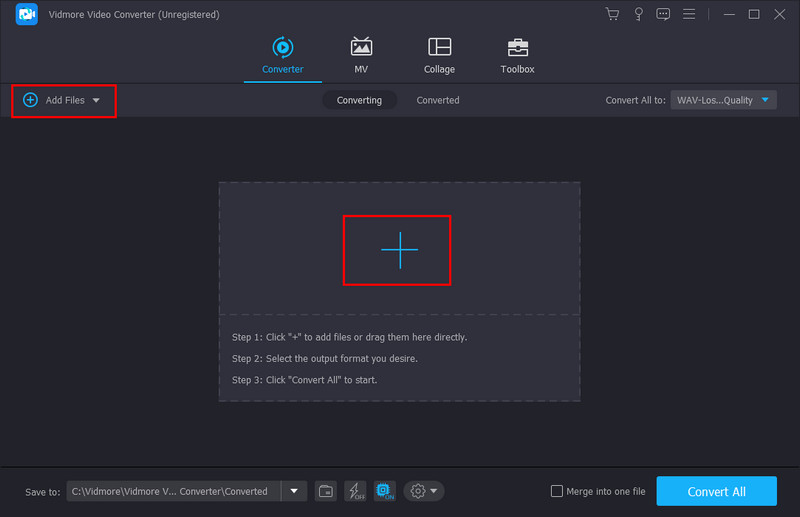
Step 2. Under the Converter section, use the Add Files or plus sign button in choosing your file. Add the WAV file you desire to convert.
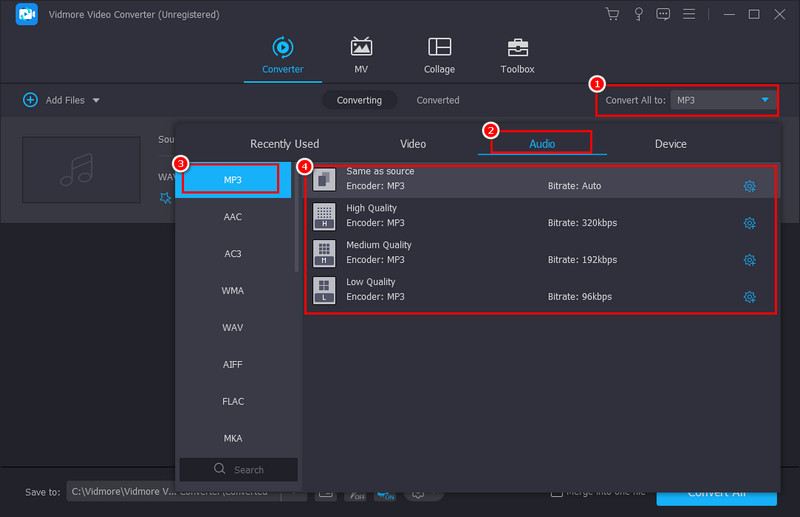
Step 3. On the Convert All to drop-down menu, go to Audio and select MP3. Optionally, you can choose your desired audio quality on the right part.
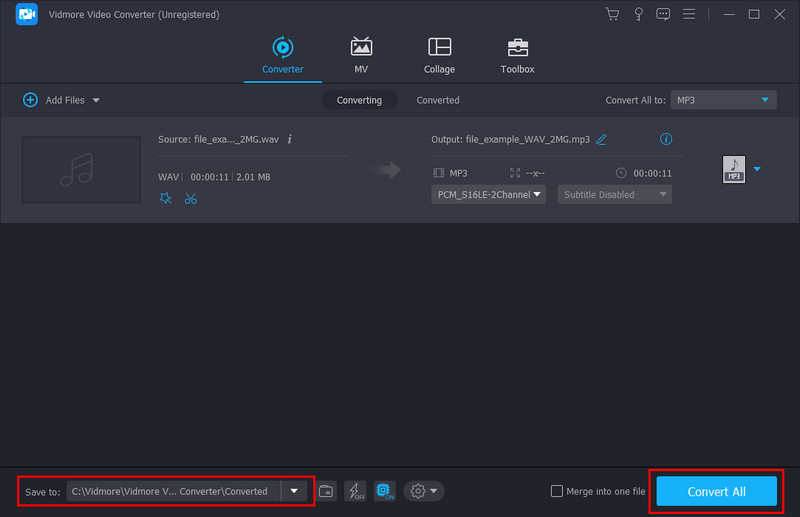
Step 4. Finally, pick where you want to store the converted file on the Save to menu. Then, hit Convert All to begin the conversion.

Part 2. Convert WAV to MP3 in iTunes
Did you know that you can also use iTunes to convert WAV to MP3 using Mac? iTunes is a well-known media player and library program developed by Apple. Aside from managing your audio files, it offers a convenient solution to turn a WAV file into an MP3 format. But remember that iTunes does not have a built-in function to directly convert files. Yet, there’s a workaround that involves changing iTunes settings to transform your WAV to MP3. Here’s how:
Step 1. Launch the iTunes application on your computer. Head to the File menu and pick Add File to Library. Select and add the WAV file you wish to convert.
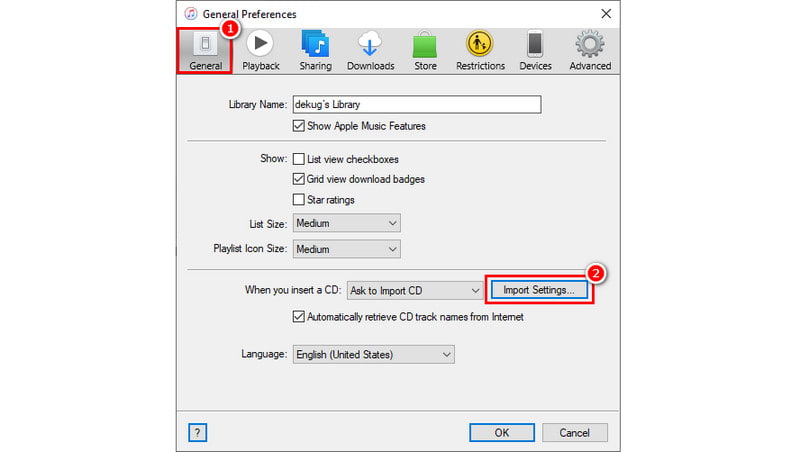
Step 2. Now, navigate to the Edit menu and choose Preferences from the drop-down menu. On the window that appears, go to the General tab and click Import Settings.
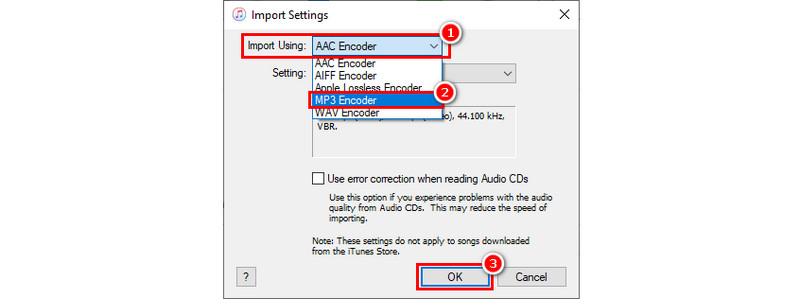
Step 3. On another mini window that will pop up, head to Import Using. Next, select MP3 Encoder from the options available and hit OK.
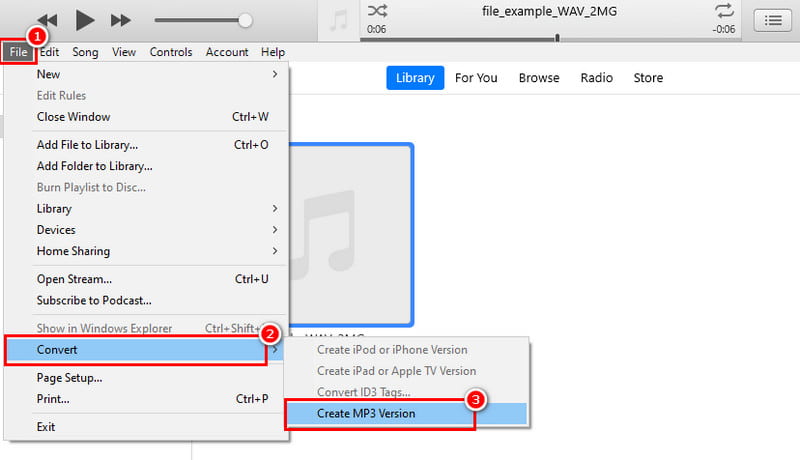
Step 4. Now, choose your WAV file. Go to File ] Convert ] Create MP3. Last but not least, iTunes will create an MP3 version of your file with the same name.
Pros
- It can convert WAV to MP3 for free.
- It is accessible on both Mac and Windows operating systems.
Cons
- iTunes is resource-intensive particularly on older or less powerful hardware.
- You can't choose the quality of the converted MP3.
Part 3. Convert WAV to MP3 Online
If you do not prefer installing software on your computer, there are online tools that can help you. One such platform that will allow you to convert WAV files to MP3 is CloudConvert. It is a versatile online tool designed to promote seamless file conversion across various formats. Using it, you can also convert WAV to MP3 without any hassle. It provides a quick solution for transforming your audio files without any app installation. But note that since it is online, a stable internet connection is vital. How to make WAV into MP3 using it? Here’s a guide for your reference.
Step 1. To start with, launch your favorite web browser. Then, search and access the CloudConvert.
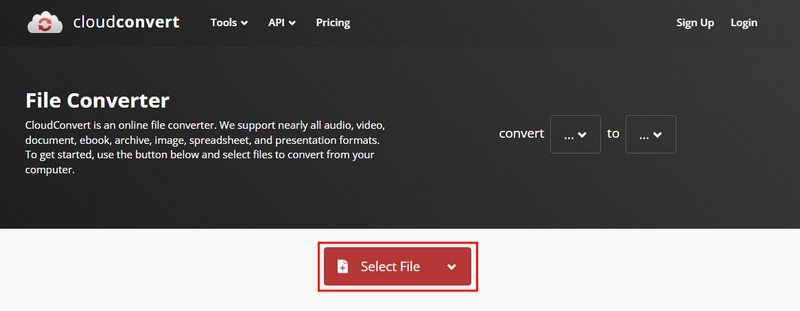
Step 2. On the main site of the platform, click the Select File button you’ll see. Choose and upload the WAV file you wish to convert. Also, you can drag and drop it directly on the website.
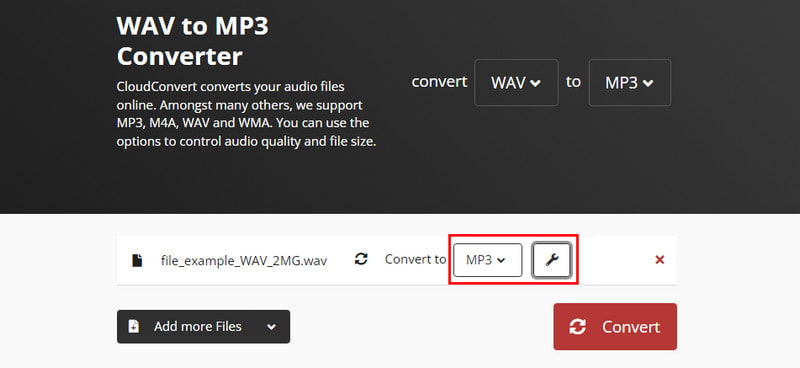
Step 3. After uploading your WAV file, choose MP3 as your desired output format. Find it on the list of available options in the Convert to section. Optionally, you can customize and adjust its parameters as you wish.
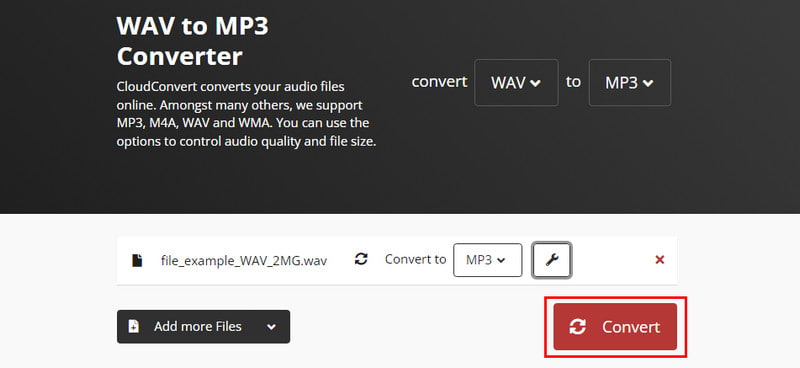
Step 4. Once you’re ready, initiate the conversion by hitting the Convert button. Finally, the WAV to MP3 conversion process will begin.
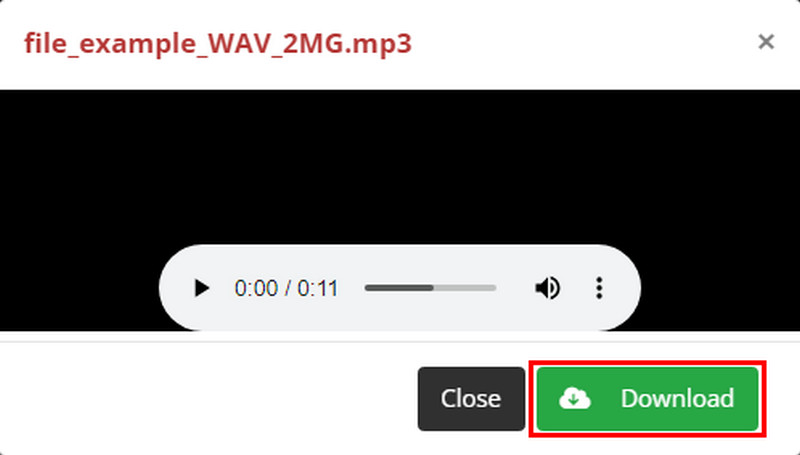
Step 5. When the procedure is through, click the Download button to export your converted file. And that’s it!

Pros
- It can be opened from any internet-enabled device with a web browser.
- It supports an extensive array of audio and video formats, like MP4, WAV, MP3, etc.
- Offers a free plan with a daily limit of 25 conversions and a maximum file size of 100MB.
Cons
- Upgrading to a paid plan is necessary for larger files or frequent conversions.
- Uploading files to a third-party website might raise security concerns.
- The conversion process relies on a stable internet connection.
Part 4. Transform WAV to MP3 with FFmpeg
Have you ever heard of FFmpeg? Well, it is a powerful open-source multimedia framework that is loved by tech enthusiasts. It became well-known as it can handle a vast array of audio and video tasks, including file conversion. It uses a command-line interface that users can utilize to transform their files to another format. A command line is where you type specific commands to instruct a program. In converting WAV to MP3 using FFmpeg, you do the same thing. It also gives an extensive range of options for customizing the conversion process, like changing audio bitrate. Yet, this method requires some technical knowledge to navigate. But fear not. Instead, follow the steps below to learn how to use it.
Step 1. Begin by installing FFmpeg on your computer. Ensure you download the appropriate version for your computer.
Step 2. Then, launch the Command Prompt on Windows or Terminal on macOS or Linux. It is where you'll type the FFmpeg commands.
Step 3. Now, use commands like “cd” to change the directory containing the WAV file you wish to convert. Alternatively, you can state the full path to the WAV file in the FFmpeg command.
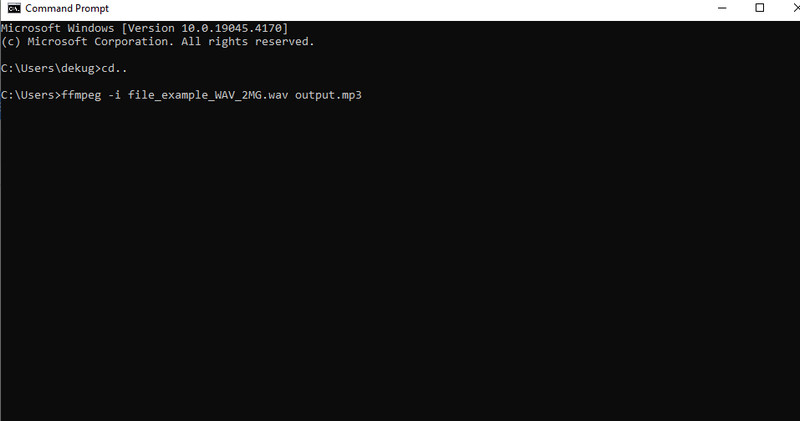
Step 4. Next, type the conversion command just like the sample below.
ffmpeg -i input.wav output.mp3
- Replace “input.wav” with the actual name of your WAV file.
- Replace “output.mp3” with your desired filename for the converted MP3.
Step 5. Finally, press Enter to execute the FFmpeg command you have typed. FFmpeg will begin processing the WAV file and converting it to MP3 format. That’s how to transfer WAV to MP3 using FFmpeg.
Pros
- FFmpeg offers a vast array of features, such as controlling audio quality, bitrate, etc.
- There's no cost involved in using this method.
- You can convert multiple WAV files at once by using wildcards in your commands.
Cons
- FFmpeg commands require some technical knowledge.
- Typing incorrect commands could lead to conversion errors or corrupted files.
- Lacks user-friendly buttons and menus.
Part 5. How to Convert WAV to MP3 on iPhone
Are you an iPhone user who’s looking for an application to help you transform WAV to MP3? Audio Converter - Extract MP3 is here to guide you. It provides a convenient solution for converting audio files directly on your iPhone. It supports tons of audio file formats, including MP3, WAV, WMA, ACC, and so on. Aside from that, it can extract audio from video and can do video conversion. It can also trim and add audio as you wish. Also, it stands out as a media player that can play audio and video files. Now, here’s how you can turn your WAV file to MP3 with this app.
Step 1. Open the App Store on your iPhone and install Audio Converter - Extract MP3. Tap the plus sign button at the top-right corner of your screen.
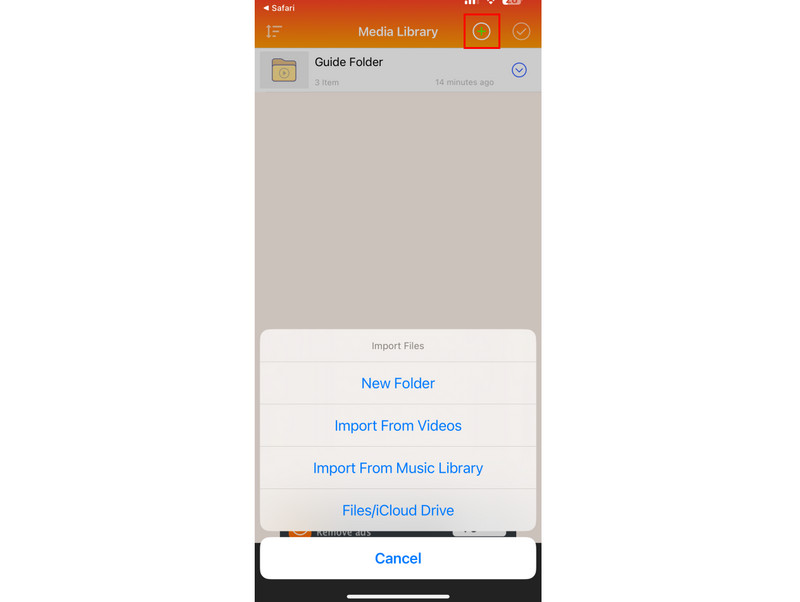
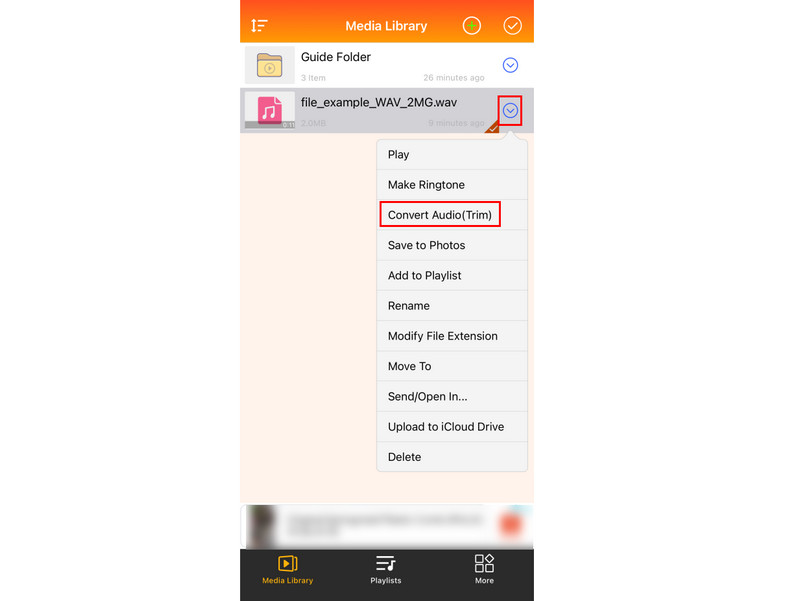
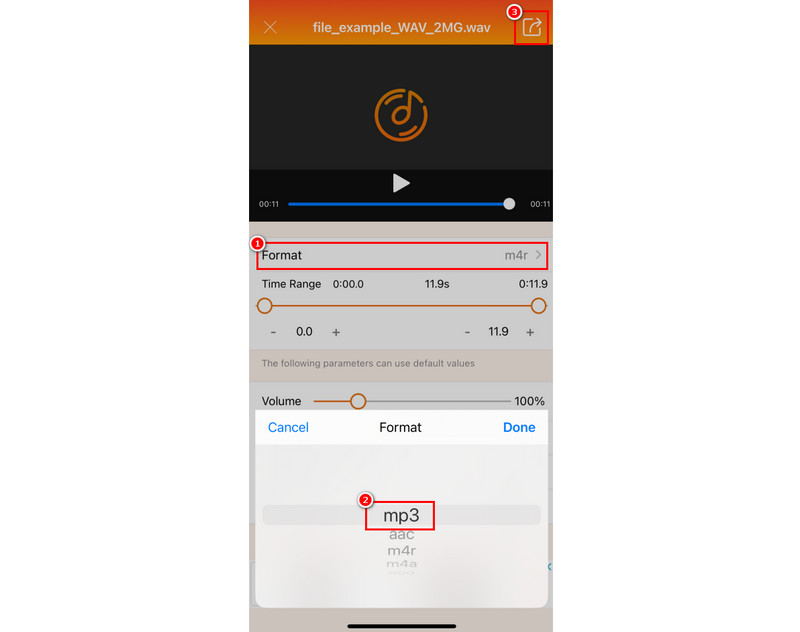
Step 2. Choose and add the file you want. Then, tap the button next to the WAV file imported into the application. From the list that will appear, tap the Convert Audio (Trim) option.
Step 3. On the next screen, tap the Format option and select mp3 from the available selection of formats. Tap Done to confirm the selection, then tap Share to save the converted file.
Pros
- Convert basic audio files like WAV to MP3 without any in-app purchases required.
- Allows converting various audio formats stored on your iPhone.
Cons
- The app contains advertisements that can be annoying.
- Large WAV files might require upgrading to a paid plan within the app.
Part 6. FAQs About How to WAV to MP3
Is a WAV better than MP3?
When talking about sound quality, yes WAV is better than MP3 as it offers higher quality audio. WAV is uncompressed, unlike MP4, which is a compressed format. However, for file size, MP3 is better than WAV since WAV files are much larger than MP3. So, WAV may not be as convenient for storage and distribution as MP3.
Does converting WAV to MP3 lose quality?
Yes, slightly. MP3 compresses the audio to save space, which can result in some loss of detail. But for most listeners, the difference is not that noticeable.
Can I use Audacity to convert WAV to MP3?
Of course, yes! Audacity is an open-source and free editing tool that can also convert WAV to MP3. Users can import WAV files into Audacity and export them as MP3 using the built-in export options.
What are the disadvantages of WAV?
WAV does have some disadvantages. One disadvantage of WAV is that it takes up more storage on your device. Another one is that not all devices can play WAV files natively. Also, it is not ideal for sharing, and it can be cumbersome.
Conclusion
So there you have it! Converting WAV to MP3 is easier with the right tools and knowledge. Now, you can free up valuable storage space on your device. Remember, the best conversion method depends on your needs. Yet, if you want a convenient tool that supports batch converting WAV to MP3, there’s a tool we highly recommend. None other than the Vidmore Video Converter. There are many more features and editing tools you can enjoy with it, so try it today.