How to Save QuickTime Screen Recordings and Movies as MP4 Format
“I cannot find the option to save a screen recording as MP4 file in my QuickTime, I can only save as MOV, how can I export as MP4?” Years ago, Apple introduced MOV as the go-to format for anyone using QuickTime. Today, most people still choose MP4 as the primary video format. That is not because they prefer to MP4 but have to. MOV is still not so widely used as MP4. This guide will tell you the best ways to export QuickTime to MP4.


Part 1: How to Export MP4 in QuickTime
Firstly, there are something you should know about QuickTime. It has two versions, the normal and pro version. Both of them can export movies to MP4 in QuickTime, but they work a bit different. The pro version supports more output formats and includes video converting feature.
How to Export MP4 in QuickTime
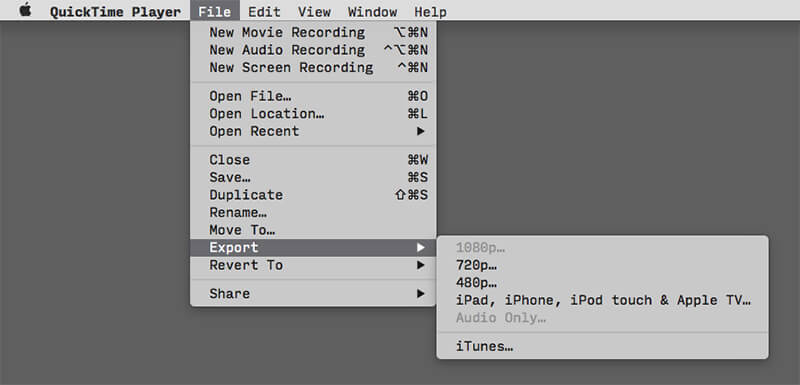
Step 1. Go to the File menu after you take a screen recording or play a movie, choose Export and iPad, iPhone, iPod touch & Apple TV.
Step 2. Then a dialog will pop up. Enter a filename into the Export As box, and find a location to save the MP4 file. Click and expand the Format option and pick iPad, iPhone 4 & Apple TV.
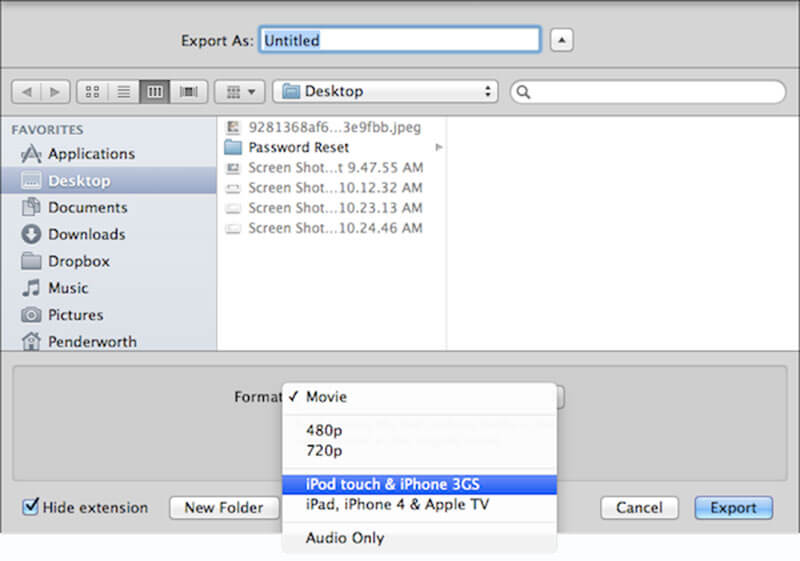
Step 3. Hit Save and QuickTime will export the screen recording or movie as an MP4 video file with 720p.
Note: You cannot get any more options in the normal version, such as video quality and more.
How to Export MP4 in QuickTime Pro
Step 1. If you are using QuickTime Pro and want to export a movie as MP4, also go to the File menu and choose Export.
Step 2. On the popup dialog, write down a filename and find a location to save the output. Open the Export drop-down list and choose Movie to MPEG-4. Hit the Save button to make QuickTime Player record in MP4 instead of MOV.
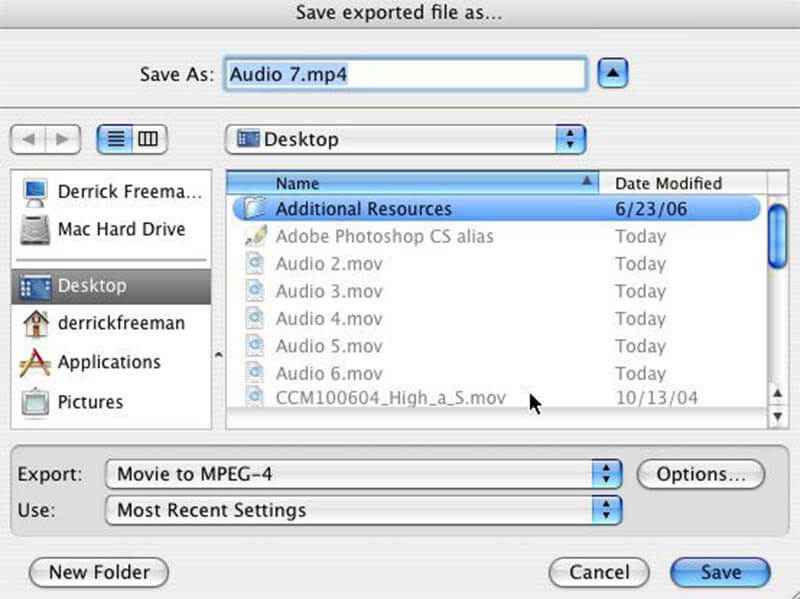
Note: If you want to change options, click the Options button to get them.
Part 2: Best Alternatives to QuickTime to Record Screen in MP4
Alternative 1: Vidmore Screen Recorder
QuickTime is not the only way to record screen in MP4. Vidmore Screen Recorder works well on screen recording. Moreover, it lets you save recordings in MP4 directly.
Basic Features of the Best Alternative to QuickTime
- Record screen in MP4 with a single click.
- Support webcam and microphone capture too.
- Produce high quality screen recordings automatically.
How to Record Screen in MP4 without QuickTime
Step 1. Install Screen Recorder
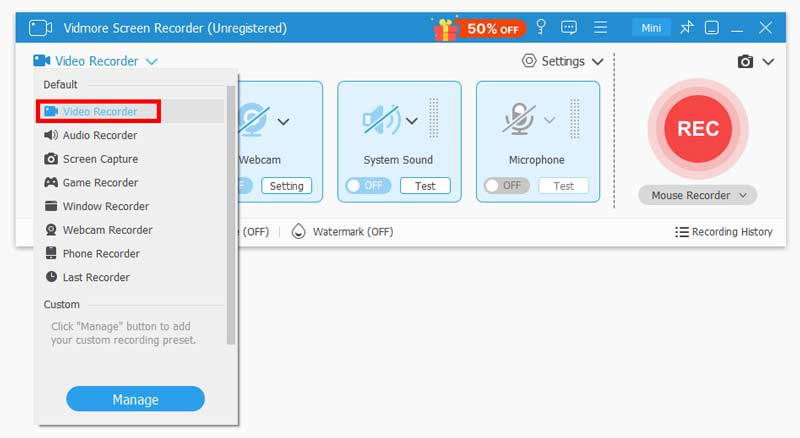
Run the best alternative to QuickTime Player once you install it to your PC. There is a specific version for Mac. Then choose Video Recorder to open the main interface.
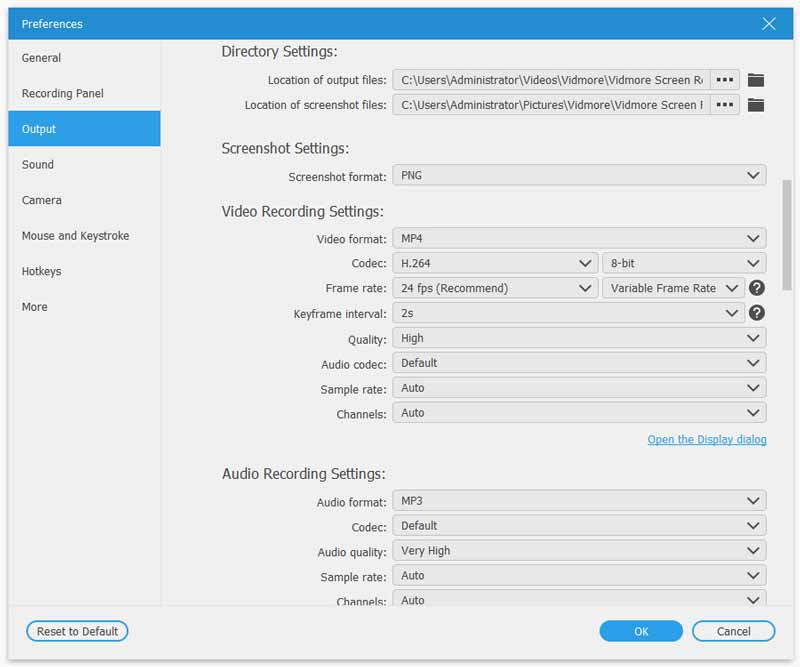
Click the Gear icon to open the Preferences dialog, go to Output tab, and select MP4 from the Video format option. Set other options and click OK.
Step 2. Record screen
You can see four options in the main interface:
Display: Record full screen, custom region or a window.
Webcam: Add your face to screen recording.
System Sound: Capture any sound from your system.
Microphone: Record the sound and voice through microphone.
Turn on or off each option based on your need.
When you are ready, click on the REC button to begin recording screen without QuickTime. Now, you can find the buttons on the toolbar to add text and painting to recording or take screenshots.

Step 3. Save screen recording in MP4
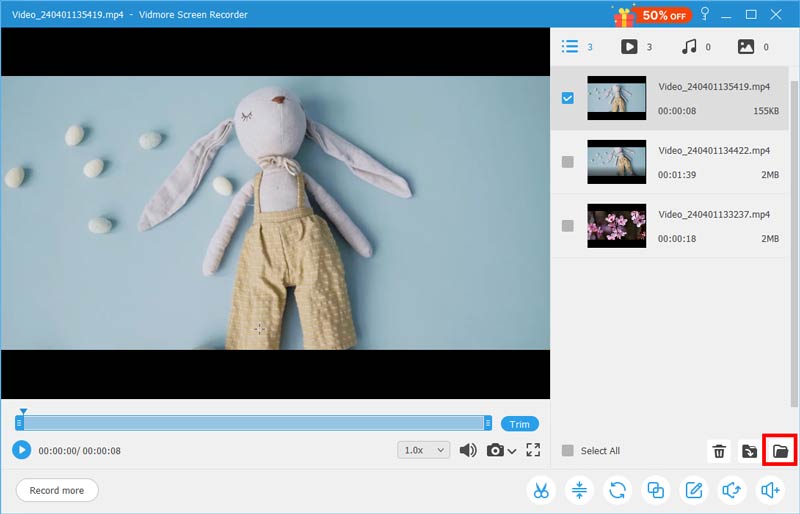
When you want to stop recording, click the Stop button to enter the preview window. Then view the recording by hitting the Play icon. If it contains unwanted frames, cut them with the Clip feature. Finally, click on the Save button to export screen recording in MP4 file.
Alternative 2: Vidmore Free Online Screen Recorder
Sometimes, web-based apps are more convenient, such as Vidmore Free Online Screen Recorder. Although it can meet your basic need of screen recording, the web app is totally free to use.
Main Features of the Best Alternative to QuickTime
- Main Features of the Best Alternative to QuickTime
- Free of charge.
- No watermark or length limit.
How to Use the Online Alternative to QuickTime
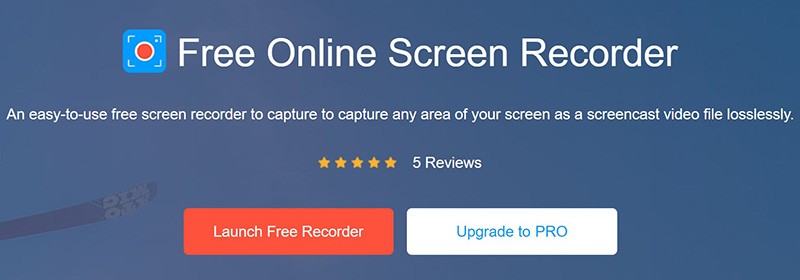
Step 1. Open https://www.vidmore.com/free-online-screen-recorder/ in a browser when you want to record screen. Click Launch Free Recorder to download the launcher.
Step 2. Click the Monitor icon and set the recording area. To add your face to the recording, enable Webcam; otherwise, disable it. Then select the audio source, like System audio or Microphone.

Step 3. Press the REC button to initiate screen recording. When you are done, click the Stop button and download the video file.

Part 3: FAQs about QuickTime Export MP4
Can Windows 10 convert MOV to MP4?
Unfortunately, Microsoft does not provide video conversion service as part of the Movies and TV software. Instead, you have to use a free online video converter to convert QuickTime movies to MP4 on Windows 10.
Is MPEG-4 the same as MP4?
To be honest, MPEG-4 and MP4 are not the same thing. The former is a compression method while the latter is a video container format. What’s more, MP4 is one of the media container for MPEG-4. However, QuickTime will export movies as MP4 if you choose Movie to MPEG-4.
What files are compatible with QuickTime?
QuickTime supports a number of formats, such as MOV, most MPEG-4 files, like MP4, M4V, M4A, and MPEG-2, DV Stream, Mjpeg, WAV, AIFF, AAC, etc. When it comes to output format, it only supports MOV, AAC, HEVC, and MP4.
Conclusion
This guide has shared you how to export screen recordings or movies as MP4 files in QuickTime Player. Though you can use QuickTime to Record Mac’s screen, QuickTime only can save videos in limited formats, like MOV. If you look for an alternative screen recorder, Vidmore Screen Recorder is worth to consider. It is able to export your screen recordings in MP4 directly. If you still have other questions, please feel free to leave a message below this post.
MP4 Tips
-
Edit MP4
-
Quicktime
-
Convert MP4


