Enhance iPhone Video Quality After Shooting: 4 Methods
Do you like taking videos on your iPhone? Or have you ever recorded a video only to realize afterward that it looks a bit blurry, shaky, too dark, or not as sharp as you expected? Even though iPhones are known for their impressive cameras, not every shot turns out perfect, especially in low light, fast movement, or less-than-ideal angles.
The good news is that poor video quality doesn’t mean you have to re-record. There are several ways to enhance iPhone video quality after shooting. In this article, you’ll learn four effective methods to improve clarity, stability, and overall visual quality, helping your iPhone videos look cleaner, smoother, and ready to share.

PAGE CONTENT
Part 1. Can You Change Video Quality After Shooting?
iPhones are renowned for their exceptional camera quality, making them ideal for capturing high-quality photos and videos. However, good camera hardware does not always guarantee great video results. Several factors can affect video quality after shooting, such as poor lighting, shaky hands, incorrect focus, or compression during saving and sharing.But here’s the thing, it is possible to change the video quality from an iPhone after shooting. While lost details cannot always be fully restored, tools and editing features can enhance clarity, adjust brightness and colors, reduce shakiness, and improve overall visual appeal. With the right methods, even imperfect iPhone videos can look significantly better after shooting.
Part 2. How to Improve Video Quality by Changing the Camera’s Recording Settings on iPhone?
One of the easiest ways to enhance video quality starts even before hitting the record button. iPhones offer built-in camera settings that allow users to control resolution, frame rate, and other recording options. By adjusting these settings properly, videos can be captured with clearer details, smoother motion, and improved overall quality, reducing the need to change video quality after shooting.
So here’s how to improve video quality on iPhone:
In your iPhone's Settings, scroll down and select Camera. From there, click the Record Video option and choose 4K at 60fps.
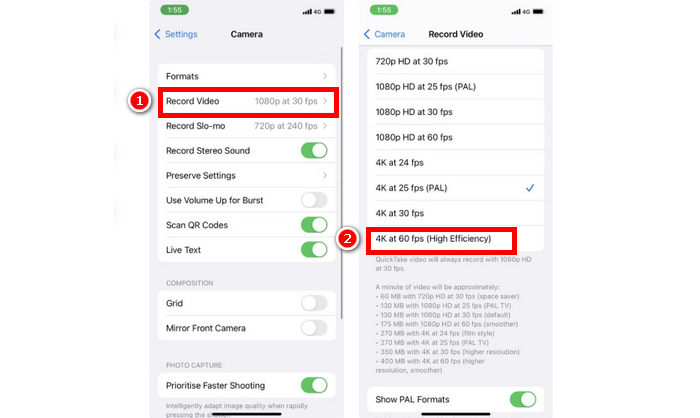
With this camera setting, your iPhone records videos at a higher resolution and smoother frame rate, resulting in sharper details and more fluid motion. This is especially useful for fast-moving scenes, action shots, or videos that will be edited later, as higher-quality footage retains more detail during enhancement. Keep in mind that recording in 4K at 60fps will use more storage space, so it’s best to check your available storage before enabling this setting.
Part 3. 4 Methods to Enhance Videos
If adjusting camera settings isn’t enough, several tools can help enhance video quality on iPhone after recording. These methods range from AI-powered enhancers to popular mobile and desktop editing apps, each offering different levels of control and convenience. Below are four effective ways to enhance video quality, tailored to your specific needs and editing preferences.
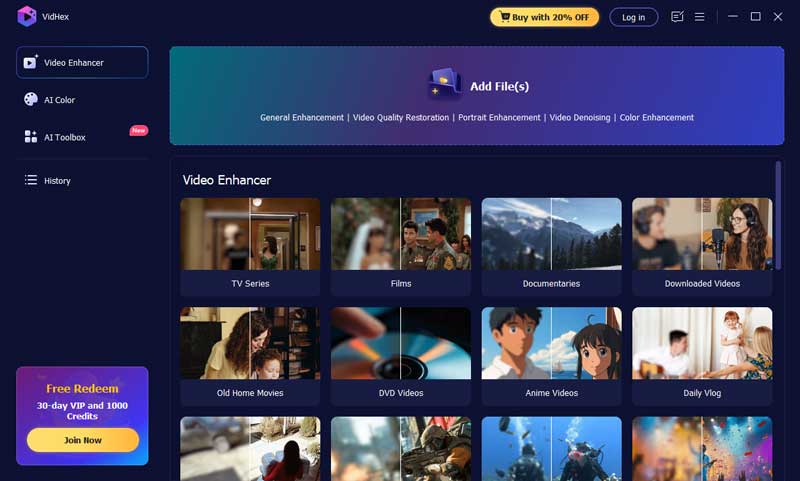
Method 1: Using the Vidmore Video Enhancer
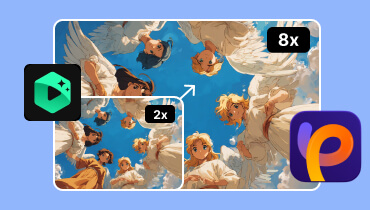
Vidmore Video Enhancer is one of the most reliable tools you can use to change video quality after shooting, especially if you prefer using AI-powered technology tools. The software offers multiple upscaling options, providing flexibility in achieving your desired results. One of its strengths is its user-friendly interface, which makes all features easily accessible, even for beginners. During the enhancement process, you can select your preferred output resolution, including 100%, 200%, 400%, and up to 4K. Additionally, the program enables you to fine-tune settings such as bitrate, video encoder, output format, and destination folder. With these capabilities, Vidmore Video Enhancer stands out as an excellent option for delivering a better and more enjoyable viewing experience.
Main Features:
- • Uses AI to enhance video quality.
- • Supports multiple formats, including MP4, MKV, MOV, WEBM, and others.
- • Capable of enhancing different video types, such as anime, vlogs, and documentaries.
- • Batch upscaling video to 8K for processing multiple videos at once.
- • Simple and intuitive interface.
How to Change Video Quality After Shooting Using the Vidmore Video Enhancer:
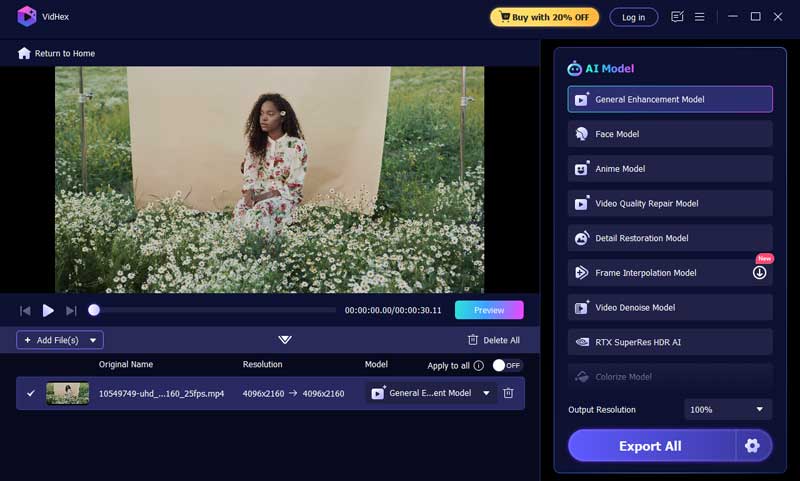
Step 1. First, you need to download and install the Vidmore Video Converter on your device.Free Download
Step 2. Next, launch the tool and click the Add Files button to add the video that you want to enhance.
Step 3. Once you’re done, just click the Export all button to download the video with the enhanced sound.
There you have it. Indeed, with Vidmore Video Enhancer, enhancing the video quality after recording on an iPhone is effective and easy. Additionally, with its AI integration, the video quality is automatically enhanced to its best. Lastly, its simple and intuitive interface makes it a great tool for all types of users, especially beginners.
Method 2: Using inShot
InShot is a popular mobile video editing app designed for quick and easy video enhancement, especially for iPhone and Android users. It allows you to improve video quality after shooting by offering simple yet powerful editing tools, such as resolution adjustment, filters, brightness and contrast controls, and frame-by-frame trimming. With its beginner-friendly interface, InShot is ideal for users who want to enhance videos directly on their phone without relying on complex software. Whether you’re editing vlogs, social media content, or casual clips, InShot provides a convenient way to refine your videos and make them look more polished in just a few taps.
Main Features:
- • Offers an adjustable frame rate for smoother video playback.
- • Allows resolution changes to improve overall video clarity.
- • Utilizes AI-powered sharpening to minimize blur and soften edges.
- • Includes professional color correction tools for balanced visuals.
- • Provides cinematic filters and effects for a more polished look.
- • Supports exporting in HD, 4K, or custom resolutions.
How to Change Video Quality After Shooting Using the Vidmore Video Enhancer:
Step 1. Open InShot and choose the video you want to edit. It will appear on the timeline.
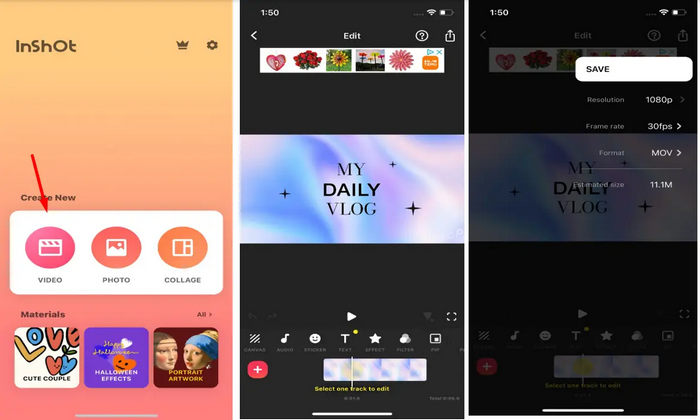
Step 2. Next step, this is optional, you may adjust the brightness, contrast, and saturation using the color tools.
Step 3. Lastly, to enhance the quality of the video, change the frame rate for smoother playback and select HD or 4K resolution. Tap Export to save the enhanced video.
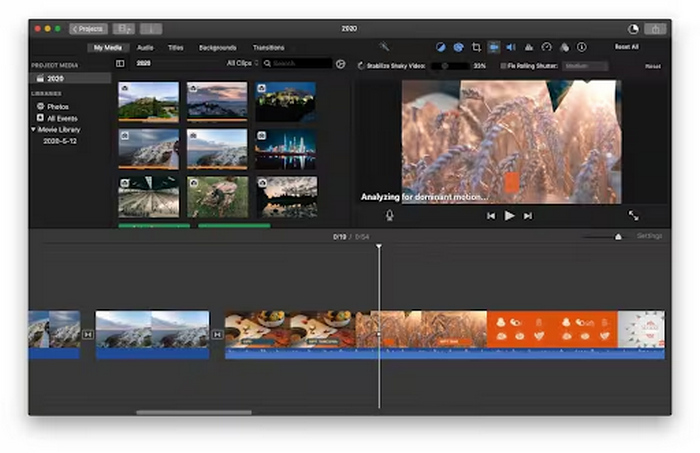
Method 3: Using CapCut
Another tool that you can use to change video quality after shooting on an iPhone is CapCut. This video editor tool allows users to edit videos, but apart from that, already-shot videos can also be enhanced through the tool's special features.
Main Features:
- • User-friendly and intuitive interface.
- • Enables users to layer different videos.
- • Offers basic editing tools to further enhance video quality.
How to Change Video Quality After Shooting Using the Vidmore Video Enhancer:
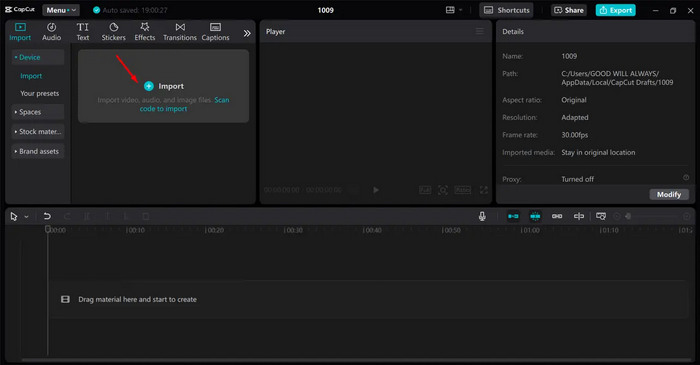
Step 1. Open CapCut and click Import to upload your video from your device.
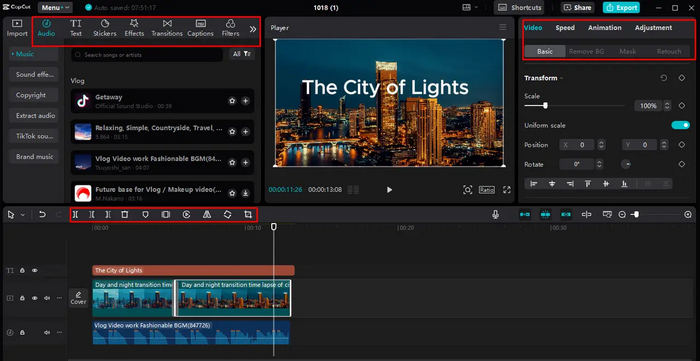
Step 2. Add the video to the timeline and trim or split unwanted parts. Adjust the aspect ratio, then use tools like stabilization, motion effects, and canvas settings. You can also add filters, transitions, text, and use AI features such as auto captions or text-to-speech.
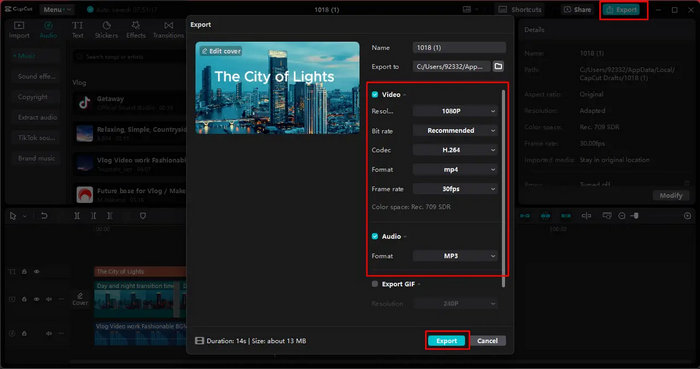
Step 3. Click Export, set your preferred resolution and frame rate, then save the video or share it directly to platforms like YouTube or TikTok.
Method 4: Using iMovie
Movie is Apple’s built-in video editing application designed specifically for iPhone, iPad, and Mac users. It offers a simple yet powerful way to change video quality after shooting, making it ideal for beginners and casual editors. With iMovie, you can easily refine your clips, apply cinematic effects, and export high-quality videos without needing third-party software. Its clean interface and seamless integration with Apple devices make video editing smooth and hassle-free.
Main Features:
- • Easy-to-use timeline for quick video editing.
- • Basic color correction and video adjustment tools.
- • Supports HD and 4K video export.
- • Optimized for iPhone, iPad, and Mac devices.
How to Change Video Quality on iPhone with iMovie:
Step 1. Open iMovie and create a new project.
Step 2. Import your video by selecting it from your media library.
Step 3. Tap on your video clip, then navigate to the stabilization option.

Step 4. Enable stabilization, and iMovie will automatically reduce excessive camera movement, creating a smoother playback.
Part 4. FAQs on How to Change Video Quality on iPhone After Shooting
Does enhancing video quality increase the file size on iPhone?
Yes, enhancing video quality usually increases the file size. Higher resolutions, smoother frame rates, and improved bitrate settings require more storage space. For example, exporting a video in 4K will require significantly more storage space than exporting it in HD. If storage is limited, consider balancing quality and file size by choosing optimized export settings.
Is it better to enhance videos on an iPhone or on a computer?
Both options are effective, depending on your specific goal. Enhancing videos on an iPhone using apps like InShot, CapCut, or iMovie is convenient and ideal for quick edits. Enhancing videos on a computer offers more advanced tools, better processing power, and AI-based features, making it a better choice for noticeably improving low-quality or blurry footage.
Can enhanced iPhone videos still be shared on social media without losing quality?
Yes, enhanced iPhone videos can still be shared on social media, but some platforms apply compression during the upload process. To minimize quality loss, export your video in the platform’s recommended resolution and frame rate. Uploading in higher quality, such as HD or 4K, helps retain better clarity after compression on social media.
Conclusion
A blurry or shaky iPhone video doesn’t have to stay that way. With the right settings and simple tools, you can easily improve video quality on iPhone even after shooting. So, whether you start by optimizing your camera’s recording settings or rely on editing tools like Vidmore Video Enhancer, InShot, CapCut, or iMovie, each method offers a practical way to improve clarity, stability, and overall visual appeal. The key is choosing the approach that best matches your needs. Let’s get started!