![]() Game Recorder
Game Recorder
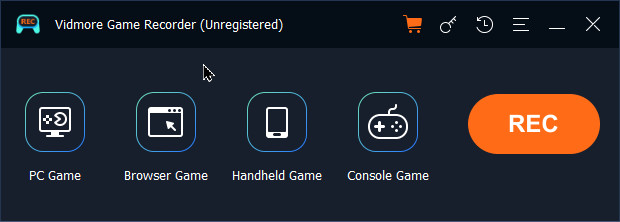
Vidmore Game Recorder is an easy but powerful game recording software. It can capture any gameplay on your PC, browser, mobile devices, and game console. With it, you can easily record a game highlight moment for sharing with friends or social media. Moreover, its webcam recording feature lets you create the picture-in-picture vision conveniently.
Following is the detailed user guide to show you how to use this software.
Vidmore offers the free trial version for everyone, but the free trial version has limitations.
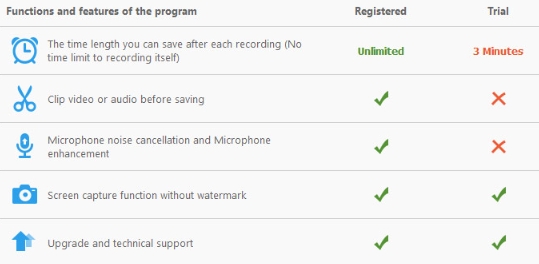
For enjoying the full features of this software without any limits, you are recommended to register it.
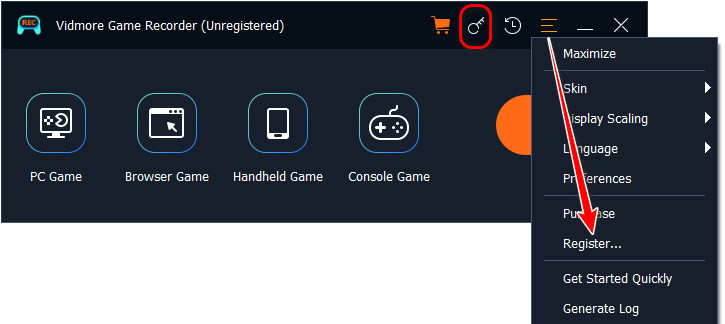
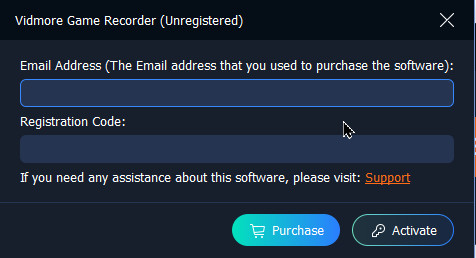
Click the Register button (A lock icon) in the menu and enter your email address and paste registration code in the box. Then, click Activate to register this software.
You can also find the Register option by clicking the menu with the three-dot and select Register.
Email Address: The email address is what you used to purchase the product.
Registration Code: A string of characters marked as Activation key, license code or KEYCODE(S) in the order confirmation letter you received after the successful purchase.
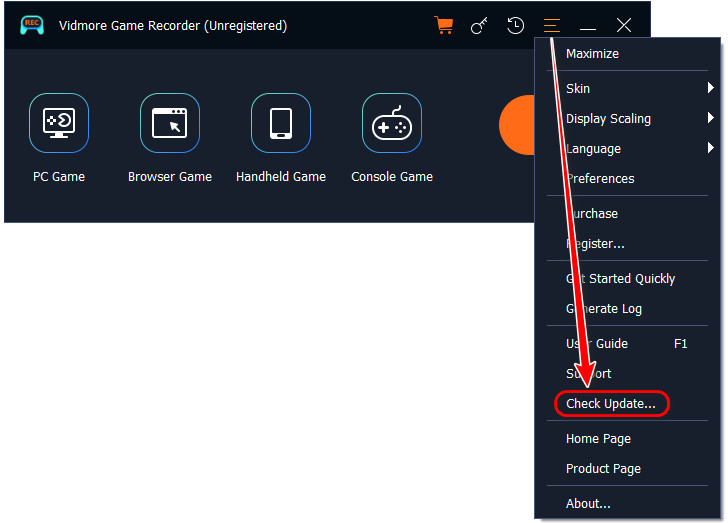
Frequent updates from Vidmore products will be provided to fix some bugs and improve the product. For updating the software, here is the method.
Click the Menu icon with three-dot and choose Check Update. If there’s an update, you should download and install it immediately.
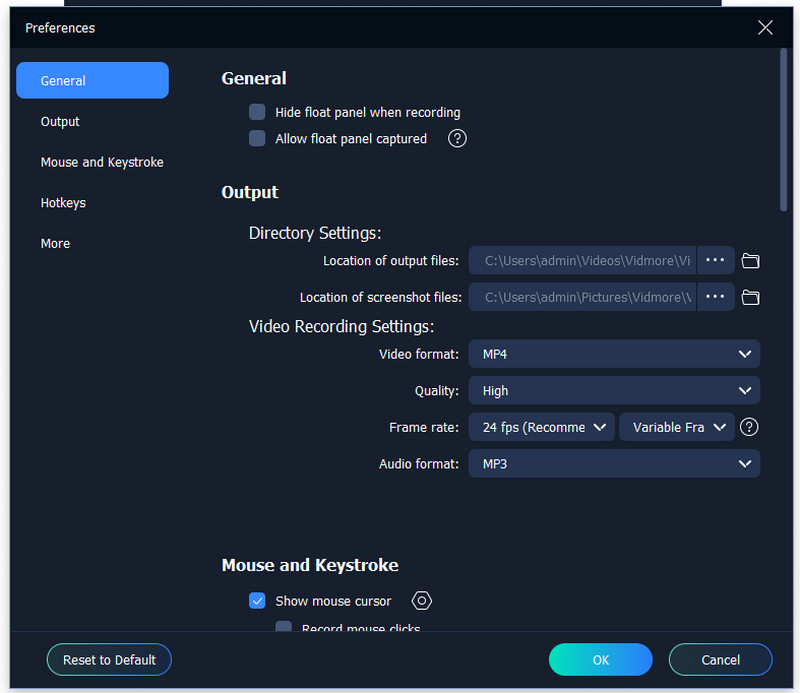
Settings from Preferences let you preset before recording.
Click the Menu icon with the tree-dot and select Preferences, and then you can locate the different tabs from the left sidebar and change the settings on the right window. There are 5 main sections: General, Output, Mouse and Keystroke, Hotkeys, and More.
Step 1. Choose the game mode
First, launch your game software and Vidmore Game Recorder. There are 4 game record modes offered. To record the gameplay on your PC, choose the first mode – PC Game.
Step 2. Start recording
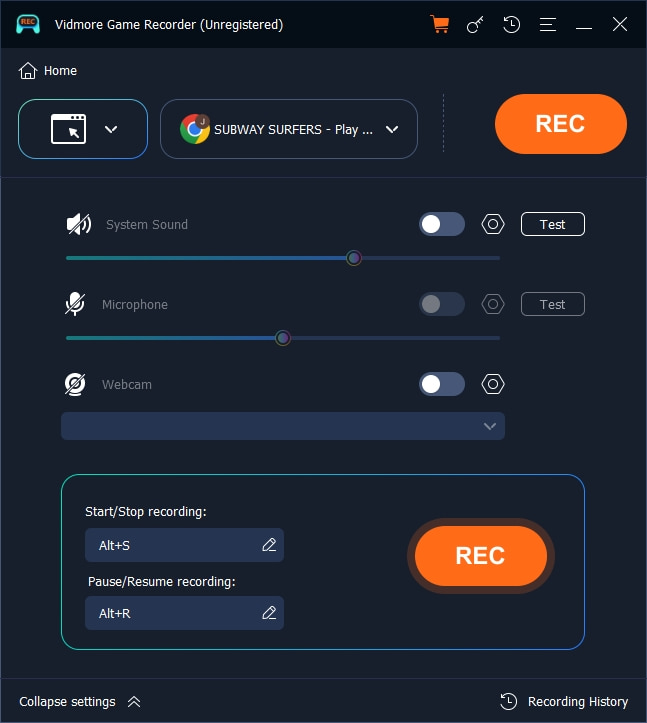
Vidmore Game Recorder will automatically identify the launched PC game. Open game window, and you can see a Rec icon in the upper-left corner. Click it or using shortcut keys to start/stop recording (Default: Alt + S – Start/Stop recording; Alt + R – Pause/Resume recording). Plus, click the Toolbox icon beside the Rec icon, and you can set the webcam to achieve picture-in-picture recording.
Step 3. Set parameters
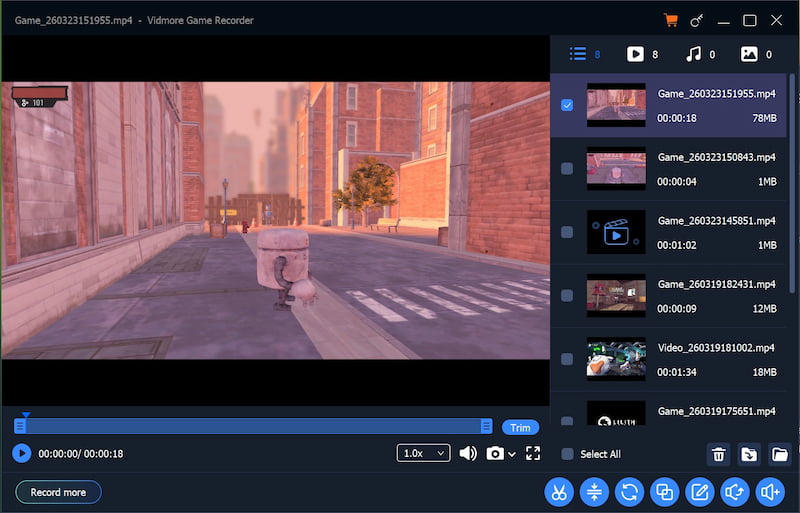
When you stop the recording, there will pop up an editing window. You can easily preview and trim the game recording, or set the play speed, volume, and take screenshot in the toolbox below. (Tips: If you need more advanced editing features, there are another 7 tools in the bottom-right corner.)
Step 4. Save recording
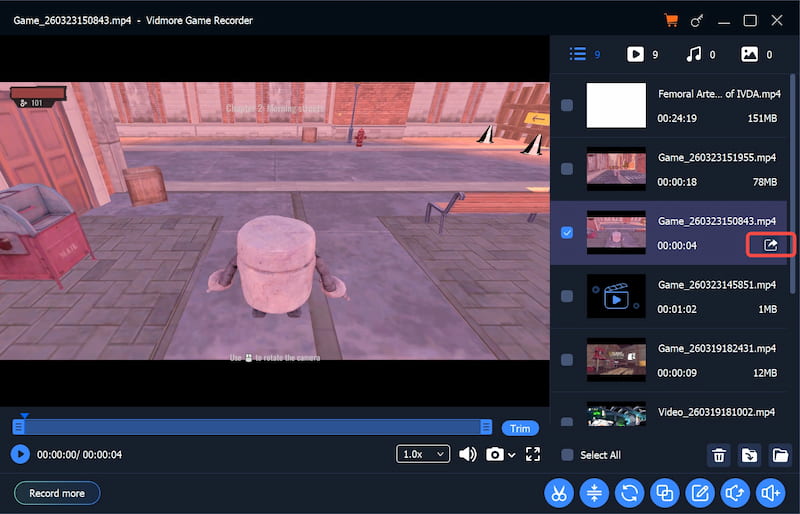
After editing, hover the mouse over the file you want to save, and an Export icon will appear on the right. Click the icon to save the recording file. When saving is finished, the Export icon will turn to an Open File icon. You can click on it to directly locate the save location.
Step 1. Choose the game mode
First, open your online game and Vidmore Game Recorder. There are 4 game record modes offered. To record the gameplay of web page, choose the second mode – Browser Game.
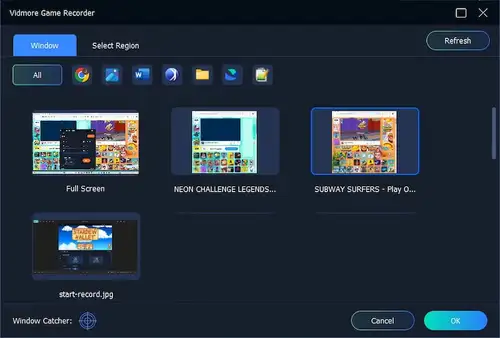
Step 2. Select the recording area
Then, a pop up will let you choose one window you want to record, or select a region as you need. Click OK to confirm your operation.
Step 3. Start recording
Next, you can start recording by clicking the Rec icon, or using shortcut key to control recording process (Default: Alt + S – Start/Stop recording; Alt + R – Pause/Resume recording).
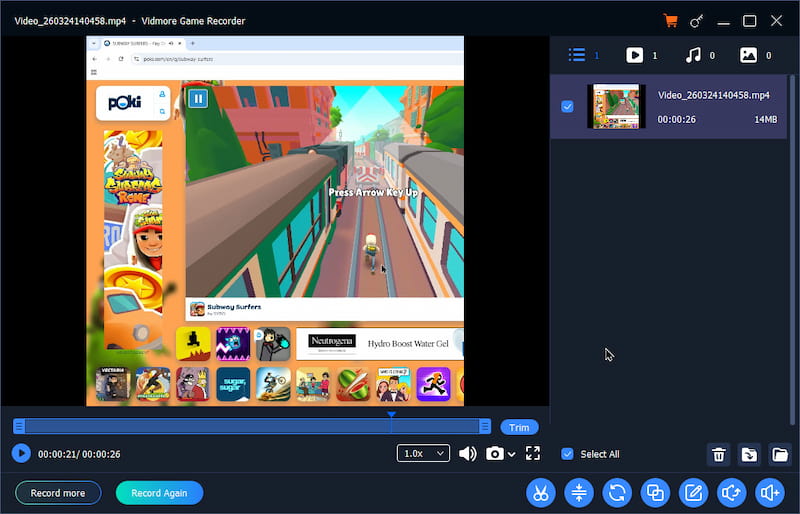
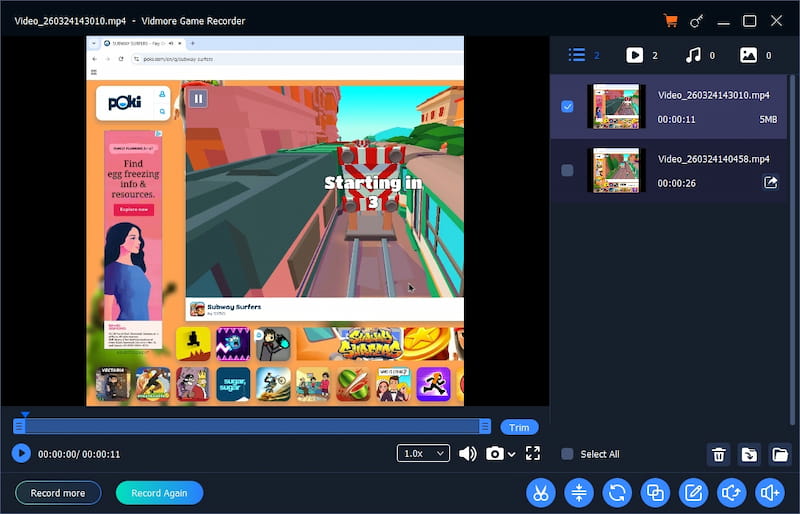
Step 4. Set parameters
When you stop the recording, there will pop up a window. You can easily preview and trim the game recording, or set the play speed, volume, and take screenshot in the toolbox below. (Tips: If you need more advanced editing features, there are another 7 tools in the bottom-right corner.)
Step 5. Save recording
After editing, hover the mouse over the file you want to save, and an Export icon will appear on the right. Click the icon to save the recording file. When saving is finished, the Export icon will turn to an Open File icon. You can click on it to directly locate the save location.
Step 1. Choose the game mode
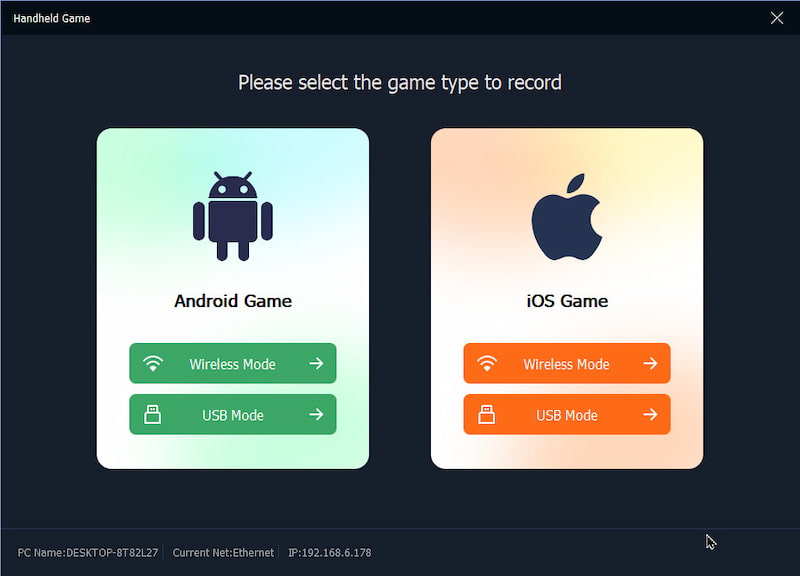
First, launch your handheld game and Vidmore Game Recorder. There are 4 game record modes offered. To record the gameplay on mobile devices, click the third mode – Handheld Game.
Step 2. Connect mobile and computer
Then, choose your device – Android or iOS. There are 2 connection ways: wireless or USB. Choose one and follow the screen guide to finish connection.
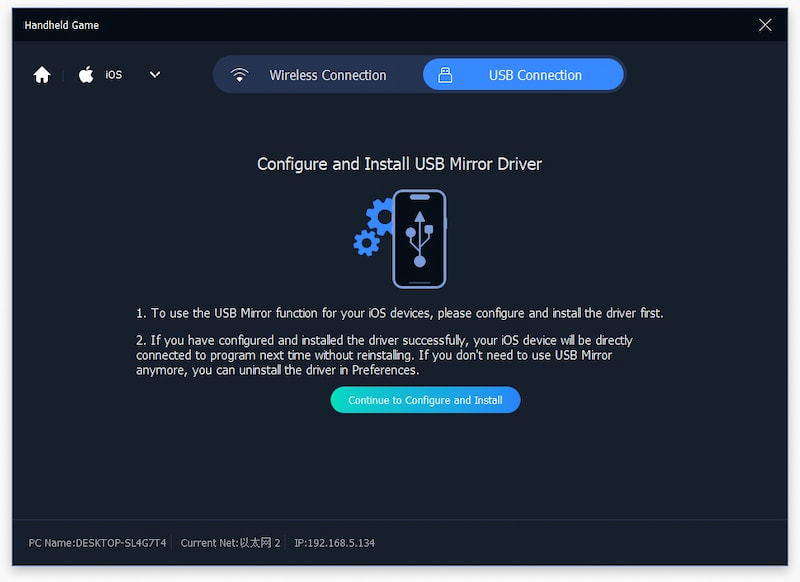
Step 3. Install mirroring drive
Take USB connection as an example, you need to install a USB mirror drive. Click Continue to Configure and Install and wait. Please click the Yes button in the mobile system prompt to authorize the installation.
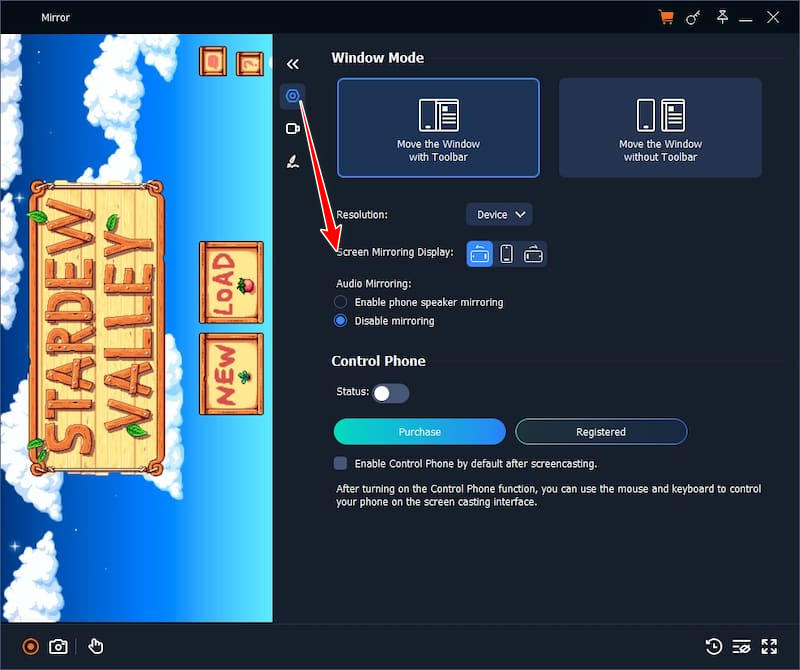
Step 4. Start recording
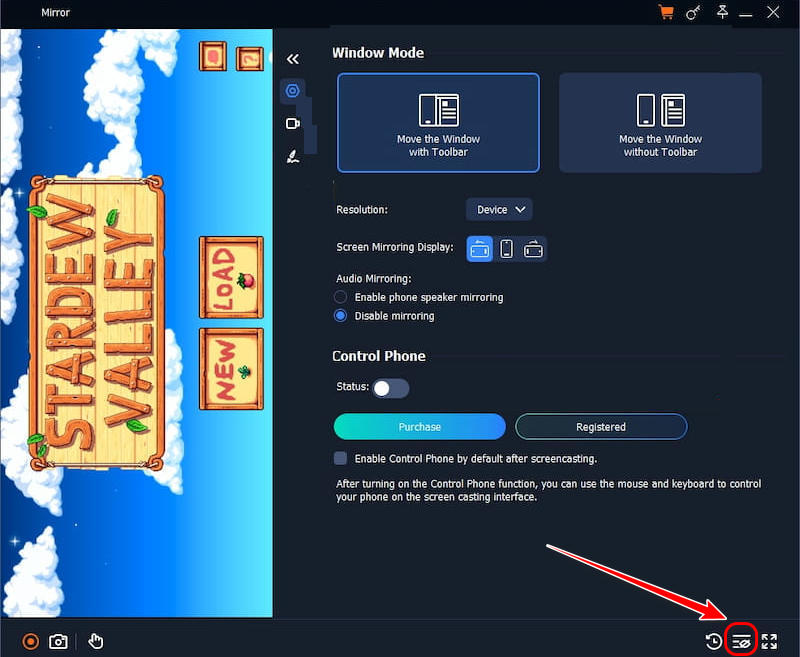
Next, you can see the mobile’s screen on PC. And the Settings section allows you adjust the resolution, screen mirroring display, audio mirroring, etc. After settings, click the red Rec button to start recording and click it again to stop recording.
Step 5. Set recording
Vidmore Game Recorder also offers a recording settings section, in which you can set the video resolution, output formats, saving location, snapshot, auto stop, and more.
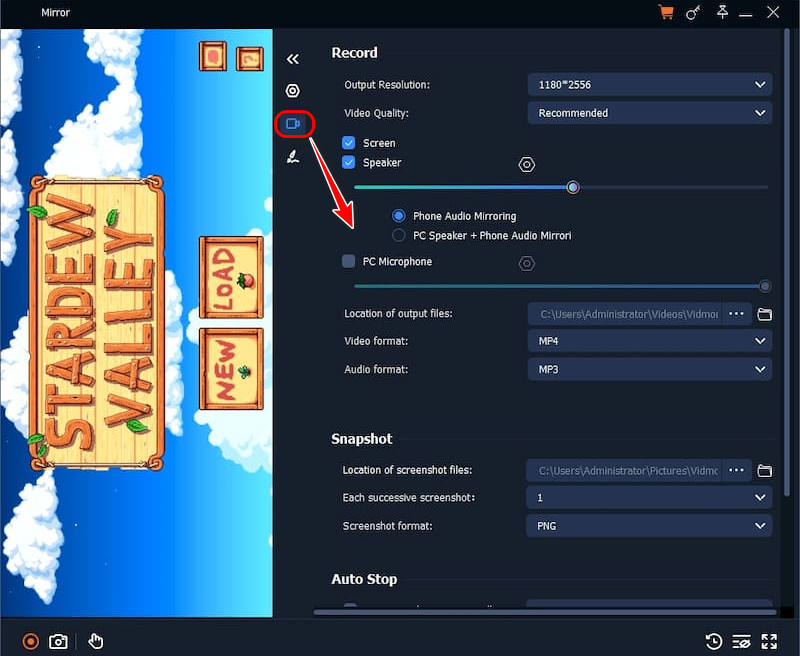
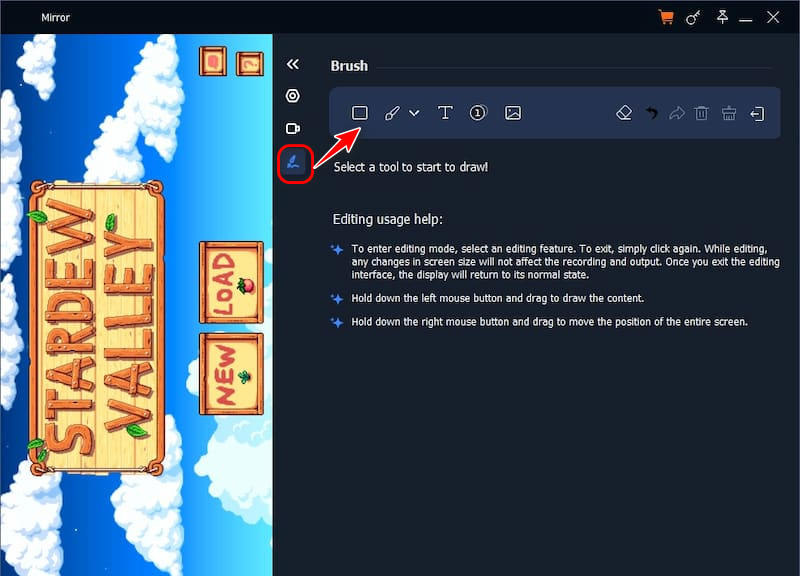
Besides, there is an editing section. You can add boxes, lines, text, numbers, images in your recording videos.
Step 6. Save recording
After the above, click the History List to find your recordings. You can easily preview and trim, or use 7 advanced editing tools in the lower-right corner. To export it, hover the mouse over the file you want to save, click the Export icon to save the file, and the icon will turn to an Open File icon.
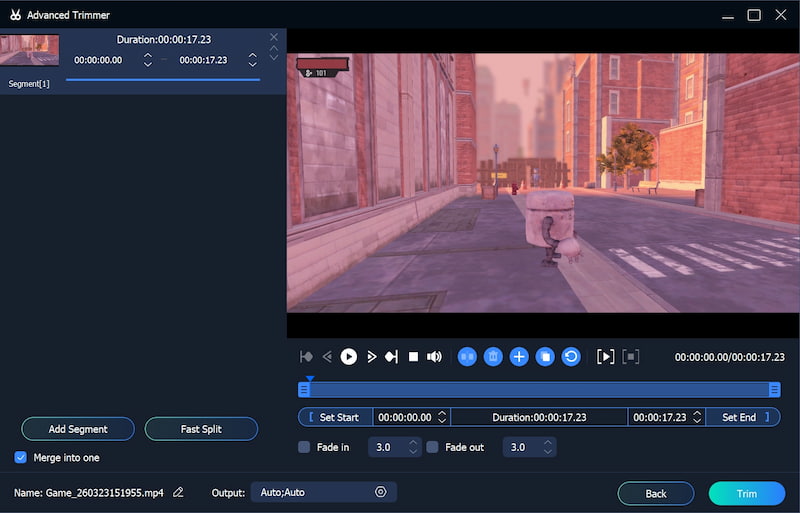
The Scissors icon stands for Advanced Trimmer. It can help you add segment in your recording, achieve fast split, trim videos precisely, and set the index of fading in and out to make the transition naturally. You can preview the trimming results before saving or restart the original videos in one-click.
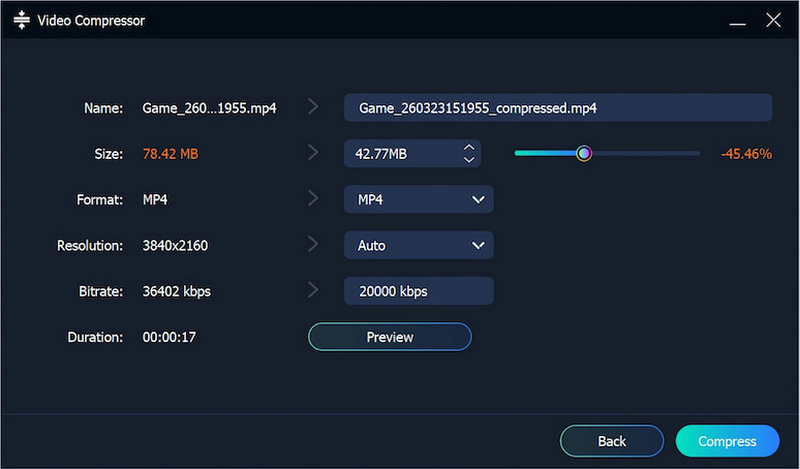
The Compression icon stands for Video Compressor. It can allow you to customize the size of output recording files. By sliding the track, compressing is very easy. Besides, you can also set the output format, resolution, and bitrate here. It also supports previewing.
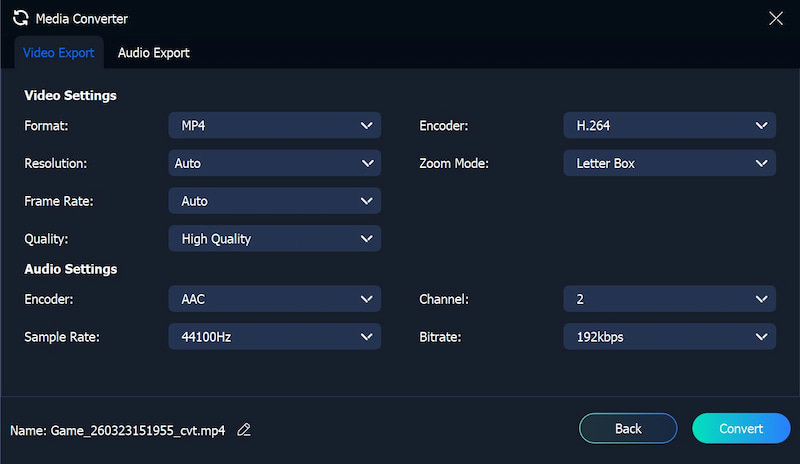
The Convert icon stands for Media Converter. In this window, you can change Video Export settings and Audio Export settings.
Video Export includes:
Video Settings: Format, Resolution, Frame Rate, Quality, Encoder, Zoom Mode
Audio Settings: Encoder, Sample Rate, Channel, Bitrate
Audio Export includes:
Format, Encoder, Sample Rate, Channel, Bitrate
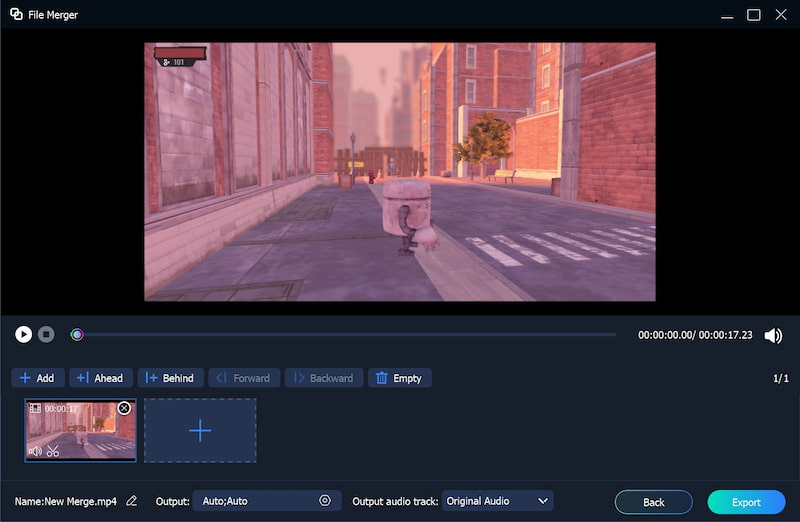
The Two-square icon stands for File Merger, which let you merge several recording clips or local videos without hassle. You can click the Add or Plus icon to add more videos.
If you want to change the order of videos, use Ahead, Behind, Forward, or Backward to adjust them. Or more directly, you can drag them to your desired place.
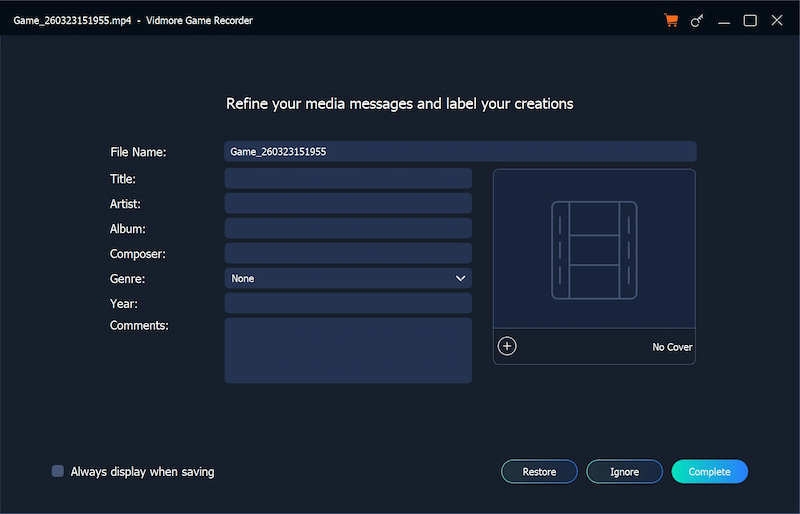
The Edit icon stands for Media Metadata Editor. In this window, you can input the Title, Artist, Album, Composer, Genre, Year, and Comments of your recordings. With these information, you can identify and manage your multiple recordings with ease!
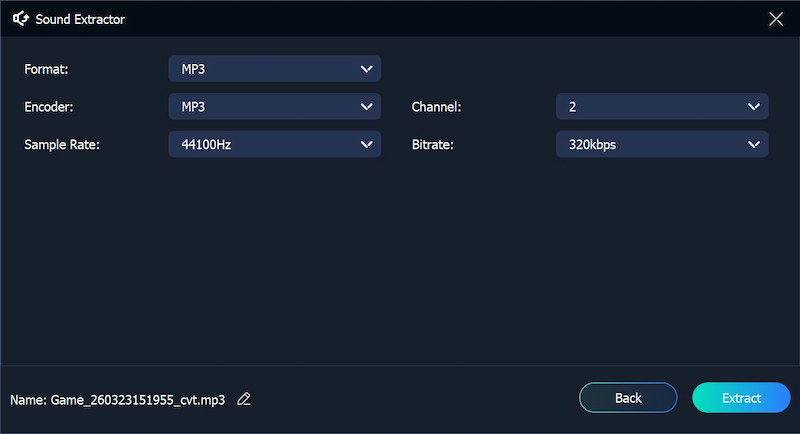
The Sound-out icon stands for Sound Extractor. This function is designed to extract the sound from the video, and then, you can have a separate audio file to be saved. What’s more, you can also set Format, Encoder, Sample Rate, Channel, Bitrate of your audio files.
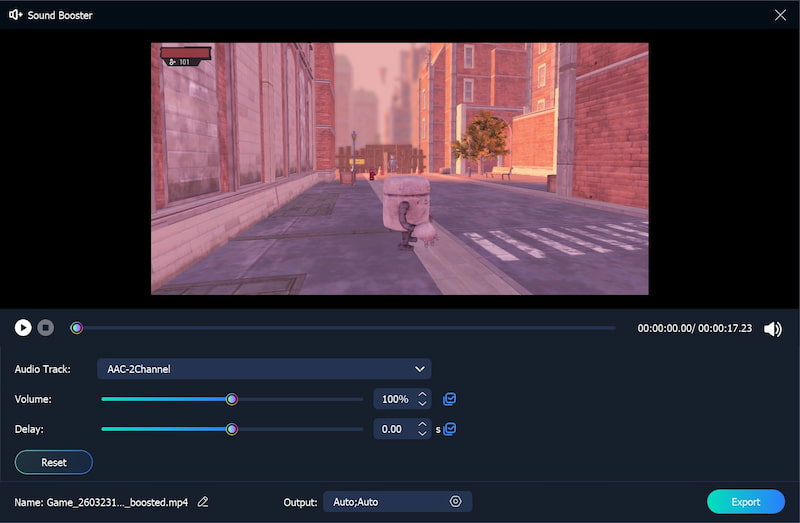
The Sound-plus icon stands for Sound Booster. With it, you can precisely adjust the volume up or down, and fix the sound delay problem. It can not only enhance sound, but also perfectly restore audio-video synchronization.
All what you have heard, seen and done will be captured at your fingertips to tell another story.
Subscribed Successfully!