![]() Video Converter
Video Converter
Basics
Main Features
Editing Functions
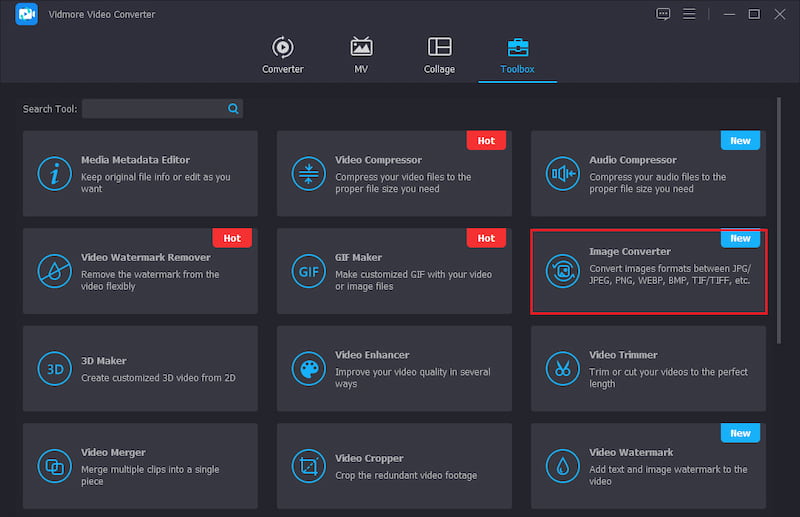
Toolbox
Vidmore Video Converter is a handy all-round video conversion tool. It accepts a variety of formats, such as MP4, MOV, AVI, MKV, WMV, and quickly converts them to other formats. Beside video conversion, this software also converts audio files to common audio formats, and extract audio from video file.
Vidmore Video Converter has a lot of useful, built-in editing options for tweaking the videos you’re looking to convert.
Following is a detailed user manual that explains how to use this software. If you still have questions after reading this guide, please do not hesitate to contact our Support Team, and you will receive reply within 24 hours.
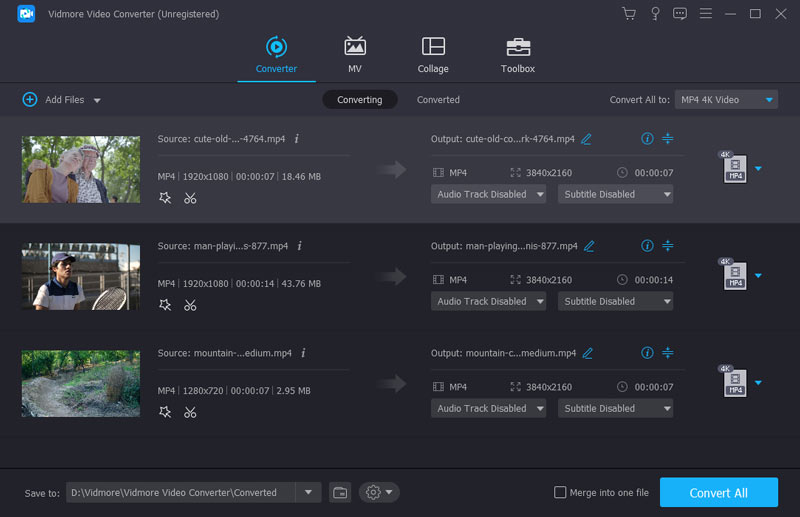
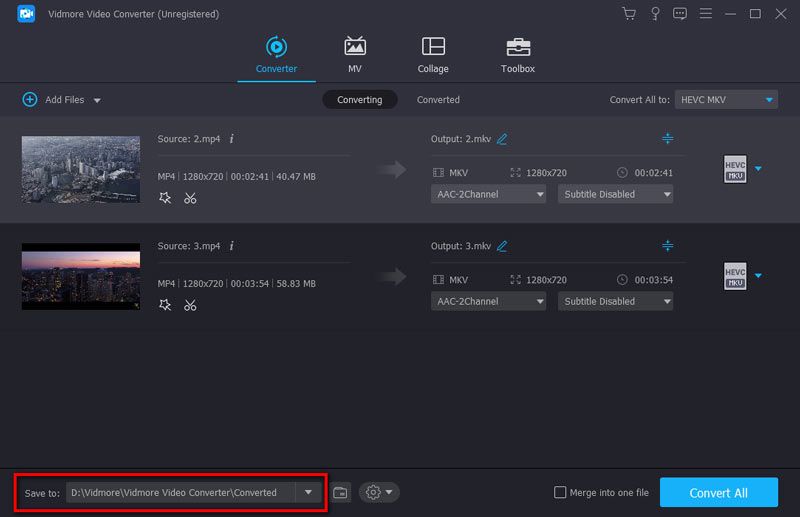
Follow the short guide below to start converting your media file.
Step 1 Click the button “Add Files” at the top-left corner. Choose the files you want to convert, and click “Open” to import the files.
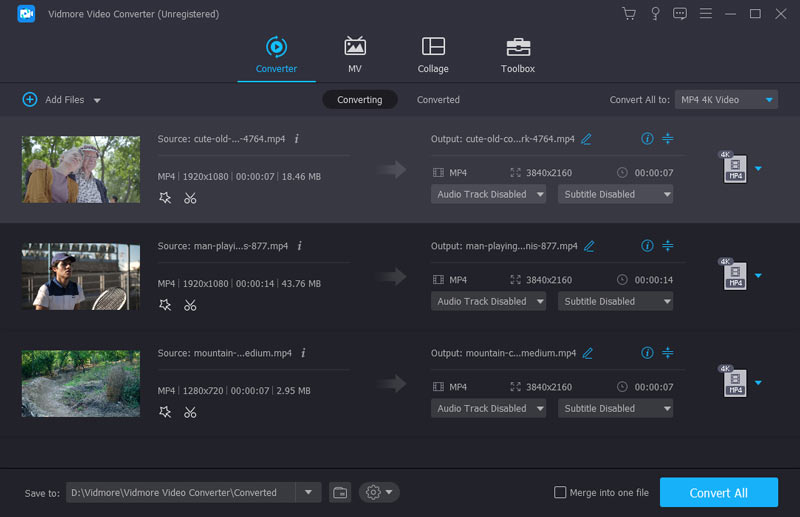
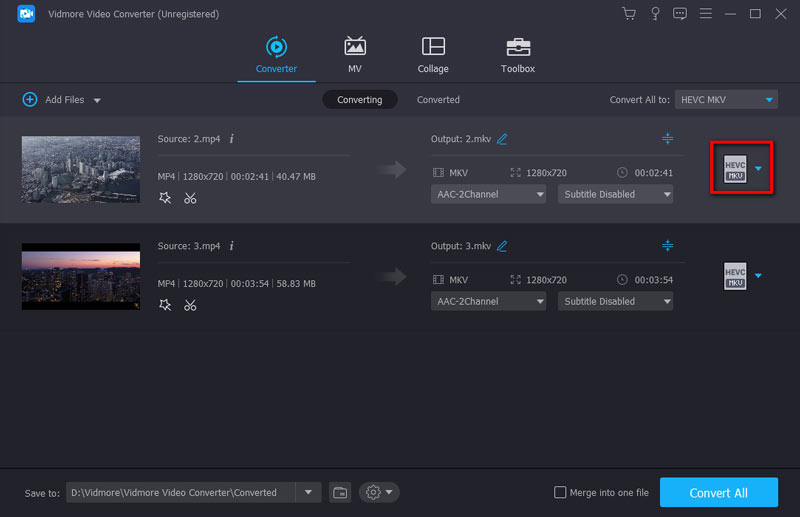
Step 2 Click the format button to choose the output format or the format that suits your device.

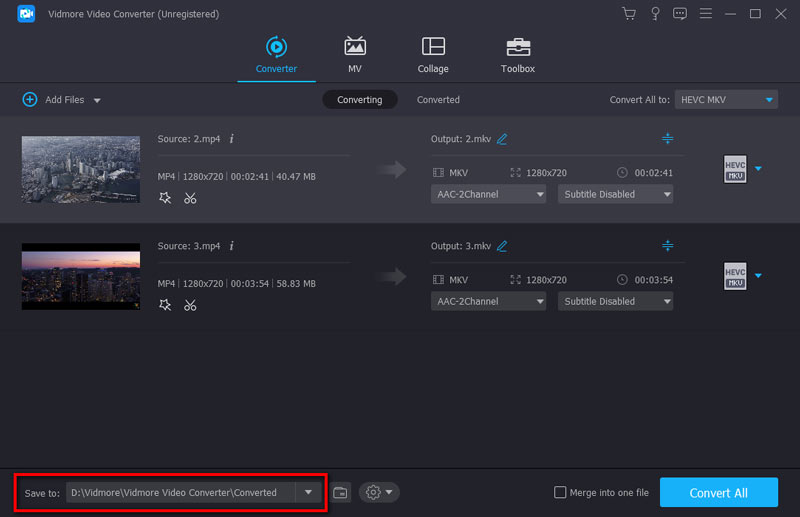
Step 3 Click the drop-down icon to browse and select the output folder. You can also choose to save the output file into the source folder.
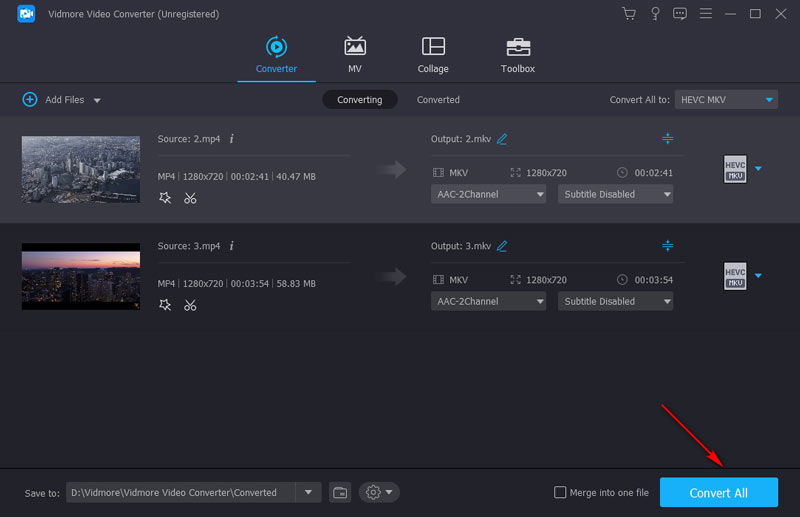
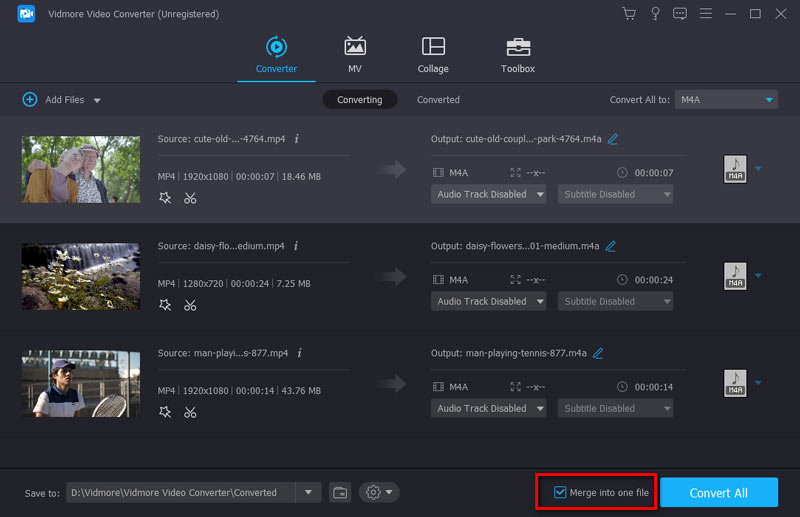
Step 4 Click the button “Convert All” in the bottom-right corner to start converting the files. If you want, you can tick “Merge into one file” option to merge multiple files.

The trial version of Vidmore Video Converter has limitations.
If you want to enjoy the full features without any limitation, you need to register the software with your E-mail address and registration code.
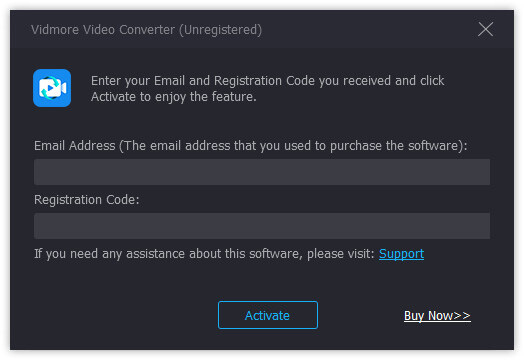
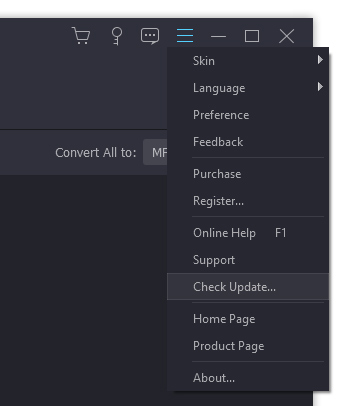
Click the Menu icon and choose “Register” to enter the Registration Center.
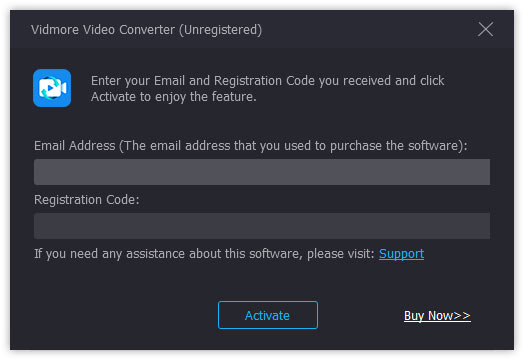
Find Video Converter feature and click “Register” button. Open the register window and enter your E-mail address. Then copy and paste your registration code directly from your email. Then click the button “Activate” to finish the registration. Please make sure that your computer has a valid internet connection while you register Vidmore Video Converter.
Vidmore Video Converter is being constantly updated with bug fixes and new features. If you want to check if your Vidmore Video Converter is the latest version, you can try the methods below.
Method 1: Click the Menu icon and choose “Check Update”. If there’s an update, you can download and install it immediately.
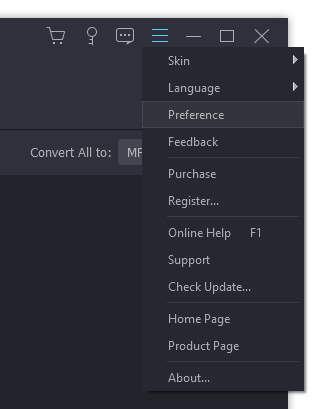
Method 2: Choose “Preferences” under the menu. Activate the option “Check for updates automatically”. You’ll get a message, when an update is available.
Method 3: Go to our product page and download the latest version.
Click the Menu icon at the top-right corner and select “Preferences”.
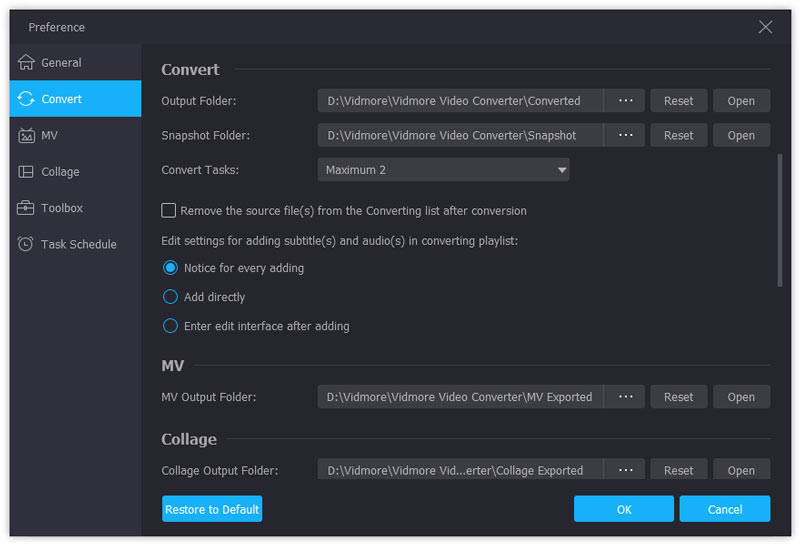
Output: Choose output folders for the converted files, snapshots, and a default format for the snapshots.
Update: Tick “Check for update automatically” to activate this option, if you want to get updates automatically.
GPU: Activate the GPU hardware acceleration, if you want to speed up the conversion speed.
Process: You can define how many files can be converted simultaneously.
Task Schedule: If you don’t want to wait for long time conversion, you can activate the option “Shut down computer” or “Sleep computer”. The computer will shut down/sleep itself when the conversion is finished. Or you can open output folder, exit program or do nothing when the task is completed.
Process: You can define how many files can be converted simultaneously.
Vidmore Video Converter allows you to convert videos to different video and audio formats with high quality. Launch the software and follow the steps below to finish your tasks.
Step 1 Add video files
Click the button “Add Files” and choose the video files that you want to convert. You can find the videos in the file list afterwards. Besides, you can drag and drop your videos directly into the file list.
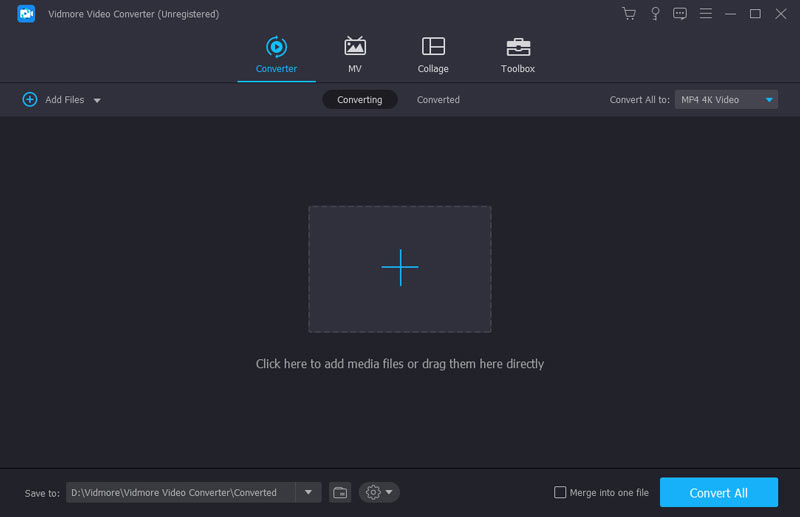
If you have a folder that contains several videos, click the drop-down icon beside the “Add Files” button and choose “Add Folder”. Then you’re able to add the folder at once.
Step 2 Choose an output format
Click on the format icon on the right side of the video file. Then you can see a list of presets. Choose a preset and adjust the profile settings according to your need.
Step 3 Choose an output folder
Click the drop-down incon on the bottom and select a path for the converted files.
Step 4 Start converting
Click the button “Convert All” to start converting your videos to the chosen format.
Step 5 Find the converted files
The process takes minutes or hours, depending on the file size and length. After it’s done, you can find the converted files in the output folder.
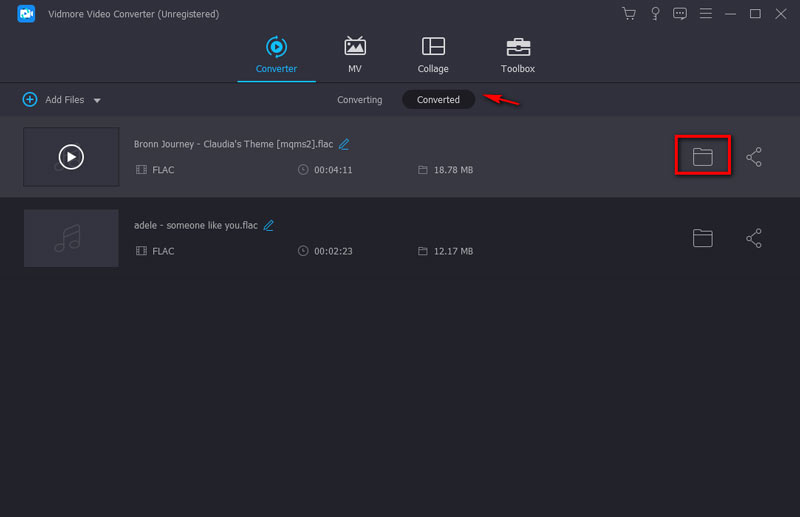
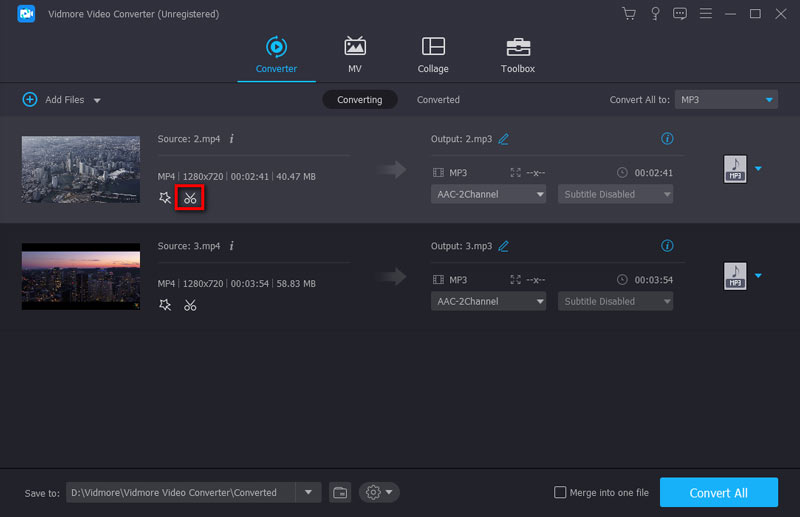
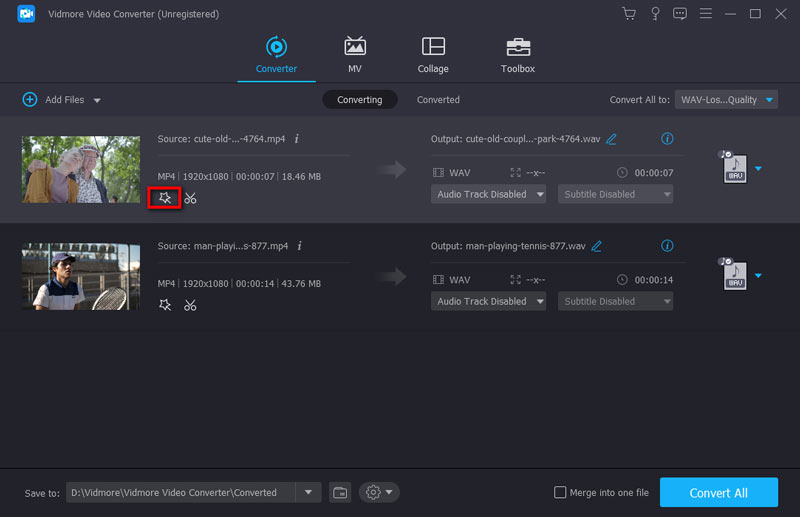
Vidmore Video Converter is also an audio converter that converts audio files and extract audio from video. After the conversion, it keeps ID3 information of the original audio files. Check out how to convert audio files with Vidmore Video Converter.
Step 1: Click the “Add Files” button and import the audio files you want to convert.
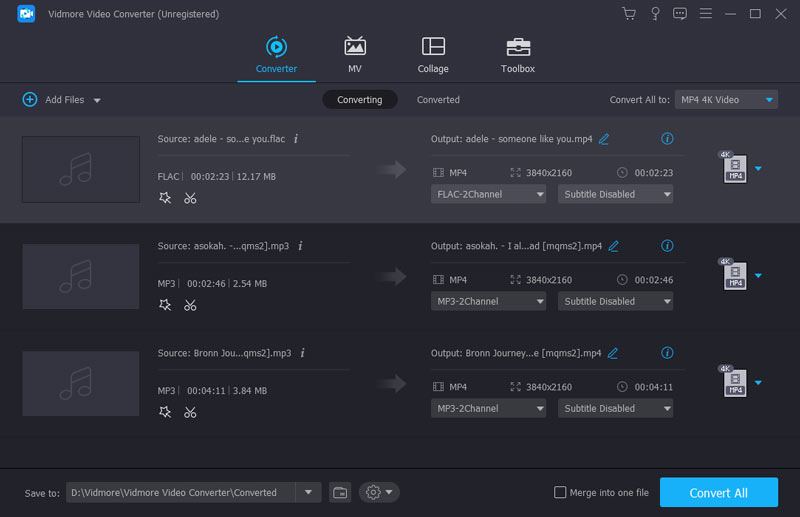
Step 2: Choose the output format for each audio, browse and select an output folder.
Step 3: Click the “Convert All” button to start the audio conversion.
Step 4: Click “Converted” to check the converted audio file. Click “Open Folder” to open the output folder after the conversion.
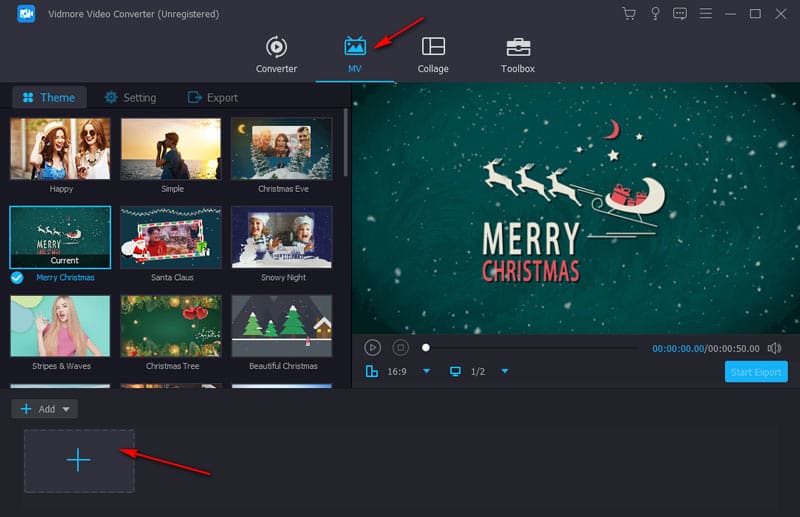
Vidmore Video Converter empowers you to create your own stunning movies in no time. You can easily combine video clips and music from the Movie Maker.
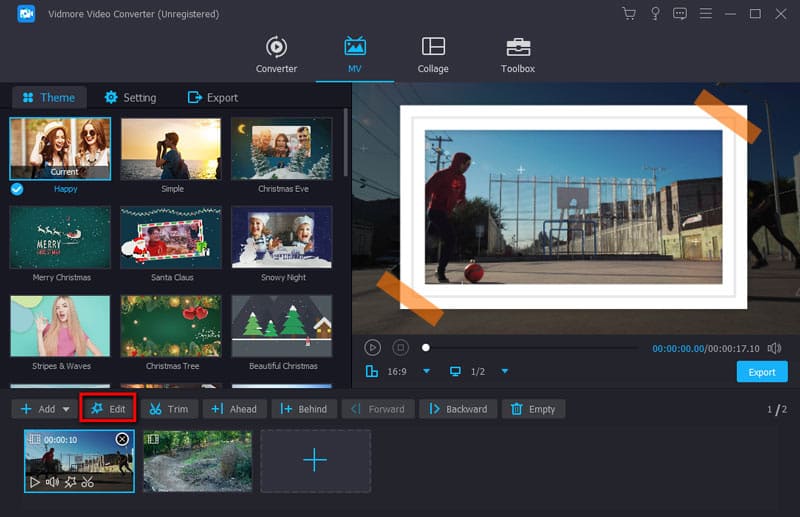
Step 1: To start with, you need to open the program and then choose the MV feature to continue. Click the Plus button from the bottom left corner and choose your video files to import.
After importing, you can drag the video to your desire position or use the Ahead or Behind button to make adjustments.
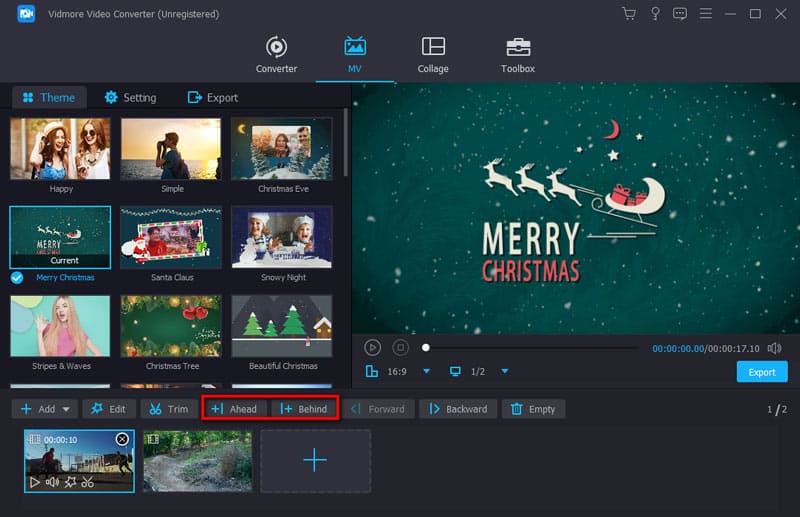
You are also allowed to edit your video clips. Just choose the video and click the Edit button, then you will enter into a new window where you can rotate/cut/crop video, add watermark, apply effects, and more.
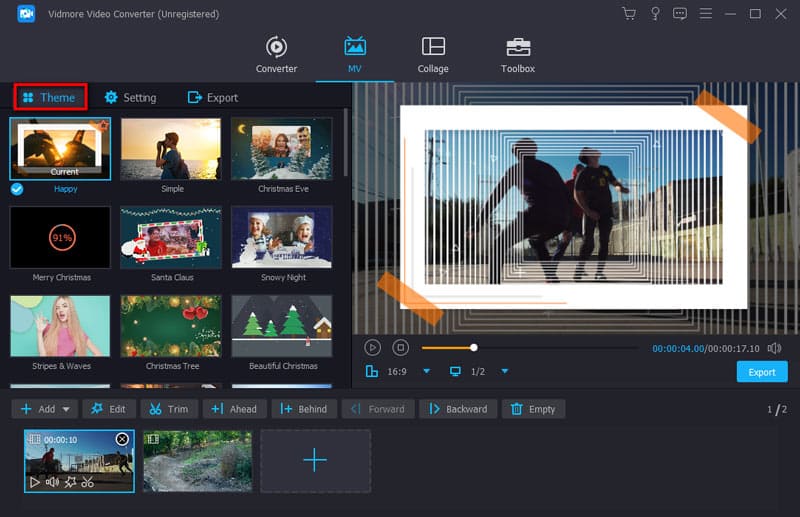
Step 2: The movie maker provides you with various themes to perfect your movie. Choose one that is suitable for your file style from the Theme section.
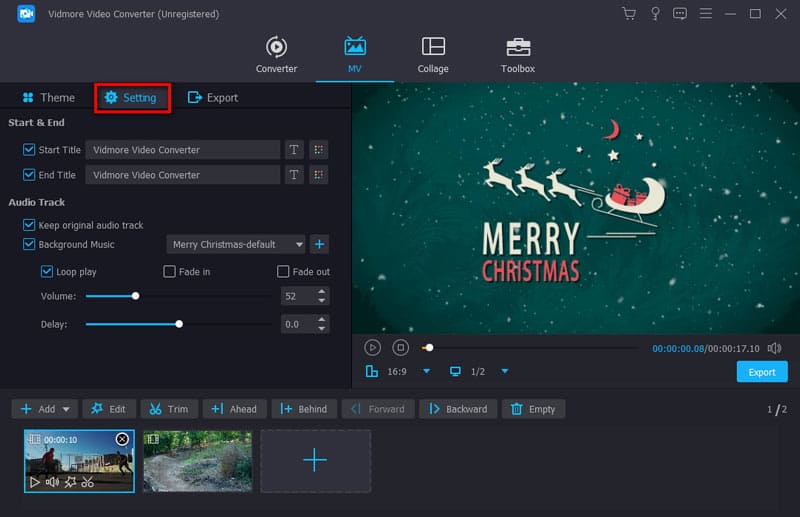
Step 3: In the Setting section, you can add start and end title for your movie. For audio track settings, you can keep the original audio track, add a song to your video, or both.
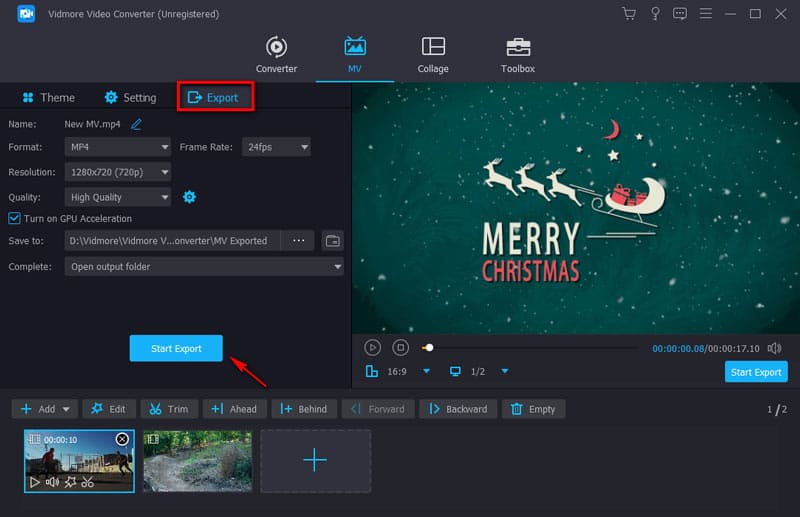
Step 4: If you’re satisfied with the result, you can go to the Export section, select the output format, and then decide the path location. In the end, click the Start Export button to produce your movie.
With our video collage maker, you can easily create beautiful video and photo collage in few minutes. You can pick a layout you like best, edit your video collage with filter, text, frame, and much more.
Step 1: After launching the program, choose the Collage feature on the top. Go to the section and select the aspect ratio and layout for your video collage.
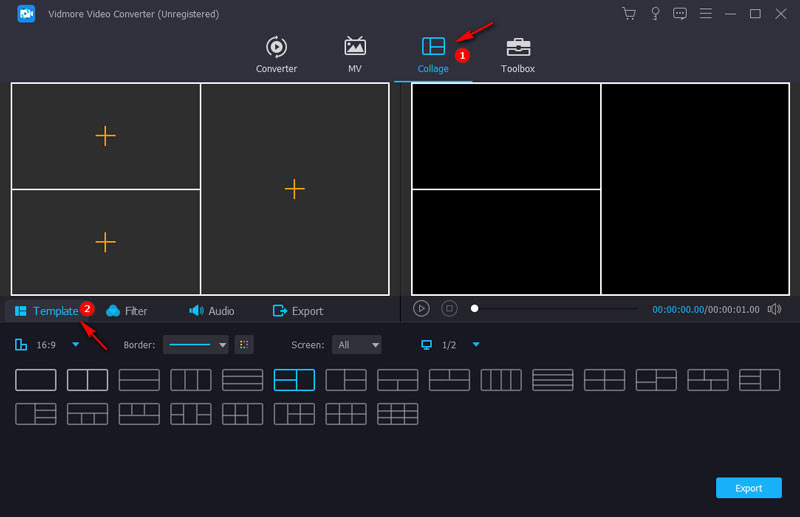
Step 2: Click the Plus icon separately to add MOV, MKV, AVI, WMV, MP4, JPEG, PNG, or GIF files to the collage.
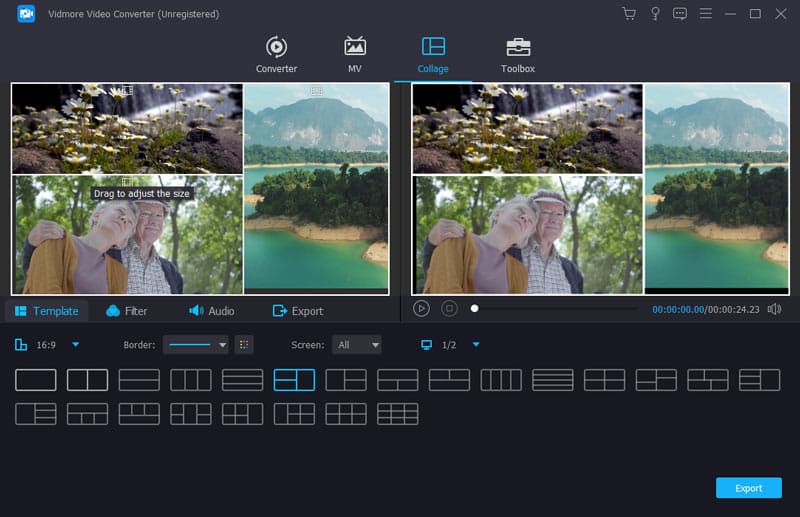
After adding your files, you can arrange and position your collage exactly for better composition. To resize the collage, you need to drag the border to your desired place.
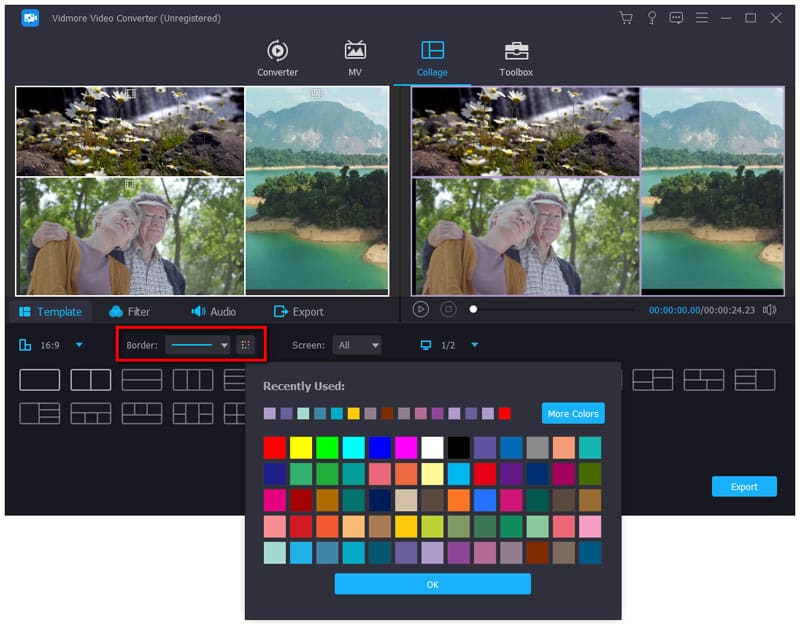
You can enhance your video collage frame by adjusting the weight and color of the frame if you need.
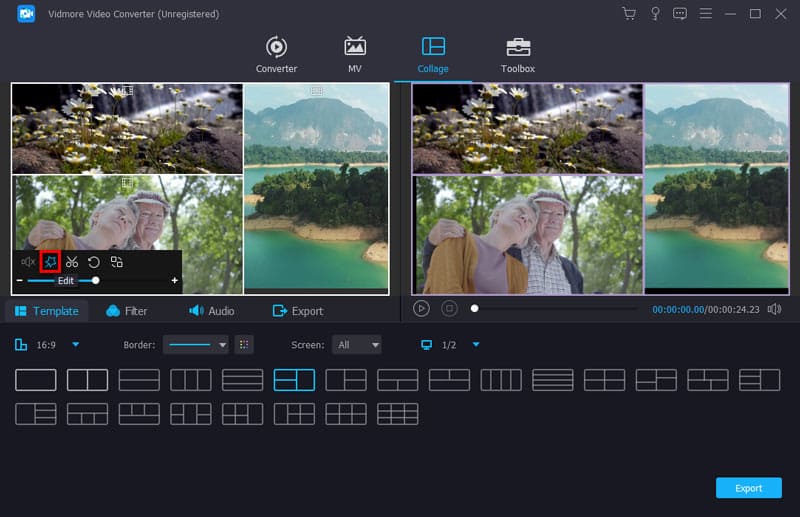
You have multiple options to edit your collage selectively, including crop, trim, rotate, or apply effects.
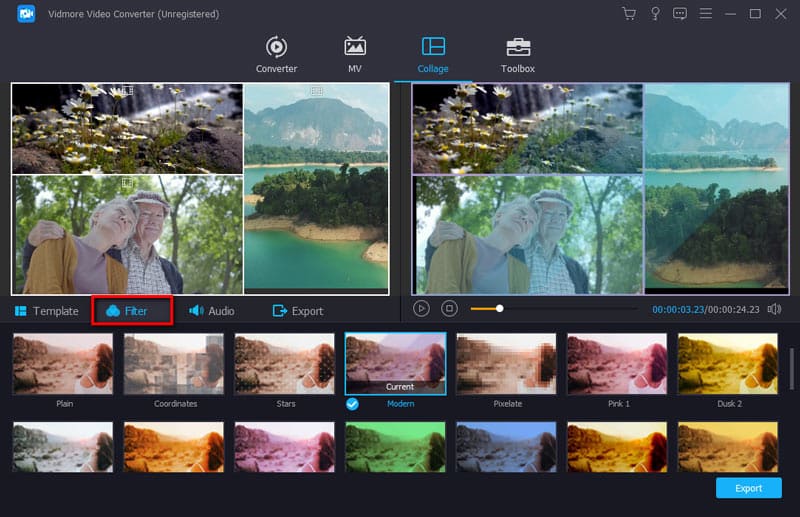
Step 3: Then, go to the Filter section and choose our inbuilt filter to apply to your collage.
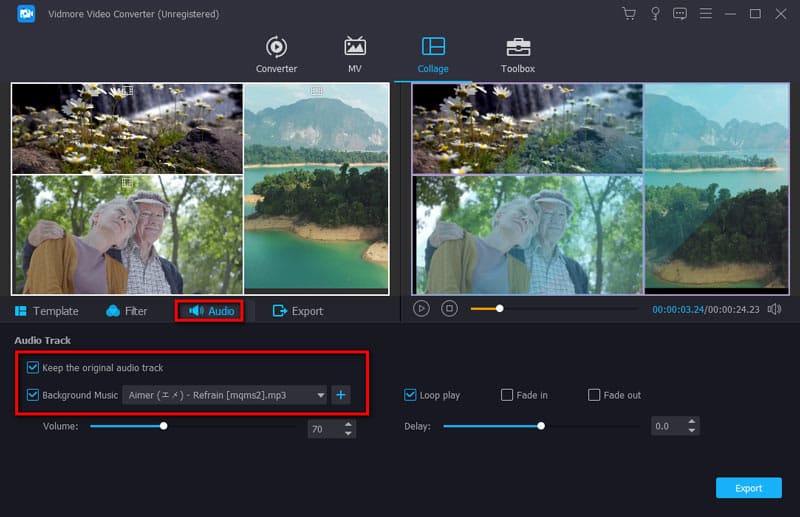
Step 4: Furthermore, you can add background music to your video collage. Just find the Audio section, check the box next to Background Music, and then click the + icon to choose a song from your computer. You can adjust the volume of your background music as you like. Meanwhile, you can keep the original audio if you want.
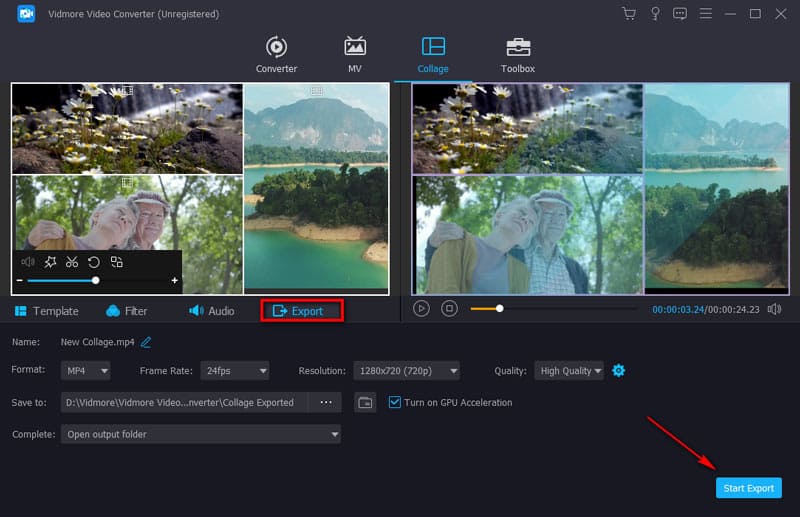
Step 5: Now, you can give your video a quick preview and go to the Export section to export your file. Here, you can rename the file, change the format, frame rate, resolution and quality of the video. After that, click the folder icon to choose a destination folder for saving your file. Finally, hit the Start Export button in the bottom right corner to process your multimedia collage.
There’re lots of presets for you to choose, so that you can easily convert your videos to a compatible format for your device. You can also adjust the detailed parameters for each profile.
Click the gear icon next to the output folder. And then you’ll find the following window.
Then you can adjust subtitle language, audio language, GPU acceleration.
By clicking the “Convert” option, and you can set the output folder, snapshot folder, convert tasks, and more.
After you adjust all the settings, you can save the settings by clicking “OK”. If you want to reset the settings, you can click “Restore to Default” to reset it to factory settings.
Vidmore Video Converter has a built-in video splitter that allows you to split a long video into clips.
Step 1: Select a video file and click the “Cut” button.
Step 2: Choose the start and end time for your clip. You can drag the clipper or enter the time directly.
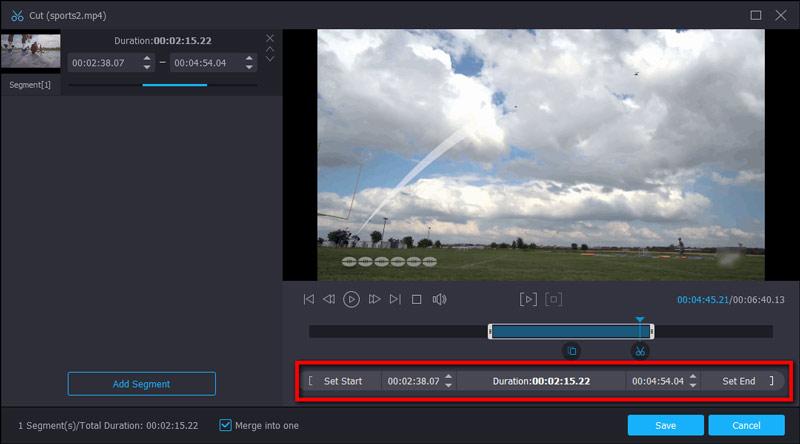
Step 3: Click “Add Segment” button to add the current clip to the list. Then, you can set another clip.

Step 4: After you have cut out the clips you want, click the “OK” button. You’ll find the clips in the file list.
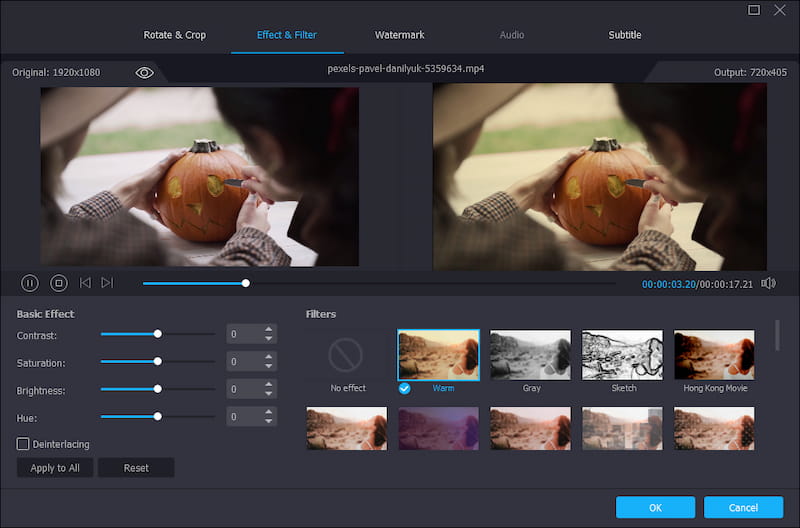
Vidmore Video Converter Ultimate offers brightness, contrast, saturation, hue adjustment for you to apply stunning effect to your video.
Step 1: Go to “Edit” > “Effect & Filter”.
Step 2: You can easily adjust brightness, contrast, saturation, hue and select deinterlacing as you need. Besides, you can try the filters to perfect your video.
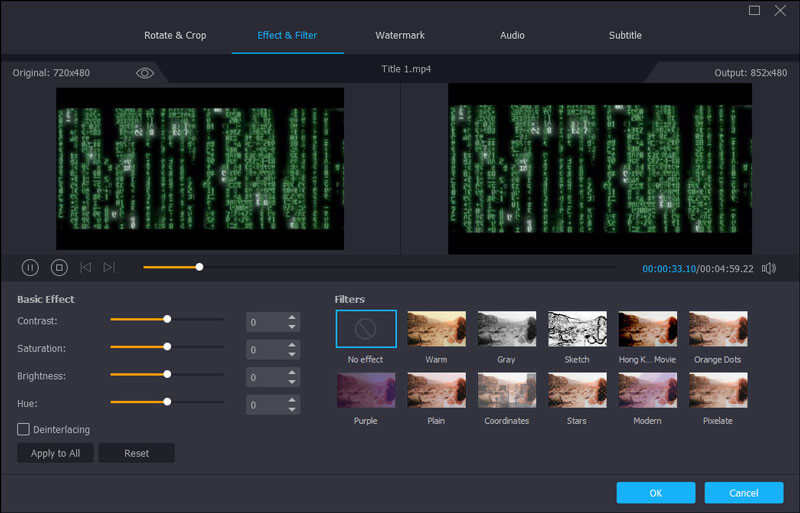
Step 3: Click “Apply to All” to save the settings.
If you’ve ever recorded a video on your smartphone, only to find it sideways or upside down, then you know how frustrating it can be to watch it later. Luckily, Vidmore Video Converter offers you a quick way to rotate or flip a video.
Step 1: Choose a video file and go to “Edit” > “Rotate & Crop”.
Step 2: Here you can flip video vertically and horizontally, rotate 90 degrees, rotate 180 degrees or rotate 270 degrees. Click one of the buttons and check the result in the preview.
Step 3: If there’re black bars around the video, you can use the crop function to cut them off. You can change the size and position of the rectangle in the preview window to define the desired frame area.
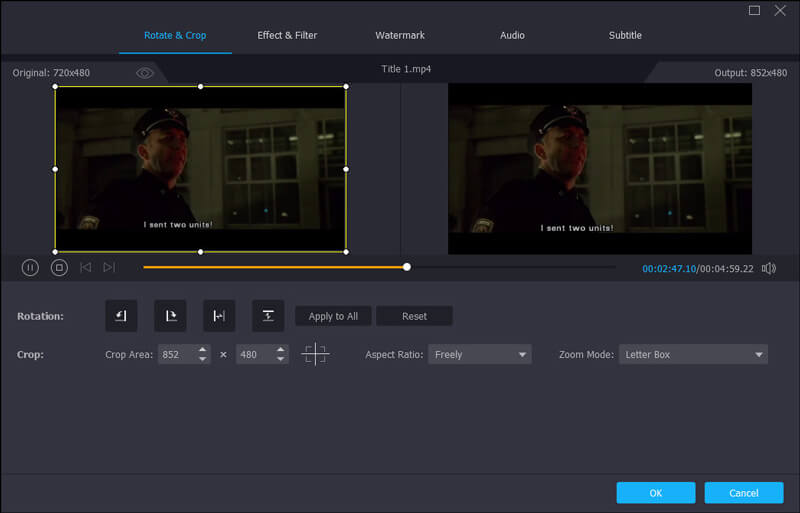
Step 4: If the aspect ratio of the cropped area doesn’t match the output one, there’ll be black bars on the edges. You can choose “Pan & Scan” or “Full” under the option “Zoom Mode”, to auto fill the black bars.
Step 5: Click the “Apply to All” button to save the changes.
If you want to add watermark to your personal video to protect your copyright, Vidmore Video Converter comes in handy.
Step 1: Click the “Edit” button, then choose “Watermark”.
Step 2: If you want to add a text watermark, enter the text to the blank. You can adjust the text fonts, colors, size and styles. Then place the text watermark anywhere on the video.
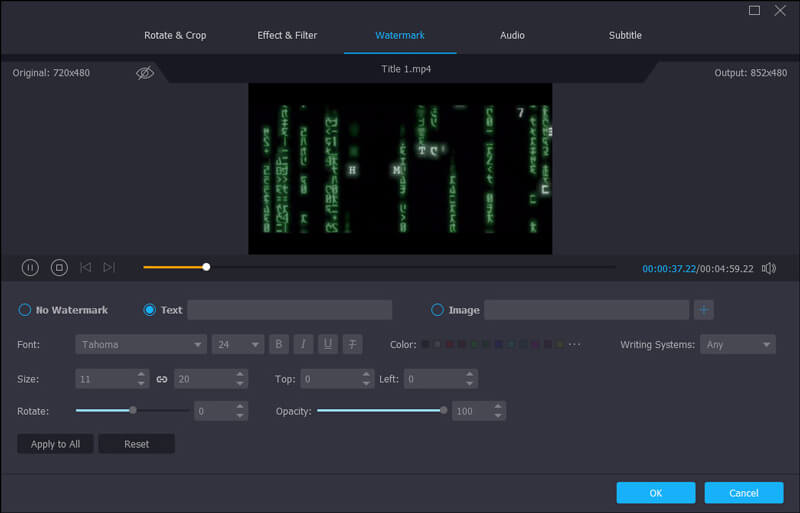
If you want to add an image watermark, activate the option “Image”. Click “Add Picture” button to select an image. And then adjust the size and place it on your video.
Step 3: Click “Apply to All” to apply the watermark.
Vidmore Video Converter Ultimate provides you audio adjustment for advanced mixing.
Step 1: Go to “Edit” > “Audio”.
Step 2: Select the audio track you would like to play. If the sound of your video is low, you can also adjust the volume. Or the image doesn’t go well with the sound, you can change the delay time to make them matched.
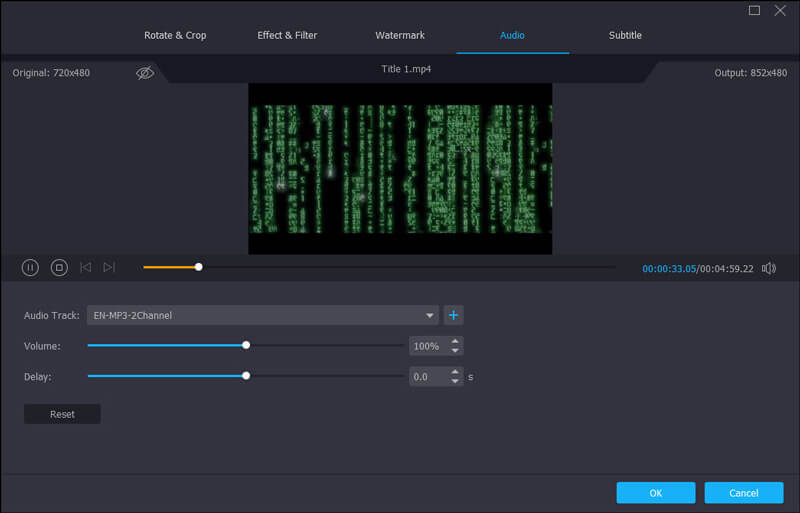
Step 3: Click “Apply to All” to save the adjustments.
If you want to post your video for sharing, it is a good choice to add subtitles with Vidmore Video Converter. This efficient video editing software enables you to embed subtitles in video permanently.
Step 1: Go to “Edit” > “Subtitle”.
Step 2: Click “Add Subtitle(s)” to import the subtitle file (*.srt; *.ssa; *.ass) from your computer. After that, you can adjust the position, font, color, transparency, delay time, outline and more.
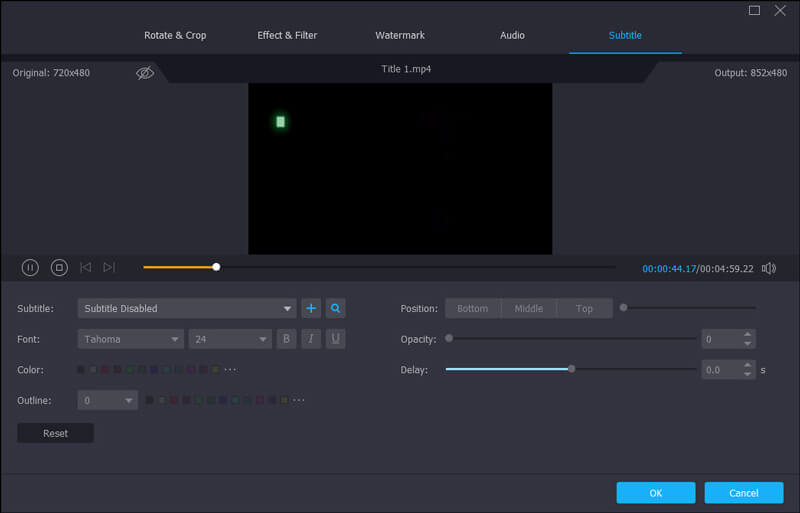
Step 3: Click “Apply to All” to save the adjustments.
With Vidmore Video Converter, you can easily combine video files with different formats like MKV, AVI, MP4, FLV into a single file.
Step 1: Click “Add Files” to import the video clips that you want to merge.
Step 2: Select one video file in the list and then choose an output format for the merged video.

Step 3: Check the box “Merge into one file”, and click “Convert”. Then the software will convert and combine all the added files into one.
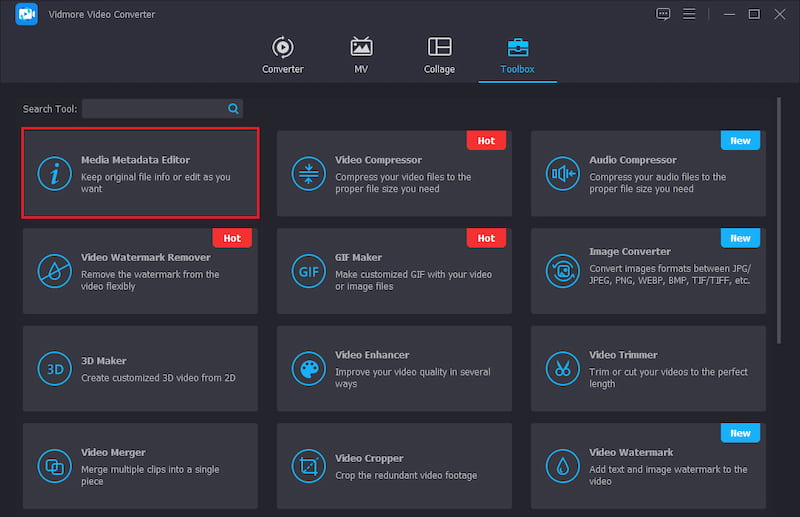
Vidmore Video Converter has an Edit Media Metadata option that allows you to add personal tag on exported video or audio recording files.
Step 1: On the top menu of the tool, select the Toolbox tab. Then you can click the Media Metadata Editor to load a video.
Step 2: Add a supported media file that you need to edit. Then, adjust the file name, title, artist, album, composer, genre, year, comments, etc. In addition, you can set the snapshot for the video.
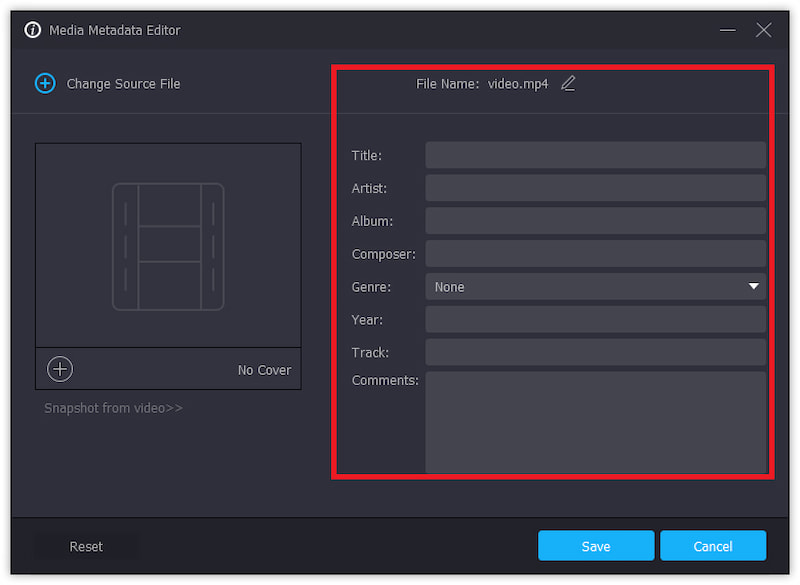
Step 3: Click the Save button to save the current video.
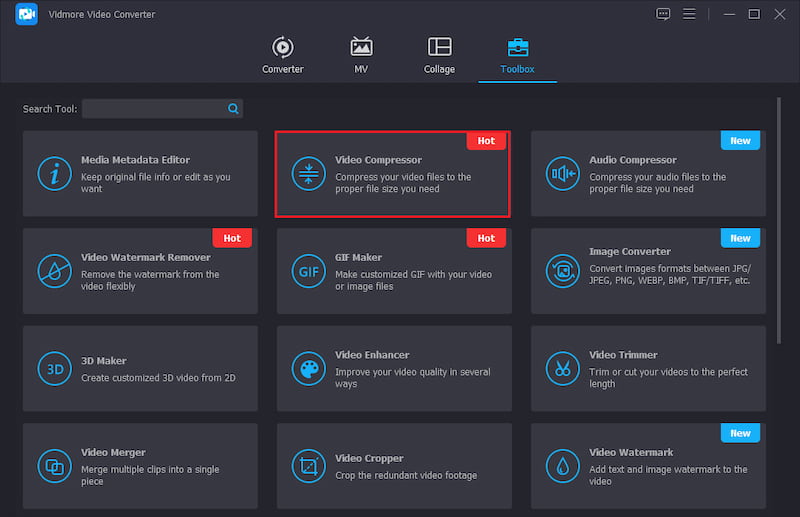
If you want to compress your video files to the proper file size you want, Video Compressor can help you.
Step 1: You can select Video Compressor option from Toolbox tab. Then you need to import a video by clicking the Plus sign button.
Step 2: Then, start to modify the video’s Name, Size, Format, Resolution, or Bitrate
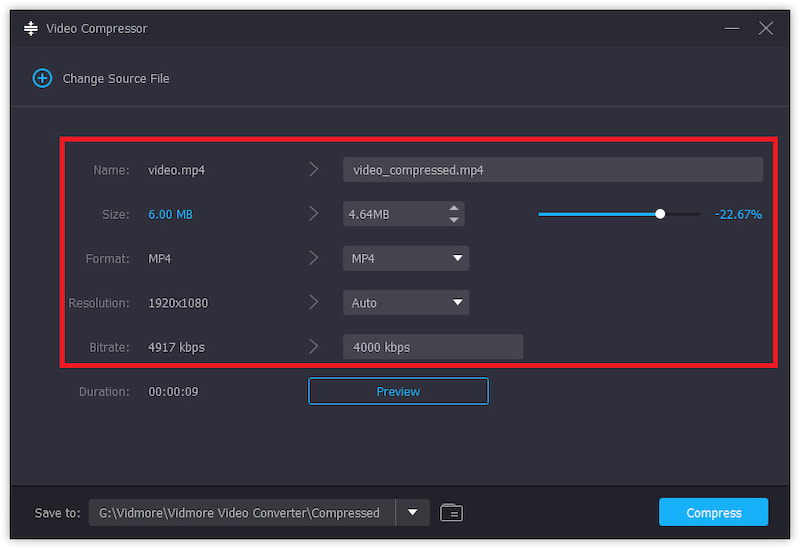
Step 3: Now, you can preview the video. If you like it, click the Compress button.
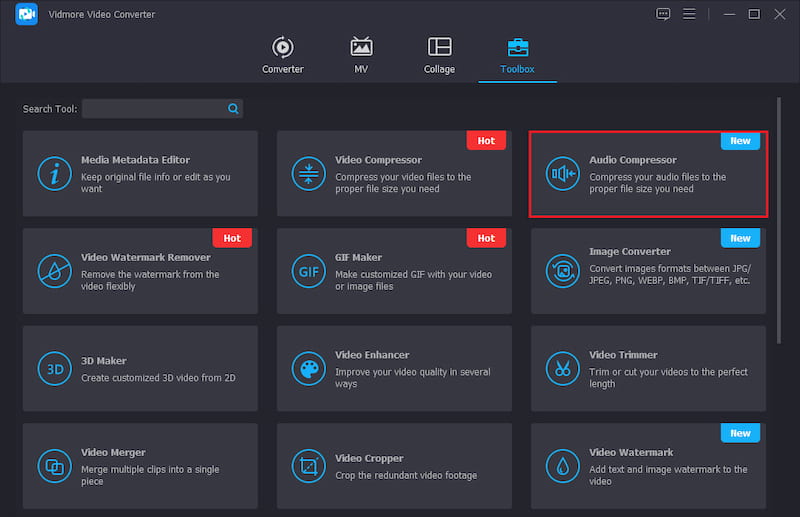
Audio Compressor can do it if you want to compress your audio files to the smaller file size.
Step 1: Under the Toolbox tab, click the Audio Compressor option. Import to compress by clicking the Plus sign button from the appearing window.
Step 2: Then, modify the Name, Size, Format, Channel, Sample Rate, and Bitrate of the audio.
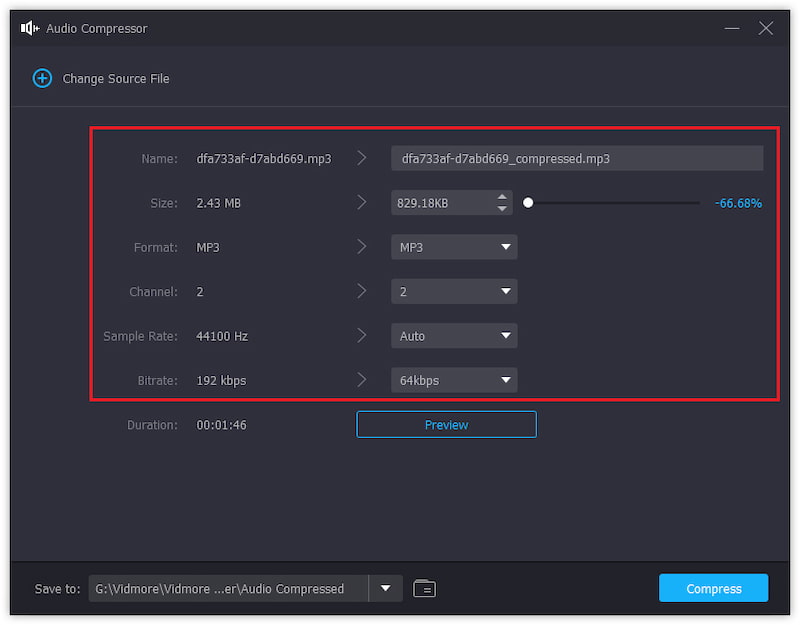
Step 3: Preview the audio. If you like it, click the Compress button to get your new audio.
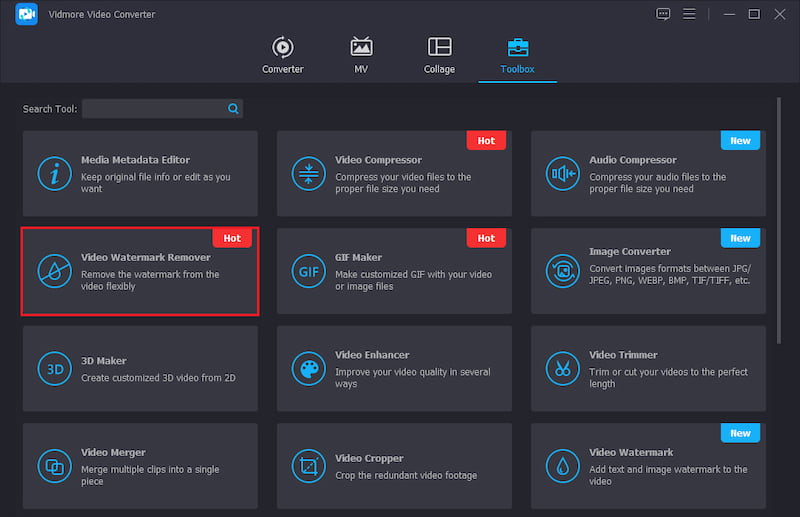
With Vidmore Video Converter, you can flexibly remove the watermark from the video.
Step 1: Enter the Toolbox tab and select Video Watermark Remover. Then, you can add a video with watermark.
Step 2: Click the Add watermark removing area option directly.

Step 3: Drag and move the frame to hide the watermark area. Then, adjust the frame to a proper size.
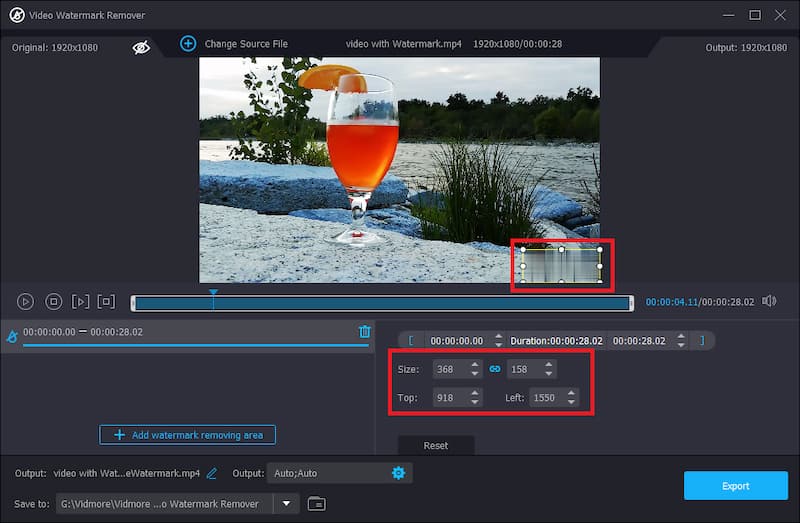
Step 4: Start playing to preview the video. If you don’t have to change other video details, click the Export button to start removing watermark.
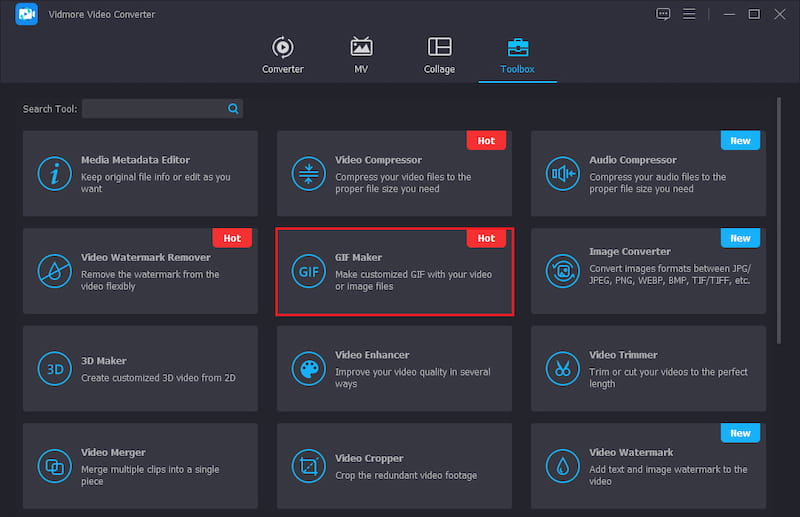
You can make any video or image files you like into customized GIFs with the GIF Maker.
Step 1: Locate the GIF Maker in the Toolbox tab. Next, select a video or some pictures to import what you want to make a GIF.
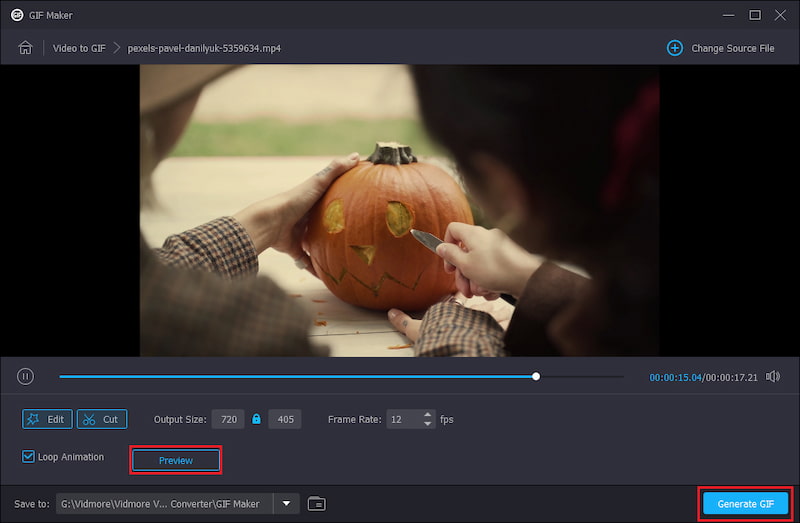
Step 2: Click the Edit button, use the functions of Rotate & Crop, Effect and Filter, Watermark, Audio, and Subtitle, then it can enable you to change the video’s visual effects.
Step 3: Click the Generate GIF button to obtain your GIF.
The Image Converter can convert images between JPG/JPEG, PNG, WEBP, BMP, TIF/ TIFF, etc.
Step 1: Under the Toolbox tab, click the Image Converter option. Import one or more images to convert by clicking the Plus sign button.
Step 2: Start to modify the output names and select Convert All to some format you want to, such as BMP. Then choose the storage path.
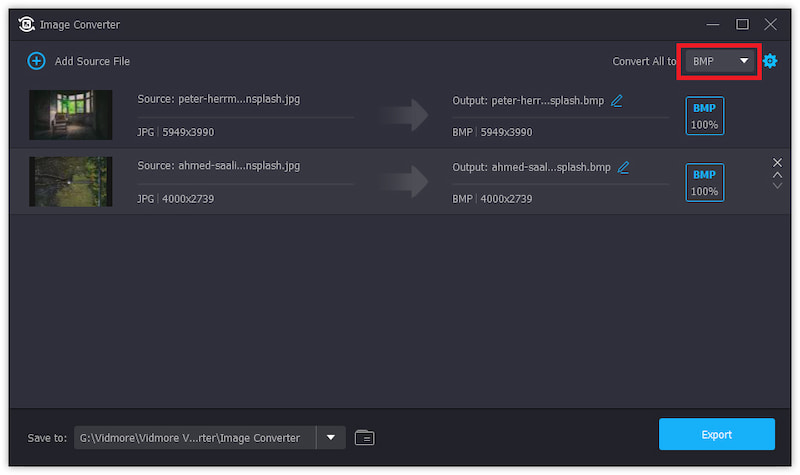
Step 3: Click the Export button to start the image conversion.
If you want to create customized 3D videos from 2D, the 3D Maker is a good choice.
Step 1: Select 3D Maker in the Toolbox tab. Then, click on the Plus button to add a video.
Step 2: Several options to make 3D are also suitable for you, such as Anaglyph, Split Screen, Depth, Format, and Quality. With these options, you can get better 3D effects.
Anaglyph: Red/Cyan anaglyph, monochrome/half color/full color/quality Dubois; Green/Magenta anaglyph/half color/full color; Amber/Blue anaglyph, monochrome/half color/full color.
Split Screen: Side by Side (Half-Width), Side by Side (Full), Top and Bottom (Half-Height), Top and Bottom (Full).
Depth: The depth of an anaglyph 3D can be changed from 0 to 15.
Format: MP4, MOV, MKV, AVI, WMV, WEBM, M4V, FLV, TS, TRP, etc.
Quality: High, Standard, and Low.
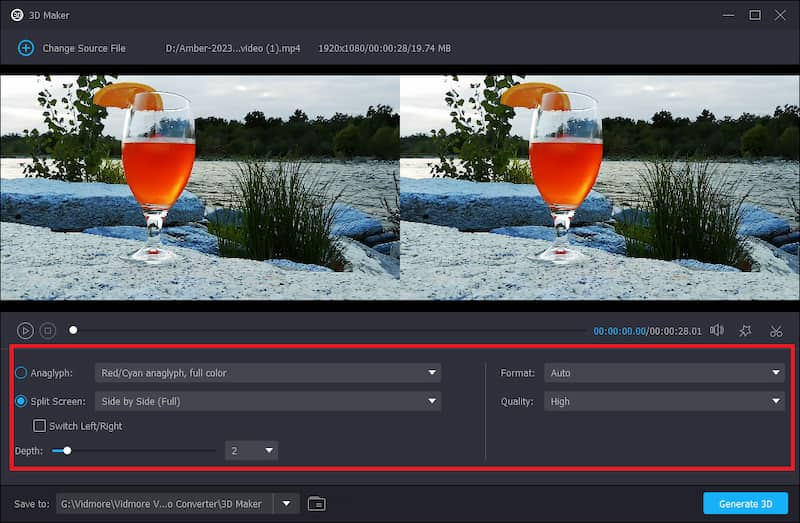
Step 3: Finally, click Generate 3D and start creating your own 3D work.
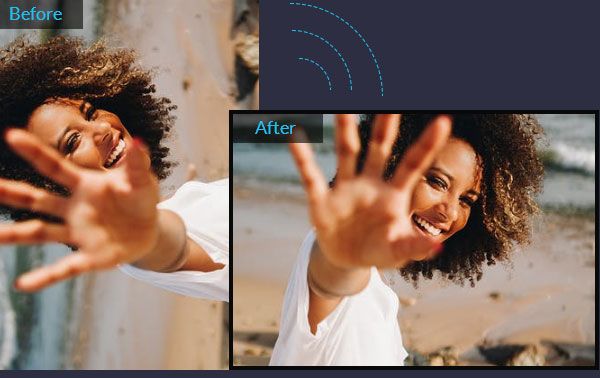
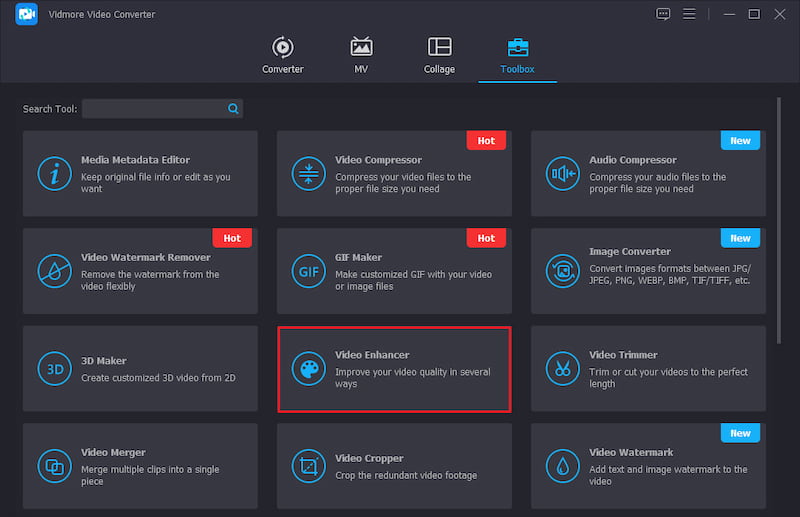
The Video Enhancer can improve your video quality in several ways.
Step 1: Under the Toolbox tab, find the Video Enhancer option. Next, import a video that you want to enhance.
Step 2: Four options for you to enhance a video, include Upscale Resolution, Optimize Brightness and Contrast, Remove Video Noise, and Reduce Video Shaking. Choose the aspects you want to enhance from the options.
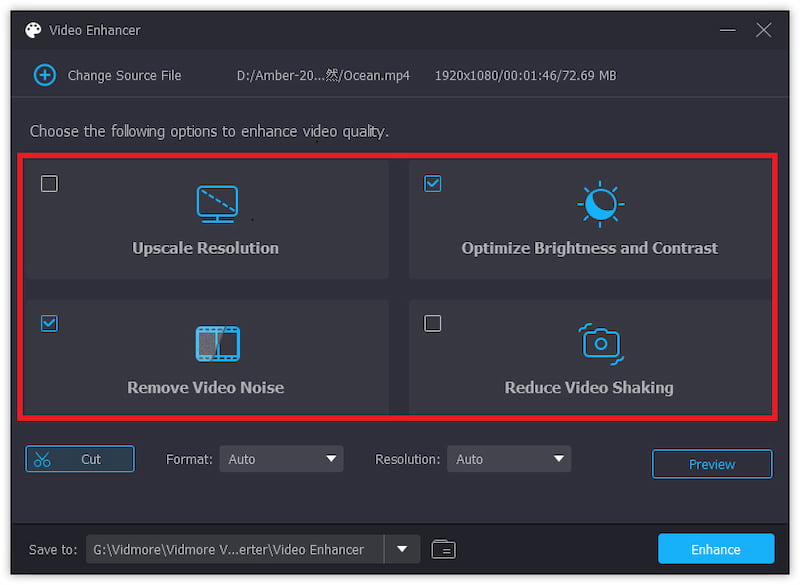
Step 3: Preview the video’s visual effects. Lastly, you can enhance your video by clicking the Enhance button.
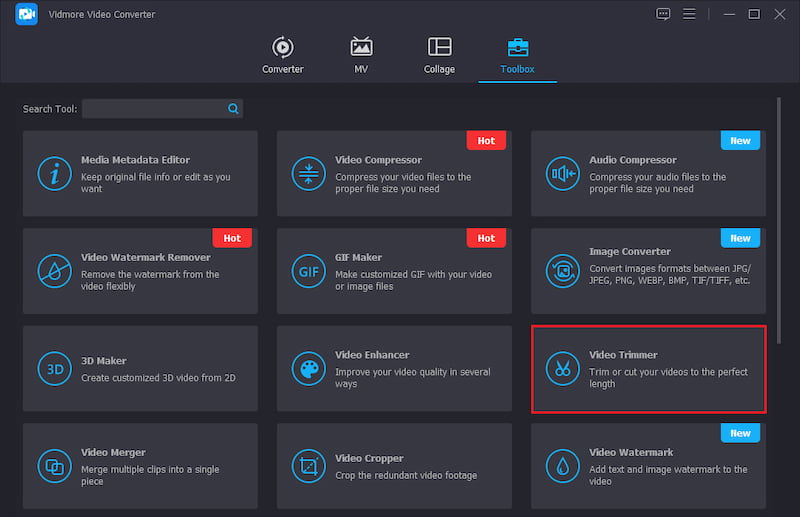
Video Trimmer has the advantage of trimming or cutting your videos to the perfect length.
Step 1: Select the Video Trimmer option from Toolbox. Next, load a video to start your trimming.
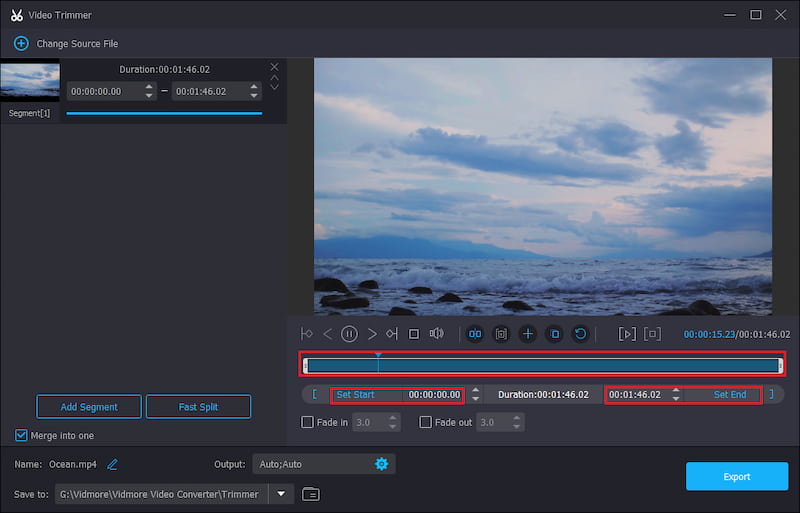
Step 2: You can move the starting and ending time points to set the timeline of the video. Or you can input the time directly from Set Start to Set End.
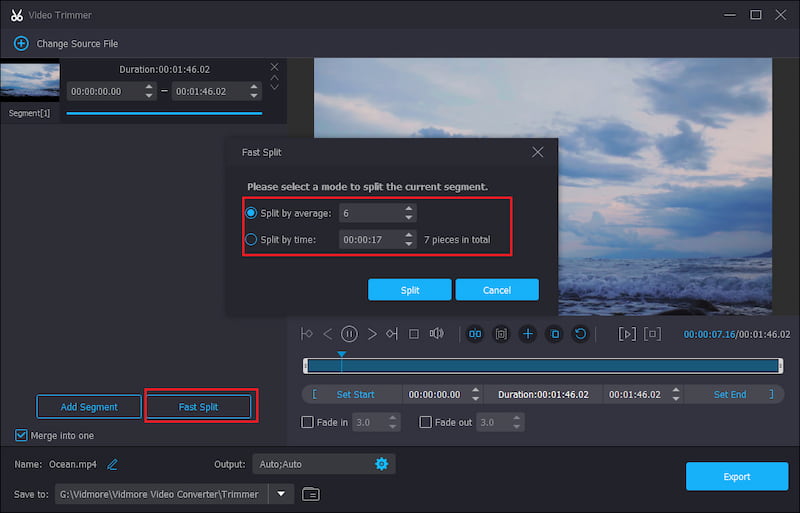
Step 3: You are clicking on the Add Segment button to add other segments or split a segment individually by Fast Split. In addition, the Fade in/out beneath the progress bar is your other video choice.
Step 4: Finally, you can start the trimming process by clicking the Export button.
Video Merger is a good tool to merge multiple into a single video.
Step 1: Click the Video Merger from the Toolbox. Add your video clips by clicking the Plus button.
Step 2: Then, arrange the clip order. You can drag the clip directly to its proper position or click Forward or Background button. If you want to add ahead or behind a selected clip, you can click the Ahead and Behind button. After that, Trim and Edit a clip as your need.
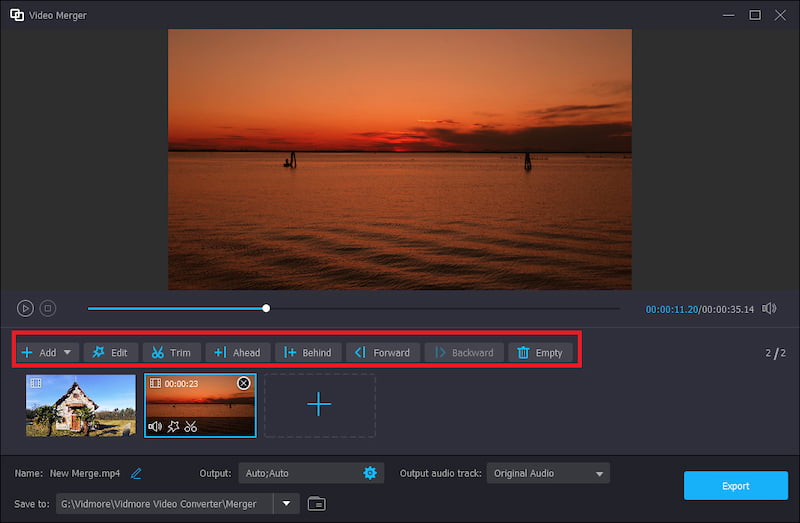
Step 3: Finally, change the Name, Output settings, and saving path for the output file. Click the Export button to end it.
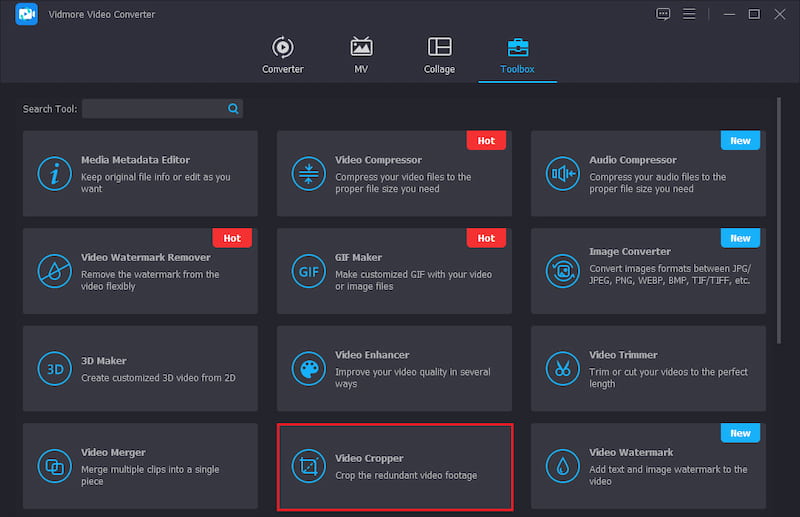
Video Cropper comes in handy if you want to crop redundant video footage letterbox, or change the video aspect ratio.
Step 1: Firstly, you can open the Toolbox tab. The Video Cropper option is for you to import and crop a video.
Step 2: To crop the video, you can drag the aspect ratio to suit the video; you can also choose the pointed areas of the video. Then, you can customize the aspect ratio of the video by the. Crop Area or Aspect Ratio.
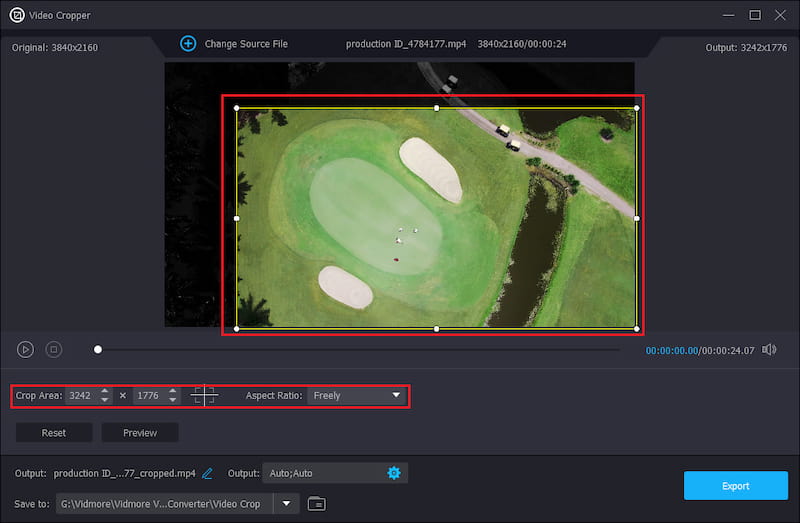
Step 3: Preview the cropped video and click the Export button to save the cropped video.
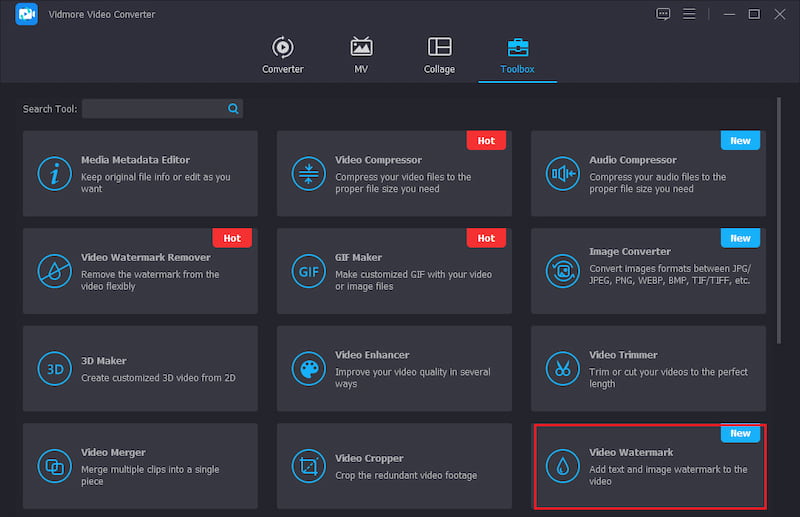
If you want to add text and image watermark to the video, Video Watermark you should have a try.
Step 1: Choose the Video Watermark option from the Toolbox tab. Then, add a video to this tool.
Step 2: Choose Text Watermark to add a watermark to the text file, or click on the Image Watermark to add a logo. Of course, you can simultaneously add text and image watermarks to a video.
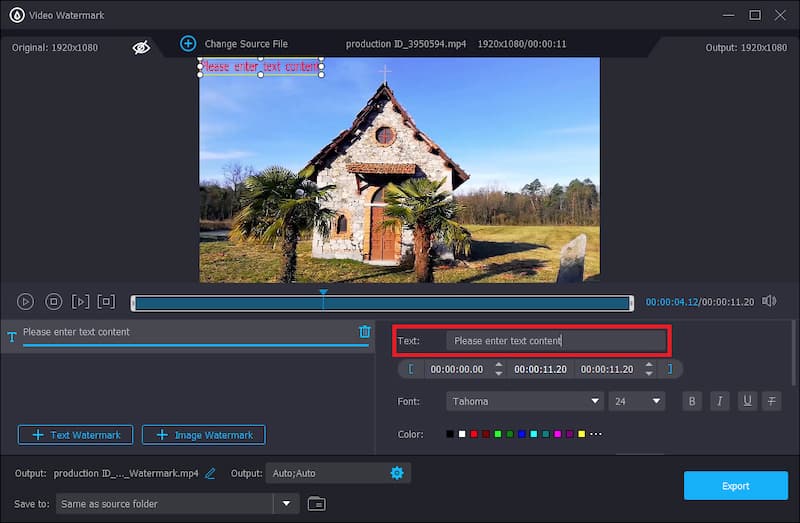
Step 3: Then, modify the Font, Color, and duration period of the watermark. In addition, you can decide it’s starting and ending time on the video playing process.
Step 4: Finally, click on the Export button to save your video.
Color Correction can favor to your video, showing better color saturation by correcting your video color.
Step 1: Access the Color Correction and add a video needed to correct its color.
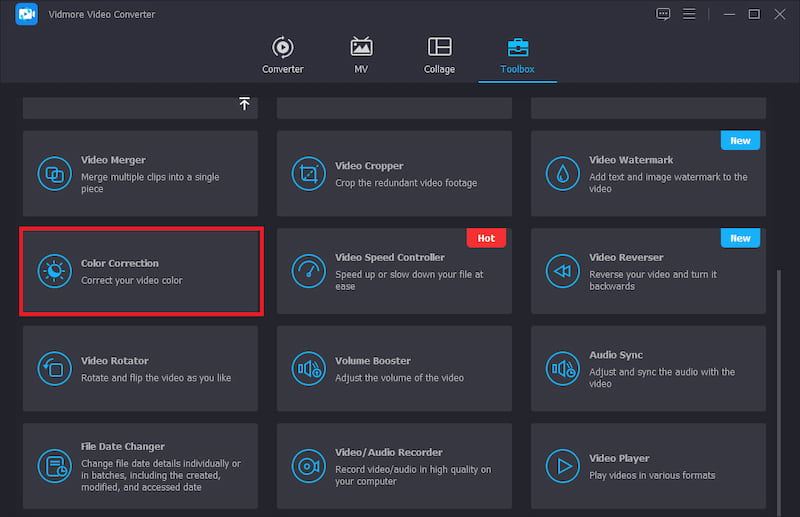
Step 2: Change the Contrast, Saturation, Brightness, and Hue in the editing panel.
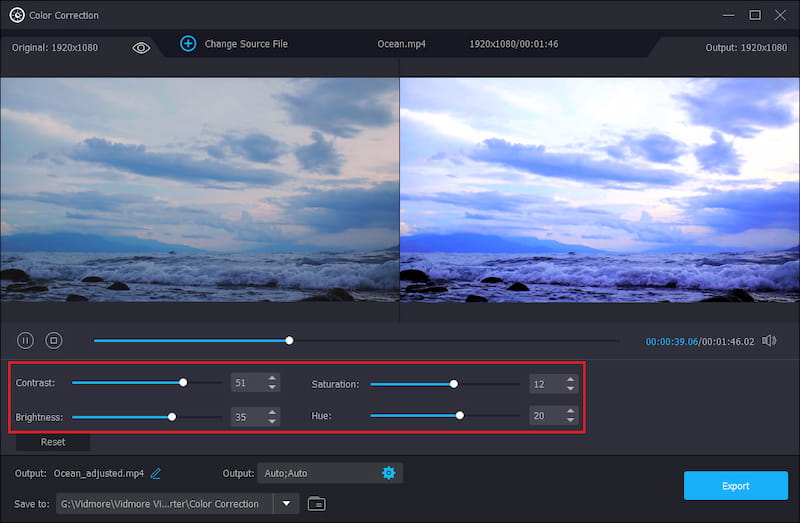
Step 3: Preview the video effect, and click the Export button if you are satisfied with the results.
Video Speed Controller provides speed adjustment for your video file.
Step 1: If you want to speed up or slow down your video, you can use Video Speed Controller from Toolbox. Then you have to add a video.
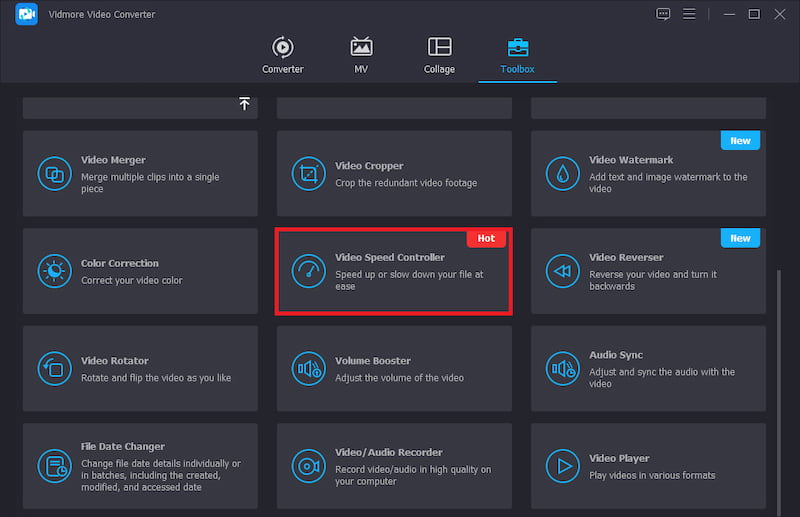
Step 2: Choose one playback speed that suits your preferences from several options. It includes the speed from 0.125x, 0.25x to 8X. Then, if you want to change some information, you can modify the video/audio basic settings and the file path.
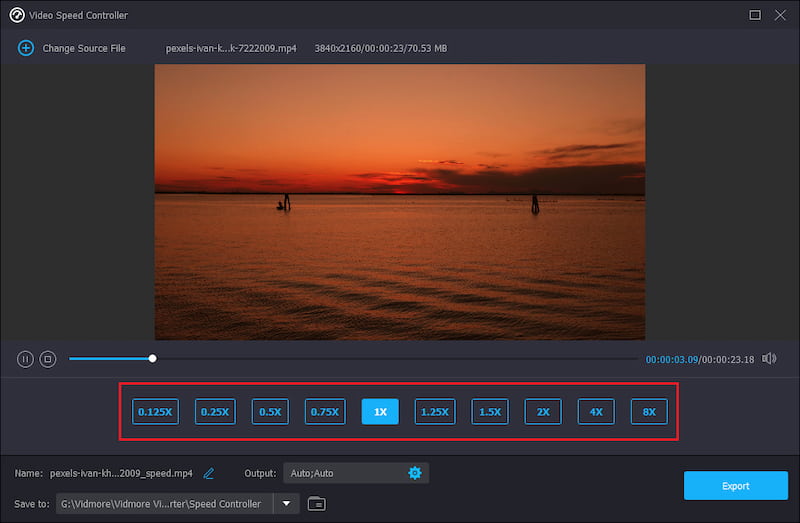
Step 3: At this time, you can click the Export button to get a new video.
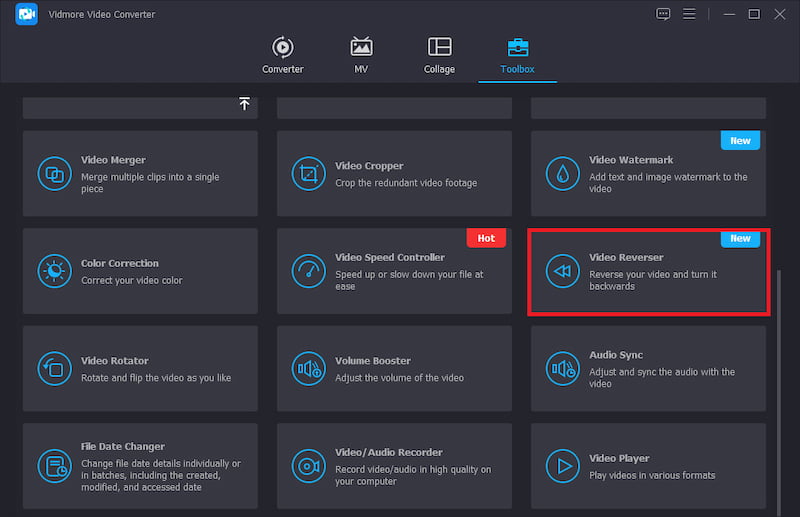
With Video Reverser, you can quickly reverse your video and turn it backward.
Step 1: Find the Toolbox tab and click Video Reverser. Now you should add a video to the reverser.
Step 2: Reverse the part of the video by using the handlebars or setting the duration period.
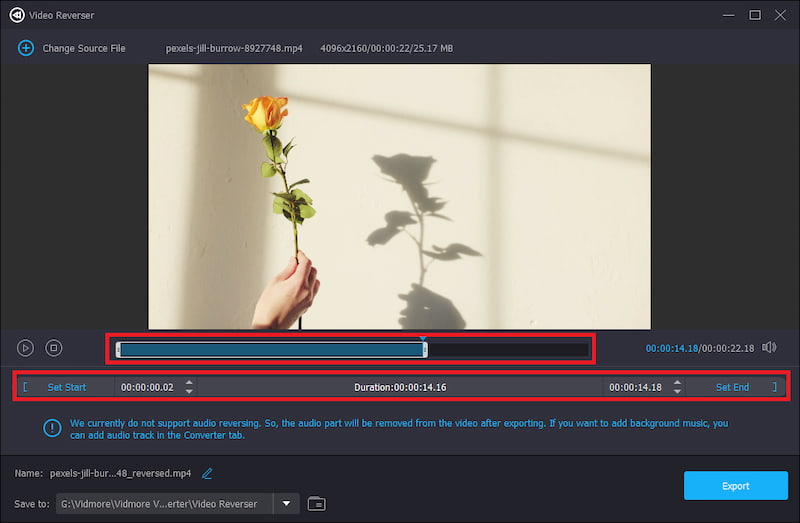
Step 3: Finally, click the Export button to complete the reversion.
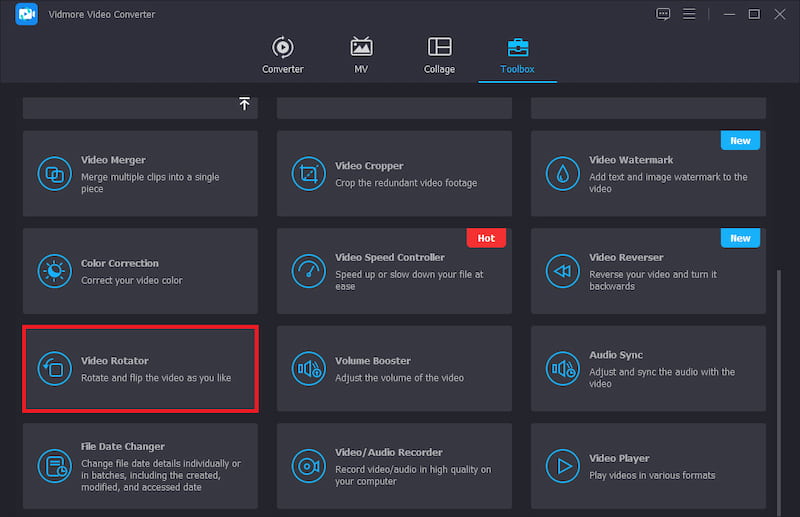
If you want to rotate and flip the video as you like, try the Video Rotator.
Step 1: Click the Video Rotator in the Toolbox tab. Then, load the video you want to rotate.
Step 2: You can use Video Rotator to change the video orientation. By rotating the video to 90/180/270 degrees clockwise, you can see different video effects.
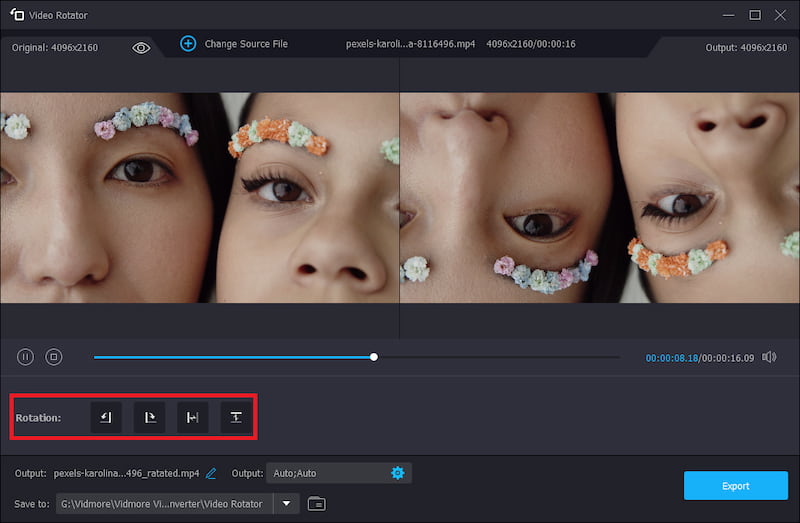
Step 3: Rename the video, modify Output Settings and set a destination path. If you think it’s ok, you can click the Export button to make the rotated video.
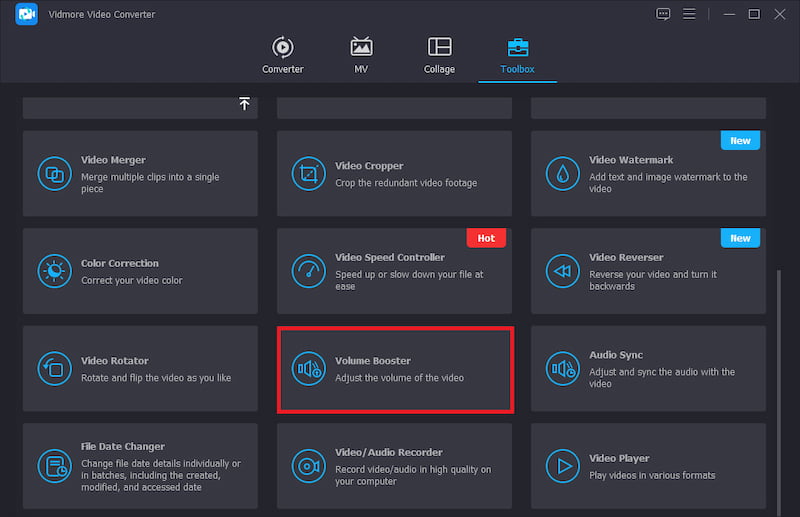
When you need to adjust the video’s volume to louder, start using Volume Booster.
Step 1: Choose Volume Booster in the Toolbox tab and add a video.
Step 2: Select the Audio Track according to the video audio. Drag the Volume slider to the left or right to reduce or increase the volume.
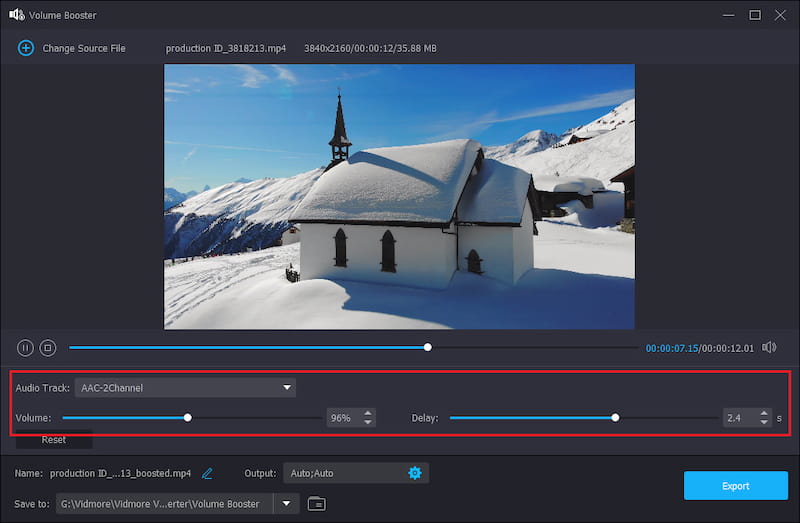
Step 3: Finally, set a file destination for the output file and click the Export button to end it.
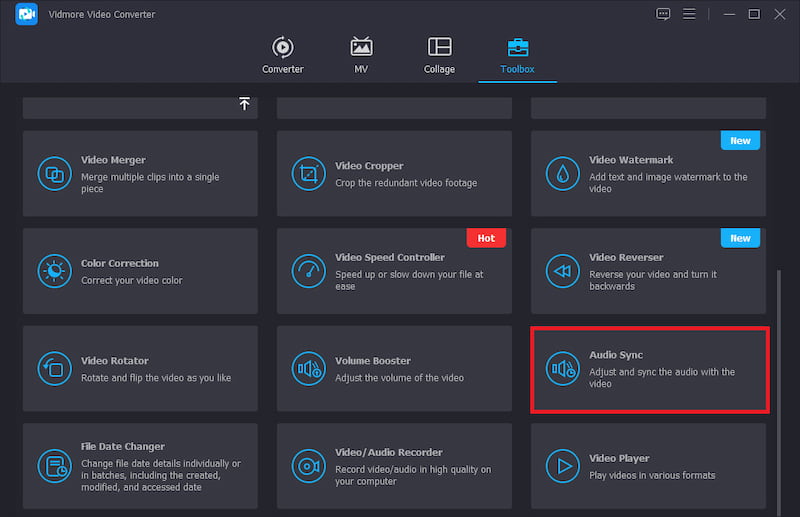
Audio Sync supports adjusting and syncing the audio with the video.
Step 1: Access Audio Sync from the Toolbox tab and add a video.
Step 2: Drag the Delay slider left to slow down the audio or drag it to the right. Then you can speed up and sync the audio with the video.
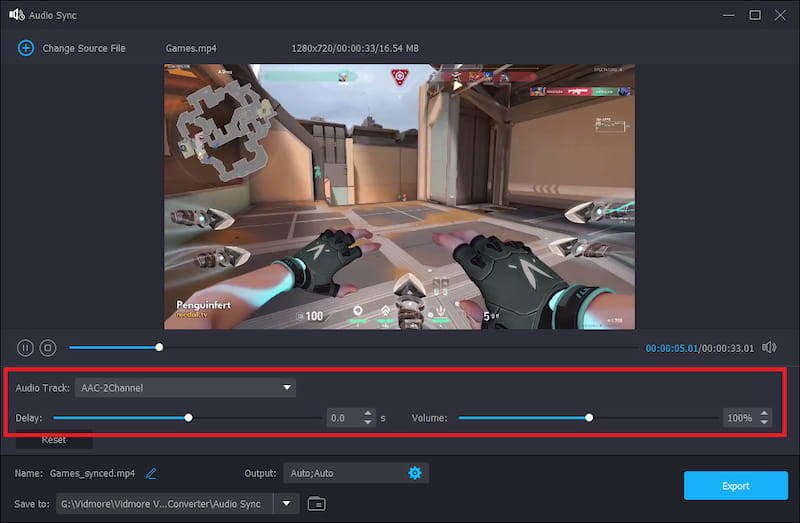
Step 3: Finally, you can edit the audio’s name settings and select an output folder. After that, you need to click the Export button.
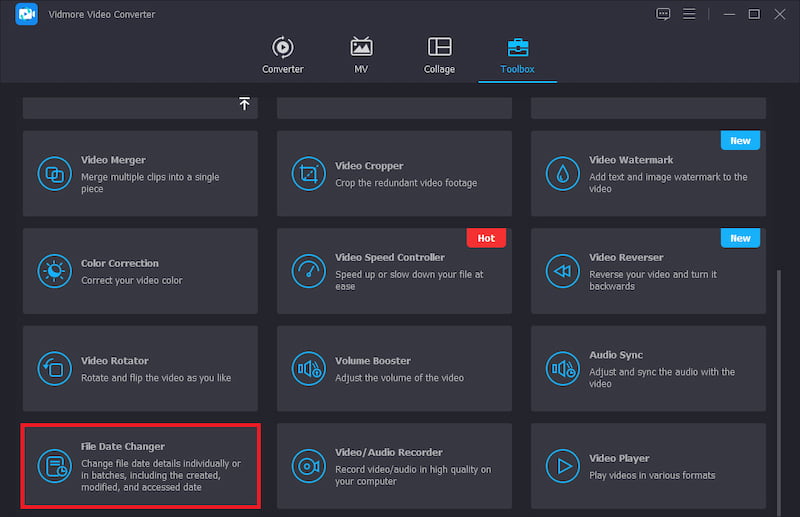
With the File Date Changer, you can change file date details individually or in batches, including the created, modified, and accessed date.
Step 1: Select the File Date Changer from the Toolbox tab and add one or more videos.
Step 2: Click on the file’s Created, Modified, and Accessed date areas and edit the date you need manually.
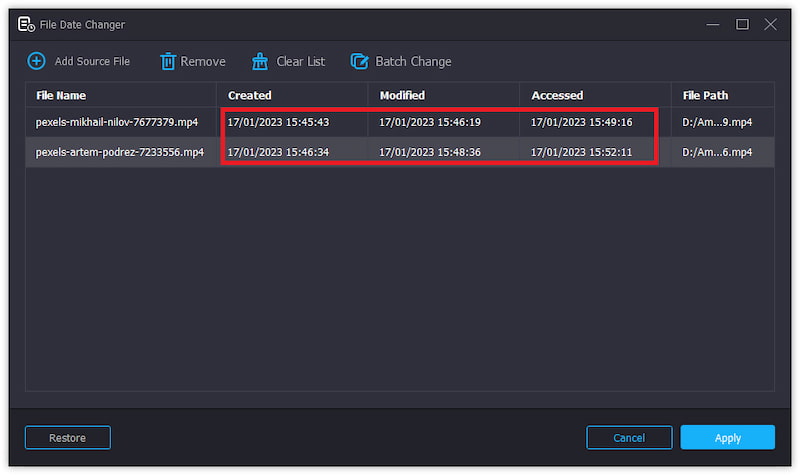
Step 3: Click Apply and apply the changed file date to the original file if you are sure to change it.
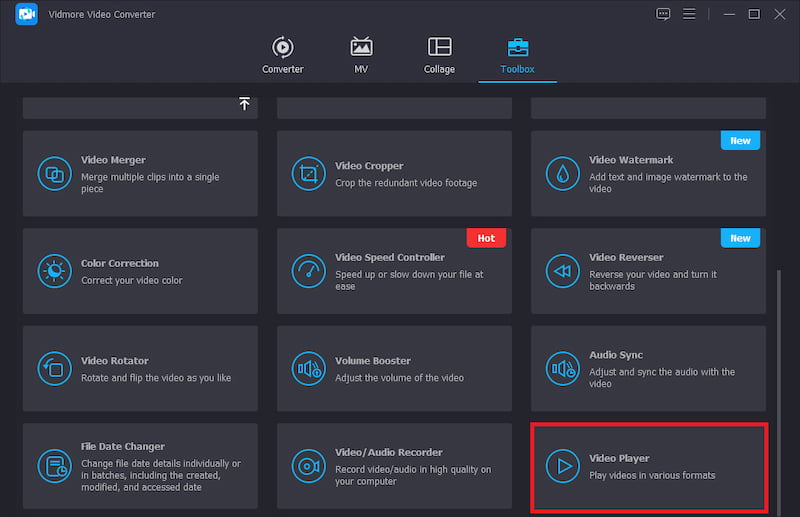
If you want to play videos in various formats, the Video Player can do it.
Step 1: From the Toolbox tab, choose Video Player. Then, add a video to play.
Step 2: Adjust the effect of video playback from the bottom of the page, such as subtitles, speed, etc.
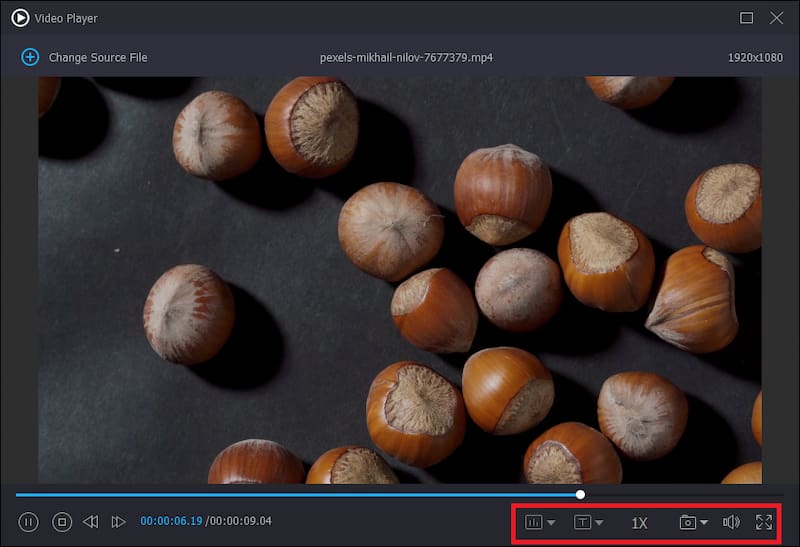
Step 3: Finally, Click the close symbol in the upper right corner to end your video.
Download this 4K-capable video processing software to convert videos with ease.
Subscribed Successfully!