![]() Video Editor
Video Editor
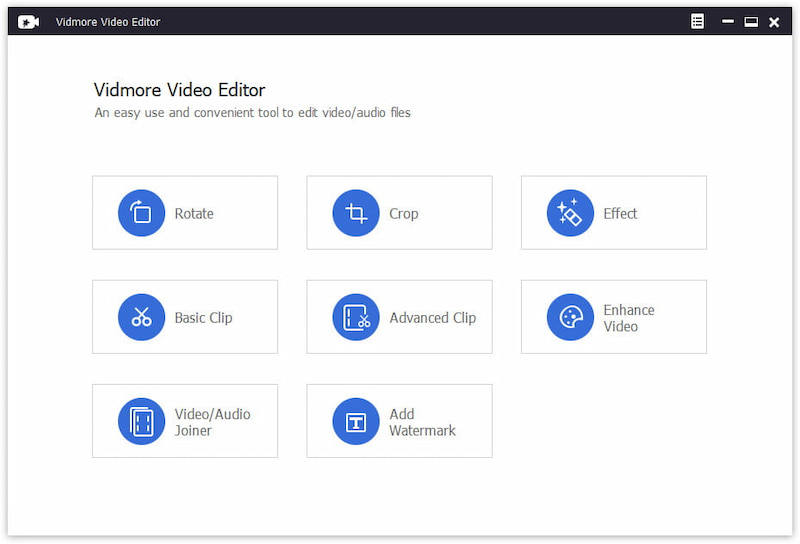
Vidmore Video Editor is a professional video editing tool for video beginners. It offers all the basic video editing effects, like rotate, crop, watermark, clip, merge, etc., to create stunning footage. Highly compatible with most popular video and audio formats, you can do an easy editing task on PC and Mac. What’s more, this video editing software can transcode video and audio formats to other formats for sharing or playing on your device.
What follows is the detailed guide to show you how to use Vidmore Video Editor.
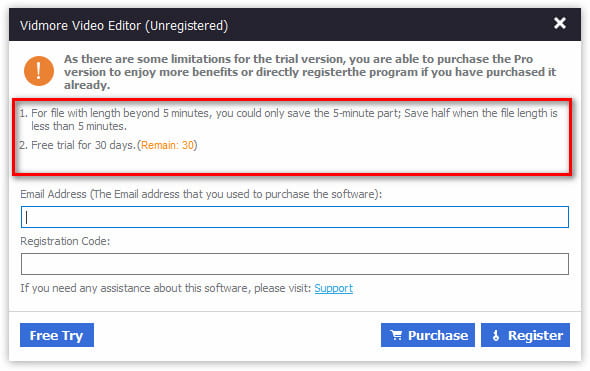
Vidmore Video Editor offers you a free trial version for 30 days. You can use its full features with a limited time length.
To benefit from the full features, you should register it.
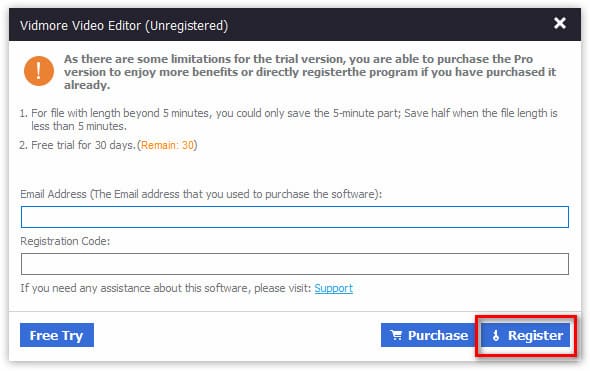
In the pop-up window after the first launchment every day, you can see the register window. Just input your email address and registration code to activate it.
Besides, you can find the register button on the top-right corner in the toolbar. Or click the Menu pulldown list to find the Register option.
Email Address: The email address is what you used to purchase the product.
Registration Code: A string of characters marked as Activation key, license code, or KEYCODE(S) in the order confirmation letter you received after the successful purchase.
After typing the above information, click the Register button on the bottom-right corner to activate this software.
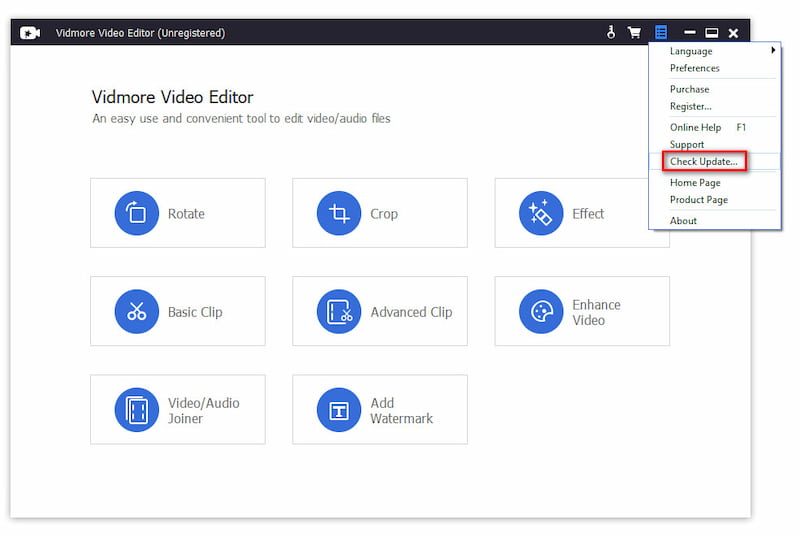
Vidmore Studio always works hard to update this software to fix some bugs and bring new features. For updating the software, you are given 2 methods.
Click the Menu icon at the top with three-dot and choose Check Update from the drop-down options. If there’s an update, you should download and install it immediately.
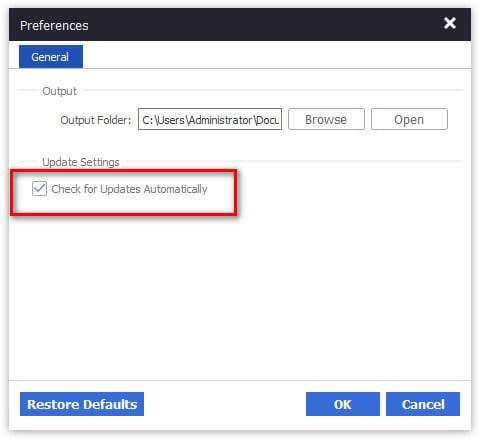
Select Preferences under the menu with three-dot. Then you will go to the General tab by default. Select the checkbox of Automatically check for updates.
Then once this software updates, you will receive the automatic update notification. Then you just need to download and install the latest version.
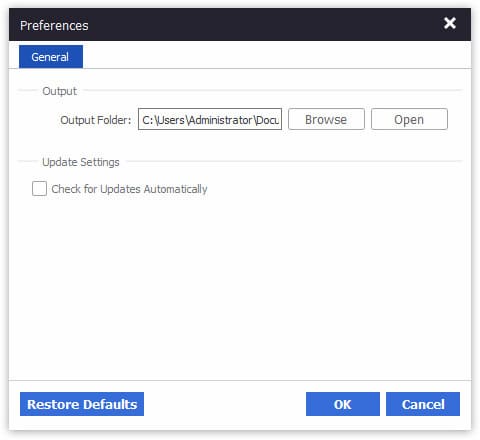
Before starting editing a video file, you can set your preferences to choose the output folder to store the exported video file.
Just select Preferences from the top menu, and you can click Browse to change the destination of the output file.
Optionally, you can tick the box of Check for Updates Automatically to update this software automatically.
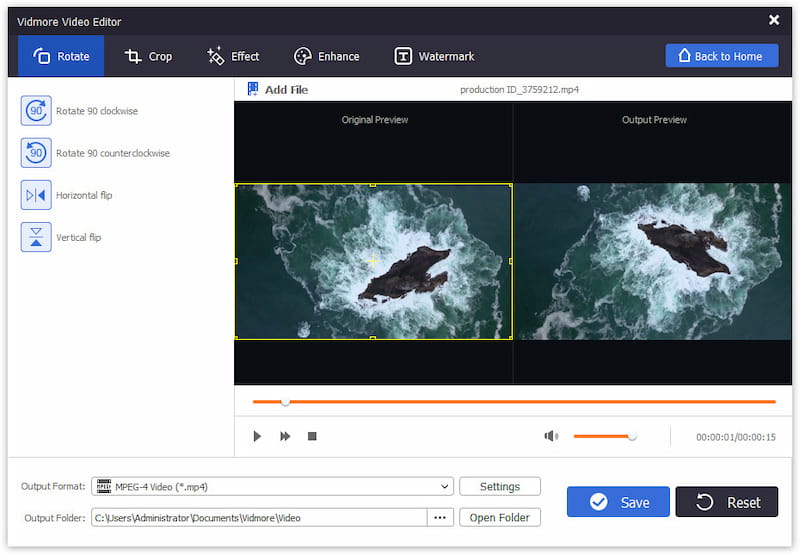
This software can rotate a sideways video in 90 counterclockwise or clockwise, and flip a video vertically and horizontally.
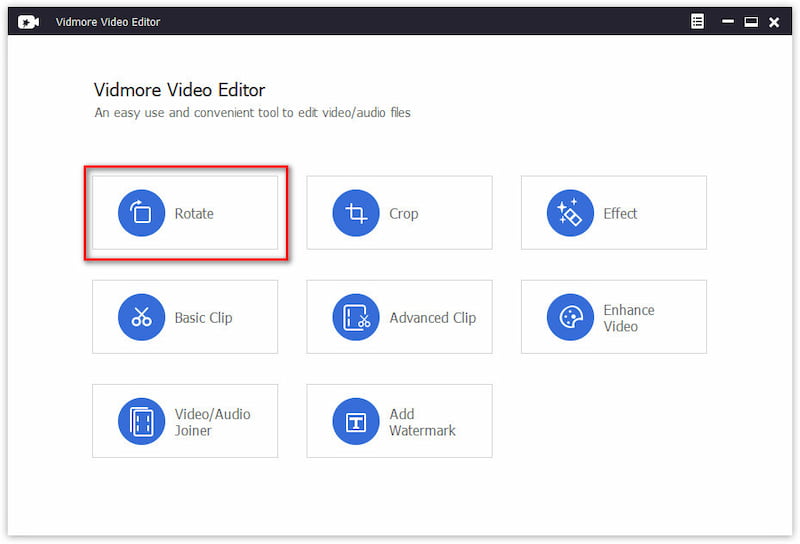
Step 1. Choose Rotate
Download and run Vidmore Video Editor on your computer. In the main interface, you can see the main editing features it supports. Select Rotate here.
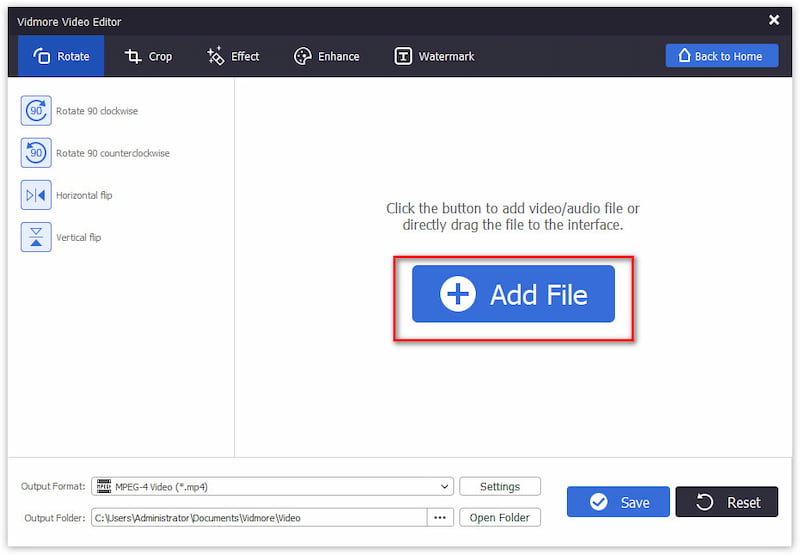
Step 2. Add a video file
Click the Add File button to import the video file that you want to rotate. This software also supports drag-and-drop to add the video file directly.
Step 3. Rotate and flip a video
Click the rotate options from the left sidebar, and you can rotate or flip a video as you like.
You can click the options multiple times to get the correct video angle or effect you like.
You can preview the video effects in real-time by clicking the play icon.
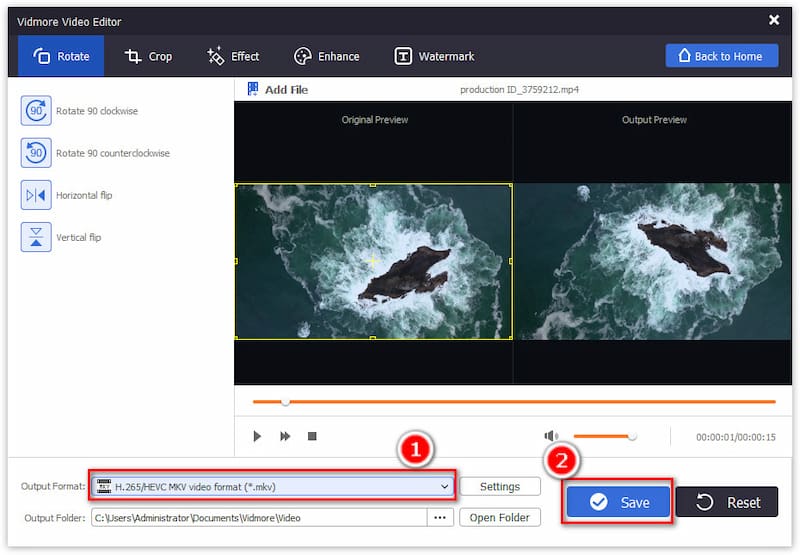
Step 4. Export a video
Once the rotating effects are confirmed, you should select an output format from the dropdown list of Output Format, and set the output folder location by clicking the three-dot next to Output Folder.
Finally, click Save to start rotating a video and export it to your computer.
Vidmore Video Editor can help you zoom in and out of a movie to get rid of black bars.
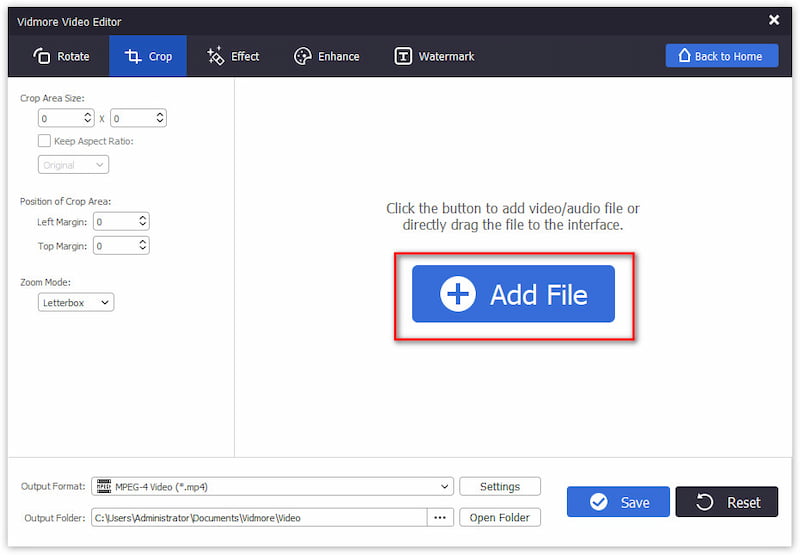
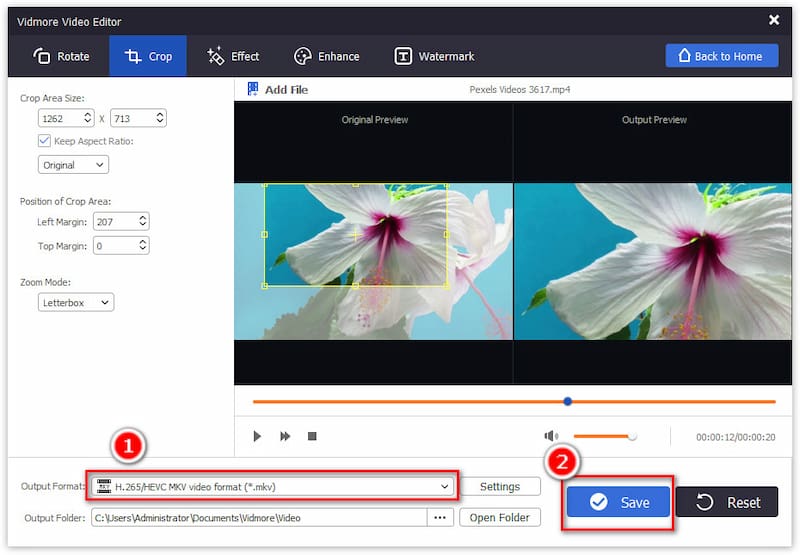
Step 1. Choose Crop
Open Vidmore Video Editor on your computer. You should select Crop from the main interface.

Step 2. Add a video file
Click the Add File button to import the video file that you want to crop. This software also supports drag-and-drop to add the video file directly.
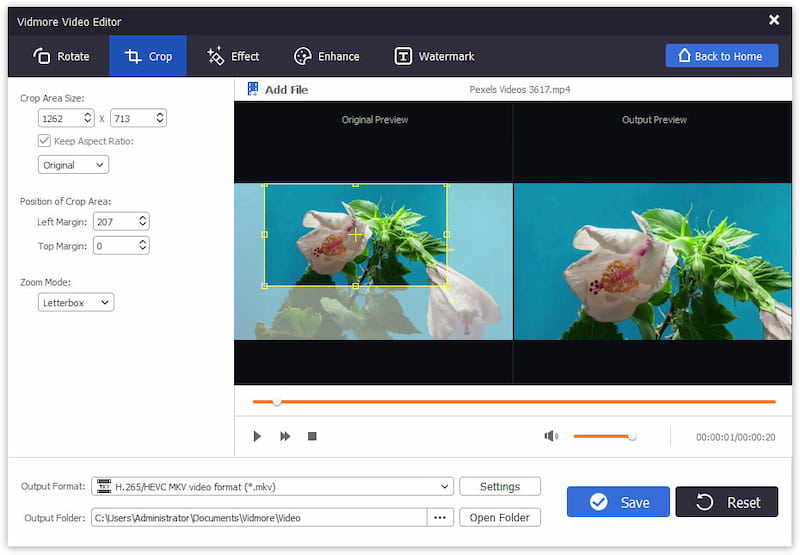
Step 3. Crop a video
Drag and move the yellow frame to confirm the cropping area. The cropping area and position can be changed by settings the value from the left sidebar.
You can adjust the video ratio and choose zoom mode to make the video suit your player.
Step 4. Export a video
Once the cropping effects are confirmed, you should select an output format from the dropdown list of Output Format, and set the output folder location by clicking the three-dot next to Output Folder.
Finally, click Save to start cropping a video and export it to your computer.
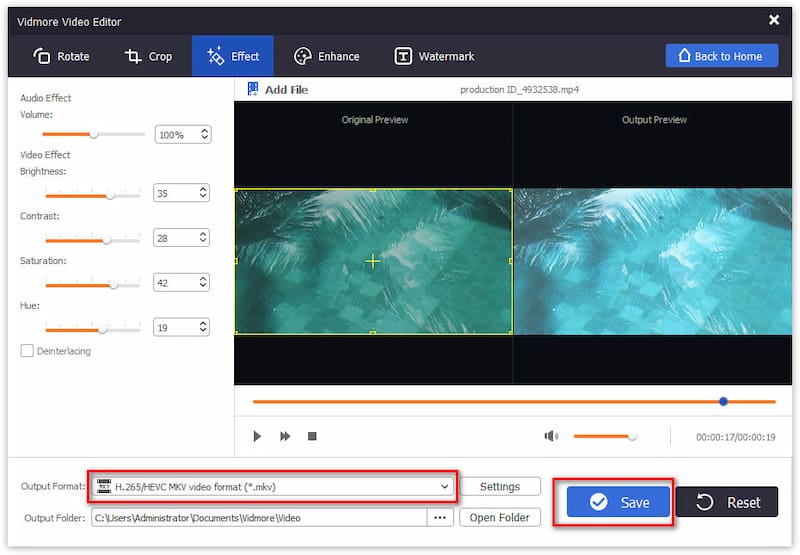
Vidmore Video Editor lets you adjust such effects as brightness, contrast, hue, and saturation manually.
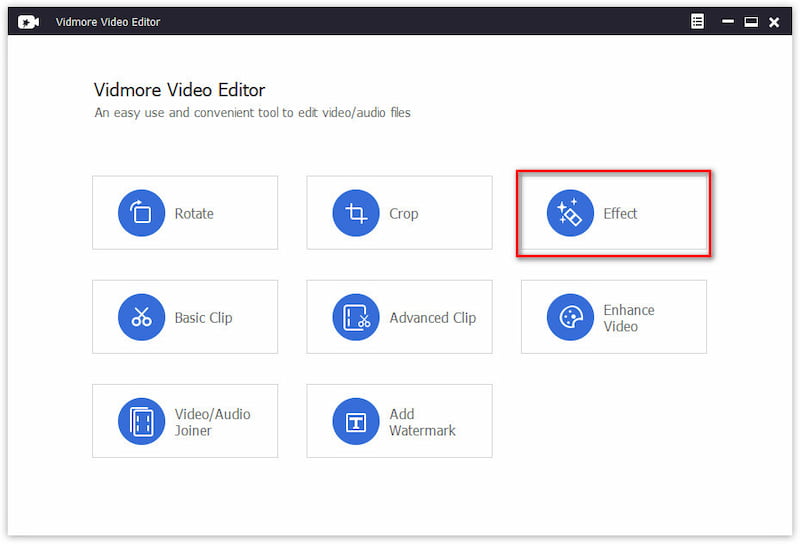
Step 1. Choose Effect
Run Vidmore Video Editor on your computer. You should select Effect from the main interface.
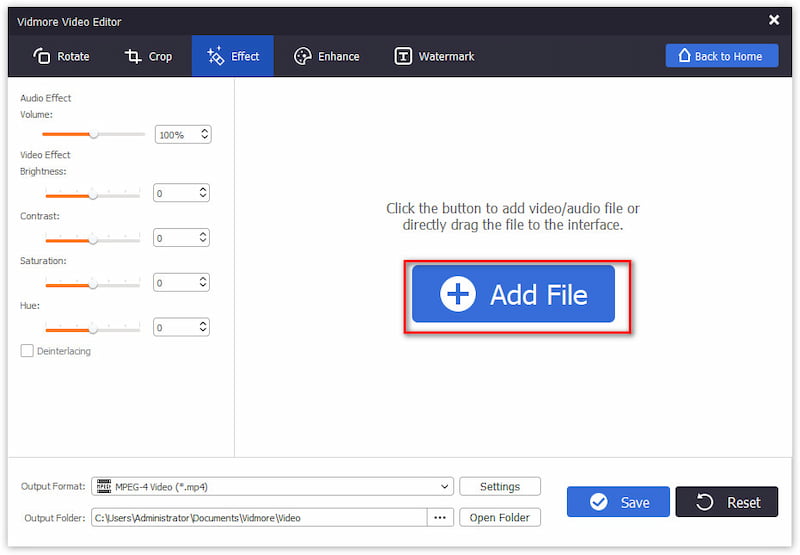
Step 2. Add a video file
Click the Add File button to import the video file that you want to adjust effects. This software also supports drag-and-drop to add the video file directly.
Step 3. Adjust a video effect
Adjust the video effect by moving the slider of Brightness, Contrast, Saturation, and Hue.
Besides, you can adjust the audio volume for the background music.
Select the checkbox of Deinterlacing optionally.
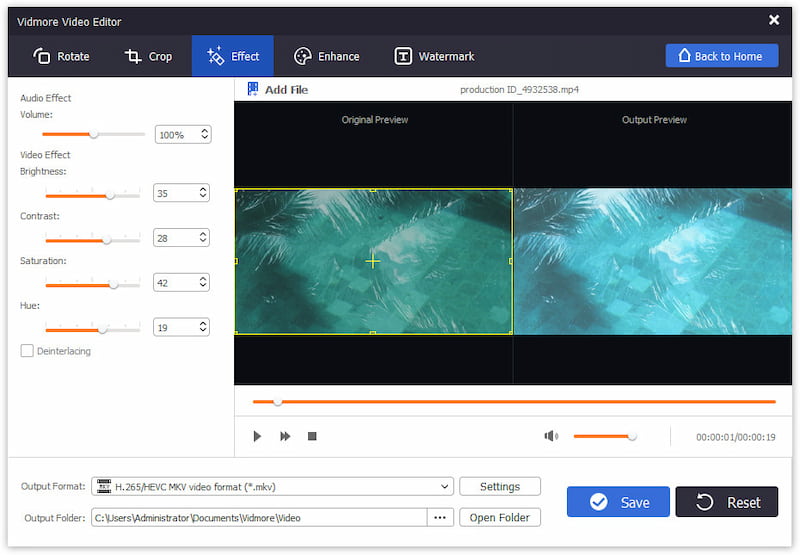
Step 4. Export a video
Once the video effects are confirmed, you need to choose an output format from the dropdown list of Output Format, and change the output folder location by clicking the three-dot next to Output Folder.
Finally, click Save to adjust the video effects and export the video file immediately.
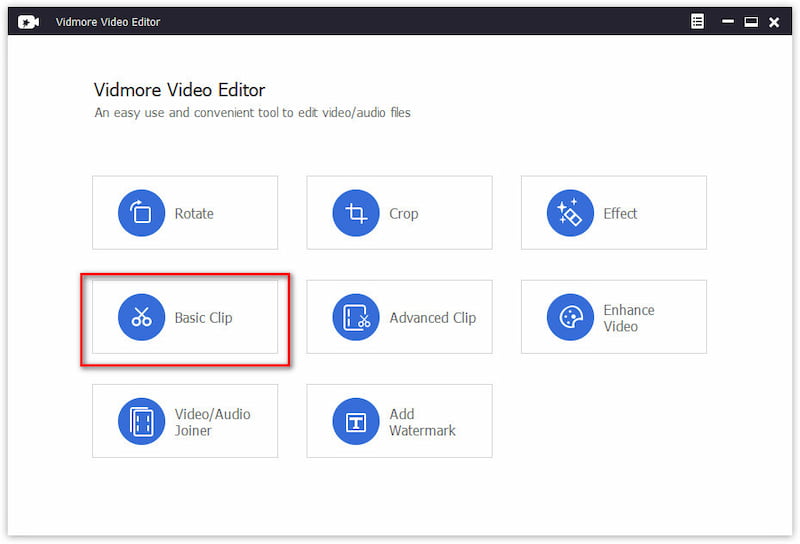
Vidmore Video Editor offers a simple clip feature to select a video clip and remain or remove it.
Step 1. Choose Basic Clip
Run Vidmore Video Editor on your computer. You should select Basic Clip from the main interface.
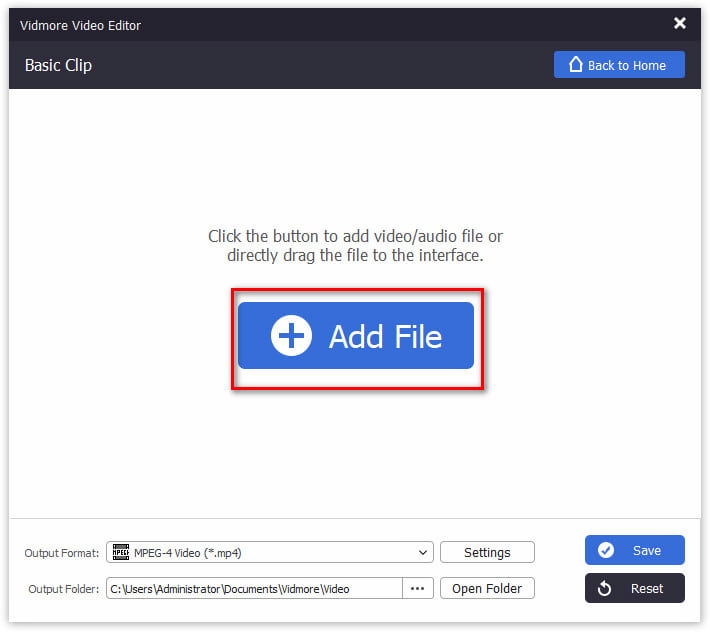
Step 2. Add a video file
Click the Add File button to import the video file that you want to clip. You can also drag and drop to add the video file directly.
Step 3. Clip a video
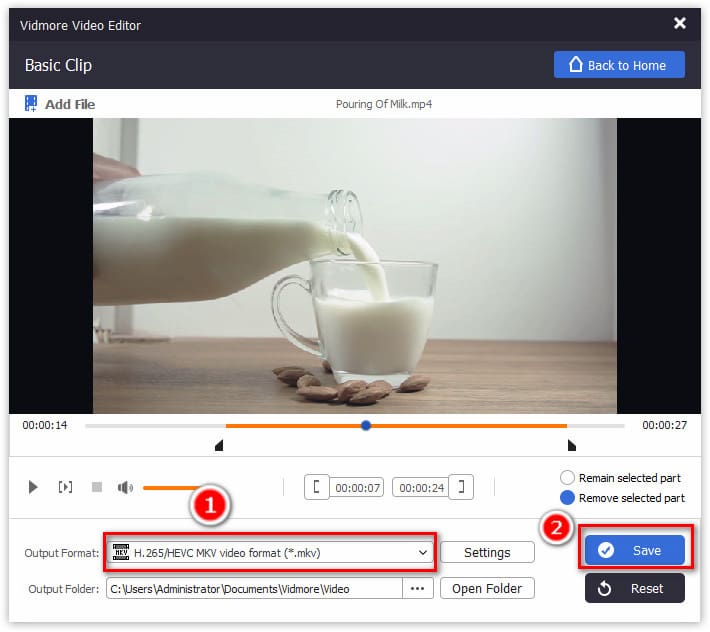
Move the progressing bar to set the starting and ending point, then select the checkbox of Remain selected part or Remove selected part according to your needs.
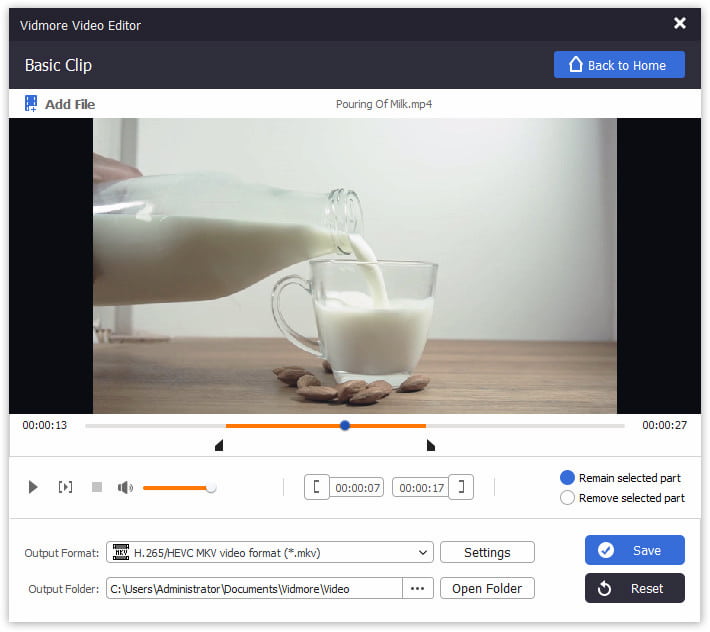
Step 4. Export a video
Once the video clip is done, you should choose an output format from the dropdown list of Output Format, and change the output folder location by clicking the three-dot next to Output Folder.
Finally, click Save to start clipping the video and export it in no time.
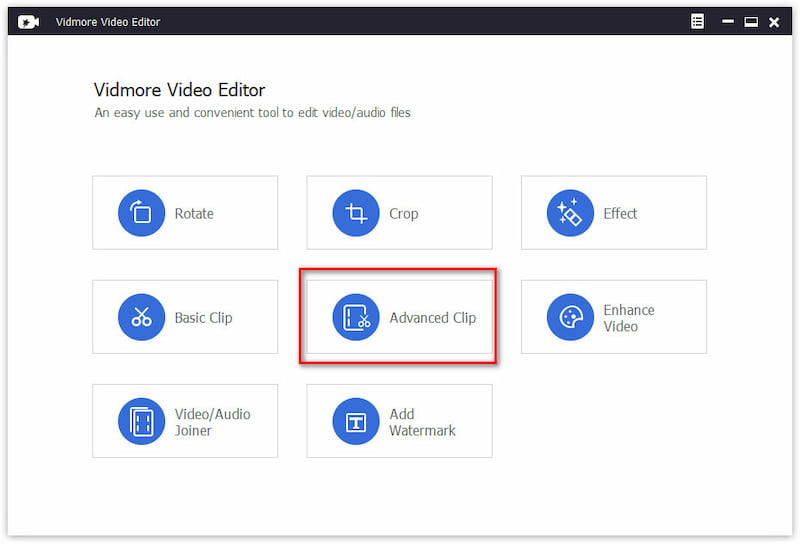
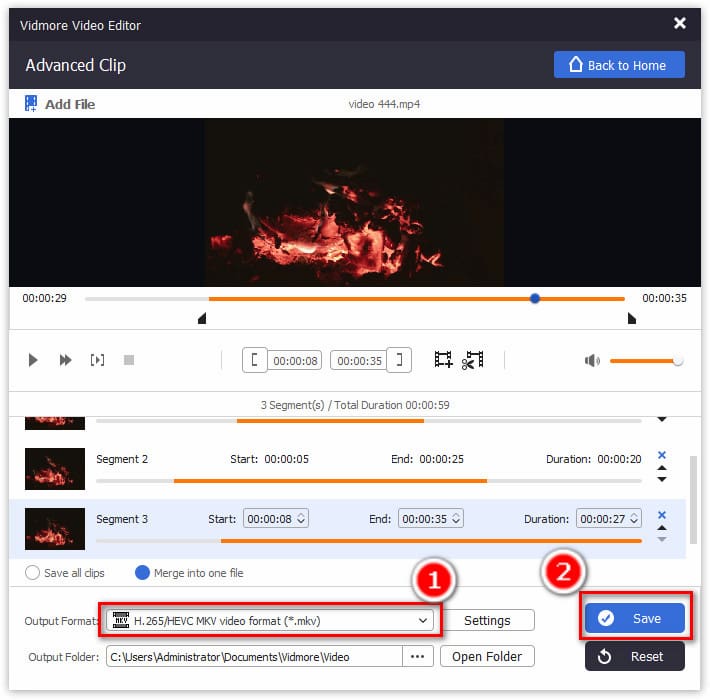
Compared with the basic clip, Vidmore Video Editor offers another clip feature, Advanced Clip, to cut a video into more features.
Step 1. Choose Advanced Clip
Again, launch Vidmore Video Editor on your computer. You should select Advanced Clip from the main interface.
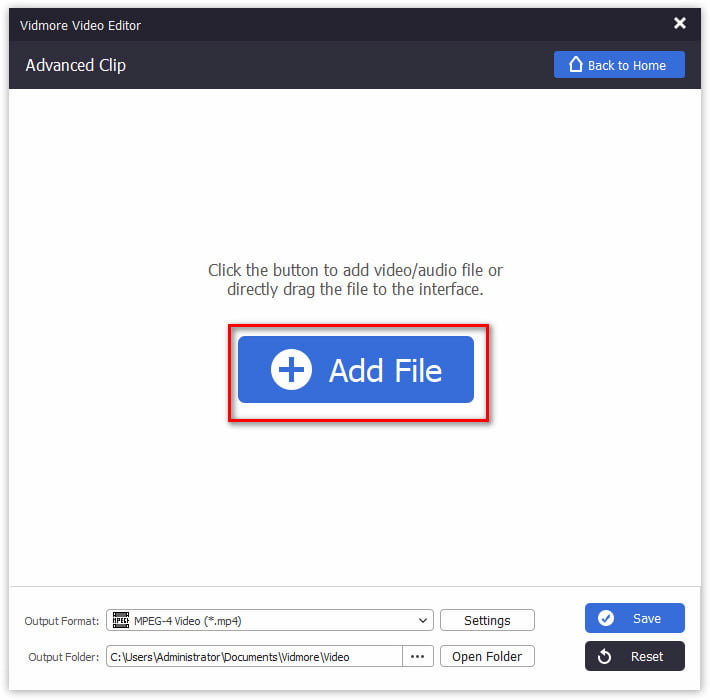
Step 2. Add a video file
Click the Add File button to import the video file that you want to clip. You can also drag and drop to add the video file directly.
Step 3. Clip or split a video
Move the progressing bar to set the starting and ending point, then click the New Clip or Split option to add a new clip, or split one file into 2 clips.
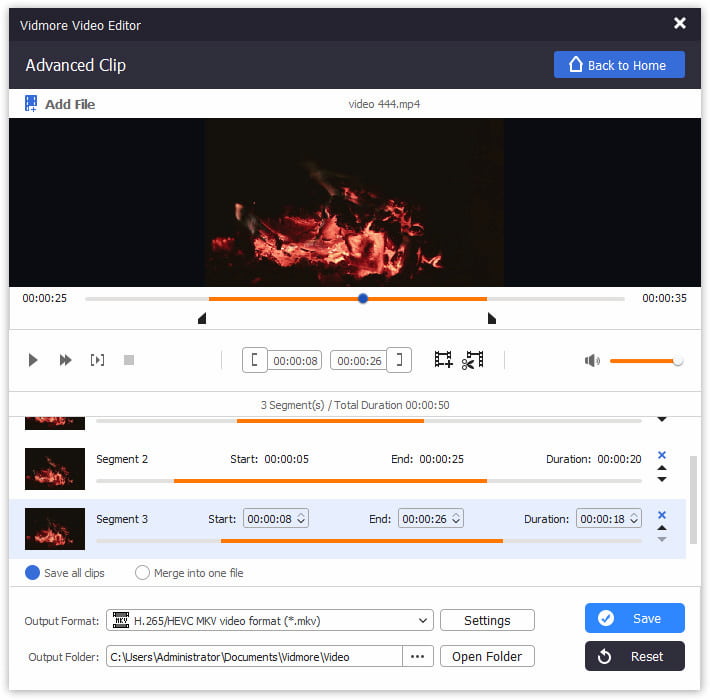
Optionally, you can merge all the video clips into one file here by selecting Merge into one file after clicking the arrow-down or arrow-up icon to arrange the order.

Step 4. Export a video
Once the video clip is done, do not forget to choose an output format from the dropdown list of Output Format, and change the output folder location by clicking the three-dot next to Output Folder.
Finally, click Save to start clipping the video and export it right now.
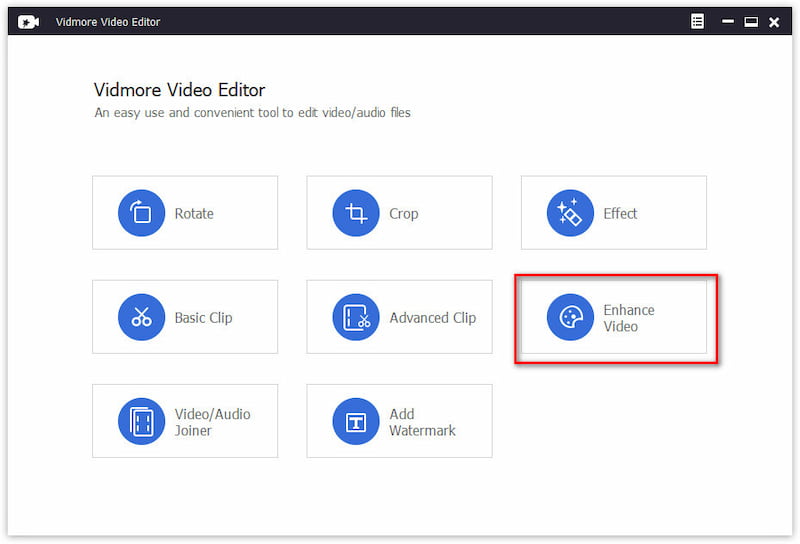
Vidmore Video Editor is capable of improving video quality by enhancing the video file.
Step 1. Choose Enhance
Again, run Vidmore Video Editor on your computer. You should select Enhance from the main interface.
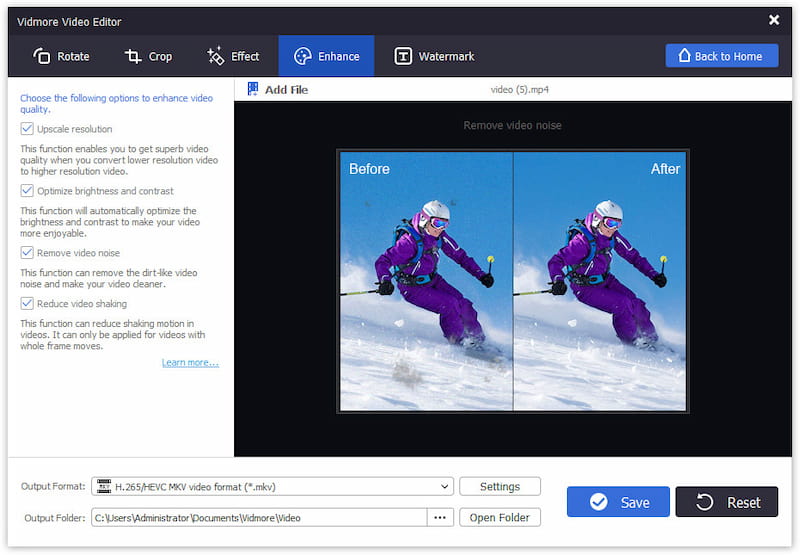
Step 2. Add a video file
Click the Add File button to import the video file that you want to enhance. You can also drag and drop to add the video file directly.

Step 3. Enhance a video
From the left sidebar, you can see 4 options to improve the video quality, Upscale resolution, Optimize brightness and contrast, Remove video noise, and Reduce video shaking.
Click the square checkbox that appears on the left sidebar to enhance your video quality according to your needs. You can select all of them.
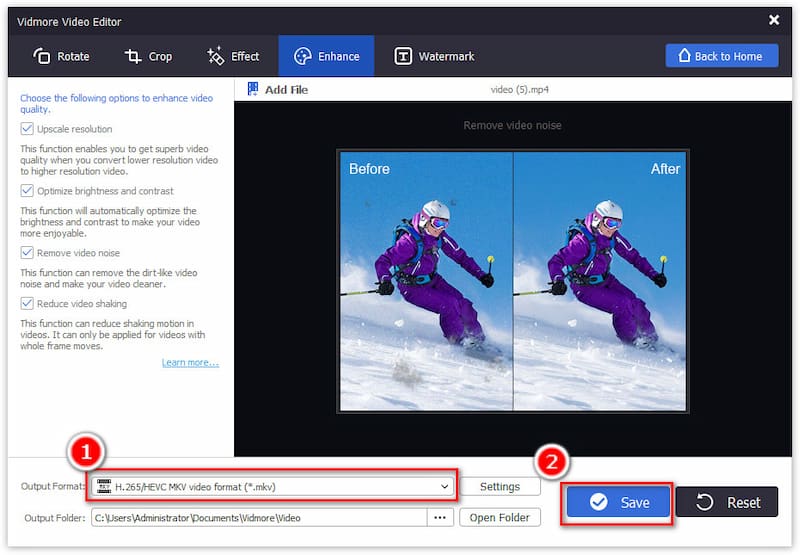
Step 4. Export a video
Once the video enhancement is complete, choose an output format from the dropdown list of Output Format, and change the output folder location by clicking the three-dot next to Output Folder.
Finally, click Save to start enhancing the video and export it right now.
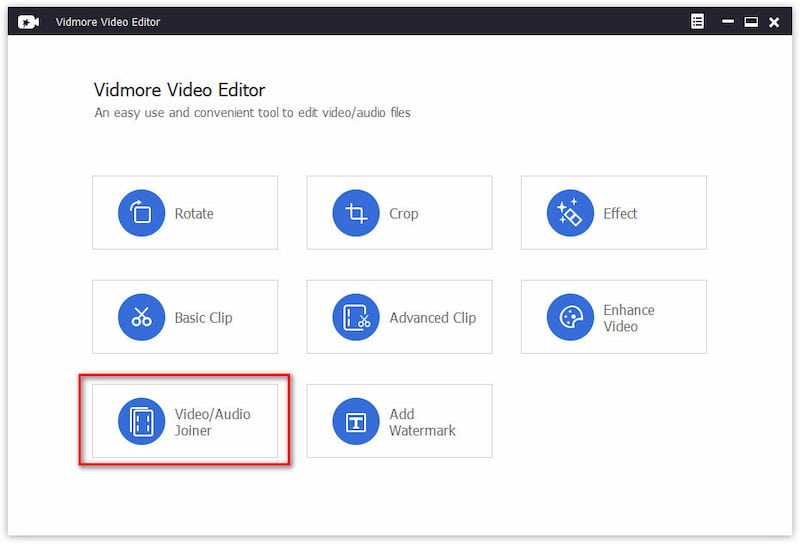
Vidmore Video Editor can combine video and audio into one single file.
Step 1. Choose Video/Audio Joiner
Again, run Vidmore Video Editor on your computer. You should select Video/Audio Joiner from the main interface.
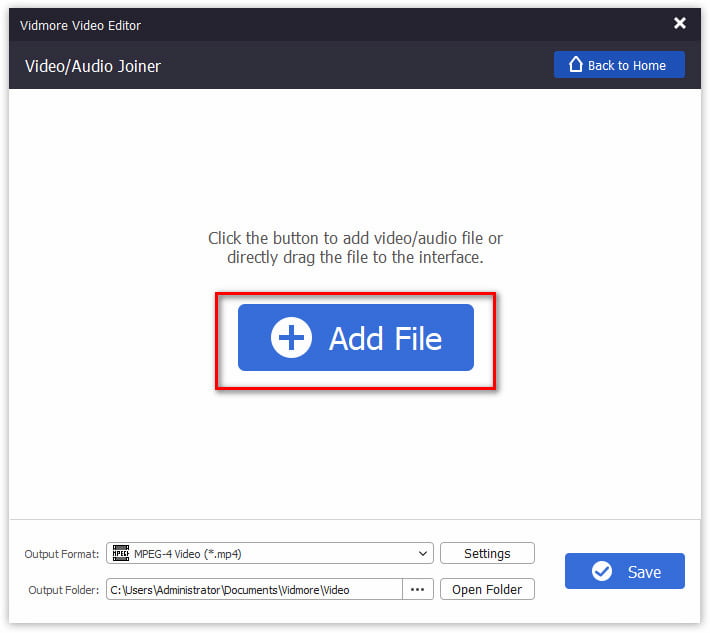
Step 2. Add multiple video or audio files
Click the Add File button to import the video or audio files that you want to merge. You can also drag and drop to add those video or audio files directly.
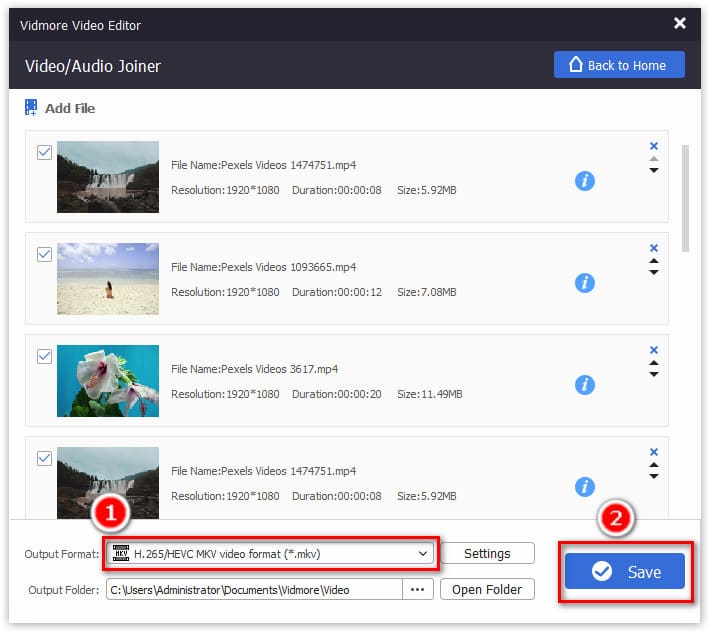
Step 3. Join video or audio
Click the arrow-down or arrow-up icon on the right side of each file to arrange the order.

Step 4. Export a video
Once the video files’ order is confirmed, choose an output format from the dropdown list of Output Format, and change the output folder location by clicking the three-dot next to Output Folder.
Finally, click Save to start merging the video file and export it right now.
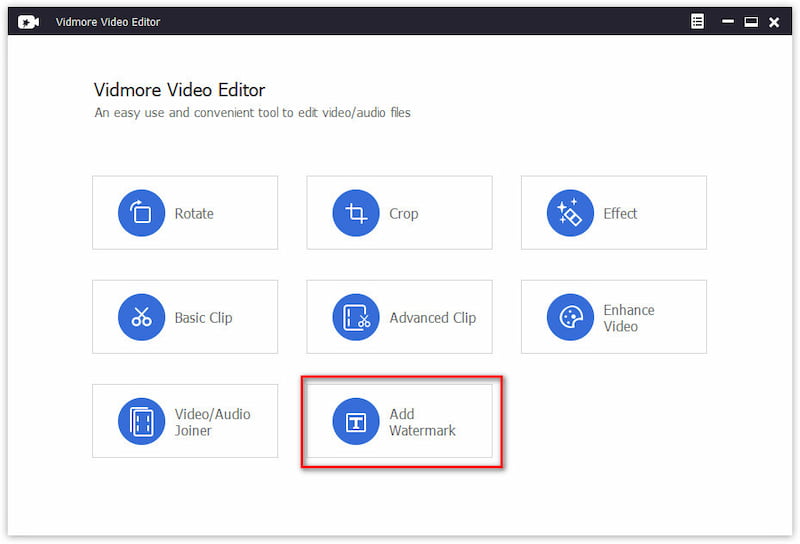
Vidmore Video Editor lets you add a text or image watermark into a video file.
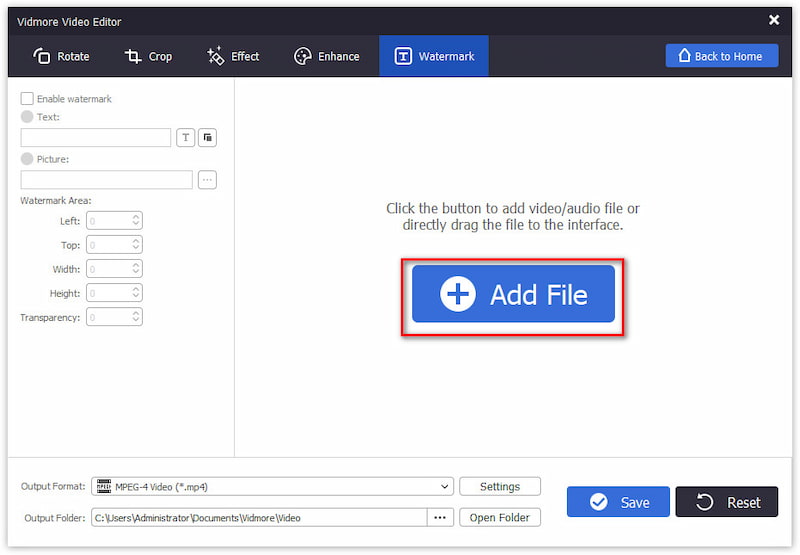
Step 1. Choose Add Watermark
Again, run Vidmore Video Editor on your computer. You should select Add Watermark from the main interface.
Step 2. Add a video file
Click the Add File button to import the video or audio files that you want to add a watermark to. You can also drag and drop to add the video directly.
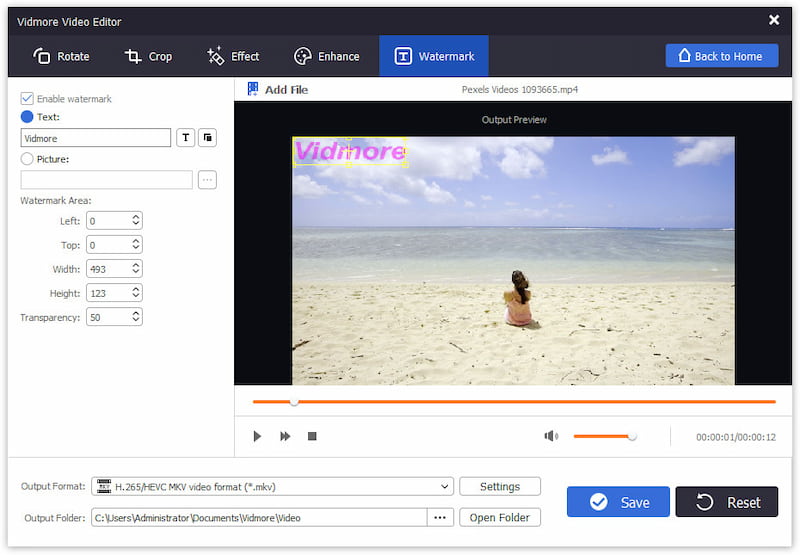
Step 3. Watermark a video with text or image
Click Enable watermark, then choose the checkbox of Text or Picture.
After that, you can start editing the watermark by changing the text style or color and moving the image position.
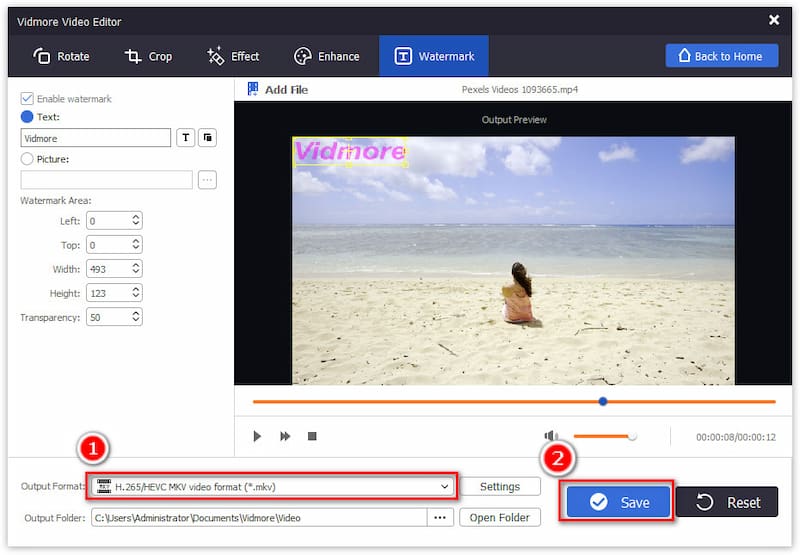
Step 4. Export a video
After you have added a watermark, you should choose an output format from the dropdown list of Output Format, and change the output folder location by clicking the three-dot next to Output Folder.
Finally, click Save to start adding the watermark into the video file and export it right now.
A full-featured video editor to create professional videos in minutes
Subscribed Successfully!