![]() Vidmore VidHex
Vidmore VidHex
Vidmore VidHex is designed for the enhancement of low-resolution video to high resolution, brightness and contrast adjustment, and video shake and noise reduction. Apart from video enhancement, you can export your enhanced videos to various video formats.
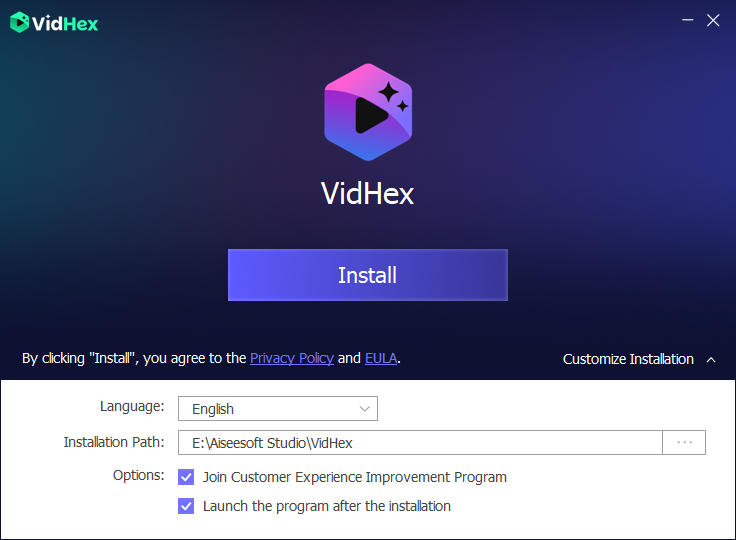
Click Free Download button at the top of the guide page to download Vidmore VidHex on your computer. After downloading, install and run this program on your computer.
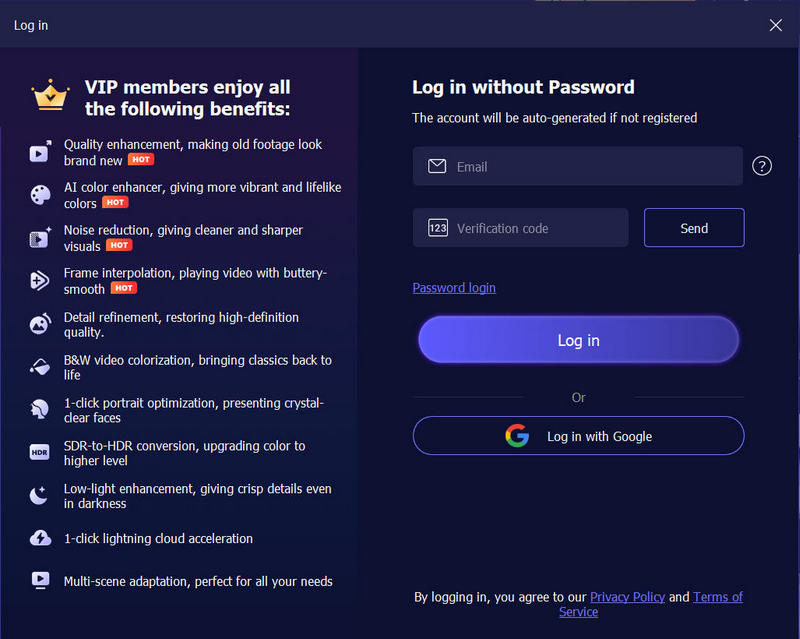
After launching this software, you can click the Log in tab to input your email address and the Registration code sent to your email. Then click register.
Email: The email address that you fill in the order form.
Verification Code: A string of characters marked as Activation key, license code or KEYCODE(S) in the order confirmation letter you received after the successful purchase.
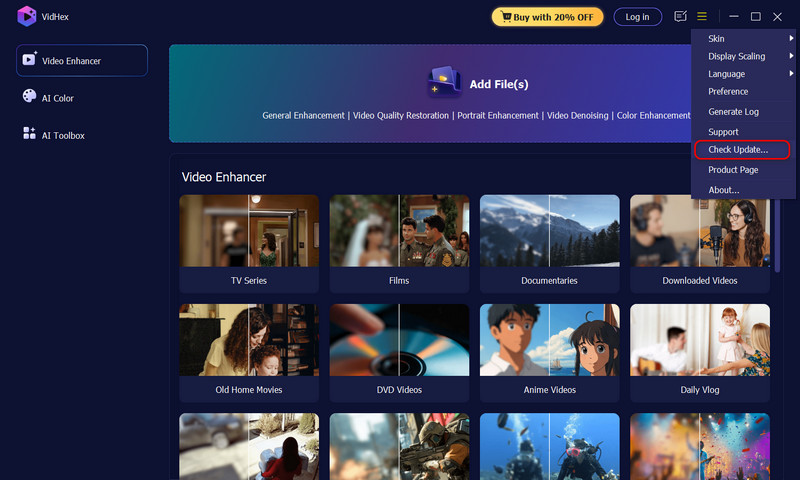
To update the software, find Menu from the top bar and select Check Update… from its drop-down list. Then the program will check the version you’ve installed. If the version is not the newest, it will remind you to update the software.
Or you can download the latest version of Vidmore VidHex from the product page.
Step 1 Launch Vidmore VidHex
After downloading and installing this video enhancement tool, launch it on your computer.
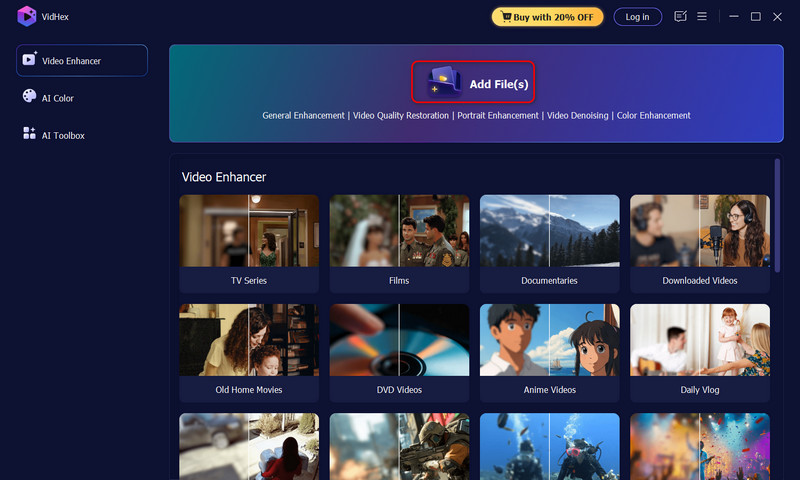
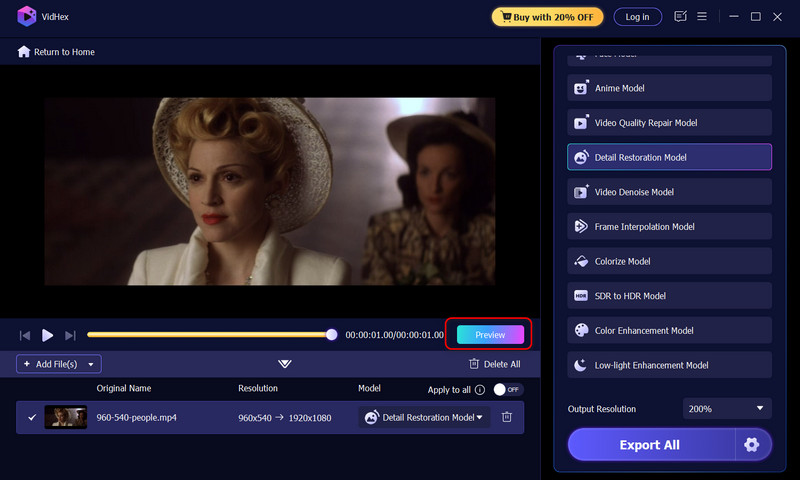
Step 2 Add Files(s)
Click Add File(s) to import your low-quality video files.
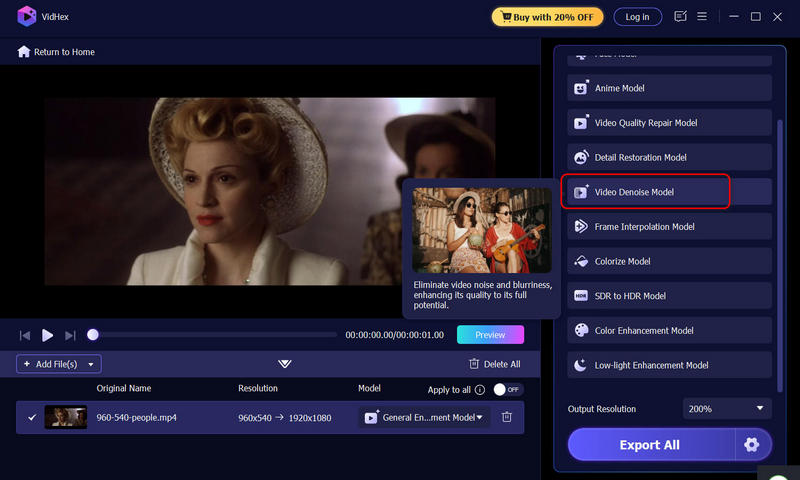
Step 3 Enhance video
From the AI Model list on the right, choose and click one of the following options to enhance video quality based on your needs.
General Enhancement Model: Remove video noise and enhance clarity for stunning, high-quality results in any scenario.
Face Model: Restore facial details for portrait-focused videos, bringing out the finest features.
Anime Model: Transform low-resolution anime videos into high-definition clarity, restoring every detail with vibrant precision.
Video Quality Repair Model: Fix compression damage and restore video quality, ensuring the best visual experience.
Detail Restoration Model: Revive blurry footage by restoring lost details and textures, making every frame sharper.
Video Denoise Model: Eliminate video noise and blurriness, enhancing its quality to its full potential.
Frame Interpolation Model: Enhance video playback with intelligent frame insertion, ensuring ultra-smooth, fluid motion for a seamless viewing experience.
Colorize Model: Breathe new life into B&W videos with intelligent colorization, making them vivid and captivating.
SDR to HDR Model: Enhance color vibrancy for a more dynamic and rich visual experience in every frame.
Color Enhancement Model: Increase color vibrancy, adjust contrast, and correct color balance to make colors appear more vivid, accurate, and detailed.
Low-light Enhancement Model: Best for night scene videos, it improves brightness and background details for clearer, brighter footage.
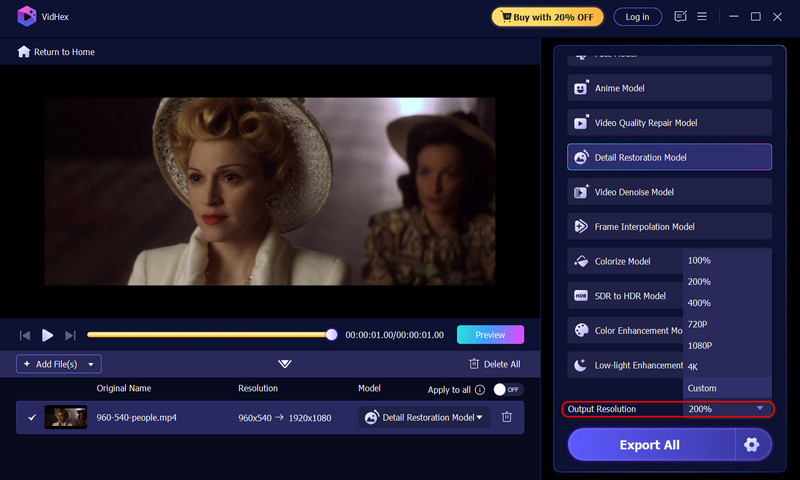
Step 4 Set output customization
Next, under the AI Model list, click the Output Resolution to set your ideal quality. Vidmore VidHex can enhance your footage to 100%, 200%, 400%, 720P, 1080P, 4K, and even 8K. Also, you can customize the resolution you want.
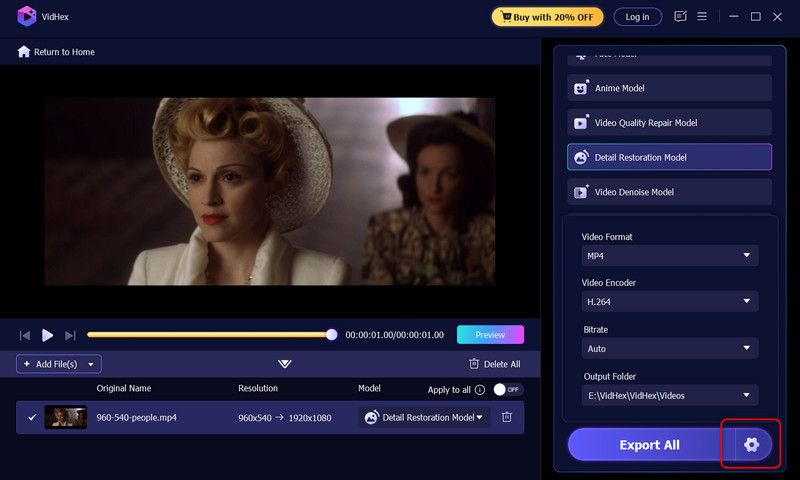
Meanwhile, at the bottom-right corner, click the gear icon to customize your ideal format, encoder, bitrate, and output location.
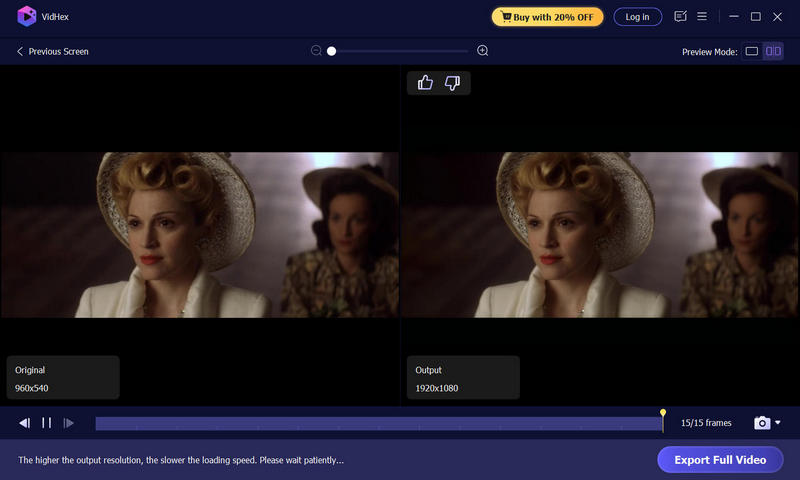
Step 5 Preview the Effect
When all is done, click the Preview button under the picture to view the effect. It will take a while to apply your settings.
Step 6 Export the result
If satisfied, hit the Export Full Video button to send your result out.
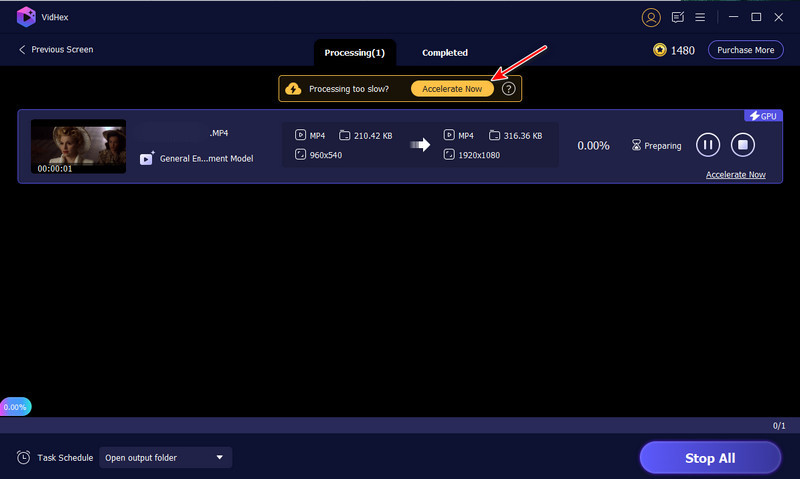
Step 7 Use cloud acceleration
From the exporting process window, click the yellow button of Accelerate Now to improve your enhancement efficiency. It bypasses your hardware limitations, ensuring a smoother and quicker workflow.
Best video quality enhancer to improve poor-quality video.
Subscribed Successfully!