
Learn How to Solve Out-of-Focus Video in Premiere Pro
Have you ever tried importing your video into Adobe Premiere Pro and found it blurry or out of focus? Well, if yes, then we know how frustrating it is to have dissatisfying footage you worked so hard to capture. There are several reasons why your video appears blurry. It can be due to incorrect camera settings, export issues, poor scaling, or a lack of focus in the videos. So, if you want to learn how to fix out-of-focus video in Premiere Pro, we are here to help you. First, we will provide you with a clear explanation of why you are encountering this type of issue. After that, we will provide you with the best way to fix the issue smoothly. Without anything else, come here and obtain all the necessary information regarding the topic.

PAGE CONTENT
Part 1. What is Out of Focus Video
An out-of-focus video or footage occurs when the camera fails to focus on the main subject, resulting in a soft, blurry, or hazy appearance. Unlike intentional blur effects (such as bokeh or depth of field), unintentional focus issues degrade video quality. It makes the details unclear and reduces the professional appeal. With this result, it might be dissatisfying, especially for viewers. If you're curious about why some videos are out of focus, proceed to the next part for more insights.
Part 2. Why is my Premium Pro Video out of Focus
If your Premiere Pro videos appear out of focus, there are several reasons for this. Read the details below and learn about the common causes of this issue.
The video was Captured Out of Focus
If your video was recorded with an incorrect focus, you can expect cloudy footage. It can be due to manual focus errors, autofocus issues, and more. When taking a video, it is best to check your camera to ensure that you have focused on the main subject.
Incorrect Sequence Settings
Your camera settings can play a crucial role when capturing video. If the sequence resolution is not aligned with the footage resolution, Adobe Premiere Pro may scale it poorly, which can cause blurriness.
Export Issue
If you export the video incorrectly, then it can degrade the video quality. Always ensure that your video is exported with the H.264 codec and set the bitrate to high for optimal video output.
These are some of the reasons why such errors occur. If you are interested in learning how to fix an out-of-focus video, please see the next section for more information.
Part 3. How to Fix Video in Cloud Effect Premiere Pro
Method 1. Enhance Video Quality in Premiere Pro using Magic Sharp
The Magic Sharp feature is part of Continuum by Boris FX. After downloading this software, it can be automatically integrated into Adobe Premiere Pro. Then, you can already use it to fix the blurry video. You can follow/use the simple guide below to solve the problem using this tool.
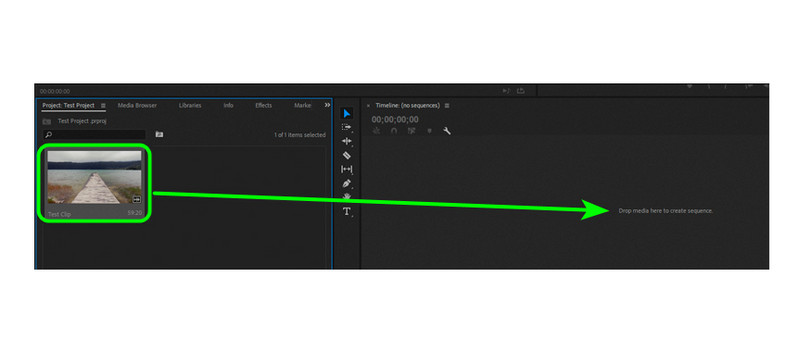
Step 1. After launching Adobe Premiere Pro, select the New Project option to add the out-of-focus video. Then insert the file into the Timeline section. Afterward, the sequence will appear on your screen.
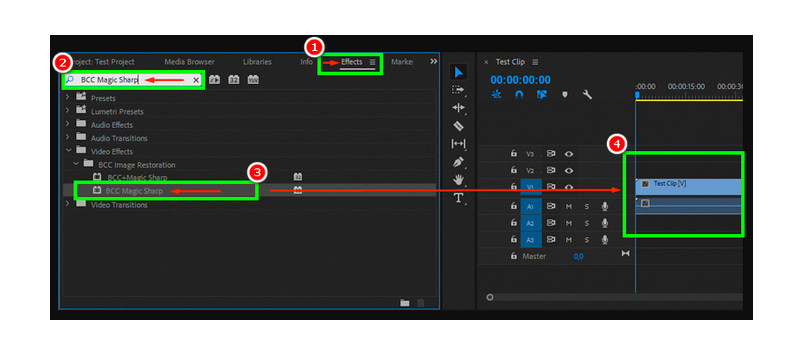
Step 2. For the next step, navigate to the Effects section and type 'BCC Magic Sharp' in the search box. After that, click and drag it over the video on your timeline.
Step 3. Now, you can begin modifying various parameters in the Effect Controls section until you get the quality and appearance you prefer.
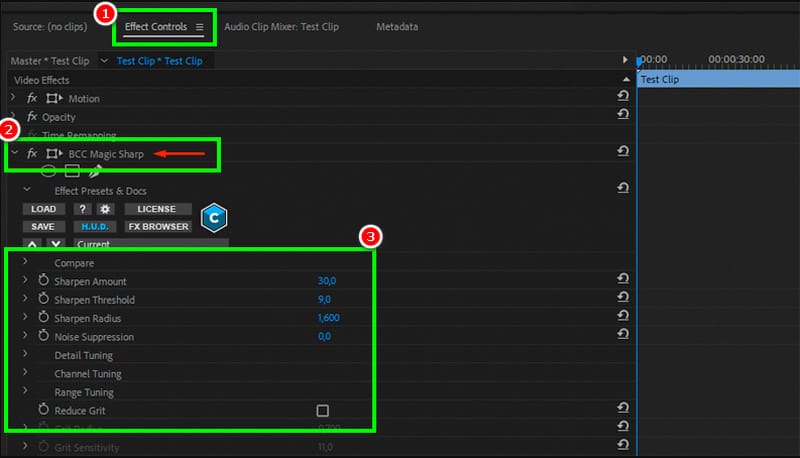
Once you are satisfied, you can start saving the video to your computer.
Method 2. Use Premiere Pro Built-in Features to Fix Out-of-Focus Video
If you want to learn how to sharpen your video in Premiere Pro, you can also rely on its built-in features. So, start with the process, you can check the instructions below.
Step 1. After you insert the video in the Timeline section, the sequence will show up.
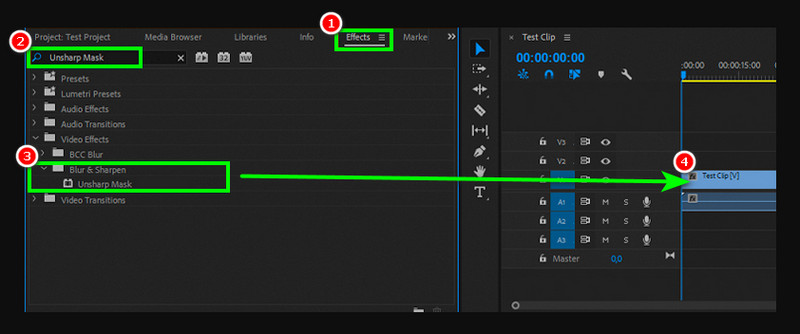
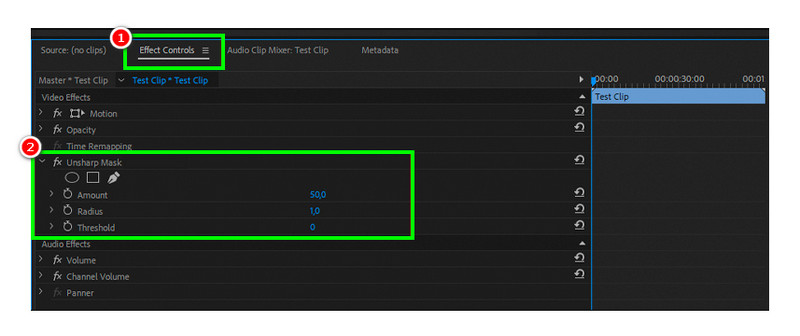
Step 2. Tick the Effects panel to open and navigate to the Unsharp Mask Effect option. Drag this effect over the video to the timeline.
Step 3. After applying the Unsharp Mask Effect to the video, you can now go to the Effect Controls section and start to sharpen the video. All you need to do is adjust various parameters, such as amount, radius, and threshold until your preferred result appears. Once done, save the video.
Using these two methods, you can ensure to fix the blurry videos in Premiere Pro. The good part here is that there are more features you can rely on to enhance your footage. The only drawback here is that its user interface is confusing, making it unsuitable for novices.
Part 4. Bonus: Excellent Video Repair Tool to Enhance Video Quality
Poor video quality can significantly impact your viewing experience. To enhance the quality of your video, the best approach is to use exceptional software, such as Vidmore Video Fix. With the help of this repair tool, you can expect to have a satisfying quality after the repair process. But what makes it special is its capability to give an easy-to-understand design. With its simplicity, you can navigate all the essential features during the process. Moreover, it can even offer AI-driven technology to provide you with a better outcome. Additionally, you can also insert videos with various input formats. It includes WMV, MOV, MP4, MKV, AVI, FLV, VOB, and more. Lastly, you can install this software on Mac and Windows, making it more accessible to all users.
More Features
● It can instantly repair various video playback errors.
● It supports AI-powered technology for a smooth and accurate result.
● The program can offer a comprehensive layout.
● It can offer a fast repair process to avoid consuming a lot of time.
● The program can fix issues with bitrate, sample rate, resolution, and other settings.
To improve your low-quality video, follow the steps below.
Step 1. Access Vidmore Video Fix on your desktop. Once done, you can start the repair process.
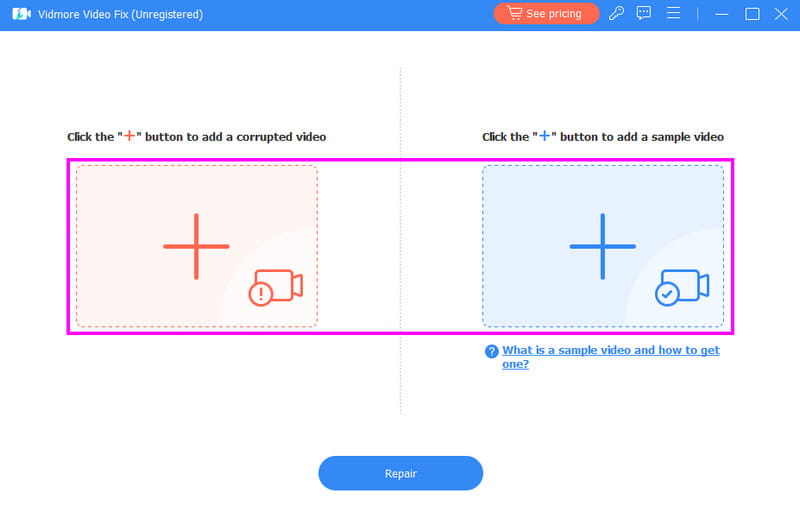
Step 2. You can now add the low-quality video by clicking the Red Plus symbol. To insert the sample video, use the Blue Plus symbol.
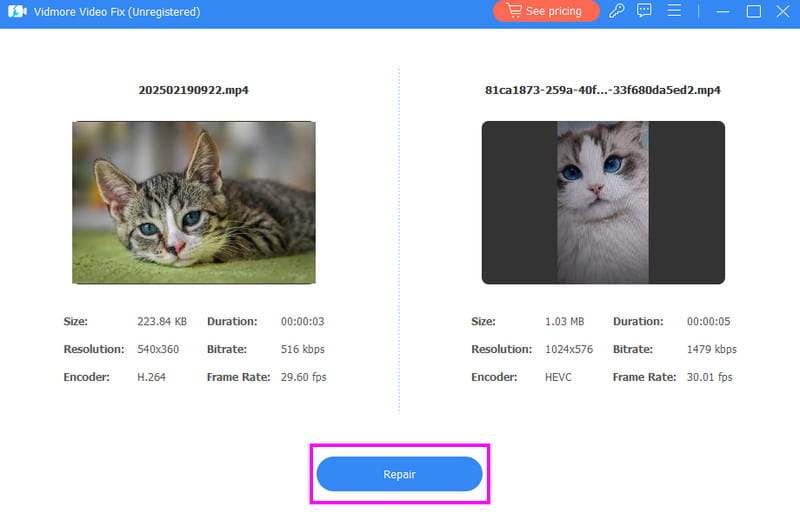
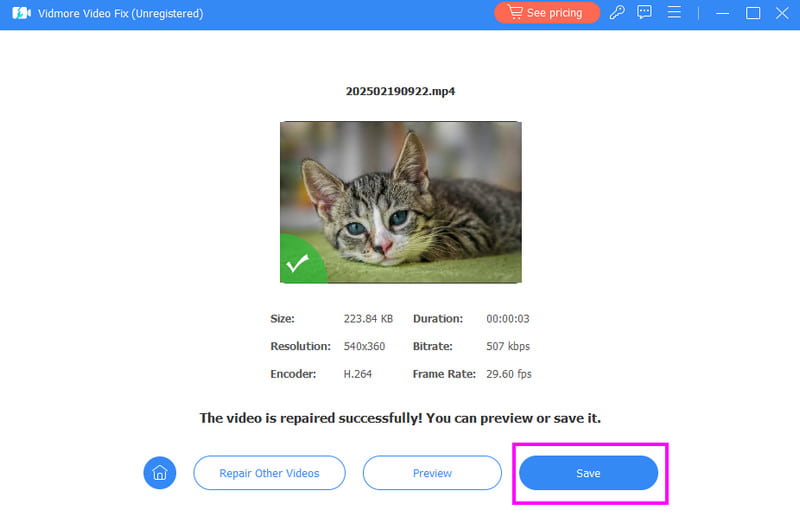
Step 3. Press the Repair button to begin enhancing your poor-quality video. After that, you can check the video's condition by clicking the Preview feature.
Step 4. For the final process, tap Save to begin saving your high-quality video on your computer.
With this procedure, you can effectively enhance the quality of your videos for a better viewing experience. In addition to that, you can also rely on this software to fix various video issues. You can fix issues such as no sound on MP4, laggy videos, shaky, blurry, pixelated, corrupted, and more.
Conclusion
How to fix out-of-focus videos in Premiere Pro? You can find all the best methods in this guidepost. You can even get more information on why such issues appear in your Premiere Pro software. Aside from that, if you have a poor-quality video and want to improve it, you can rely on Vidmore Video Fix. With this reliable software, you can enhance video quality and correct various video errors, making it an exceptional video repair software.