Add Noise to an Image to Achieve a Vintage Look on Your Pictures
Sometimes adding a film grain effect to your picture makes it stand out, especially for old photos. It is an excellent idea to add a grainy effect to the photo that will produce a vintage look. It is also one way to salvage and bring old photos back to life. Just like in life, we make things work out despite the opposition. In this post, we will apply this principle.
In other words, you will learn how to add noise to an image using the best program available. Meanwhile, instances will require you to remove the noise from an image. Henceforth, we will also introduce programs that will help you get rid of the grainy effect on your photo besides adding noise.


Part 1. How to Add Noise from an Image
One of the best tools to help you with your image manipulation is Photoshop. Thus, we will try to create a vintage look using grainy film on a picture. That is right. Users can simulate film grain in an image. The best part is that this feature is integrated even in the older versions of Photoshop, such as CS3. Additionally, the Smart Filters features will help you achieve a grainy look quickly and easily. CS2 and earlier versions may not be able to take advantage of the Smart Filters feature. Without further talking, here are the steps on how to add noise to an image:
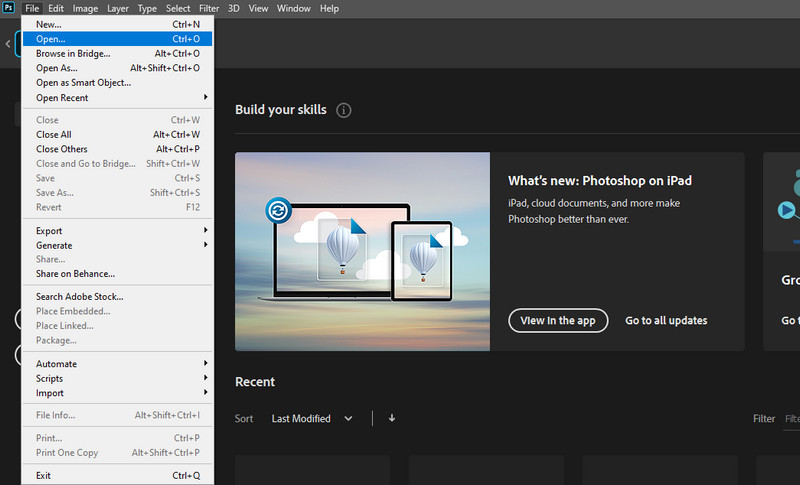
Step 1. Open your Photoshop
Launch your Photoshop program on your computer and open your target photo to edit. Go to File > Open. Afterward, select the desired photo.
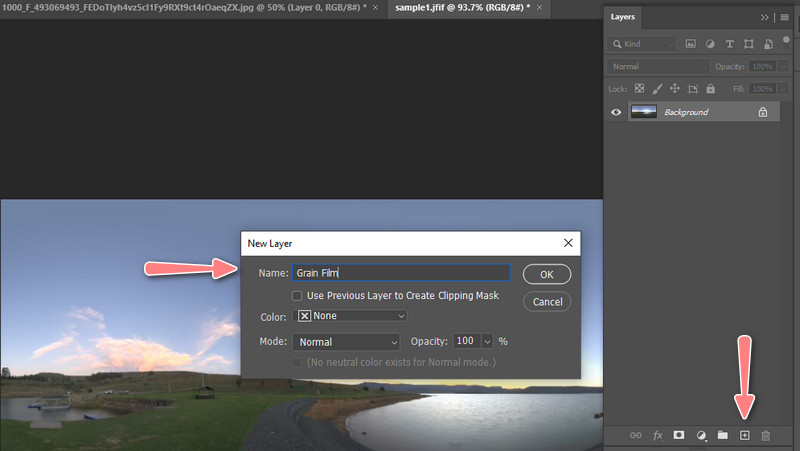
Step 2. Add a new layer
The foremost step for adding noise to your picture is creating a film grain layer. This manner will not harm the original photo in any way. Simply hold down the Alt key on your keyboard and tick the Create a new layer icon. On the popup dialog box, insert a name to the new layer.
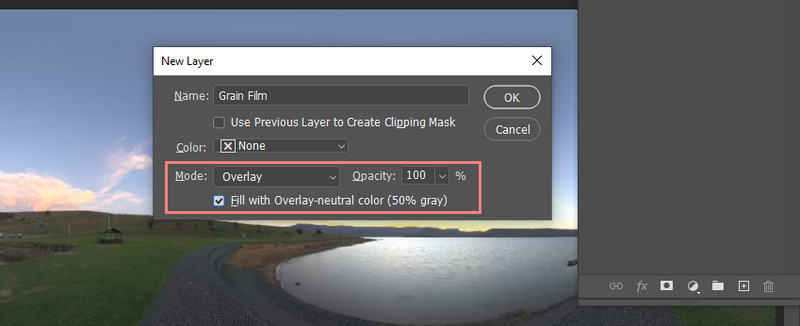
Step 3. Change layer mode to gray
On the dialog box still, you will see the Mode option. Click on it and set it to Overlay and tick the check box of the Fill with Overlay-neutral color (50% gray) option located at the bottom of the panel. Then, tick the OK button to save the changes. Afterward, a new layer will be added to the Layer panel.
Step 4. Convert the newly created layer into a smart object
Now, let us convert the newly created layer into a smart object. Press the Menu icon in the top right corner and choose Convert to Smart Object. You should see a small icon on the bottom right corner of the new layer.

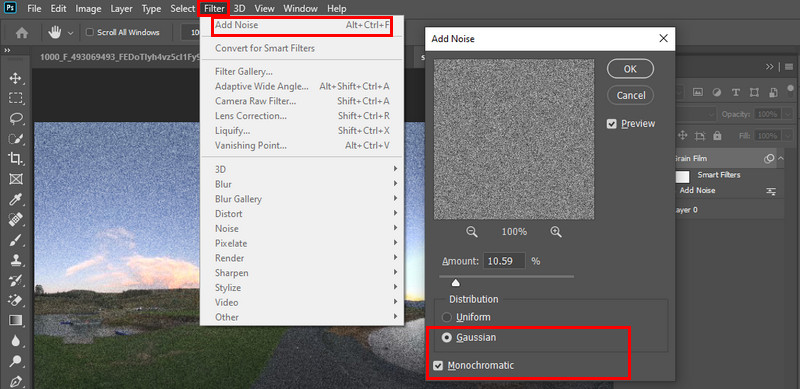
Step 5. Add the noise filter to the photo
Next, open the Filter menu on the top toolbar of the program. Tick Add Noise, and a dialog box will appear. From here, adjust the amount of noise. 10% amount value will usually work. Also, tick the Gaussian option and Monochromatic options. Hit OK to confirm. That is it! You have just learned how to add noise to an image.
Part 2. How to Remove Noise from an Image
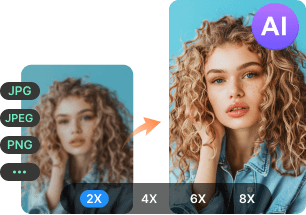
1. Vidmore Free Image Upscaler Online
If you have reasons for adding a grainy effect to a photo, there will surely be also to remove this effect. It could be that the photo you shot was naturally grainy, or the quality is unacceptable. In this case, Vidmore Free Image Upscaler Online will help you upscale your image and bring it back to life by making the photo sharp and ready to be distributed over the web. It provides four results to achieve your desired outcome. You may employ a magnification factor between 200, 400, 600, and 800 upscale factors. Thus, follow the steps to remove noise from an image:
Step 1. Visit the tool’s official page and hit the Upload Image button to import your desired photo and remove the noise.
Try Image Upscaler Now!
- Improve photo quality.
- Enlarge picture to 2X, 4X, 6X, 8X.
- Restore old image, unblur photo, etc.
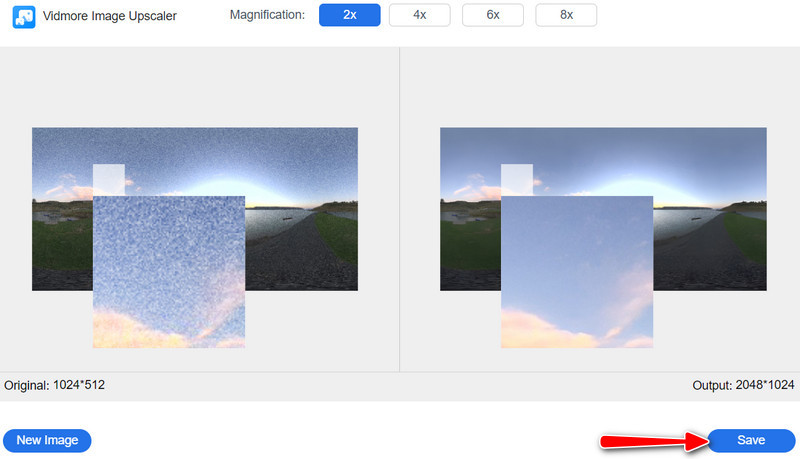
Step 2. After that, your photo will be upscaled to 2X by default. Point your mouse to the resulting image and check if you are satisfied with the output. If not, scale up the magnification factor.
Step 3. Finally, tick the Save button to have a copy of the processed photo.
2. Photoshop
While Photoshop can add noise to a photo, it can also do the other way around. Yes, you read it right. The app enables you to remove the noise from your grainy photo. However, this program is expensive if you only use it to remove noise from a photo. Here is how:
Step 1. Launch your Photoshop and load your grainy photo. Then, add a duplicate layer by pressing the combination keys of Ctrl and J. Make sure that the original photo is selected.
Step 2. This time, add a layer mask to the new layer by ticking the Add layer mask icon at the bottom of the panel.
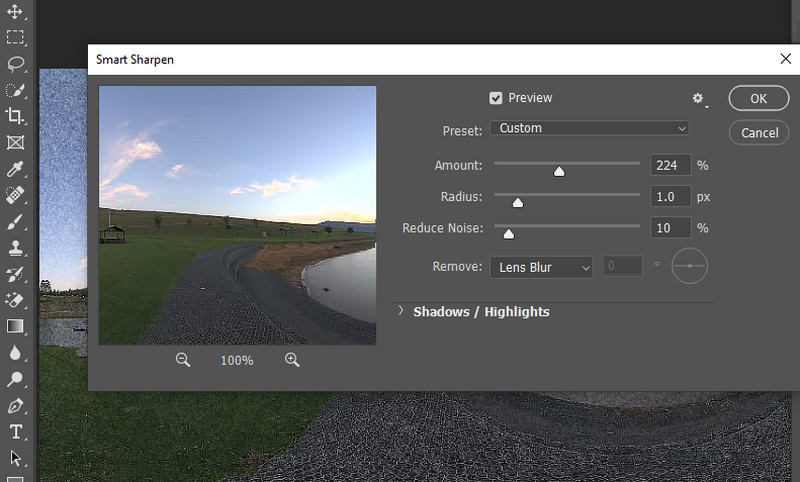
Step 3. Afterward, go to Filter and hover over Sharpen. Then, select Smart Sharpen and adjust the Amount value. 200% - 250% usually works well in making a grainy photo sharp.
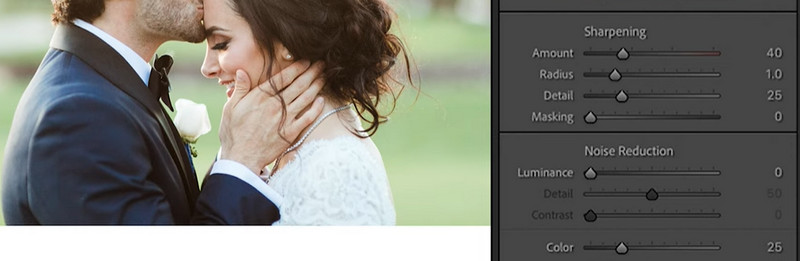
3. Lightroom
Another program you can use to get rid of the noise from a photo is Lightroom. This is compatible with macOS, Windows, iOS, and Android. Without further discussion, here is how to operate the tool:
Step 1. Open your image in the Lightroom app and head over to Detail. This action will reveal the Noise Reduction and Sharpening options.
Step 2. After that, adjust the Luminance, Color, and Detail using the sliders present in the Noise Reduction option. Make sure you selected the area to adjust by ticking the arrow in the Sharpening window.
Step 3. Simply play with these properties until you get your desired outcome. Then, save the final look.
Part 3. FAQs About Image Noise
Why add grain to your photos?
It is more like a personal preference or theme of a certain subject. If you are required to provide a filmic look, it is ideal to add noise to an image.
Why is my photo grainy?
The grain we are talking about is noise. Noise in a photo is created when the ISO of your camera is set too high.
Is it possible to remove noise from a video?
The easiest and most effective way is using video software, like Premiere Pro and PowerDirector. In other words, you need to be at least an intermediate user to achieve good-looking videos.
Conclusion
After reading the entire post, you should learn how to add noise to an image. It is easy when you have the right program to help you achieve a filmic and vintage look. The same can be said for removing noise from an image. Life is easier when you use the right program. If you want an effective tool, use the Vidmore program. Yet, if you are looking for more advanced tools, go with the latter programs.