Affinity: A Tutorial on How to Remove Background of an Image
One of the more inventive ways of making your images more visually appealing is to remove the background from them. It's a good thing that there are numerous photo editors available on the internet today, one of which is Affinity. Affinity is a visual arts tool that lets artists and designers manage files. It generates vector drawings with colors, blends styles, tweaks, and effects, edits photos, and creates artboards. If you're curious about how Affinity removes the background, look at the illustration included in this post.

- Part 1. How to Remove Background Using Affinity Photo
- Part 2. Best Alternative to Affinity Photo
- Part 3. FAQs About Removing Background Using Affinity
Part 1. How to Remove Background Using Affinity Photo
Pros of Affinity:
- It is acceptable with Windows, Mac OS, and iOS.
- Except for more complicated settings, the toolset is quick and efficient.
- It has an infinite number of layers.
Cons of Affinity:
- It only requires a one-time payment.
With the help of Affinity Photo for the desktop, you will be able to complete the entire process of removing an unwanted background.
Step 1: To get things started, let's open the picture in Affinity Photo by selecting it from the File panel on the top bar. After selecting the File tab, select the Open button. Locate and choose your image from your computer's hard disk. It will be launched in a new tab on your browser. And to unlock the layer of the image, tap the Lock icon.
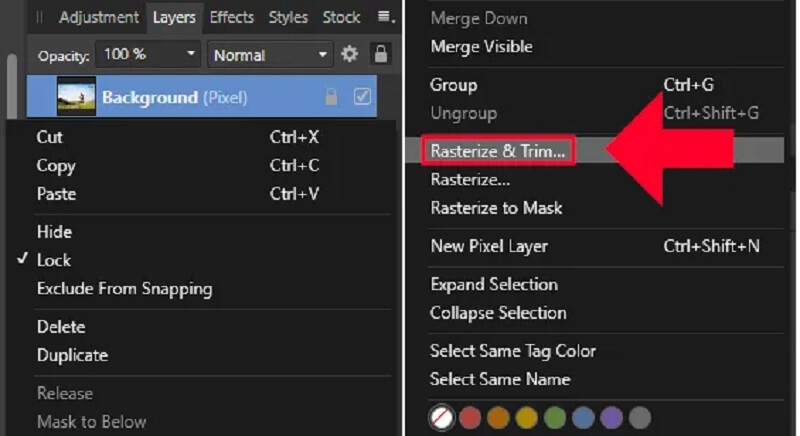
Step 2: After that, right-click on your picture layer and pick Rasterize & Trim from the context menu. In addition, with the layer unlocked and ready for editing, we can now start removing the background by making a selection around the background in the Layers panel.
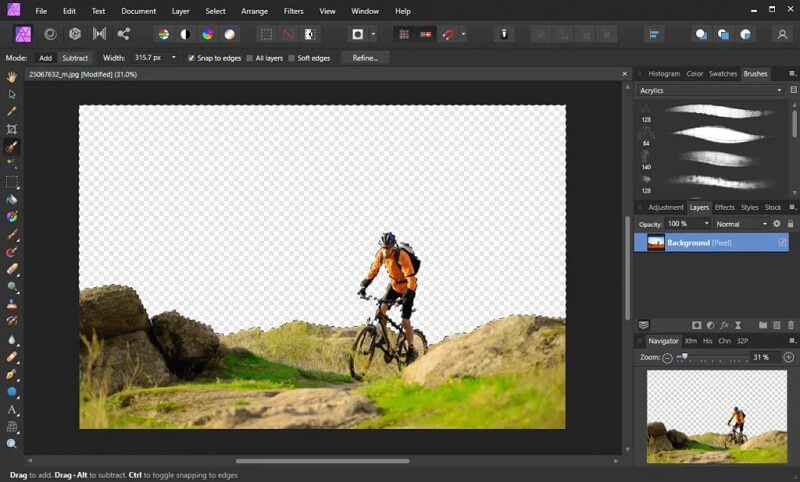
After unlocking the layer and preparing it for modification, we can begin removing the background by drawing a selection around it. To access the Selection Brush, click on it in the toolbox on the left-hand side of the display or use the keyboard shortcut W.
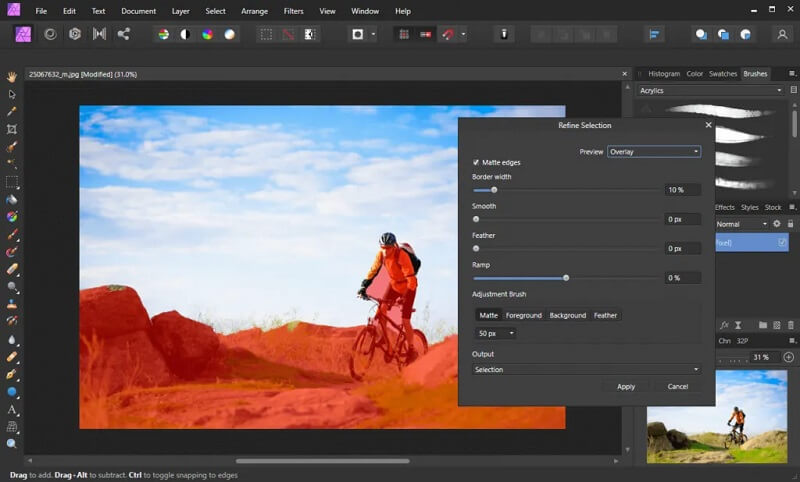
Step 3: Once you've created a rough selection around the background, you may improve it by selecting the Refine button in the toolbar. It will bring up the Refine Selection option and add a red mask to the regions outside your choice.
After refining your selection, all that is left to do to delete a background in Affinity Photo is press the Delete key on your keyboard to complete the operation.
Part 2. Best Alternative to Affinity Photo
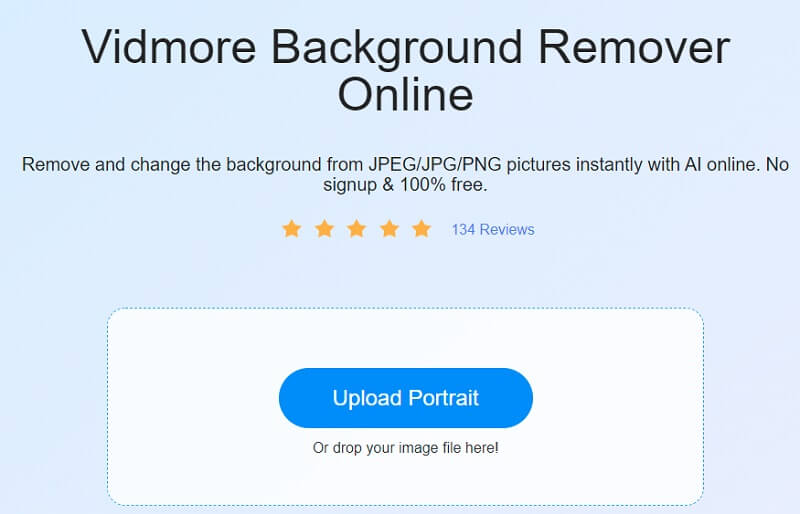
Suppose you find Affinity Photo challenging to use. In that case, there is another option for removing the background of your image from your computer. One of these options is the Vidmore Background Remover Online, available for free. Even though it is an internet-based photo editor, it has a user-friendly interface. Unlike other editors, where you must make many selections before deleting the background of an image, Vidmore includes built-in artificial intelligence to simplify the process. The only thing it means is that it will immediately remove the background when you upload your image.
Those who wish to erase the background from their image without dealing with any complicated software should use this program. If you want to master more about how this photo editor works, follow the four simple steps.
Step 1: Open Vidmore Background Remover from the web. Next, click the Upload Portrait button on the dashboard to complete the transaction. As an alternative, you may drag & drop your image file onto the primary display window of the software.
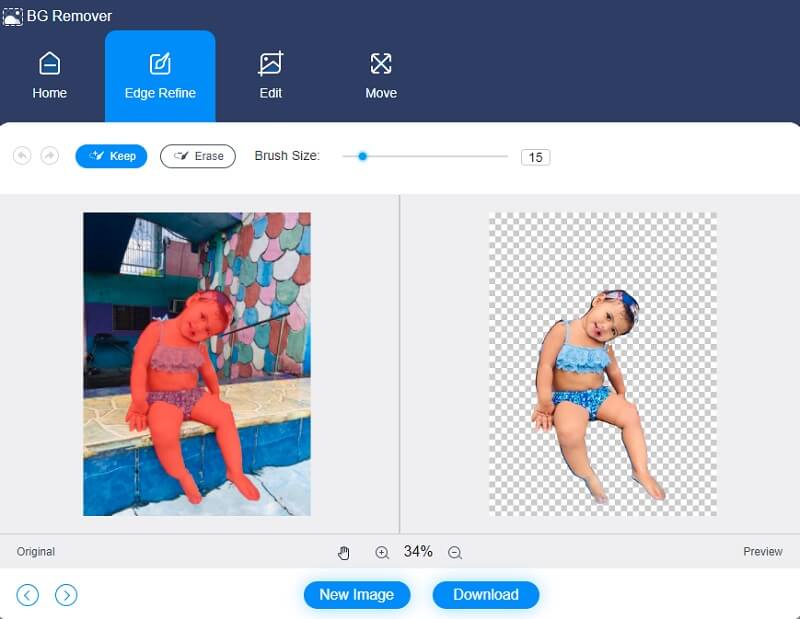
Step 2: Enable the selected image to appear on the channel's taskbar, located on the side of the browser window. The artificial intelligence of the web tool will then preview your picture based on your information.
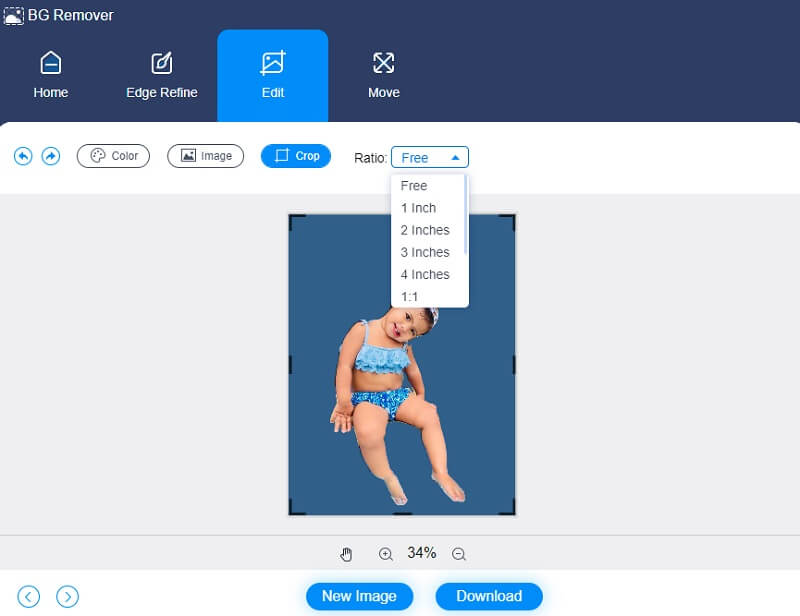
Step 3: To enhance the background of your picture more presentable, select the Edit button from the menu bar at the top of the window and make changes to the image's background appearance.

Following the selection of color for an image, cropping the image removes or adjusts the object's size as needed. You can crop your image by choosing it from the Crop menu and then picking the proper Aspect Ratio from the list.
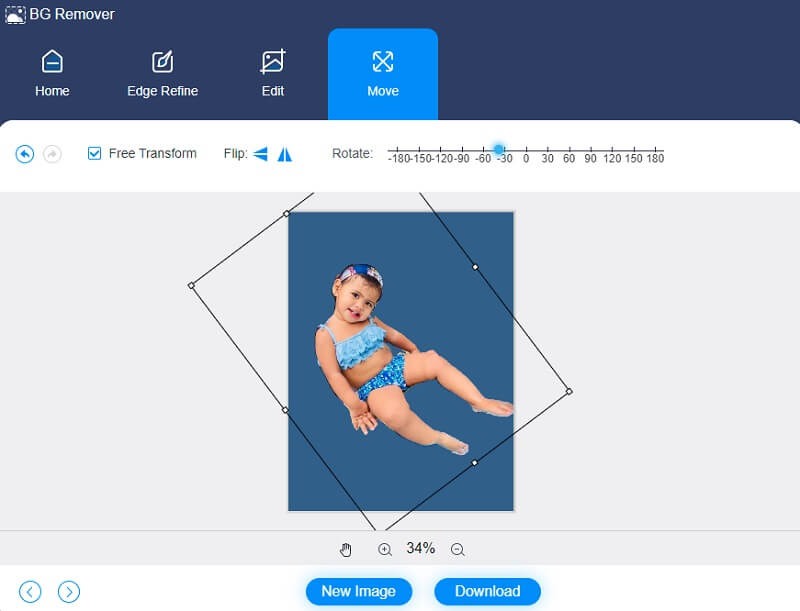
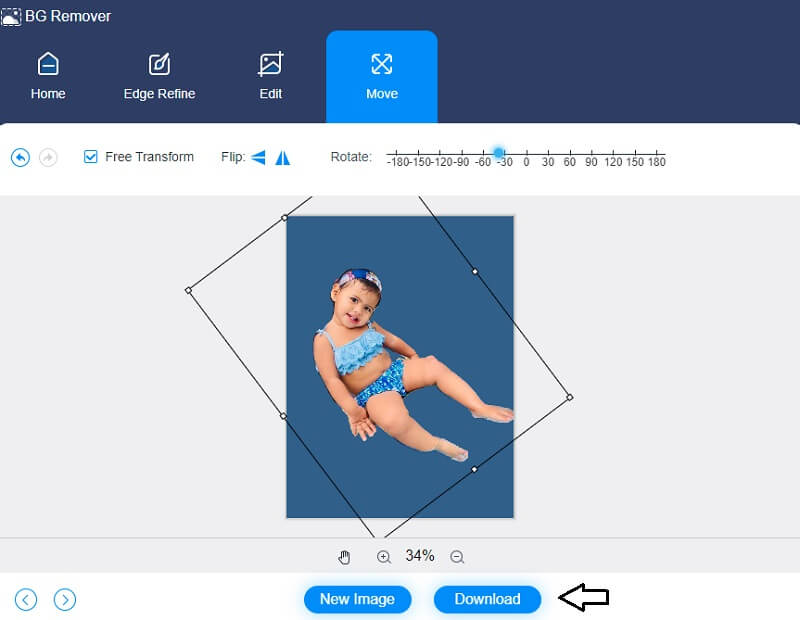
Additionally, you can flip your picture as an additional method of editing. The annual turnover of your photo can be adjusted by tapping the Move icon in the upper portion of the image and dragging the slider until it is in the appropriate position. In addition, you can rotate the image by hitting on the Triangle button in the upper corner of the screen, as seen below.
Step 4: It is easy to convert it if you do not want more modifications. Tap the Convert option to the right and navigate to the folder where you want your image to be saved. Finally, choose a folder by using the Select Folder button.
Further Reading:
3 Free Ways to Take a Photo with My Laptop Webcam (Windows & Mac)
How to Add Text to a GIF- 4 Incredibly Useful Caption Makers
Part 3. FAQs About Removing Background Using Affinity
How to use the brush tool in Affinity Designer to remove background images?
Turn on the background. The brush applies to any pixel layer. When applying the Eraser brush to a vector layer, Affinity Photo converts it to a raster layer. Erase Background Brush is located in the tools panel next to Eraser Brush. It resembles a pencil eraser but has a checkered design on the back. Then, in the context toolbar, alter the brush settings. You can also modify the brush style in the Brushes section if necessary. Finally, repaint the area with the color you wish to erase. Affinity Photo does a color sample below the paintbrush cursor.
Which is better, GIMP or Affinity?
Affinity Photo provides much more advanced picture editing features in a far more compact packaging than its predecessor. Generally speaking, it is considerably easier to use, and it takes time to ensure a great user experience. Although there are some strange user interface choices, it is still more feature-packed and consumer-friendly than GIMP.
Is Affinity Photo compatible with RAW?
Affinity Photo allows you to import raw images from your video camera directly into the program. Consequently, you will handle the unprocessed image and decide how you will enhance your image.
Conclusion
Do you know how Affinity Photo erases the background from photos? Because you learned everything you need to know about removing the background of your picture using the Affinity program, you will have no trouble eliminating the section of your image that was before visible. On the other side, if you are having trouble removing the backdrop from your image in Affinity, the Vidmore Background Remover Online is here to help! We guarantee that you will not be freaked out by the process of eliminating the undesired elements of your photographs.