How to Take Photos with Laptop Webcam on Windows and Mac
There are many built-in secret tools on your laptop, and camera (also called webcam) is one of them. The webcam can do a lot of awesome things for you, such as taking photos.
This post shares 3 free ways to take pictures on laptop via webcam on Windows and Mac computer.
Continue reading and follow it now.

PAGE CONTENT
Part 1. How to Take Photos with Laptop Webcam on Windows
The hidden webcam is Camera on Windows 10/8/7/XP computer. It can capture the webcam images and record the webcam videos easily.
Step 1. From the Start menu, click the Camera tile to open the app.
Alternatively, you can input camera in the search bar to open it.
Step 2. Then your computer screen will be turned into a giant viewfinder, and you can see your face in the webcam. Just click the Take Photo button at the right side (a camera image) to capture the webcam immediately.
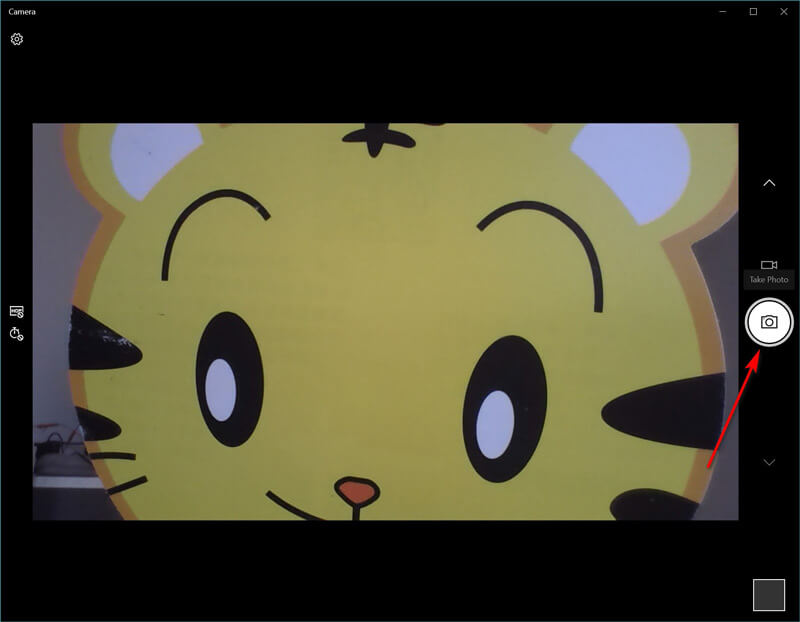
Then the taken photos will be saved in a folder called Camera Roll in your Pictures folder.
Tips
- If the app asks permission to use your camera and microphone or location, decide whether to click Yes or No.
- If your computer gets two cameras (usually one in front and one in back), you can toggle between them by clicking the Change Camera icon to take the webcam freely.
Part 2. How to Take Pictures with Laptop Webcam on Mac
Still, Mac laptop also includes the built-in webcam to take photos with Photo Booth. It is the free app to take images and record videos on Mac laptop.
Step 1. Use Spotlight to search Photo Booth and open this app on Mac.
Step 2. Find the View Photo Preview button, click it to see the Take Photo button.
Step 3. Select the Take a photo button or Take a sequence of 4 photos, and click the Take Photo button to snap the laptop image on Mac laptop.
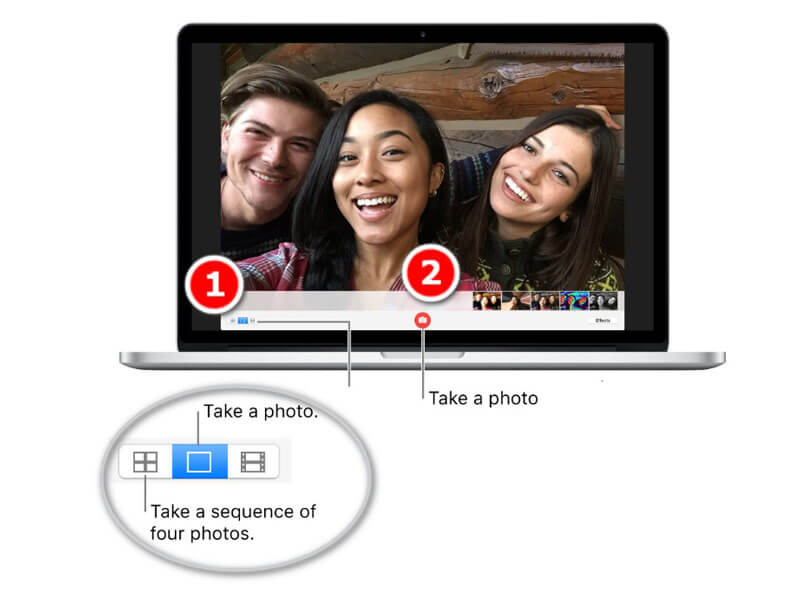
Then you can find the photos in a library in your user profile by going to the menu in Finder and select Go to folder (~/Pictures/Photo Booth Library/Pictures).
Tips
- After taking the photos on Mac laptop, you can see the images on Photo Booth by clicking the thumbnails and share them via mail, messages, AirDrop, notes, etc.
- For taking the webcam images from iSight, FaceTime, etc., you need to turn on the permission for those apps.
- There are the hotkeys that can take the screenshot for the webcam window, or customized region. Get the Mac screenshot tools here.
Part 3. How to Take Webcam Screenshots on Windows and Mac
Not only the secret photo-taken software on Windows and Mac laptop, you can also find the universal software to capture the webcam images on both Windows and Mac computer.
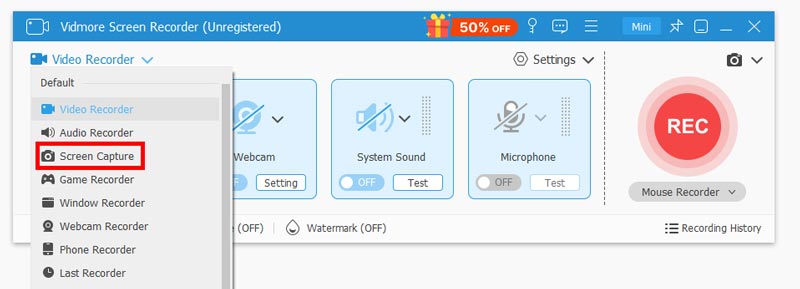
Vidmore Screen Recorder is the all-in-one screen capture software, which can take the still images for the laptop and record the dynamic video and audio from your computer.
![]() Taking Webcam Photos on Laptop
Taking Webcam Photos on Laptop
- Take photos for webcam directly on laptop.
- Capture the images by selecting any region.
- Support real-time image editing features.
- Output images as PNG, JPEG, BMP, GIF, TIFF.
- Capture images with hotkeys easily.
- Record dynamic video, audio and webcam.

Step 1. Free download this software and run it on your laptop. After that, make your webcam screen prepared.
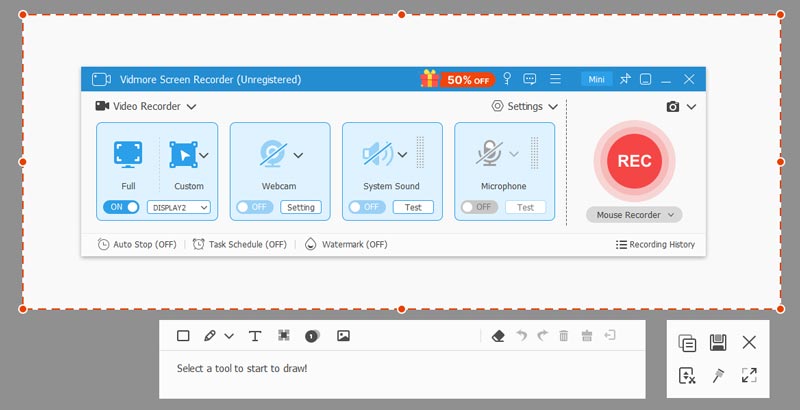
Step 2. Select Screen Capture from this software, and just hover your mouse over the webcam window. Left-click the mouse to take the screenshot.
Step 3. Here, it offers the editing features (draw a line/shape, add text, add callout, spray color, etc.) for the screenshot optionally.
Click Save button to export the webcam image.
Tips
- Not only the webcam window capture, this tool also allows you to freely capture a rectangular screen by dragging your mouse. Besides, customized window and full-screen capture are also supported.
- You can customize the screenshot format, images location and hotkeys by clicking the Preferences option in the main interface.
Part 4. FAQs of Taking Photos with Laptop Webcam
Windows 10 Camera app is missing, and how to fix?
You can follow the 3 ways to fix Camera app missing on Windows 10. 1. Change the privacy settings for Camera app to grant it permission to access the webcam (Click Settings, select Privacy under App permissions and turn on Allow apps to access your camera). 2. Reinstall the Camera app. 3. Update webcam drivers. After trying all those ways, you need to contact Microsoft to troubleshoot it, if they still do not work.
What is the shortcut to open webcam in Windows 7?
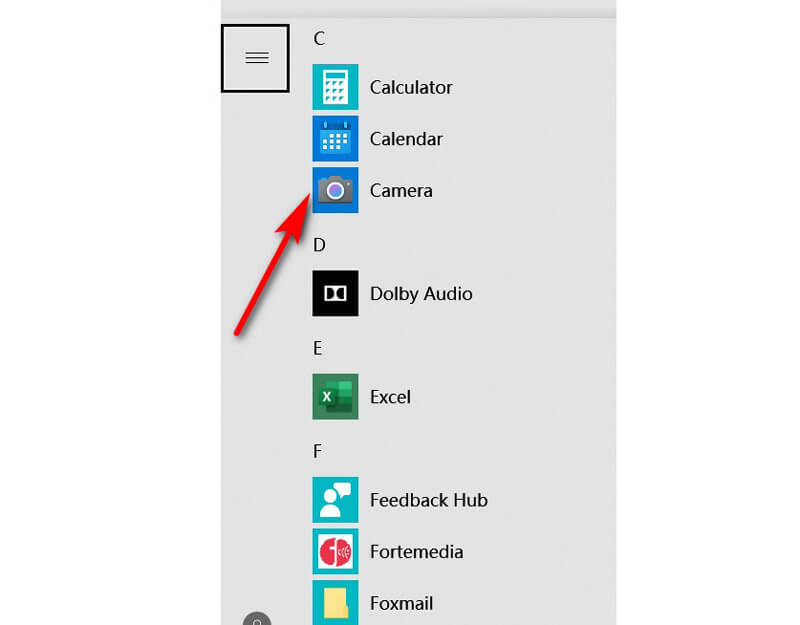
Currently, there is not shortcut to open the Camera app on Windows 7. You have to find it by clicking the Windows icon and find Camera from All Programs list.
What is the output format of a webcam photo?
Generally speaking, the output photo format is JPG for Windows laptop and PNG for Mac laptop.
How do I take pictures on my Surface Pro?
You can use the Surface Pro buttons and pens to capture the images. Get more details here to take pictures on Surface Pro.
Conclusion
This post shares 3 free ways to take a picture on a Windows and Mac computer. You can use the built-in camera tools to snap the screen, and get the free third-party screen capture software to complete the image capture.
Which way is your favorite?
Do you have any better suggestions?
Do not hesitate to leave your comments below.