![]() Screen Recorder
Screen Recorder
Basics
Main Features
Recording Controls
Vidmore Screen Recorder is the easy screen recording software for Windows and Mac users. It can capture any screen on your desktop, window from browser and audio from microphone and system. With it, you can easily make a video tutorial for posting online. Moreover, its Webcam recording feature lets you create the picture-in-picture vision conveniently.
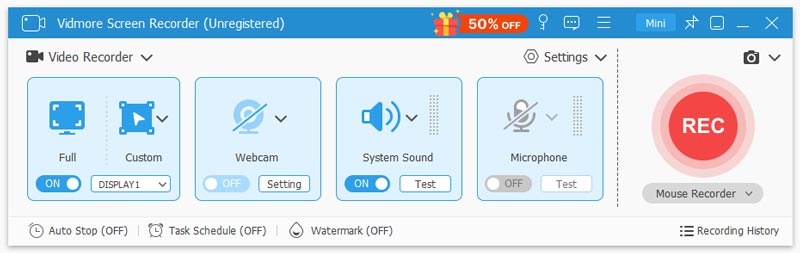
Following is the detailed user guide to show you how to use this software.
Vidmore offers the free trial version for everyone, but the free trial version has limitations.
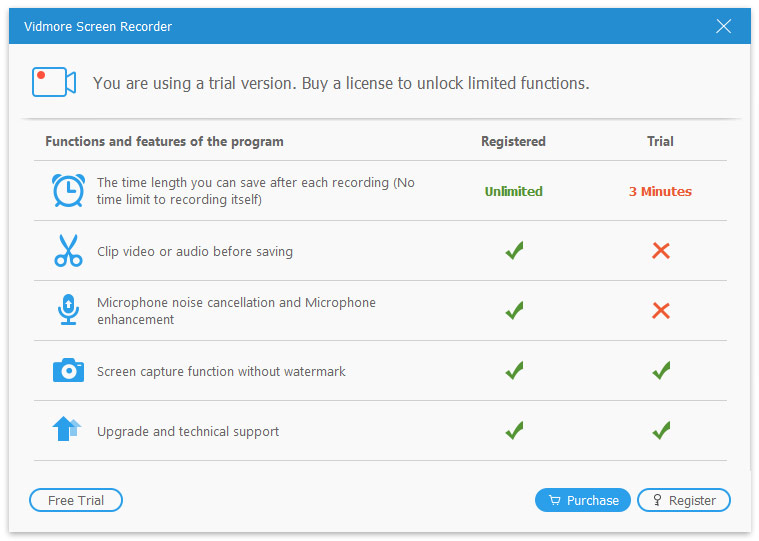
For enjoying the full features of this software without any limits, you are recommended to register it.
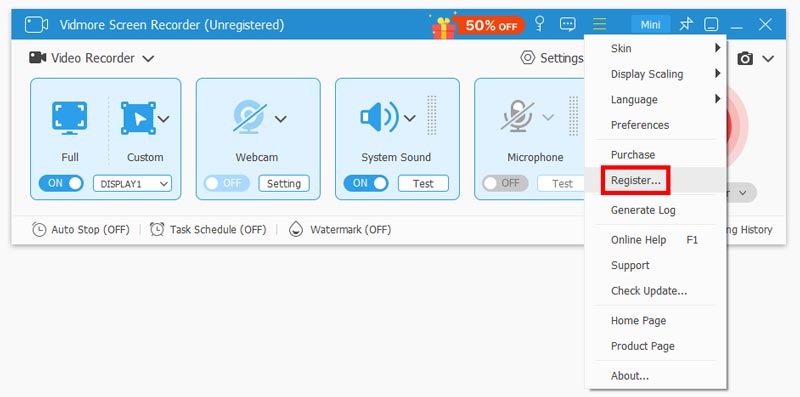
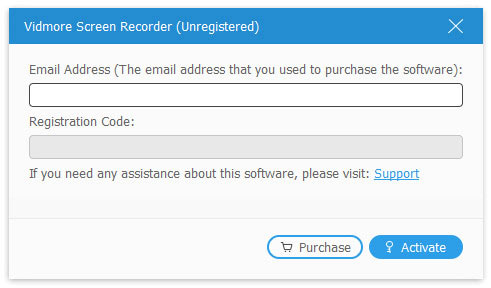
Click the Register button (A lock image) in the menu and enter your email address and paste registration code in the box and click “Activate” to register this software.
You can also find the Register option by clicking the menu with the three-dot and select “Register”.
Email Address: The email address is what you used to purchase the product.
Registration Code: A string of characters marked as Activation key, license code or KEYCODE(S) in the order confirmation letter you received after the successful purchase.
Frequent updates from Vidmore products will be provided to fix some bugs and improve the product. For updating the software, you are given 2 methods.
Method 1. Update manually
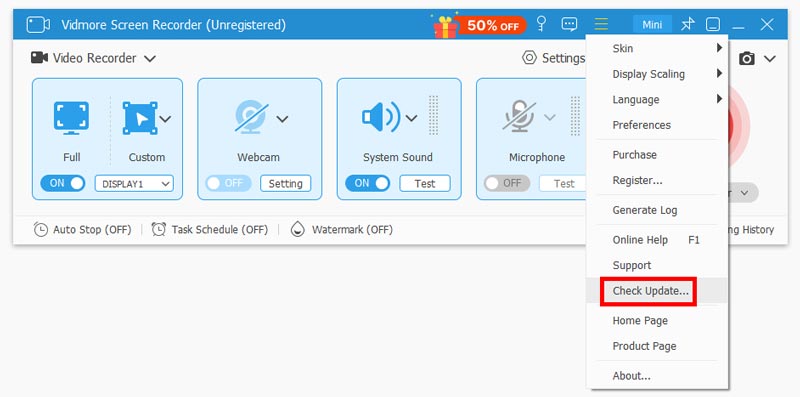
Click the Menu icon with three-dot and choose “Check Update”. If there’s an update, you should download and install it immediately.
Method 2. Update automatically
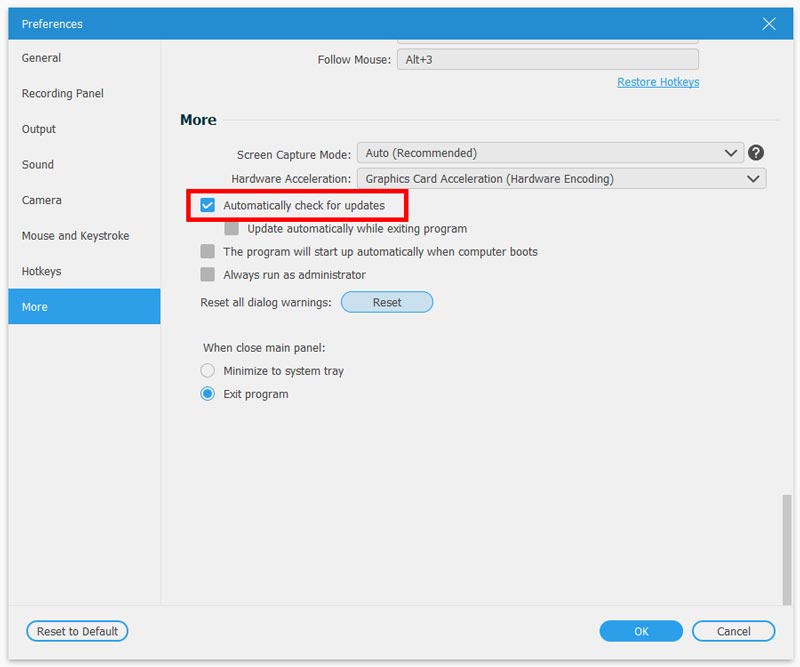
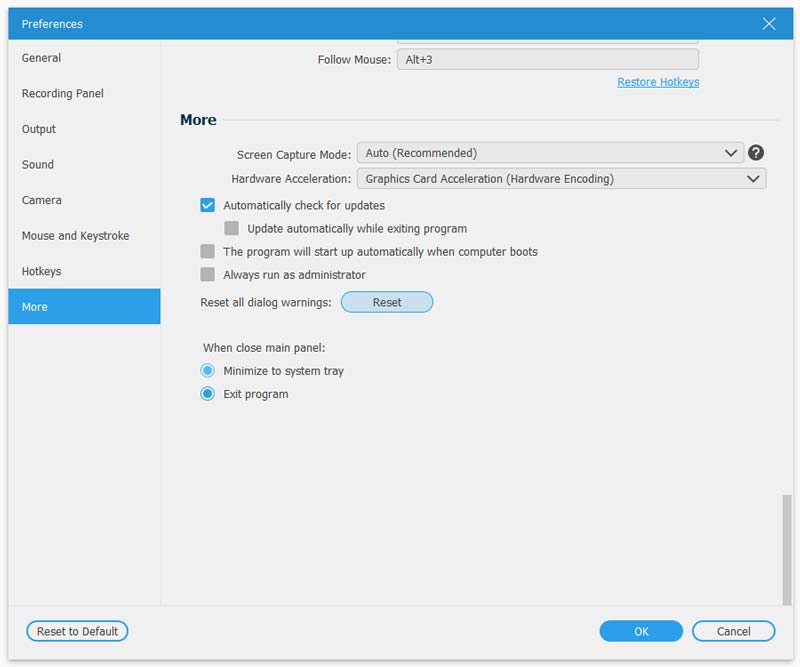
Select “Preferences” under the menu with three-dot. Navigate the “Others” tab, and select the checkbox of “Automatically check for updates”. Then this software will receive the automatic update notification if there is an update. Then you just need to download and install the latest version.
Settings from Preferences let you preset before recording.
Click the Menu icon with the tree-dot and select “Preferences”, and then you can locate the different tabs from the left sidebar and change the settings on the right window.
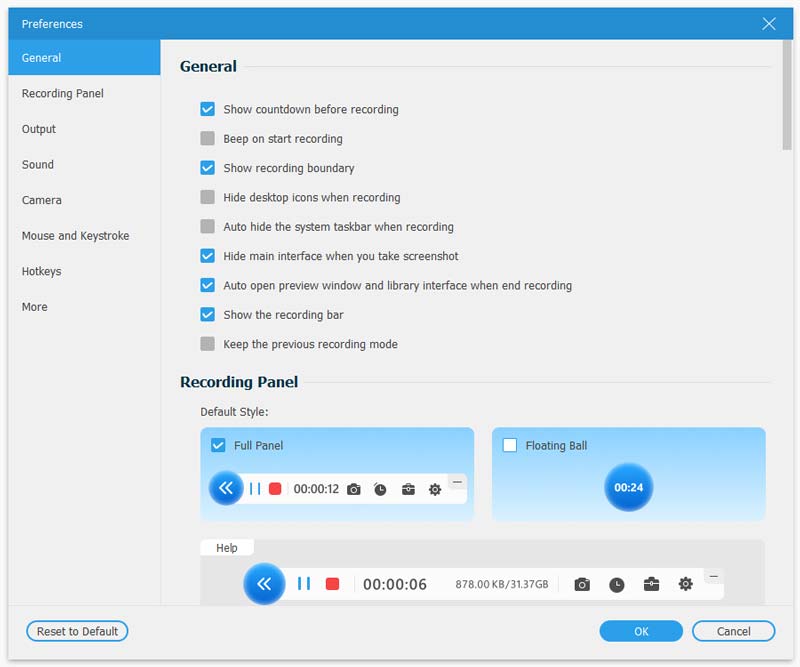
General preferences
In the “General” tab, where you could make the setting before and while recording, like show countdown before recording, hide float bar when recording, auto hide desktop icons when recording, etc.
Recording Panel preferences
You can set the default style of the float panel and change its opacity in “Recording Panel” tab. You can also hide the float panel in recoding and enable it to be captured.
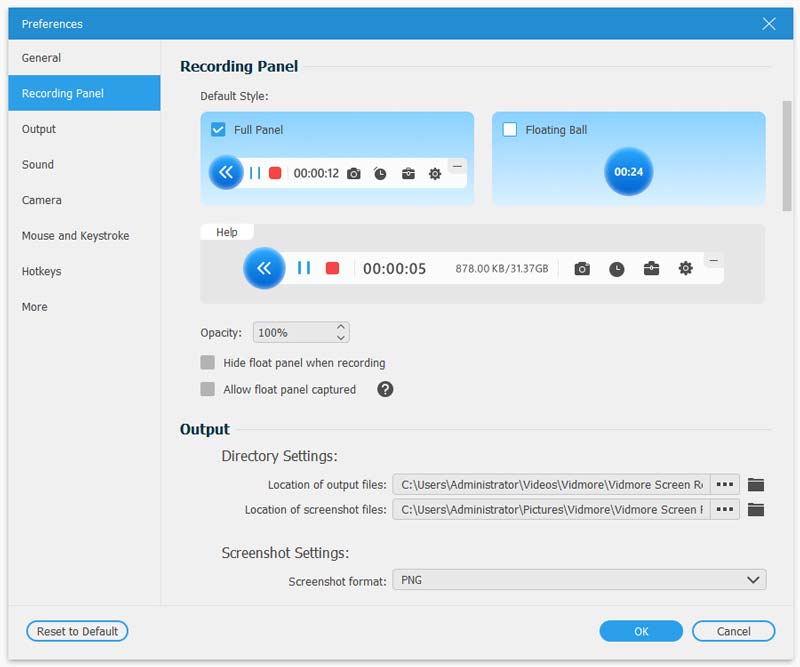
Output preferences
In the tab of “Output”, you could customize the output format for the recording and the screenshot, and the location of the output files.
While choosing the video and audio format, you can also select the codec, sample rate, quality, etc.

Sound preferences
In the “Sound Preferences” tab, click Sound Settings to enter the settings page where you can choose system sound and microphone device and control the delay and volume, etc.

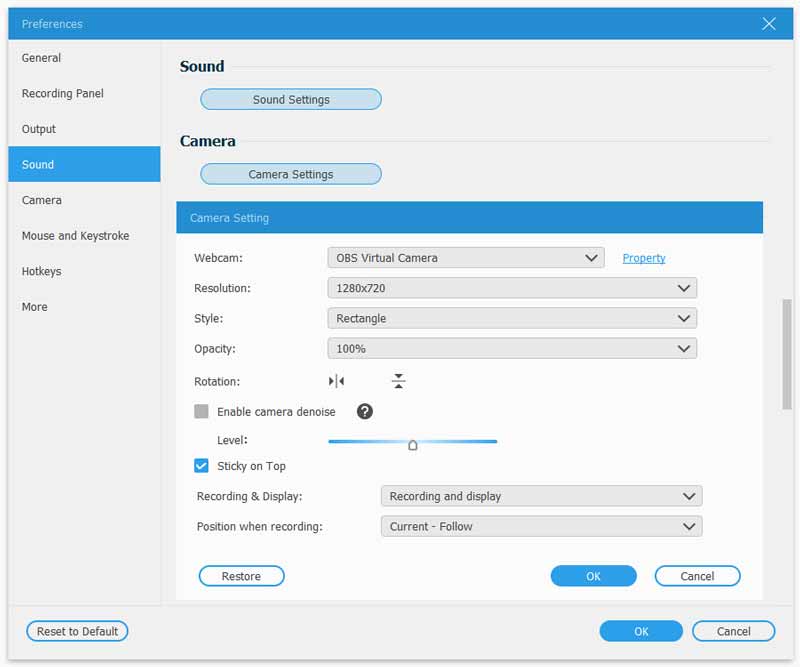
Camera Preferences
Next is the Camara Preference. You can change the camera, resolution, style, and opacity. Rotation, camera denoise, etc., are also available.
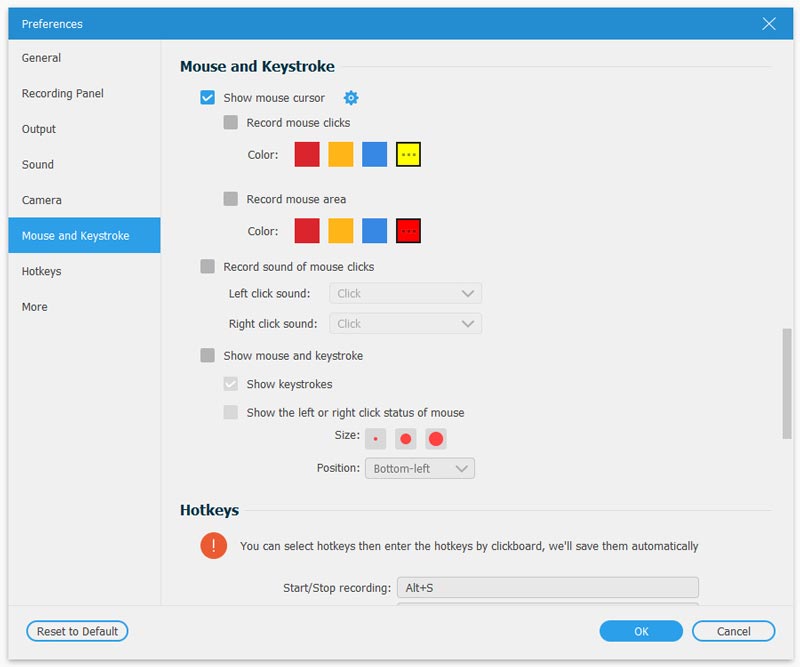
Mouse and Keystroke preferences
In the “Mouse and Keystroke” tab, you can show the mouse cursor, keystroke and change the mouse click color, area color and mouse click sound flexibly.
More preferences
Go to the “More” tab, where you can enable the hardware acceleration, automatic updates, etc.
This software can record any video and screen that is displayed on your computer. Here, let’s check how to use it to record the video on computer.
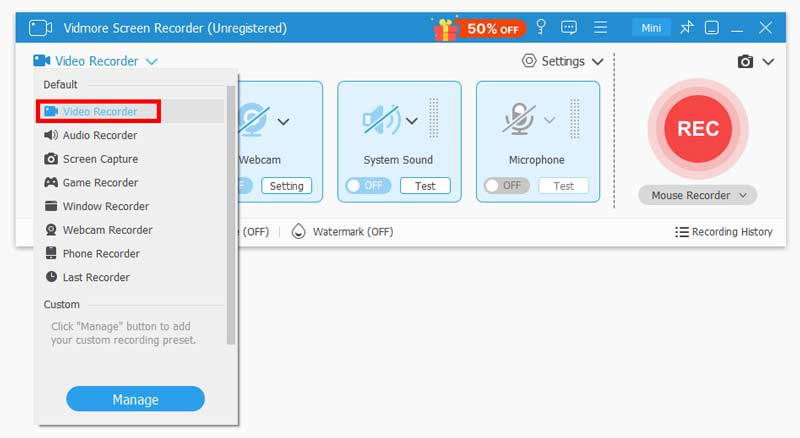
Step 1. Select Video Recorder
Run this software on your computer. In the home interface, select “Video Recorder”.
Step 2. Recording area and audio settings
After entering the Video Recorder interface, you should decide the recording area and audio recording.

For recording area, you can record the full screen by clicking “Full”.
For recording the customized area, you just need to click “Custom” to select either the common recording area with the specific value or “Select region/window” which will give you more control to select the specific window or rectangular area.
You can also Add exclusions to protect the content you don’t want to record.
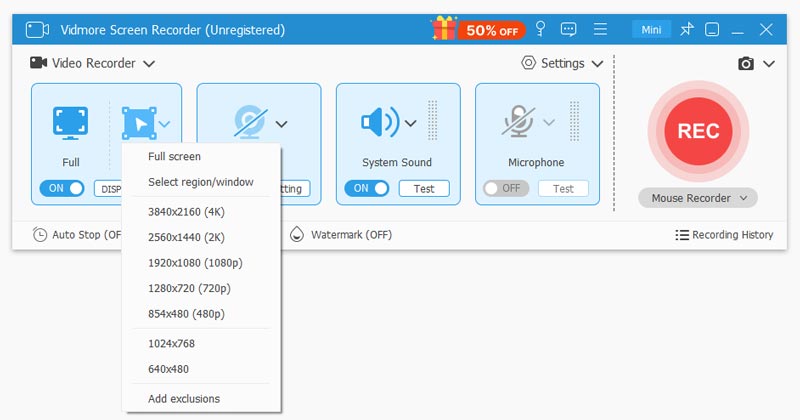
Note: For customizing the recording area, you should open the window that you want to capture. Then you can get the exact recording area.
As for audio settings, it is easy to toggle on the audio options from “System Sound” and “Microphone”.
For saving online movies, you should turn on “System Sound” and turn off “Microphone”.
For creating a video tutorial with your narration, you should turn on “Microphone”. “System Sound” is dependent on you.

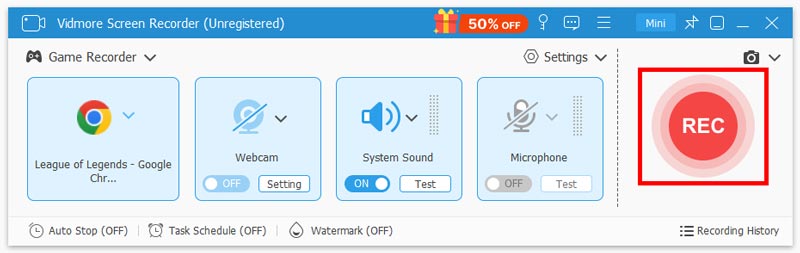
Step 3. Record and save the video recording
After all the settings are made well, just click the “REC” button to start recording. During the recording process, you can use the edit button to edit the screen while recording.
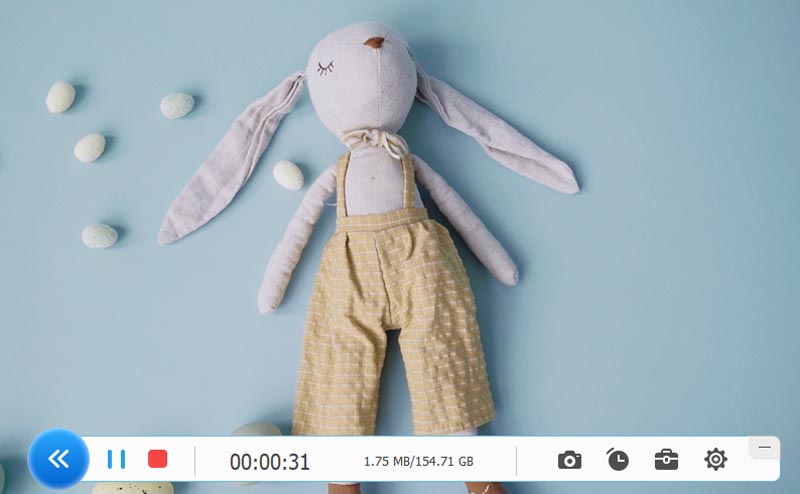
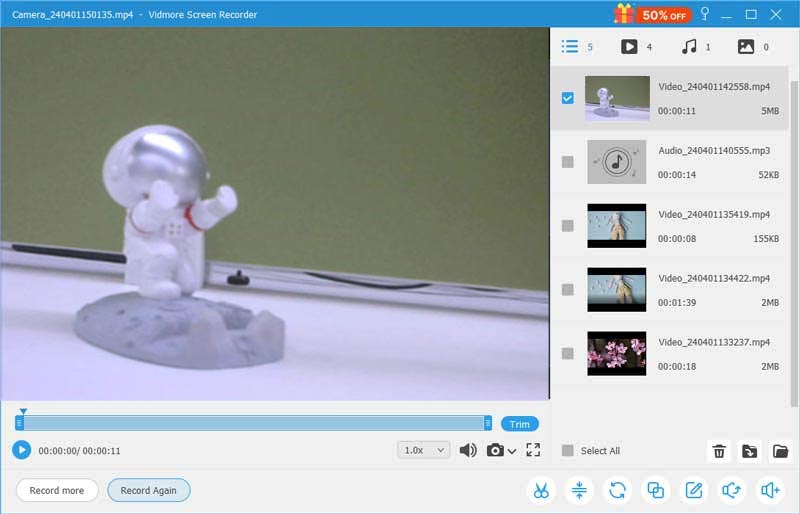
This software also lets you pause the recording by clicking the Pauses button, and you will enter the preview window if you click the Stop button.
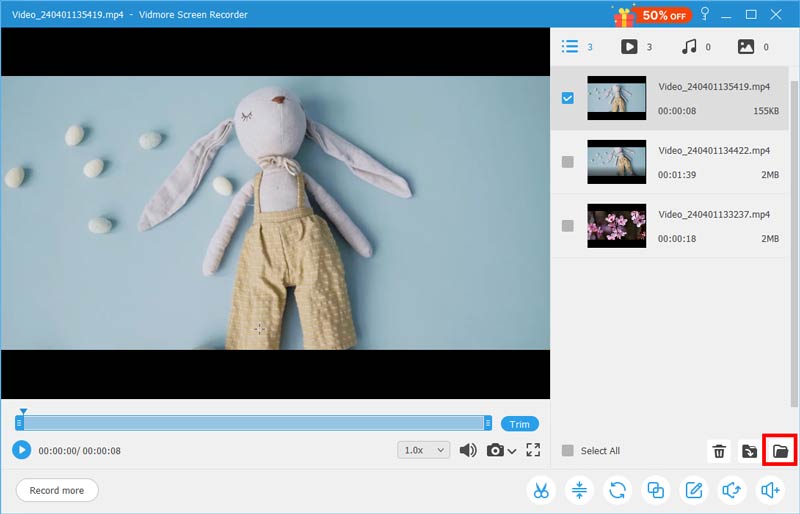
Your recording will be automatically saved to your disc. Click the “Open Folder” to see the file.
Note: You can also use the clip feature during previewing the video recording to cut unwanted parts from the file.
Step 1. Select Audio Recorder
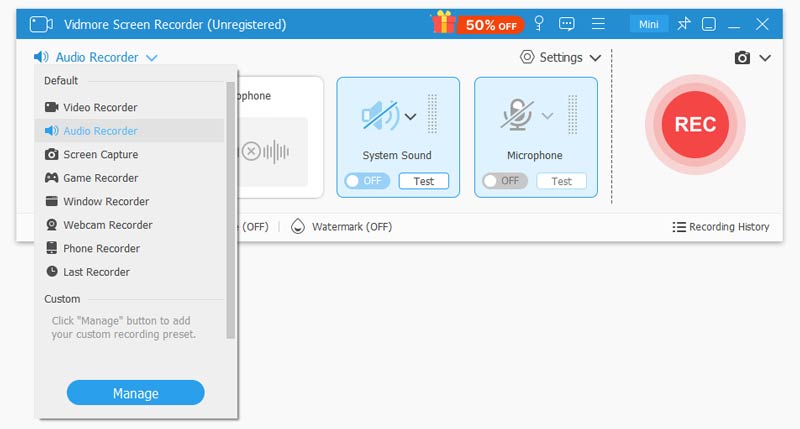
In the home interface, select “Audio Recorder” to enter the Audio Recorder interface.
Step 2. Record audio file
In the interface, you can turn on or turn off the “System Sound” and “Microphone”.
For recording the music from your computer, you just need to toggle on “System Sound” and off “Microphone”.
For recording your voice for a video tutorial, you should turn on “Microphone” and turn off “System Sound”.
Step 3. Record audio
Click “REC” to start recording the audio file on your computer.
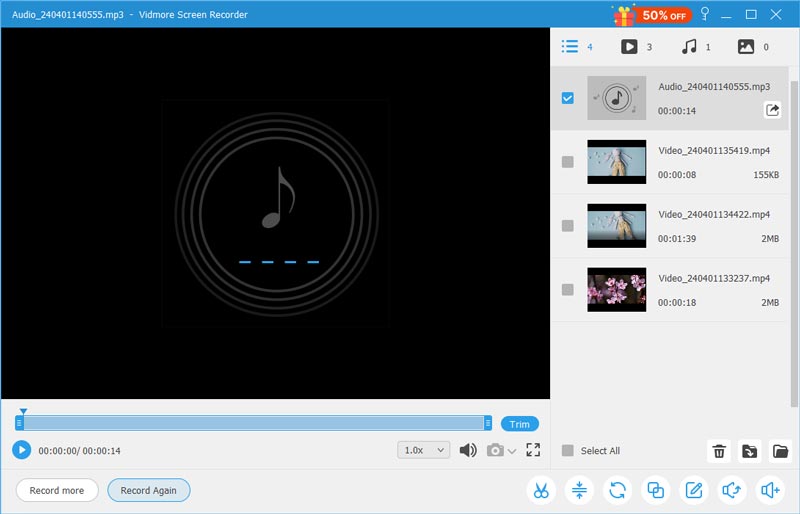
Step 4. Save the audio recording
Click the Stop button to preview the audio recording, and your audio recording will be automatically saved to your computer, too.
Note: You can also use the clip feature during previewing the audio recording to cut unwanted parts from the file.
Vidmore Screen Recorder can be used as a light-weight game recorder, which lets you capture the best moments of your gameplay with high quality.
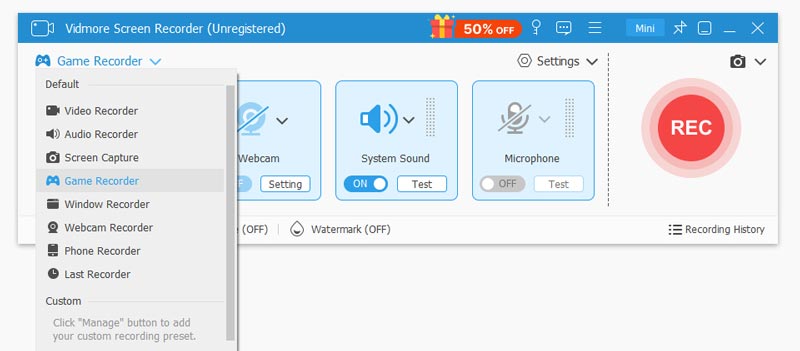
Step 1. Select Game Recorder
Start your game and launch Vidmore Screen Recorder. Choose “Game Recorder” feature to move on.
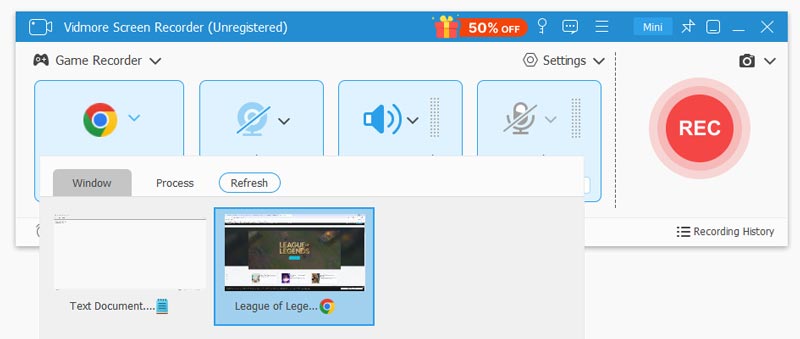
Step 2. Select game to record
Choose the game window from the “Select the game” section.
Step 3. Tweak recording settings
Click the “Cogwheel” icon to select the frame rate, output format and video quality you want to record. Then, click “OK” to save the changes.
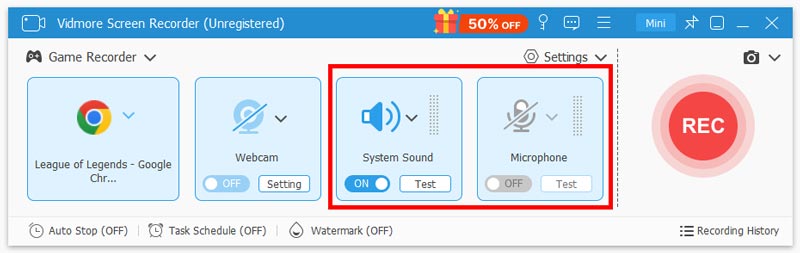
If you want overlay webcam video on the game footage, you need to turn on the “Webcam” option. To capture in-game sound effects, music, and dialogue, you need to enable “System Sound” and “Microphone” to make your video more vivid.
Step 4. Start recording your gameplay
Now, hit on the big red “REC” button and your recording will start after 3-second countdown.
Step 5. Save the recording
Once done, click on “Stop” button to end and save the recording. You can preview and edit the recorded video with ease. When you’re satisfied with the result, you need to define the file name and path to export the recording to your computer.

Webcam recording is another feature you cannot miss, when you want to record a gameplay or video call online.
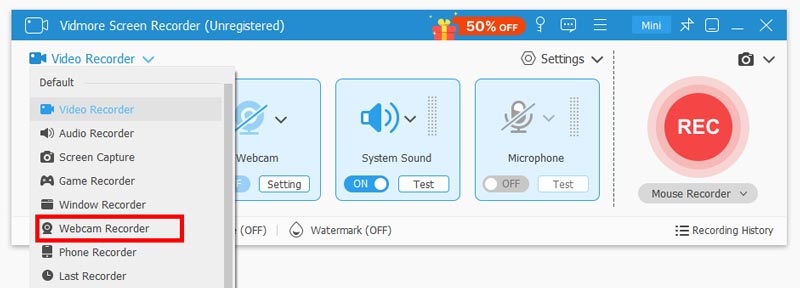
Step 1. Select Webcam Recorder
Webcam Recorder is a separate feature that enables you to record webcam only. Just select “Webcam Recorder” in the home interface to bring up the webcam.
Note: If your computer does not equip with the built-in camera, just insert an external webcam into your computer, and this software will detect it automatically.
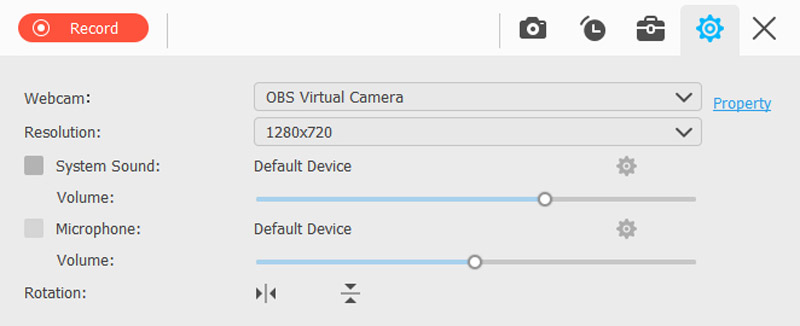
Step 2. Recording settings
Similar to recording video, you should select the webcam recording settings according to your own needs.
You can change the device and resolution and adjust system and microphone, etc.
If you want to capture both the webcam area and other regions outside the webcam region, you should just use video recorder mode.
Step 3. Start webcam recording
Click the “Record” button to start recording immediately. Again, the pause option and editing feature are available to you.
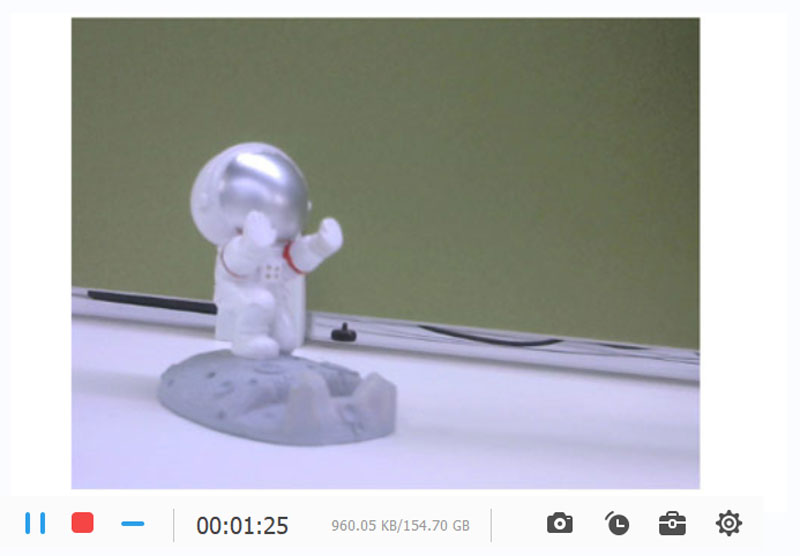
Click the Stop button to save and preview the webcam recording file. The editing features like trimmer, compressor, metadata editor are optional for you.
Screen Capture is the free screenshot-taken tool like Snipping, but this screenshot tool offers more editing features.
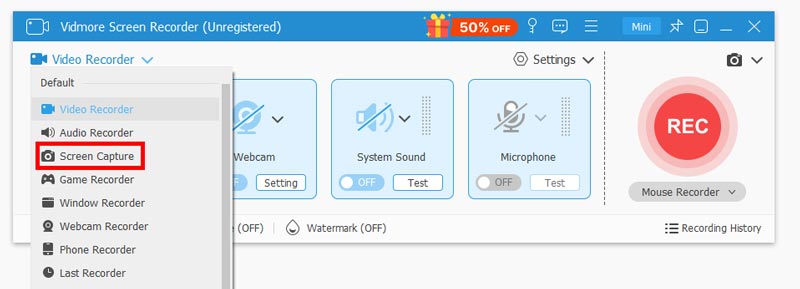
Step 1. Run Screen Capture
Open the screen where you want to take a screenshot, and click “Screen Capture” in the home interface.
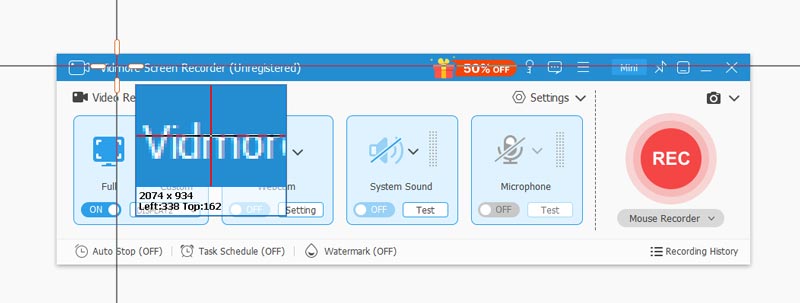
Step 2. Take a screenshot
A pop window will appear, where your mouse becomes the cursormove, and there are two ways of taking the screenshot.
1. If you want to take a screenshot for a window, just move your mouse to the window, and left-click the mouse to confirm the screenshot.
2. If you want to capture a rectangular screen, just click and drag your left mouse to do it.
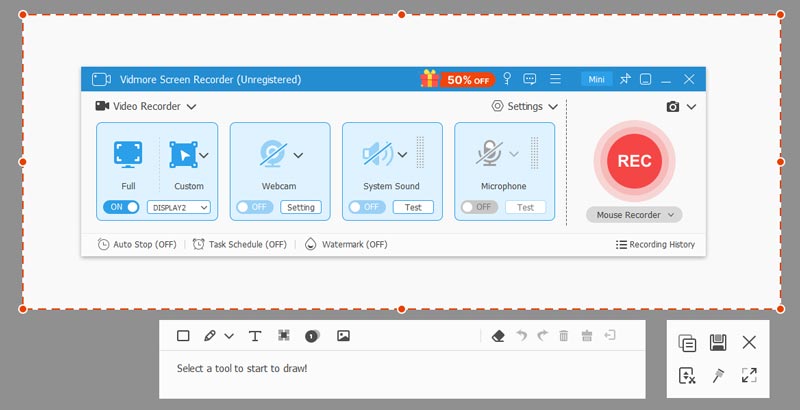
Step 3. Edit the screenshot image
Once you taking the screenshot, you will see the editing options.
Here you can draw a rectangle, arrow, line, etc., on the image, where the color can be also customized for you.
You can click the Text (T image) and image option to add the captions and images to the picture.
The controls on the right side can help you save the screenshot, pin to screen, copy to other places or take scrolling screenshot.
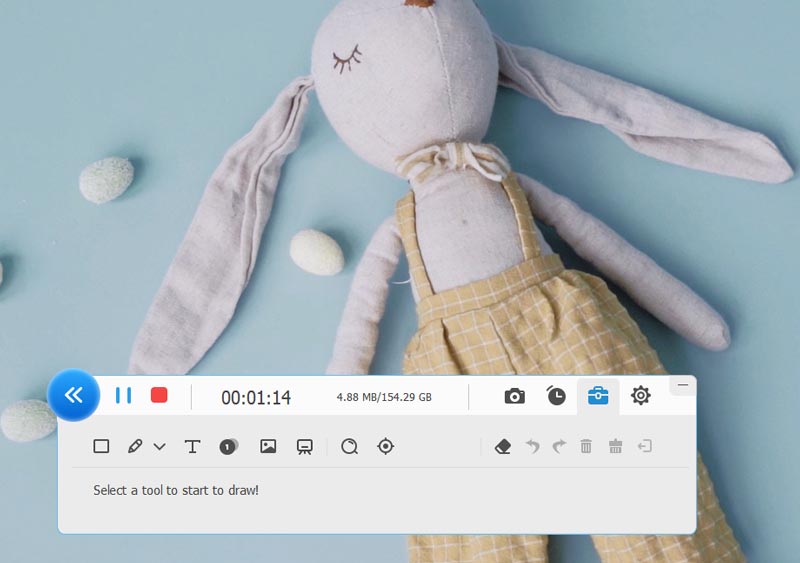
Editing while recording is the spotlights you will not miss in this screen capture software.
Whether you are recording a video or webcam recording, you can click the edit option (A pen image) to edit the recording file.
Here you can add a rectangle, ellipse, arrow, line, etc., into the video for marking. Beyond the default color, you can also select other color options at the bottom.
Caption and callout can also be added efficiently when you want to specify the steps in a video tutorial. You can also use the Eraser to clean what effects you have added before.
If you have many recording tasks, but the settings before recording are identical, then the Preset recording is what you will need exactly. It can create a preset recording and apply it to all the recording task.
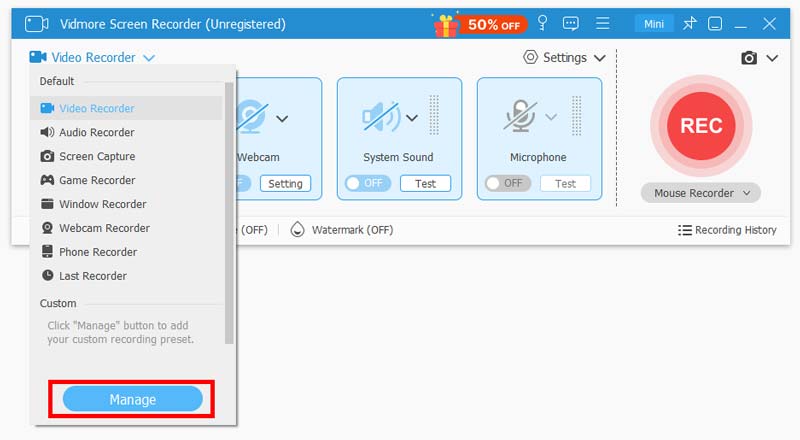
Step 1. Create a new Preset task
In the home interface, select “Manage” in the recorder mode list to add a new customized recording preset. Then in the pop-up window, select the big plus button to create a new one.
Step 2. Customize the Preset settings
Give a name for the preset task, and select what you will need from Display, Record area, Watermark, Webcam, Sound, Microphone, etc. Click “Save” and “Apply” to save the changes and apply them immediately.
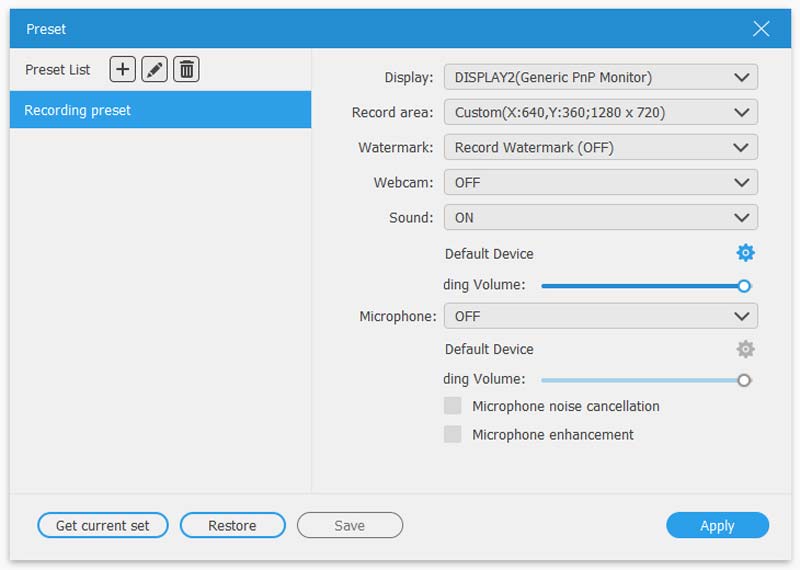
Note: If you want to create another one Preset task with the similar settings, then you just need to repeat the step 1, and click “Get current set” to copy the settings from the first Preset task. Then just adjust the settings slightly to save.
Mouse Recorder is the extra feature from Video Recorder, which gives you more controls to select the recording area.
Step 1. Select Mouse Recorder
Select “Mouse Recorder” in the home interface, and From the drop-down list, you will see the options, “Around mouse” and “Follow the mouse”.
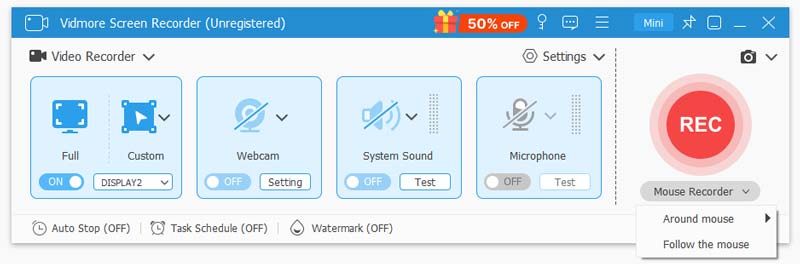
“Around mouse” is the recoding mode where the recording area will change as you move your mouse, and the area always centers on the mouse. Once you move your mouse to the border of your screen display, then the area beyond your screen display will be shown in a black screen.
“Follow the mouse,” similar to “Around mouse,” will change the recording area as you move the mouse, not center on the mouse, but the mouse is always within the selected region.Only if your mouse is moving within a selected area, all the operation process in the area will be shown clearly and the area window will not move.
“Around mouse” can record more area compared with “Follow the mouse”.
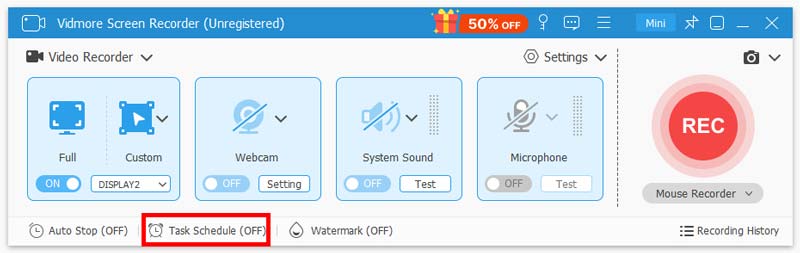
Task Schedule is similar to the alarm, which will let this software record automatically without your extra clicks.
Step 1. Start Task Schedule
Task Schedule is the feature under Video Recorder, and Audio Recorder. Enter the interface of one of the two recording modes. Click “Task Schedule” at the bottom.
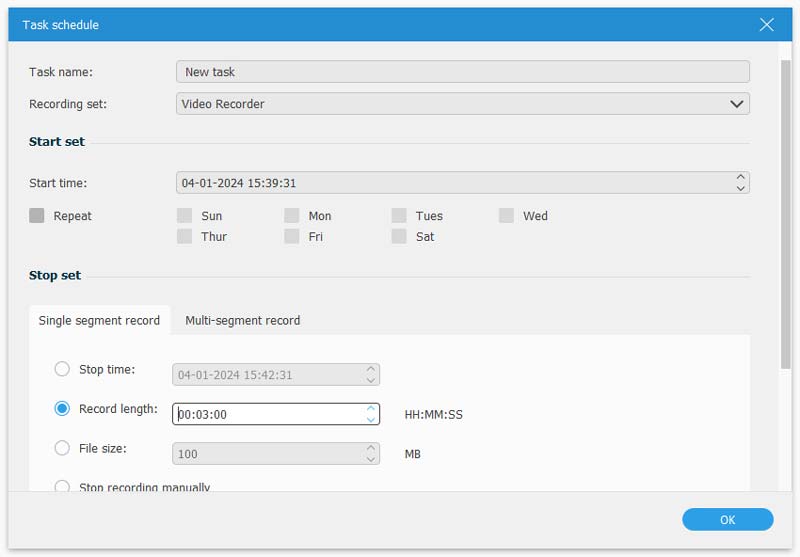
Step 2. Make Task Schedule settings
Click the big plus icon and create a new task.
In the pop-up window, you should fill the box one by one. Set the starting time, recording length, and recording set from the Preset you made before.
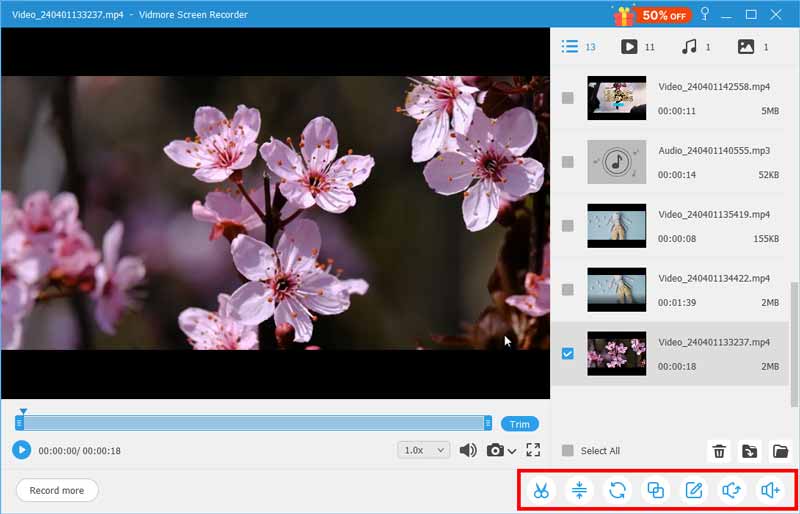
Every time you start a recording task, the recording files will be saved in the recording history.
You can find “Recording history” under the Rec button. And it will automatically open the Recording history every time you finish recording.
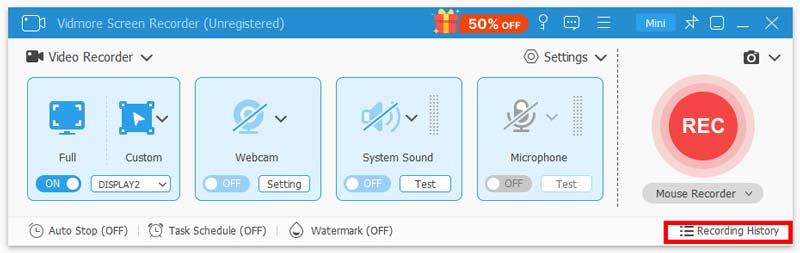
In the recording history, you can rename the recording file, play it directly, or share it directly.
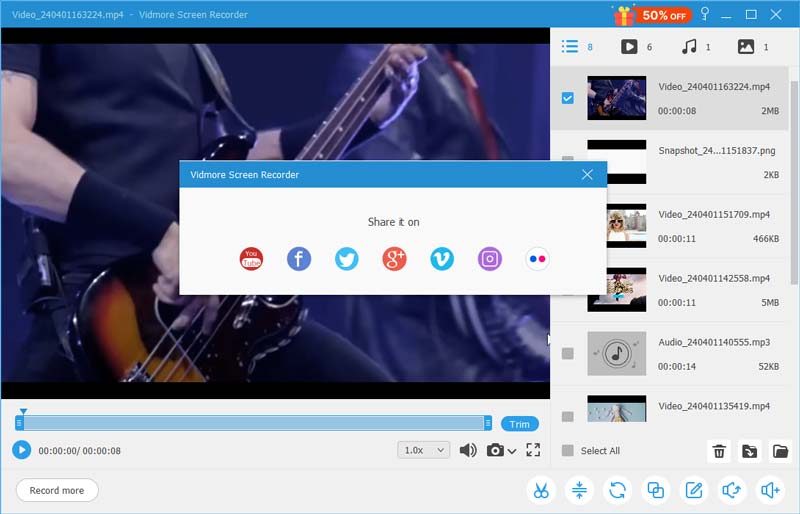
Besides the basic and advanced recording controls, you can also use multiple editing functions in the toolbar in preview or recording history.
After you enter the recording history, you can see 7 different marks at the bottom: Advanced Trimmer, Video Compressor, Media Converter, File Merger, Media Metadate Editor, Sound Extractor and Sound Booster. Select the tool according to your name.
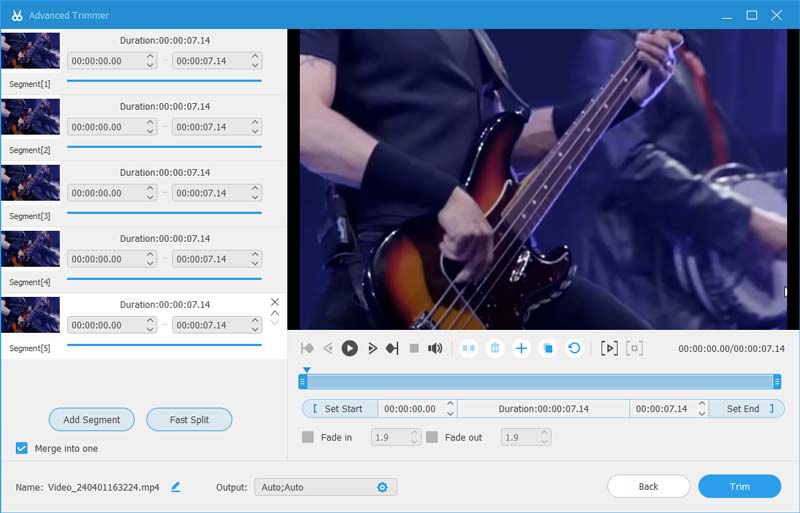
You can do the simple trimming on the preview page. But if you want to do more complicated operations, you can use Advance Trimmer.
You can make new segments with the processing bar and slider. Then, you can delete any segments you want.
You can also fast split the video into segments with one button.
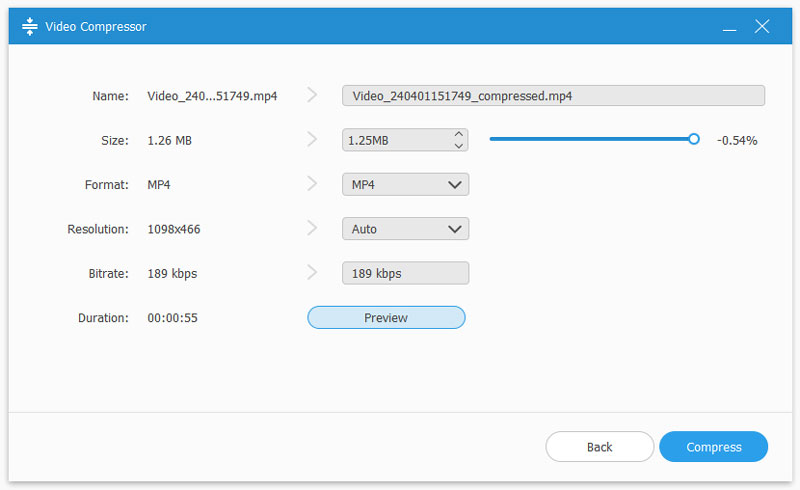
If your recording file is too large to share or process, you can use the Video Compressor to make it smaller.
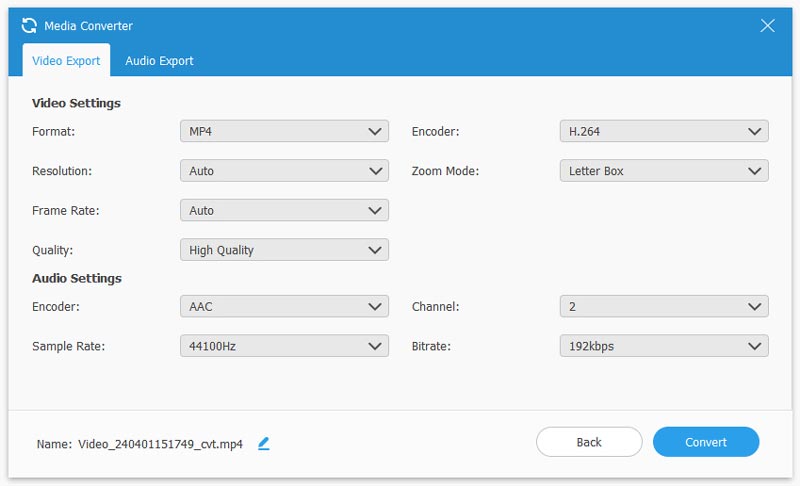
To make your recording compatible with more devices and media players, use Media Converter to transfer the recording formats.
The File Merger is a great tool to combine several clips into one file. After entering the File Merger, click the plus button to import the recording. Then, click Export to save.
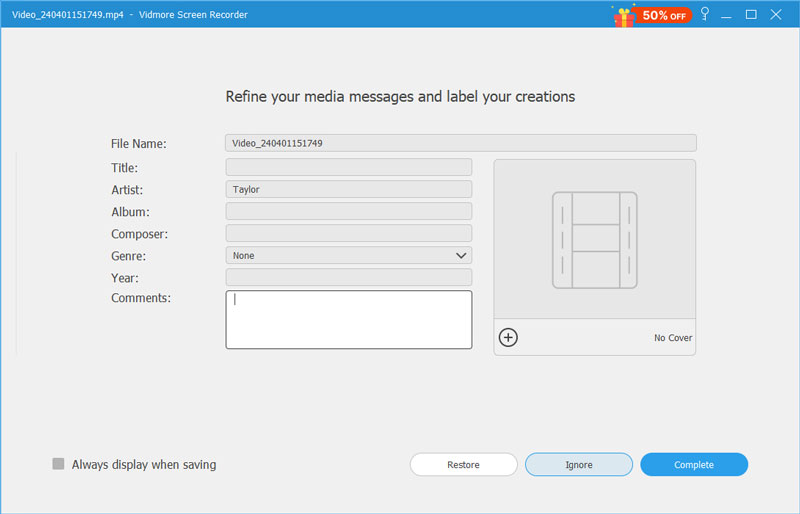
To make your recording personal, you can add media metadata with Edit Media Metadata.
You can add the file name, title, artist, album, etc.
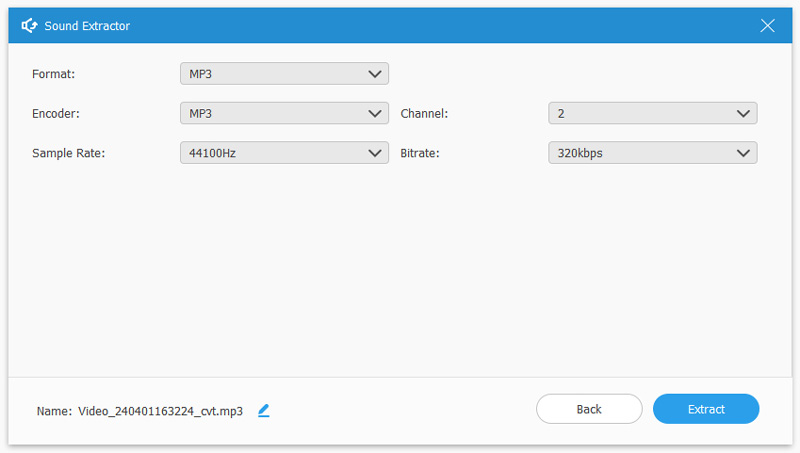
Sometimes you may just want to keep the audio. Then, just use Sound Extractor to make video into audio with a customized encoder, sample rate, format, etc.
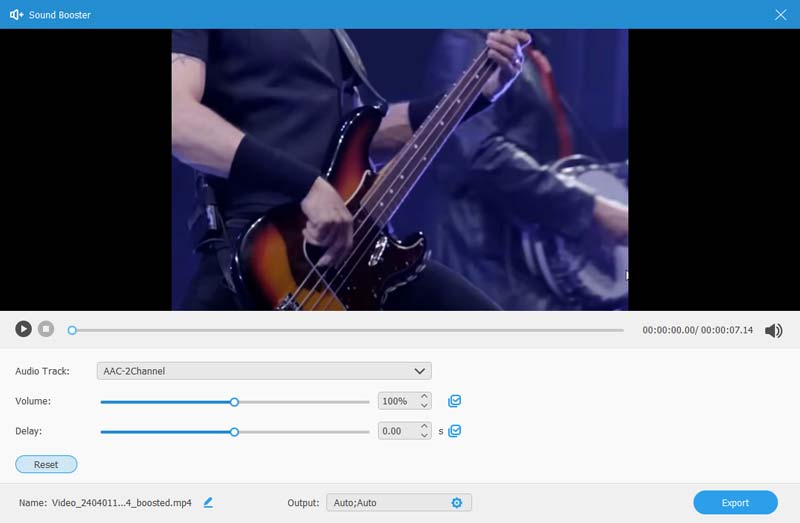
If the sound preset doesn’t make good audio, you can use Sound Booster to change the volume and delay of the audio track.
All what you have heard, seen and done will be captured at your fingertips to tell another story.
Subscribed Successfully!