Introduction
Vidmore Blu-ray Monster is the best Blu-ray movie ripping software. With this advanced software, you can rip Blu-ray to MP4/MKV/AVI/WMV/M4V/MOV/FLV and more video formats with 12x fast converting. And you also can convert Blu-ray disc/folder/ISO file to 4K/1080p HD, and 2D/3D video with zero quality loss. To save more your time, it supports batch conversion.Apart from the format converting, the editing function of Vidmore Blu-ray Monster is more powerful. You can edit the video and enhance it quality before converting. Choose
“Rotate & Crop” to change the video direction and enter
“Effect& Filter” adjust the video effect like Brightness, Saturation, Contrast, and Hue.
Quick Start
Step 1 Open Vidmore Blu-ray Monster on your PC.
 Step 2
 Drag the videos into the window of the software
 Step 3
 Select the target format on the top right corner of the window and click
“Rip All” to convert.

Register
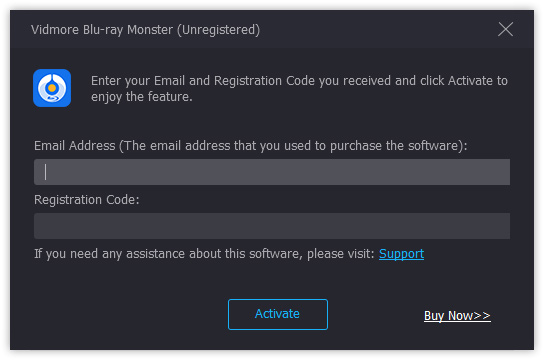
Each time you launch this software, it will pop up the register window for you. Click
“Register” on the bottom right corner to enter the window where you input your Email address and the Registration code sent in email.Then click
“Activate” to register.You also can click the key icon on the right of the top bar. It will show you the register window containing all software. Select
“Register” of Blu-ray Ripper to import your registration information.
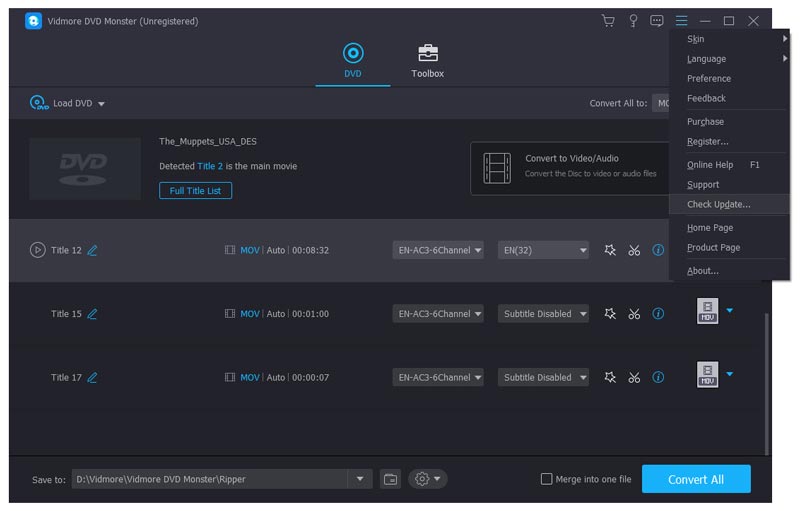
Update
To update the software, click the menu icon on the right of the top bar and choose
“Check Update” option.Then it will check the version you have installed. If the version is not the newest, it will remind you to update.
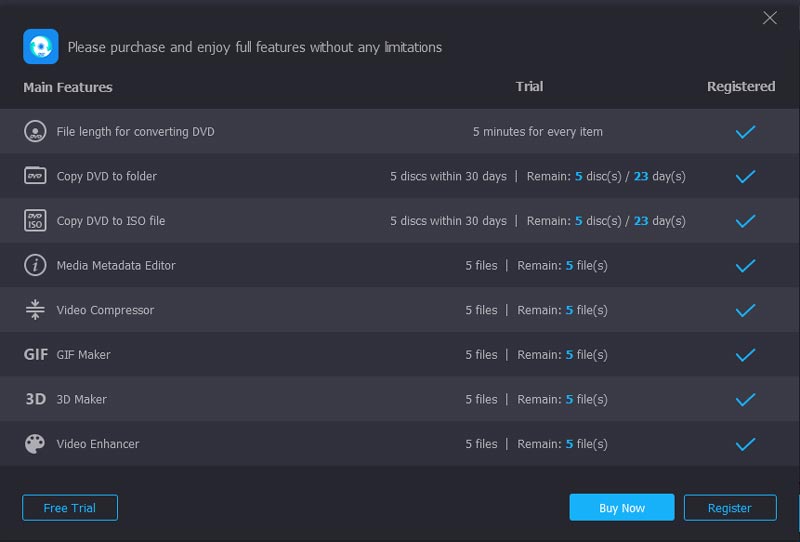
Trial Limits
As you know, the offered functions for trail users and registered users are different. Here are the differences.
Ripper Settings
Click the gear icon beside the save path bar to enter the settings window. Here are three settings you can set.

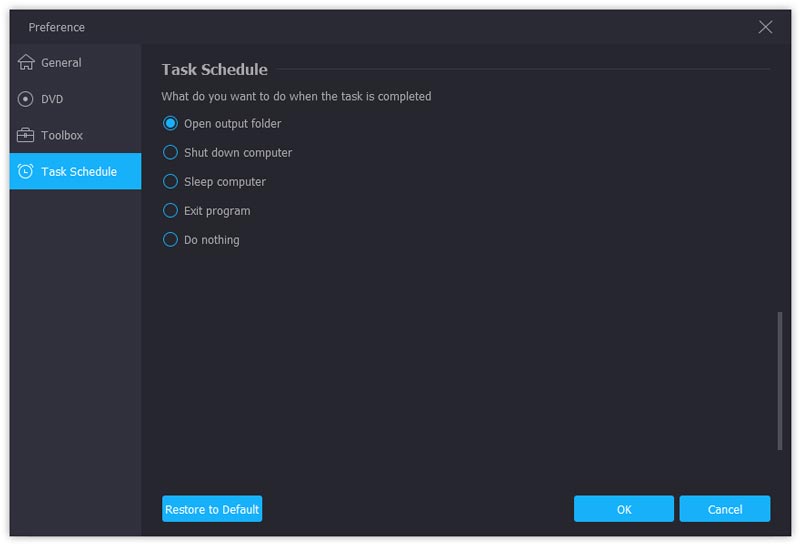
Task Schedule
In this option, you can choose the things you want to do when the task is completed.1. Open output folder2. Shut down computer3. Sleep down computer4. Exit program5. Do nothingAfter you have done, click
“OK”.
GPU Acceleration
You can enable GPU Acceleration or not. If you enable GPU acceleration, you can select
“Auto Select” or
“AMD Acceleration” in
“Prefer Select” bar.After you have done, click
“OK” to save your settings.

All Settings
By clicking this, you select all profile settings.GeneralYou can select the Subtitle Language and the Audio Language. Here are over 30 kinds of languages in each list.Here are also
“Enable GPU Acceleration” and
“Check for update automatically”.

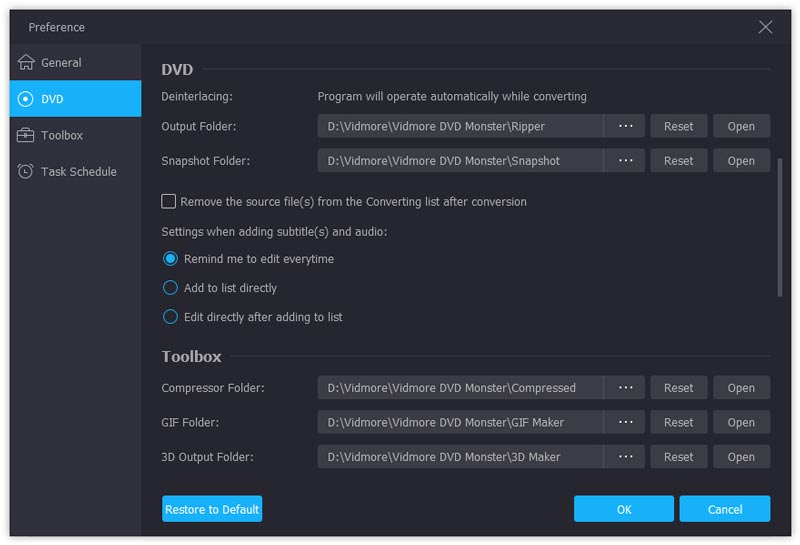
ConvertThe next part of settings is Convert.In this part, you can set the path of the Output Folder and the Snapshot Folder. And you also can choose whether remove the source files from the list after conversion or not.For adding subtitles and audio, here are three options.1. Notice for every adding2. Add directly3. Enter edit interface after adding
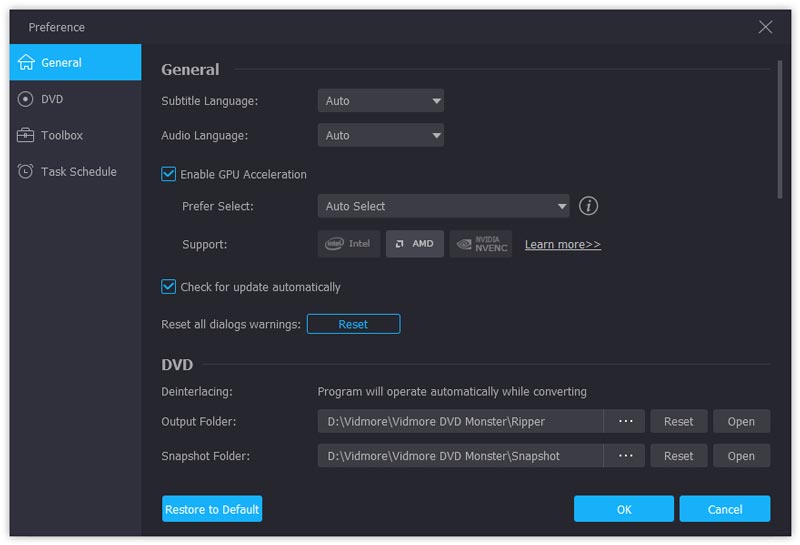
RipperIn the Ripper option, You can set the Output Folder and the Snapshot Folder.Choose whether remove the source files from the list after conversion or not.Three settings when adding subtitles and audio1. Remind me to edit everytime2. Add to list directly3. Edit directly after adding to list
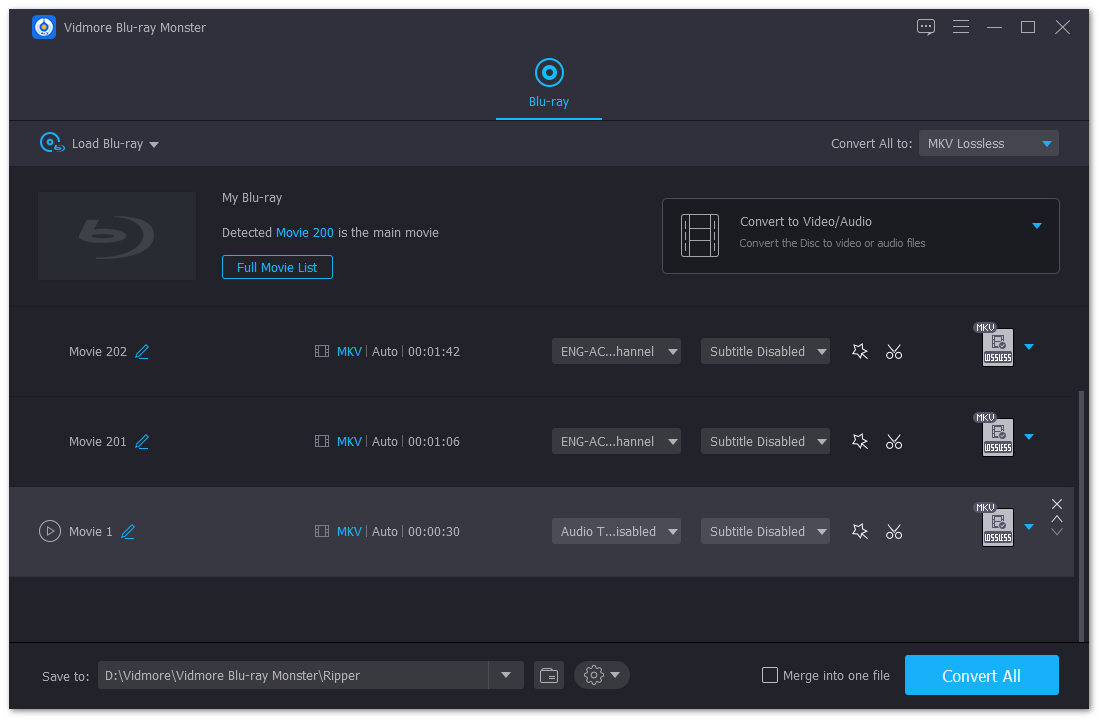
Rip Blu-ray to Any Format
Step 1 Launch Vidmore Blu-ray Monster on your PC.
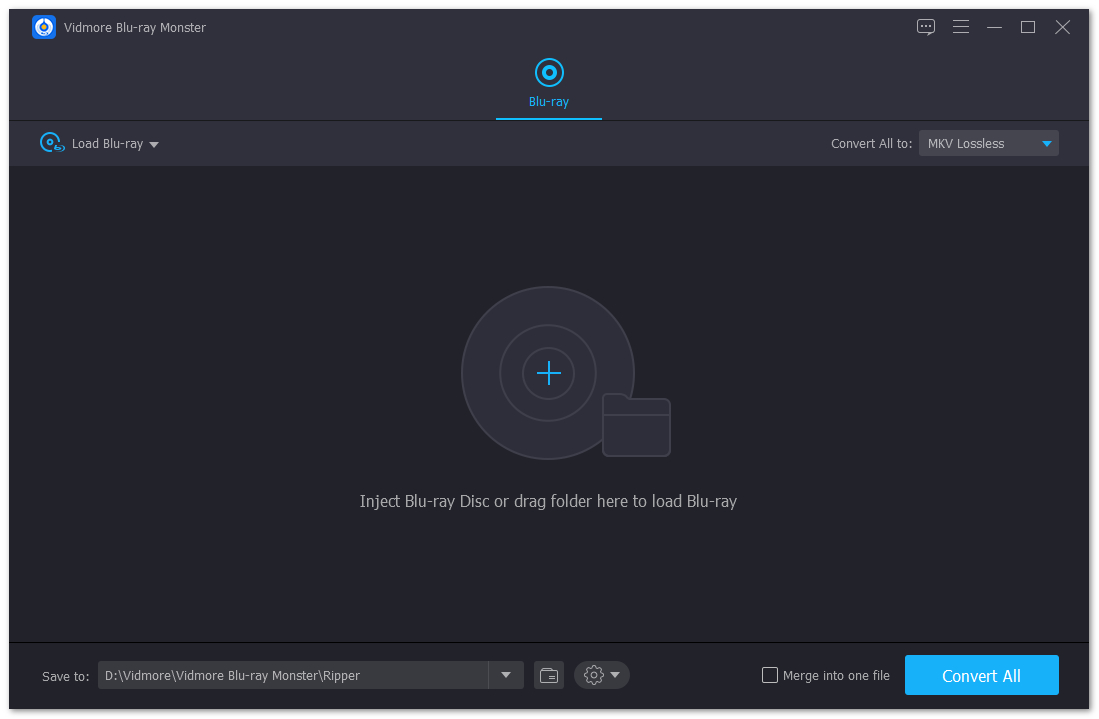
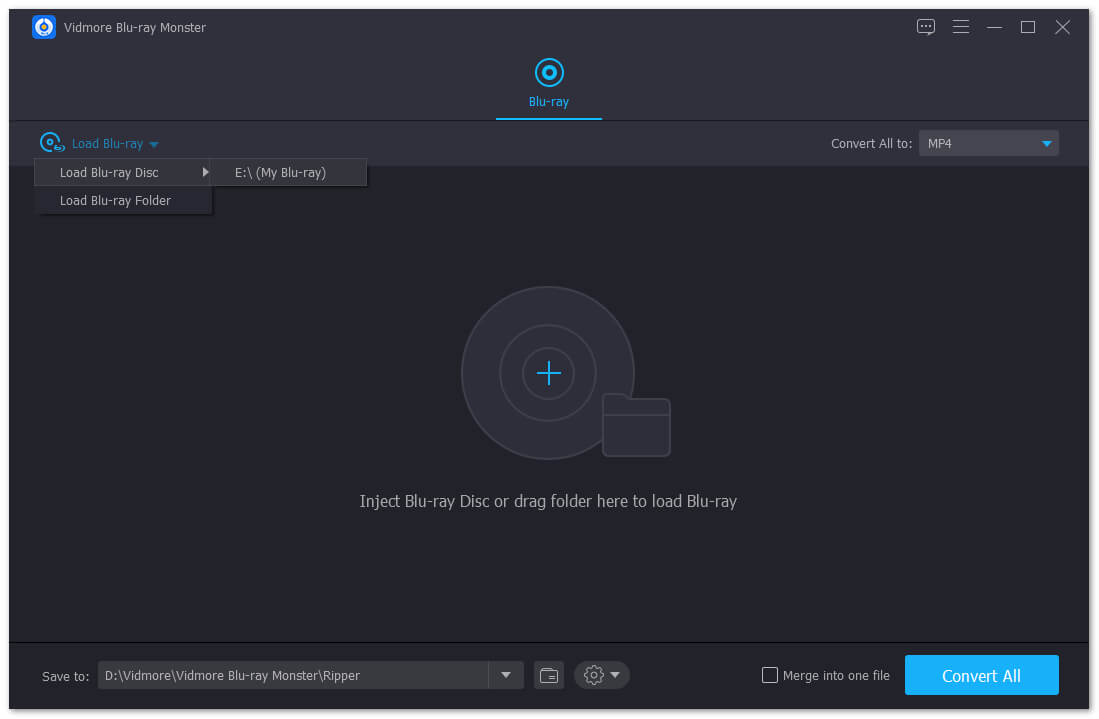
Step 2 Click the big plus icon in the middle, then the program will analyze your computer to find Blu-ray videos automatically. You also can click
“Load Blu-ray” on the top left corner to select the source of videos between
“Blu-ray Disc” and
“Blu-ray Folder”.
Note: If your videos are in disc, the software only will show you the main move. If you want to see other small videos, click the
“View/Select Title” to find your target video.
 Step 3
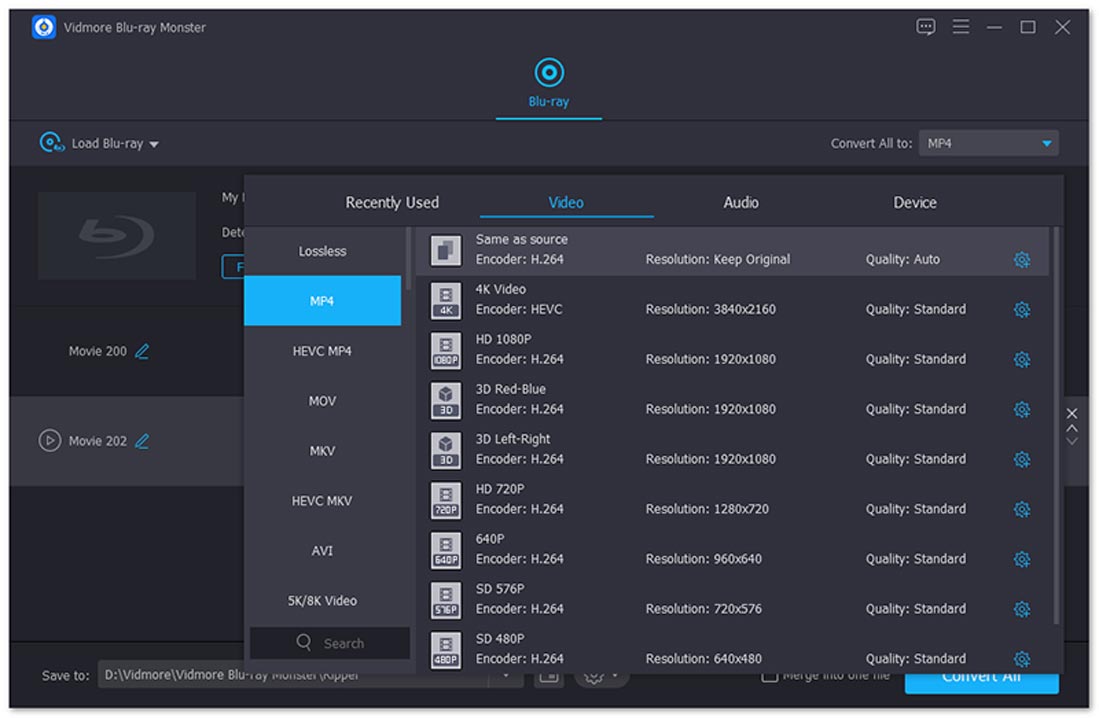
 Select your target format for all listed videos. If you want to convert videos to different formats, you can click the format icon on the right of each video bar and find the wanted format.
 Step 4
 Input the save path to the bar on the bottom left corner. Click
“Rip All” to convert videos. When it finished converting, it will pop up the folder automatically for you.
MKV Lossless
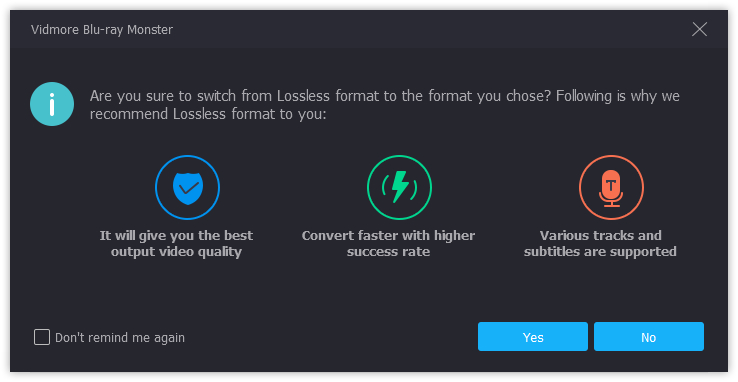
While you rip Blu-ray to other formats, MKV Lossless is the default output format. You can benefit a lot from choosing the default format.It will give you the best output video quality, and rip Blu-ray faster with higher success rate. Moreover, it will also keep all the subtitles and audio tracks of the original Blu-ray disc.
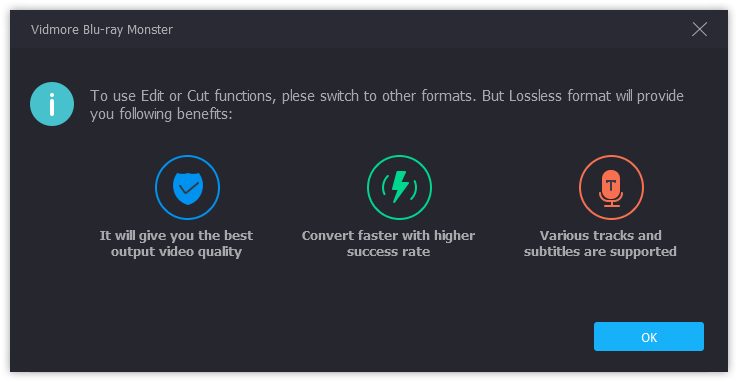
The only disadvantage of MKV Lossless format is you cannot apply the editing effects. For using the cutting and editing features of this program, you should change the default MKV Lossless into other digital formats like MP4, AVI, WMV, MPG, etc.
Profile Settings
When you rip Blu-ray into other digital formats on your computer, you could select the video or audio, even the device from the profile settings. Moreover, this Blu-ray ripping software also gives you more controls to customize the output profile settings. Select the edit icon next to the Blu-ray output format and you will start to customizing the output settings as you wish.
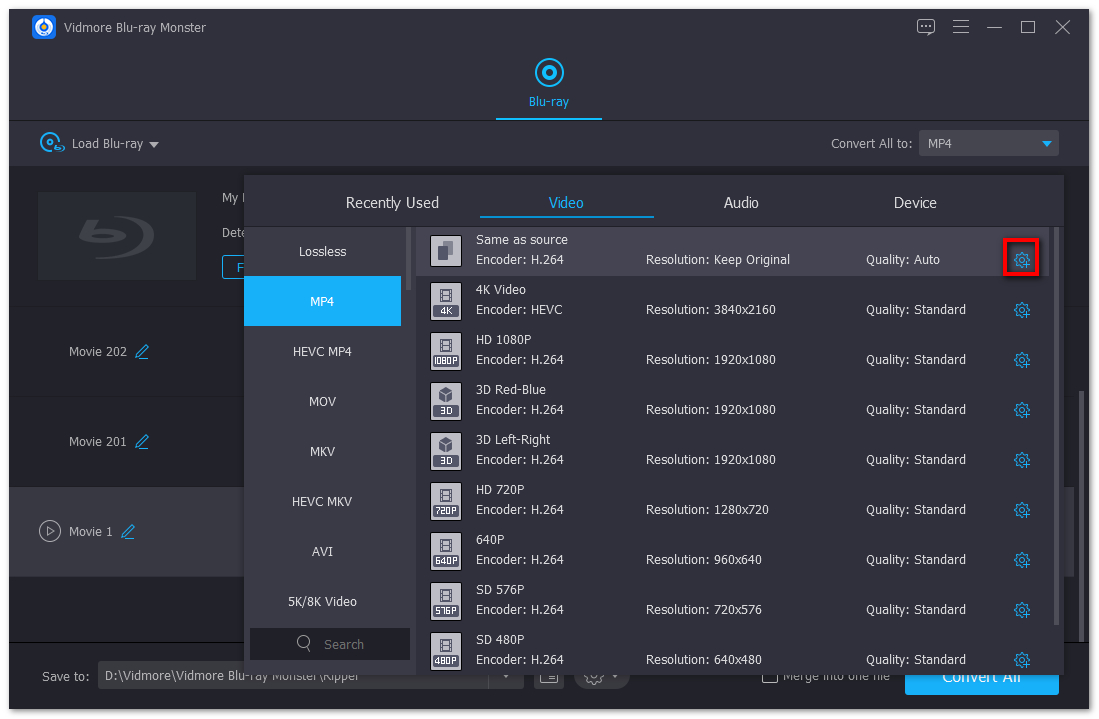
Video
Adjust the video quality, encoder, frame rate, resolution and bitrate from the drop-down list.Audio settings under the video file you could adjust the audio encoder, channel, sample rate and bitrate freely.
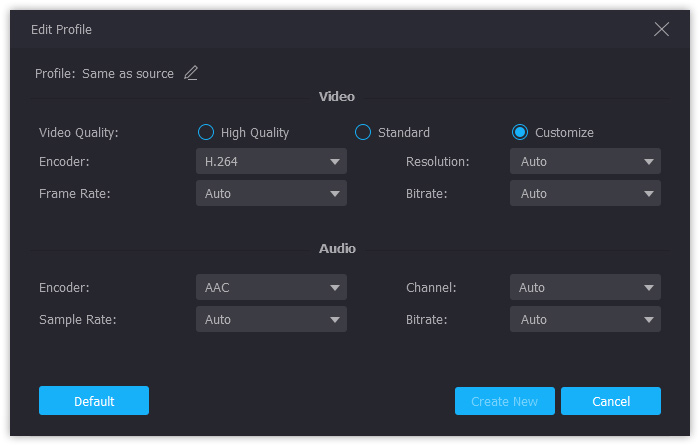
Audio
As for the audio output settings, you can adjust the audio quality, encoder, channel, sample rate and bitrate up to 320 kbps.
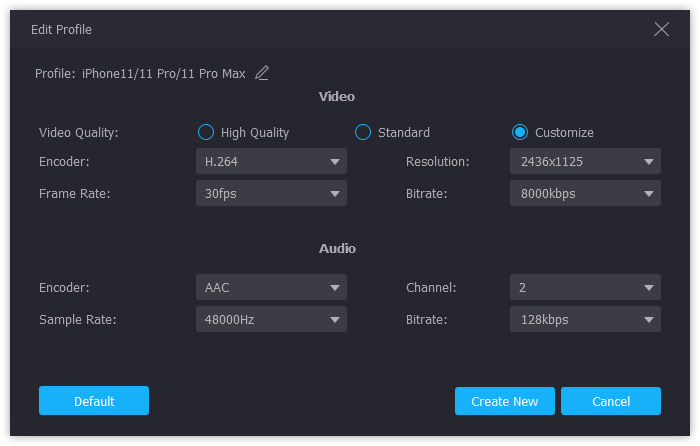
Device
For adjusting the device output settings, you should select the device and then click the edit button.Similar to video profile settings, you can adjust both video and audio separately based on the device output you selected.
Trim & Split
Step 1 After you add videos into the software, click the scissor icon beside the target format of conversion in the video list.
 Step 2
 In the following pop-up window, you can preview the video and set the start time and the end time of the segment you want.Or drag both side of the blue process bar to select the fragment you want.If you want clip another segment, click
“Add Segment” on the bottom of the left bar.
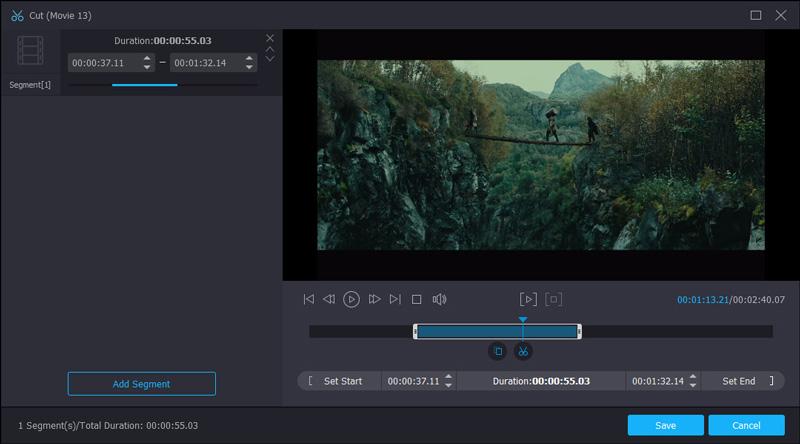 Step 3
 Click
“Save” and it will be shown in the video list in the main interface.
Effect & Filter
Step 1 Select a video and click the magic stick icon beside the scissor icon. You will see the editing window.
Step 2 Select
“Effect & Filter” option. You can see here are two parts on the bottom.The left part is the Basic Effect part. You can adjust contrast, saturation, brightness and hue of the video.On the right, you can select the wanted filter for you video. Here are over 20 kind filters for you.
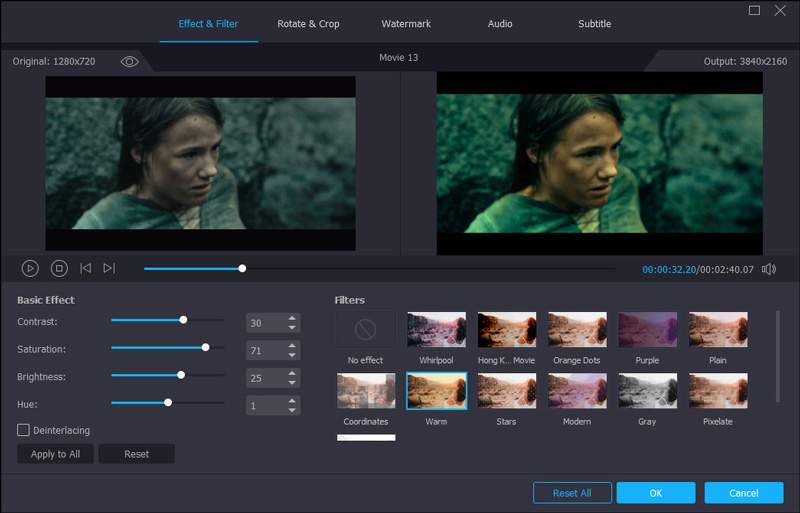 Step 3
 Click
“OK” to save your optimization.
Rotate & Crop
Step 1 Click Magic Stick >
“Rotate & Crop”.
Step 2 Here you can rotate the video vertically and horizontally, rotate 90 degrees or rotate 270 degrees. Click one of the buttons and check the result in the preview.
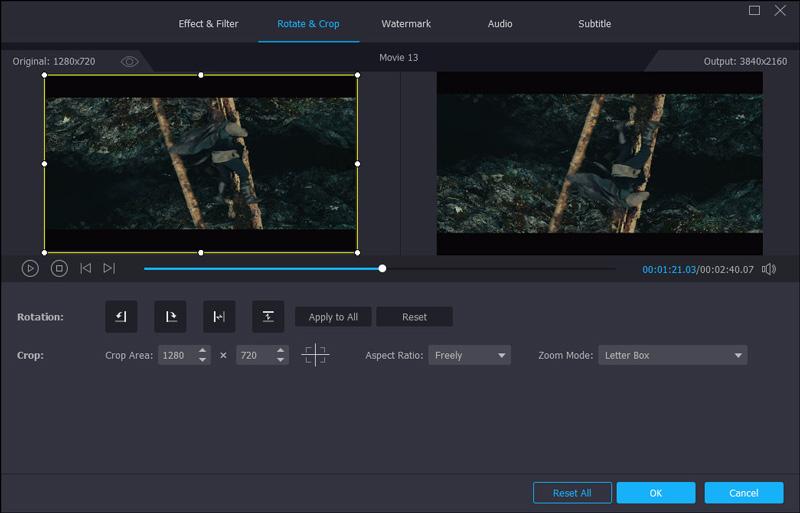 Step 3
 You also can crop the screen. Drag the white point on the yellow border to control the size and position of the rectangle in the preview window to define the desired frame area.And you also can input the size of the rectangle in the crop bar on the bottom and click the cross icon to centralize the rectangle.Besides, you also can adjust Aspect Ratio and Zoom Mode just on the right.In Zoom Mode, here are letter box, pan& scan and full for you.You can choose freely, 16:9, 4:3, 1:1 and 9:16 in Aspect Ratio.In Zoom Mode, here are letter box, pan& scan and full for you.
 Step 4
 After these, click
“OK” to save the optimization.
Watermark
Step 1 Choose a video file and click Magic Stick >
“Watermark”.
Step 2 First, you need to decide which kind of file you want to add, text or image.If you want to add text, tap
“Text”.Then you can choose the font, the size, bold, italics, underline and overline of your words. Besides, you can select the color and the writing system.On the next line, you can input the size and place of the text frame. Furthermore, you also can rotate the text frame and adjust its transparency.To add images into videos, you need to tap Image option.In this option, you can adjust the size and the position of the image, rotate it and adjust its transparency.
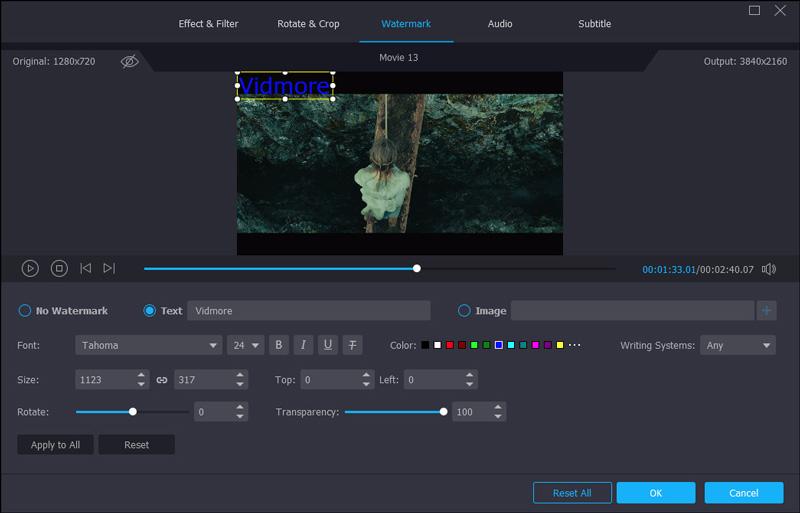 Step 3
 Click
“OK” to save the optimization.
Audio Track
Step 1 Select one and click Magic Stick >
“Audio”.
Step 2 In the half bottom, here are three options.Audio Track: Here are two Channels for you in it. EN-AC3-6Channel and EN-AC3-2 Channel. If you want to add audio track on your computer, click the plus icon to add it.Volume: Adjust the sound of the audio track.Delay: Set the start time for the audio track.
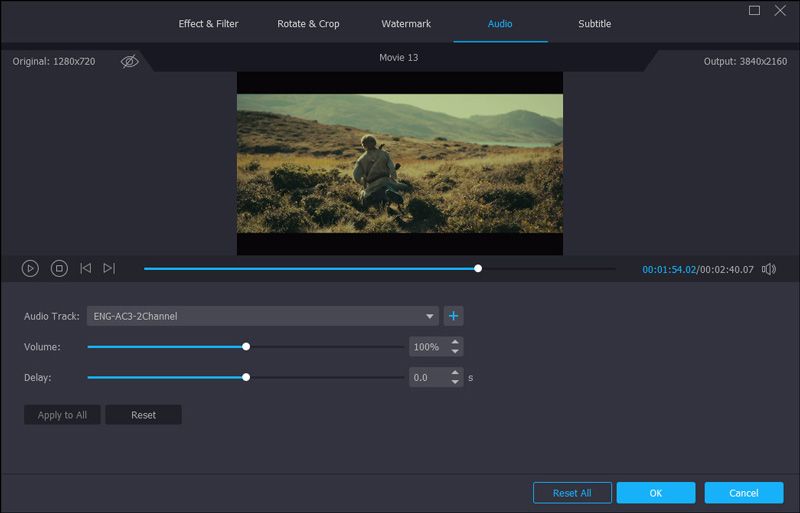 Step 3
 Click
“OK” to save your settings.
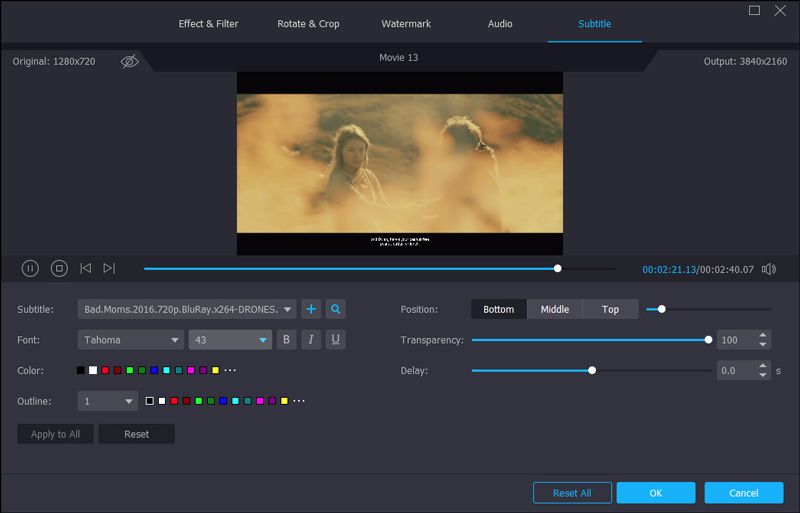
Subtitle
Step 1 Click the Magic Stick icon in the video bar you want. And choose
“Subtitle” option.
Step 2 As you see in the window, you need to click the blue plus icon to add a subtitle to it. If you do not have one, click the magnifying glass icon and the software will open the website about subtitles for you. Choose the one you want.Then you can make some adjustments about your subtitle.You can choose the font, the size, bold, italics, the underline, the color, the Outline and its color. On the right, you can adjust the position, the transparency and the start time.
Merge Titles
If you want to rip several videos and merge them together, you can tap
“Merge into one file” beside the
“Rip All” button.
