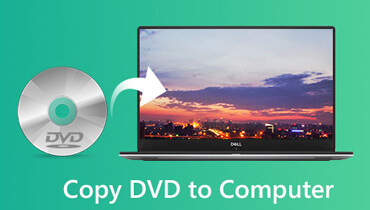
How to Copy DVDs to Hard Drive to Make Room and Playback Easily
DVD carries much of your memories, from your favorite movies to the burned collections of your life moments. However, there are always the needs that you want to copy the DVDs to hard drive on computer:
“There are tons of DVD discs in my room, and no space available for other stuff.”
“There is no DVD driver for my DVD playback on my Mac Pro Air.”
“How to play the DVDs on my iPad. I do not intend to carry the heavy DVD player.”
“I have kept the DVDs for years, and I found some of them get scratched. I do not want to lose them.”
…
At one time or another, you do need to copy the DVDs into the hard drive even the external hard drive for easy playback and make room.
Follow along with the instructions in this post to transfer DVD data into Windows and Mac computer.


Why Does It Fail to Copy DVDs into hard drive on computer?
For copying the homemade and burned DVDs, you could copy the DVDs into computer directly by copying and pasting the files. The copied folder can be playback on Windows Media player, VLC media player, etc., without problem.
However, for the commercial DVDs copy, you cannot copy simply. Almost all DVD movies you purchased are encrypted with CSS protection. For copy those DVDs, you will need the third-party software to rip DVDs with removing the encryption.
The following 3 methods focus on the protected DVD copy.
Copy Full/Selected DVD Titles to Hard Drive on Windows
The first way to get DVDs files into hard drive is using Vidmore DVD Monster.
Vidmore DVD Monster is the best software to backup DVD to hard drive in optional 3 modes for Windows 10/8/7 users. It can convert DVD discs to MP4, MKV, AVI, MOV, WMV, etc., and extract MP3, FLAC and more from DVDs at 6x fast ripping speed and 100% original quality.
- Rip DVD to MP4, MKV, AVI, MOV, MP3, FLAC, etc., for portable playback.
- Copy 1:1 DVD disc to folder or ISO file on Windows without data loss.
- GPU acceleration speeds up the DVD & Blu-ray ripping at 6 times.
- Various editing features (filter, rotate, flip, watermark, subtitle, audio track, etc.)
Step 1. Download Vidmore DVD Monster
Free download this DVD copy software into your computer. Run it after following the on-screen instructions to install it. In the main interface, you should click the “Ripper” tab.
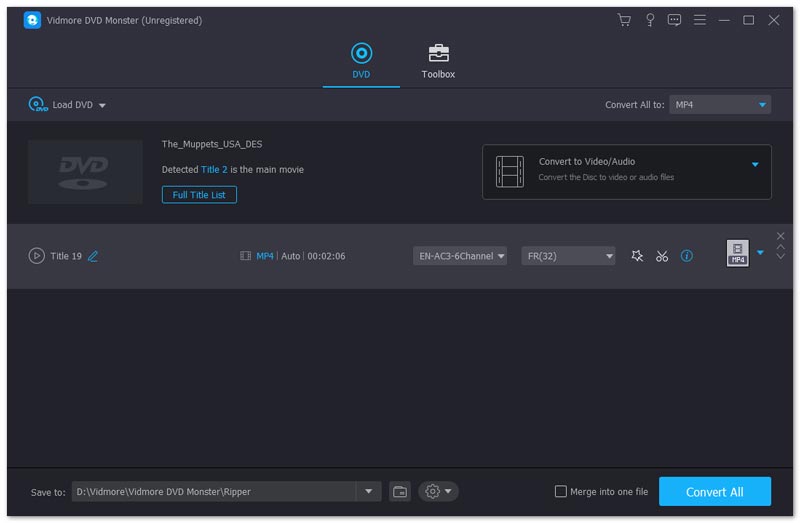
Do not forget to insert the DVD disc into your computer. If your computer does not have the built-in DVD driver, just insert an external DVD driver.
Step 2. Load DVD disc
Here there are 2 ways to load your DVD disc.
- Click the plus button in the middle and then wait seconds, this DVD ripper will detect your DVD disc automatically.
- Select “Load DVD Disc” from the drop-down list of “Load DVD” to select your DVD disc name.
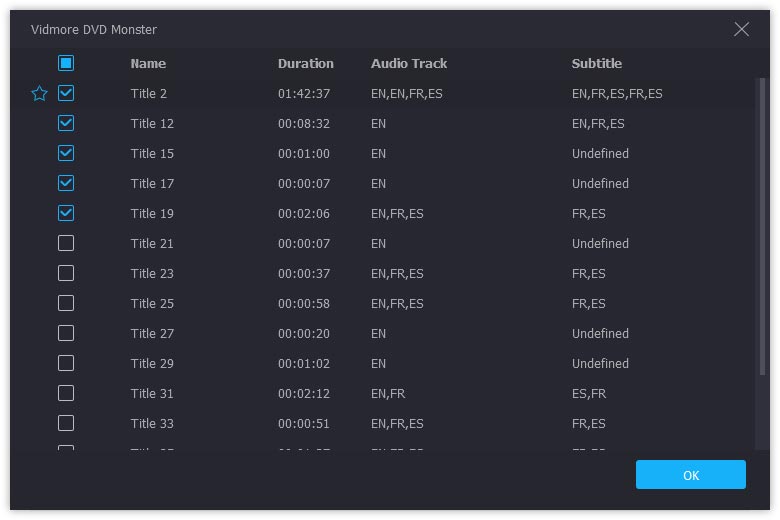
Then this software will detect your main movie title and select it automatically.
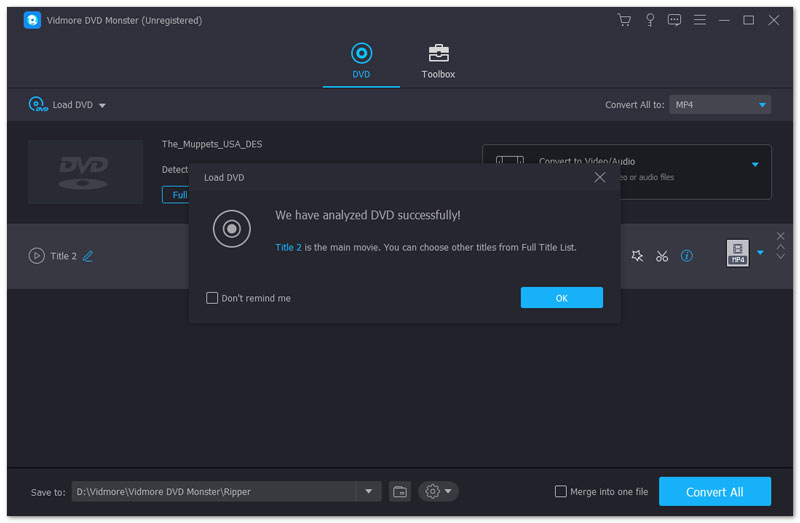
You can also select or view other titles from the DVD disc by clicking “View/Select Title”.
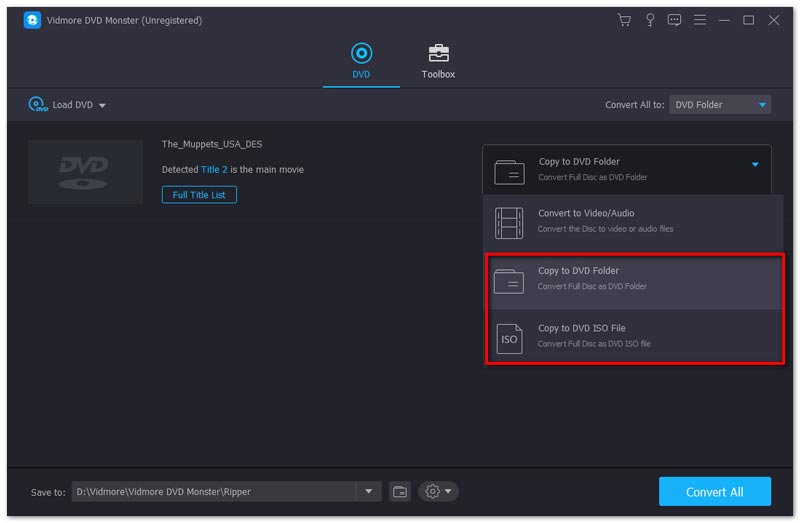
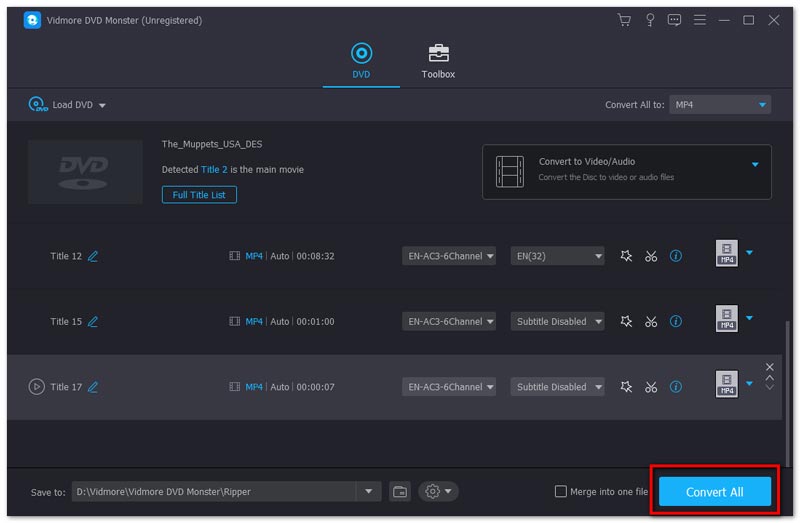
Step 3. Copy DVD disc
1. For backing up the DVD in 1:1 to store on your computer for further burning, you should transfer DVD as the DVD folder or ISO file on computer.
Just select the copying mode as “DVD Folder Ripper” or “ISO File Ripper” from the drop-down options on the right side.
2. For copying DVD to the hard drive for easy playback on your computer or other devices like iPad, Samsung phone, etc., you should rip DVD to other popular formats.
Select “Custom Format Ripper” from the drop-down options on the right side.
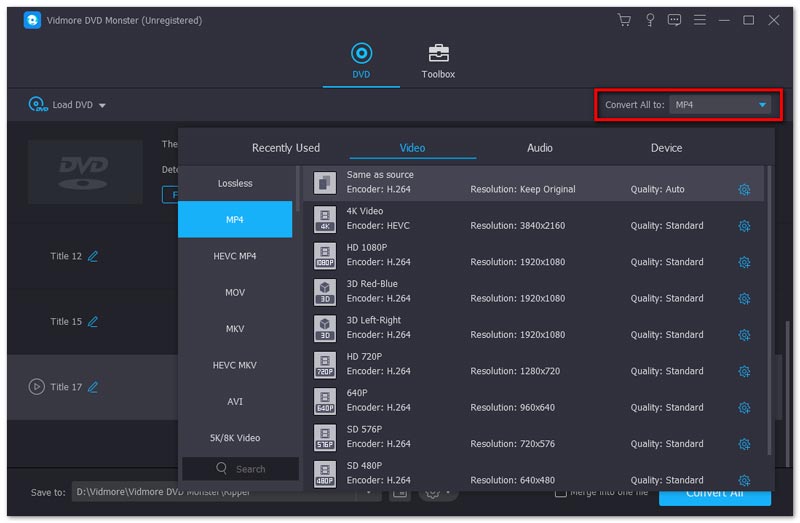
Then select the output format for every title separately from the drop-down list.
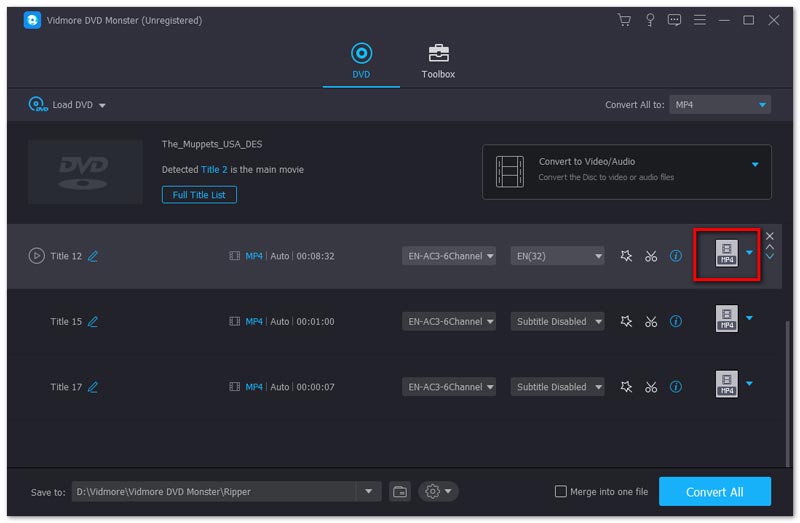
You can set the one format from MPG Lossless, MP4, MOV, MKV, AVI, WMV, WebM, M4V, FLV, TS, VOB, etc., for all titles you selected by clicking the drop-down list of “Rip All to:”.
For saving DVD with the original audio track and subtitle options, you should select MPG Lossless.
Then select the output file destination on your computer and click “Rip” on the bottom-right corner to start to copying to your hard drive.
If you want to copy the DVD files into the external hard drive, just insert the external hard drive into your computer and select it as the destination.
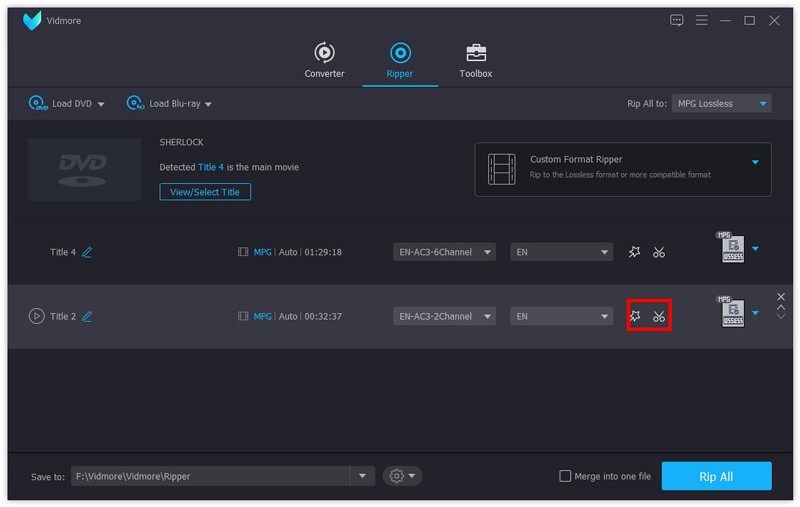
Step 4. Edit DVD movies before copying (Rip DVD option)
If you want to rip DVD to other video formats, the editing features in this software are available for you.
Click the Edit icon (the start image) and or the Cut icon (the scissors image) then you can start to edit your DVD videos.
Note: When you want to apply the editing effects, you cannot rip DVD to MPG Lossless format and you have to change to other formats.
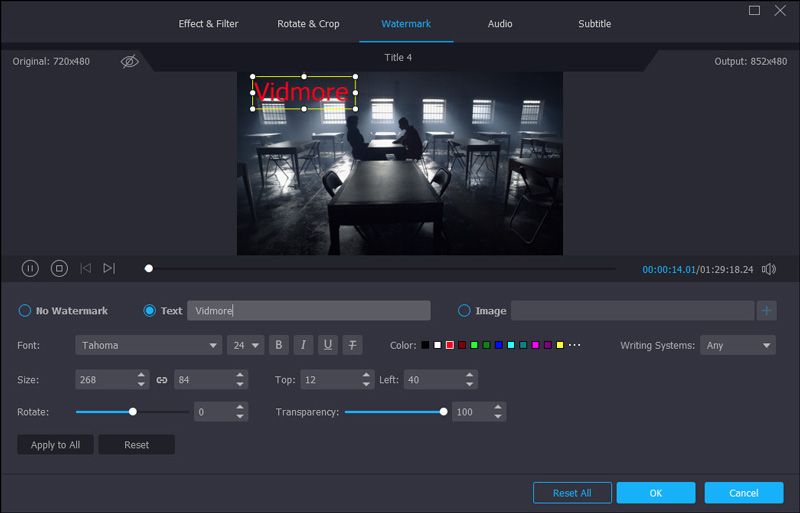
In the editing window, you can add filters, rotate, clip, crop, watermark, change audio track and subtitles, etc.
After that, you could also transfer the copied DVD folder, ISO file or the digital videos into your external hard drive for storing or easy playback.
Rip DVD Discs to MP4 on Hard Drive on Mac
When it comes to Mac users, the DVD backup software is various from App Store on Mac. Here we take 4Video DVD Manager(https://apps.apple.com/us/app/4video-dvd-manager-rip-dvd/id923932086?mt=12) as the example to show you how to store the DVD files into the hard drive.
4Video DVD Manager is the all-in-one DVD ripping software on Mac.
It can convert DVD movies into the popular digital formats like MOV, MP4, M4V, AVI, etc., with powerful editing features, even the 3D movies can be ripped from the DVD disc.
What benefits you can get from the Mac DVD ripper?
- Rip DVD to MOV, MKV, AVI, WMV, M4V, MKV, etc., for smooth playback without the DVD player.
- Extract audio files like MP3, WAV, WMV, FLAC, AAC, AIFF, ALAC, etc., from DVD movies.
- Convert 3D DVD movies to 3D digital formats on macOS.
- Edit DVD before ripping like clip, rotate, watermark, flip, crop, adjust the effects, etc.
- Hardware acceleration improves the DVD ripping speed at 6X faster than ever.
- Multi-audio tracks and subtitles are optional for you to edit in the DVD disc.
Now, let’s check how to rip DVD into the hard drive on Mac.
Step 1. Run 4Video DVD Manager on Mac
Search the DVD backup software on App Store on Mac, and download it(https://apps.apple.com/us/app/4video-dvd-manager-rip-dvd/id923932086?mt=12) from App Store on Mac.
Run it after the successful installation.
Insert a DVD disc into your Mac computer.
No DVD driver on Mac? Just plug an external DVD driver into Mac and put the DVD disc into it.
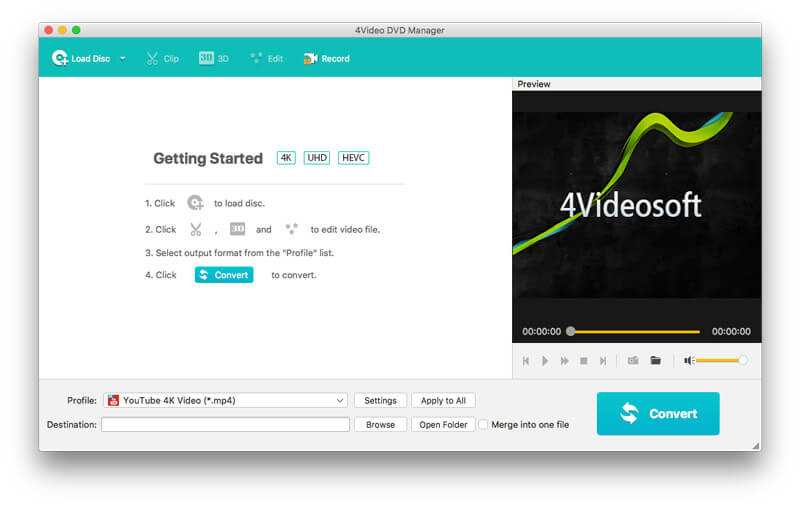
Step 2. Load DVD disc
While running this software, click “Load Disc” to import the DVD folder into this software.
Please note that you should load the DVD disc from the root directory, not the folder, if you insert the DVD disc.
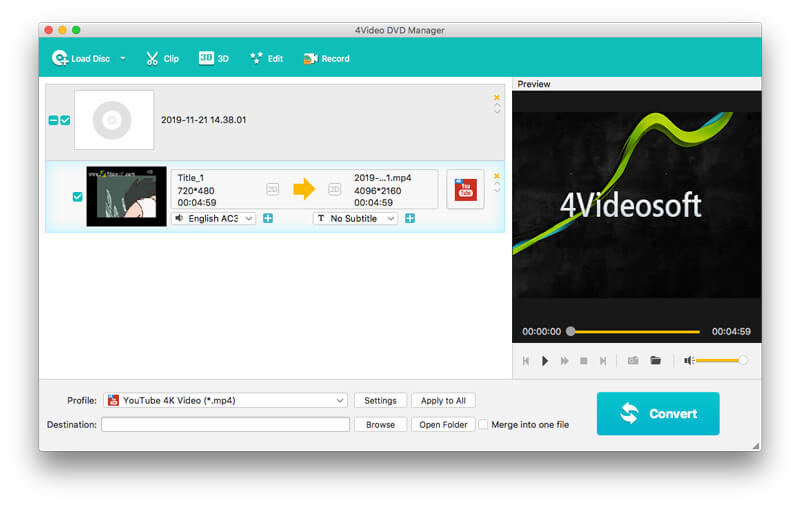
Step 3. Select output format
After loading the disc, all the title will be displayed on Mac.
Select one title, and select the output format from the drop-down list of “Profile”, where MOV, MP4, MKV, WMV, AVI, M4V, FLV, SWF, WebM, etc., are available for you.

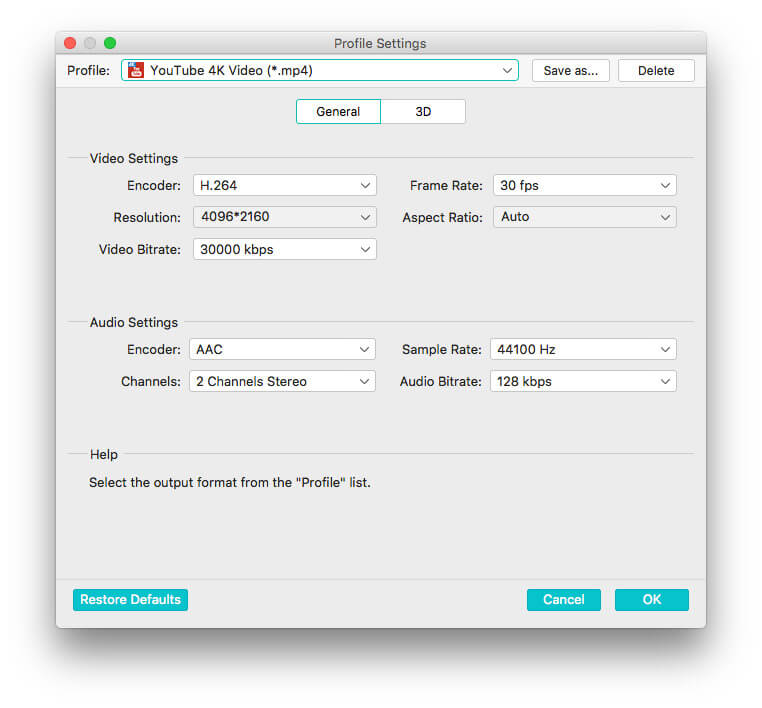
Moreover, you can custom the output settings by clicking “Settings” next to the output format, where you can adjust the video frame rate, codec, bitrate, audio volume, etc.
Click “OK” to return to the main interface of this software.
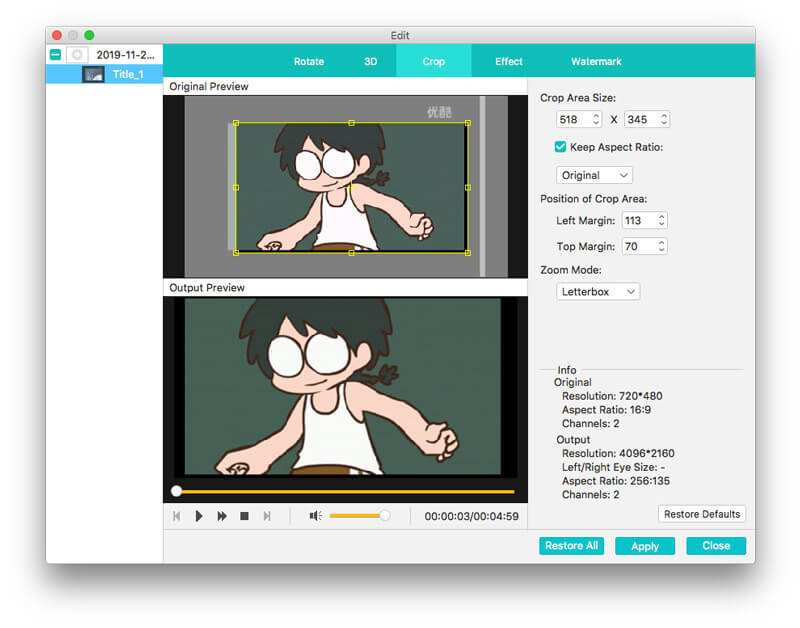
Step 4. Edit DVD movies (Optional)
You can also edit the DVD movies before converting. Just click the “Edit” button and you will start to rotate, crop, clip, and watermark the DVD effects.
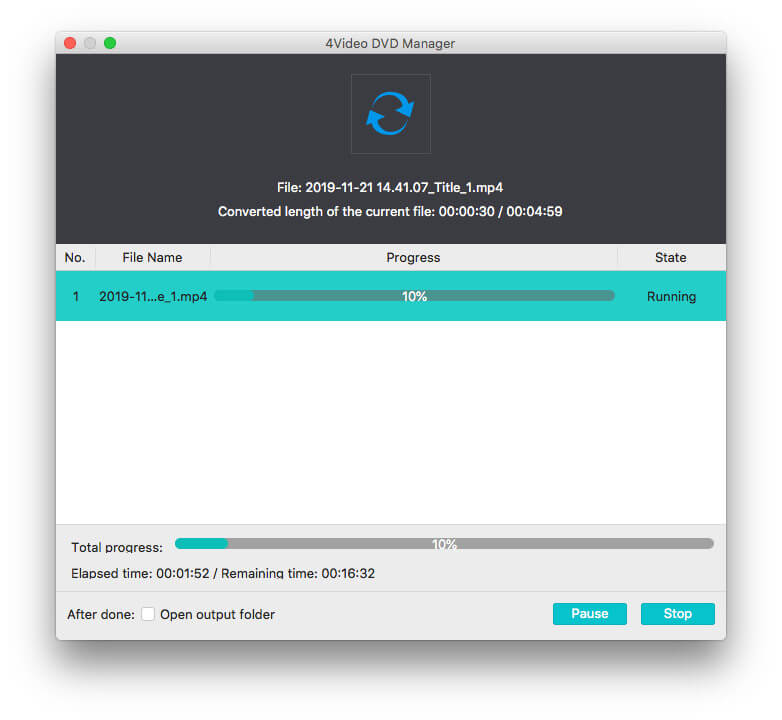
After that, come back to the main interface of this program, and click “Convert” to rip DVD into your hard drive on Mac, and you can also put the DVD movies into the external hard drive for smooth playback.
Apart from the above DVD transfer software, you could also find VLC, HandBrake, etc., which can rip and convert the unprotected DVDs into the hard drive.
Conclusion
Whether you purchase the DVD discs, or get the burned DVDs with the Panasonic or Hitachi DVD recorder, it will not wise to put the massive DVDs in your room or play them by carrying a heavy DVD player. This post shares 2 ways to copy DVDs into internal and external hard drive on Windows and Mac with the DVD ripper software.
Do you have any question in saving DVD to hard drive?
Let me know by leaving your comments.