Complete Guidelines on How to Do Color Correction in Premiere Pro
It is normal to have flaws for humans, so what more with our work, such as in our video recording? However, as we have a way to fix our flaws, there are also tools that can fix our videos as well. One of the most alterations that video editors make nowadays is correcting their videos' hues. Because, even after the intense recording planning, there will still be something that will ruin your best shot. And this will result in a non-radiant display you least expected. For this reason, everyone seeks the right partner in video editing, and one of the most sought-after is Premiere Pro. This is the main reason why we provide you with this post, for we will teach you how to color correction in Premiere Pro. Thus, by reading the content below, let’s get started with learning intention.

PAGE CONTENT
Part 1. How to Color Correct a Video on Premiere Pro
Adobe Premiere Pro is a multi-platform desktop software for video editing. Furthermore, there may be some scoops saying that it is not a legitimate tool for amateurs, but it cannot deny the fact of how robust it is. With regard to our topic, there’s also a claim that Adobe Premiere has automatic color correction technology, and its Lumetri color panel can attest to that. However, this said tool will still require your adjusting technique to attain a perfectly edited video. On the other hand, this good tool also lets you experience a good color grading functionality with basic and advanced features to utilize. Anyways, here are the steps that you can apply on applying color correction using Premiere Pro.
Step 1: Launch Adobe Premiere Pro on your PC, and begin to import a video file. To do so, go to the File menu, then Import file. Then, after the video is uploaded, drag it and place it in the Timeline.
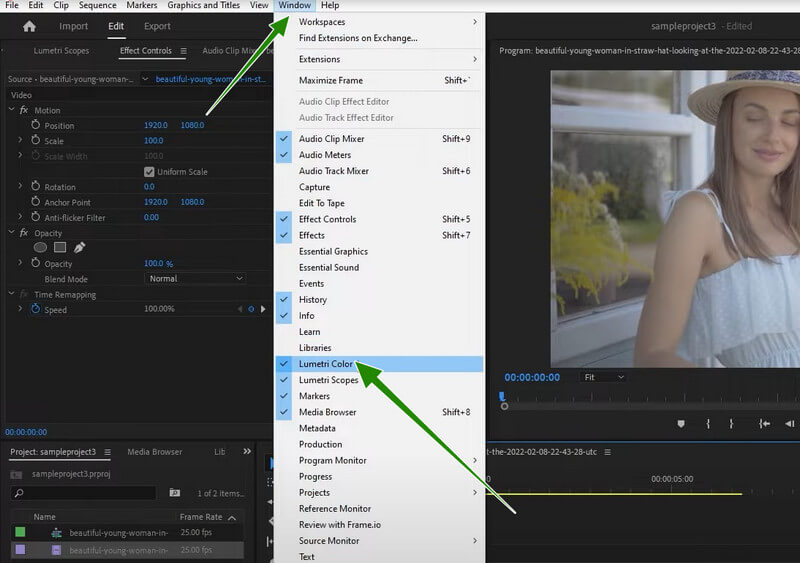
Step 2: Next to this Premiere Pro color correction tutorial is accessing the Lumetri Color feature, which you will see when you hit the Windows tab. Once hit, a new small window will appear.
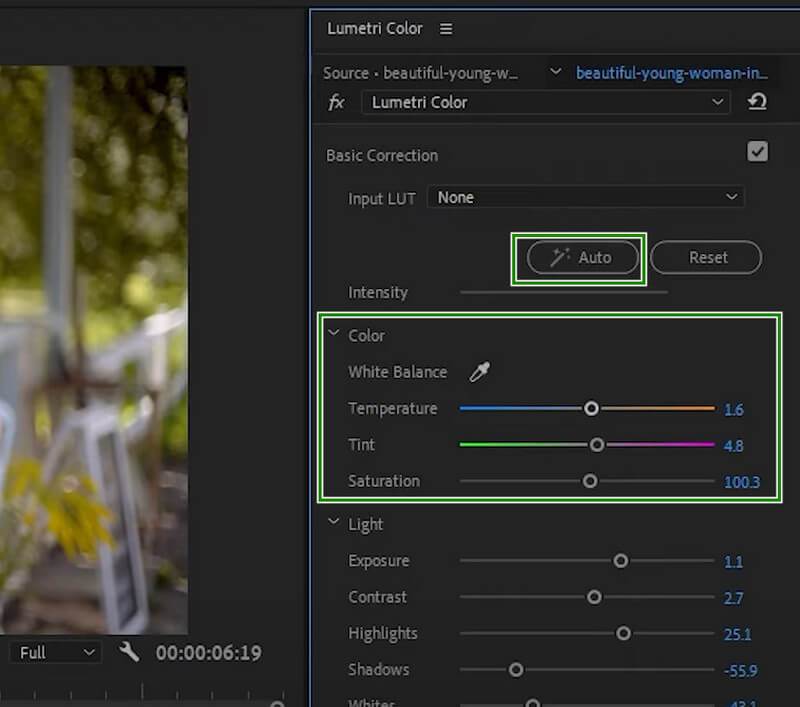
Step 3: Now once you access the Lumetri Color panel, you may hit the Auto button. Then, under the said button, adjust the sliding options that will help you intensify your video more. Once okay, you can already save the video.
Part 2. How to Apply Color Correction to Multiple Clips on Premiere
You may find yourself wanting to edit multiple videos in Premiere Pro. In this case, you may rely on the tutorial below regarding how to apply color correction to multiple clips on Premiere.
Step 1: On the main interface of Premiere, upload all the clips that you need to color correct. Then, drag and drop them all into the Timeline below. Now click on a video, then adjust its color correction using the Lumetri.
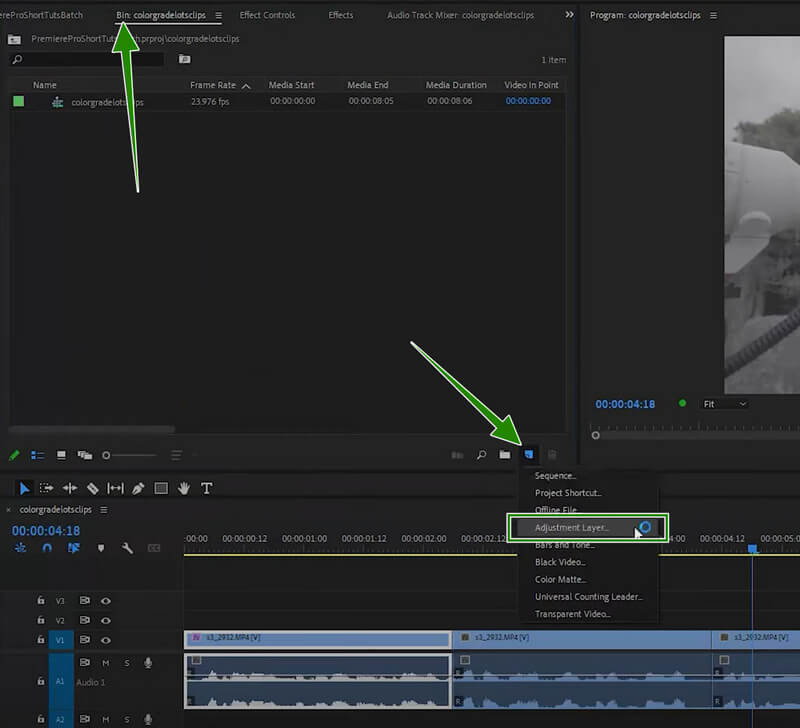
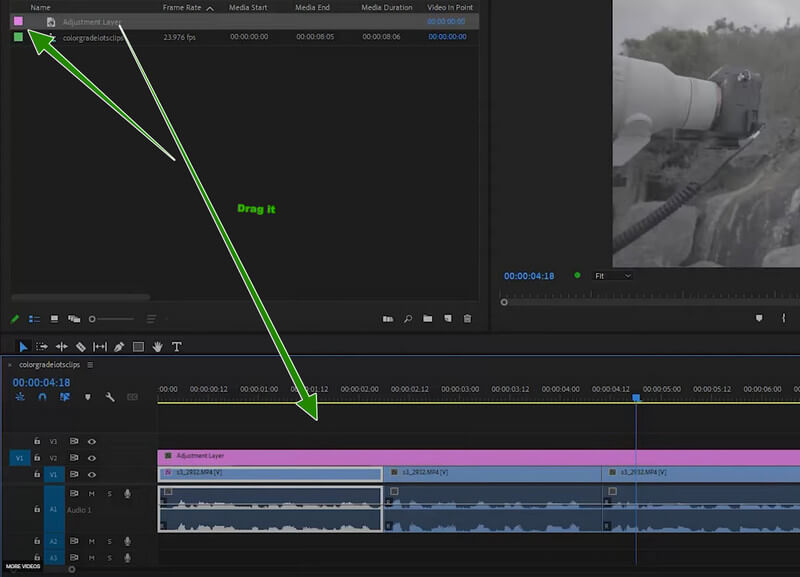
Step 2: After that, go and click the New Item button, then click the Adjustment Layer option. Then, from the popped-up window, adjust the options according to your preferences, then hit the OK tab.
Step 3: Consequently, drag the added setting onto the Timeline and adjust it until it covers all the clips there. Then, check all the clips, as they all have the same setting you have made with the basic color correction of Premiere. After that, proceed to save the videos.
Part 3. A Much Easier Way to Correct Video Color
As mentioned previously, Premiere Pro best fits professionals. With this being said, many of you, especially those who have yet to experience video editing, might feel frustrated by using it. We are glad to present you with the Vidmore Video Converter. It is an all-in-one video editor that comes with an exciting and robust color-corrector tool that is added to its extensive Toolbox. With this, you can adjust your videos’ saturation, contrast, brightness, and hue.
In addition, you will be attracted and, simultaneously, amazed at how flexible it is in providing great tools for any video editing task you need to fulfill. Imagine being the most sought-after video converter in town, and it is also the most used movie maker, collage maker, and video enhancer.
Key Features
◆ With advanced hardware acceleration technology that accelerates the tool.
◆ An incredible array of features and tools to make the video files better.
◆ It can edit and enhance bulk videos simultaneously and quickly.
◆ Output video optimization.
How to Do Color Correction in Premiere’s Alternative
Step 1: Launch the software and decide whether you will work on a batch or just a single file. For a single file, go to Toolbox > ColorCorrector. For the bulk files, just hit the Add Files tab upon arriving at the interface and upload as many files as you want.
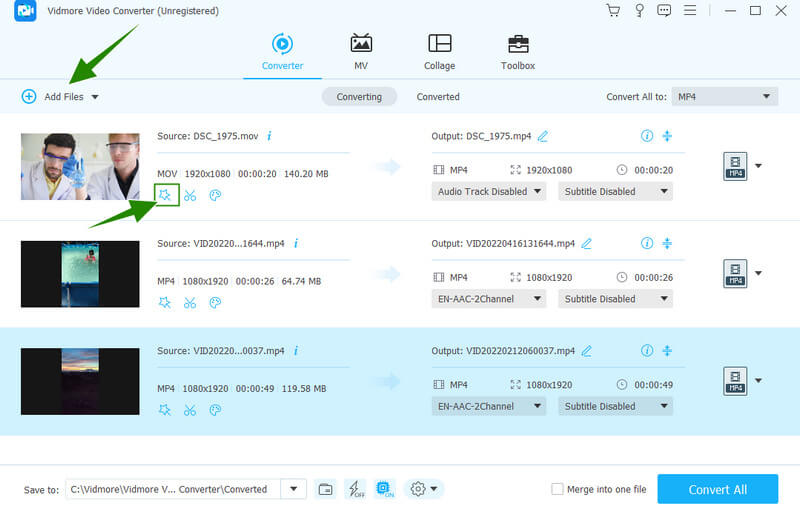
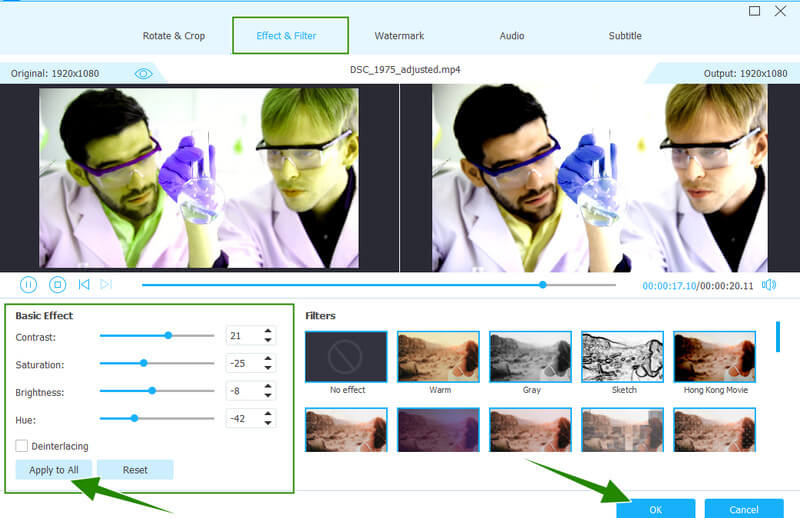
Step 2: Now hit the Star symbol under the uploaded video to access the Effect & Filter option that has the settings for color correction. Once accessed, go and adjust the Hue, Brightness, Saturation, and Contrast to meet the most embellishing color for your videos. Then, hit the Apply to All button, followed by the OK tab.
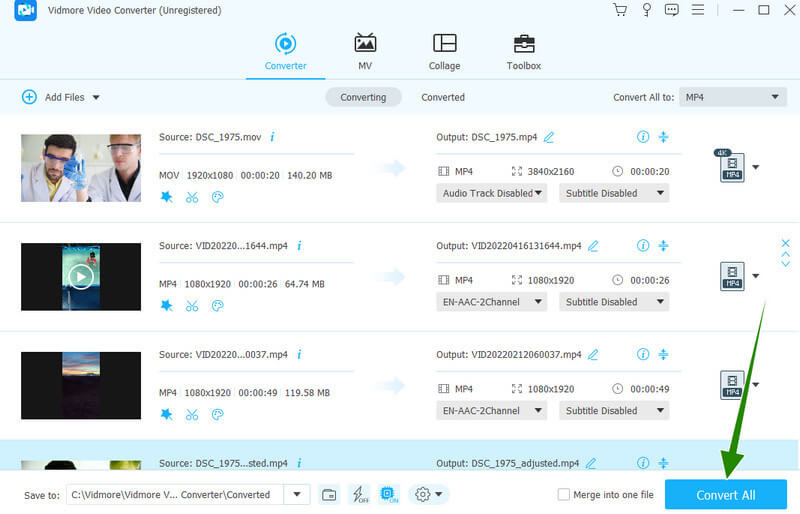
Step 3: After that, inspect the output by looking at output details such as the format. If they don’t have your preferred format, hit the Arrow drop-down at the tail part of the file. Then, choose among the hundreds of video formats you want to apply.
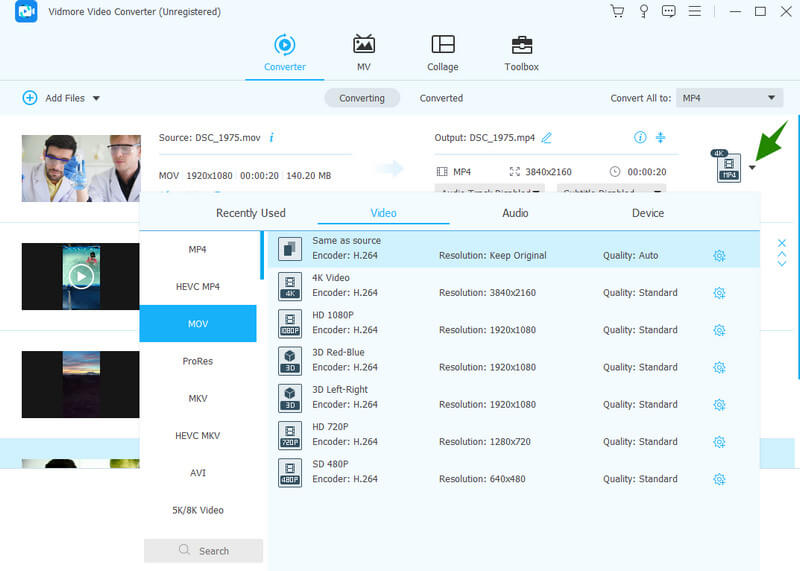
Step 4: Finally, hit the Convert All button to save and export the files simultaneously.
Part 4. FAQs about Correcting Colors on Video with Premiere Pro
Is doing the Premiere Pro color correction tutorial free?
Acquiring Adobe Premiere Pro will enable you to use its free trial edition for seven days. So, technically, you can do this tutorial for free.
Does color correcting in Premiere maintain the quality of the video?
Yes. However, there are times when correcting the color with Premiere can ruin the quality due to over-correcting.
Which is better for correcting colors, Premiere Pro or After Effects?
After Effects and Premiere Pro have the exact technicalities and procedures for color-correcting videos, and if you are a beginner, Vidmore Video Converter is much better to use.
Conclusion
You have witnessed the correct procedure for using the color correction of Premiere Pro. It is indeed an excellent tool, for it has all the fantastic tools a video editor needs. However, suppose you are after a tool’s simplicity, intuitiveness, and price. In that case, the Vidmore Video Converter has better options.