Adobe Premiere Slow Motion Tutorial: Step-by-step Process
However, you must edit the slow-motion video with Adobe Premiere to achieve its full aesthetic potential. It is one of the most excellent mainstream video editors, and as such, it comes with features that are used professionally in video editing. However, the user interface is notoriously difficult to navigate for beginners, and understanding concepts like frame rate can be a real challenge. This blog will look at how to add a slow-motion video in Adobe Premiere Pro. It also works if you want to make a slow-motion effect. Look into it if you can. In case you have trouble learning the ropes of Adobe Premiere Pro, we have located an alternative, more user-friendly program that can help you slow down a movie. Look up the relevant section.
PAGE CONTENT
Part 1. How to Create a Slow Motion Video in Premiere
Premiere provides three different options when you want to slow down a video. Depending on the situation, they modify the play speed, change the frame rate, or change the keyframes.
1. Change the Play Speed in Premiere Pro to Slow Down a Video
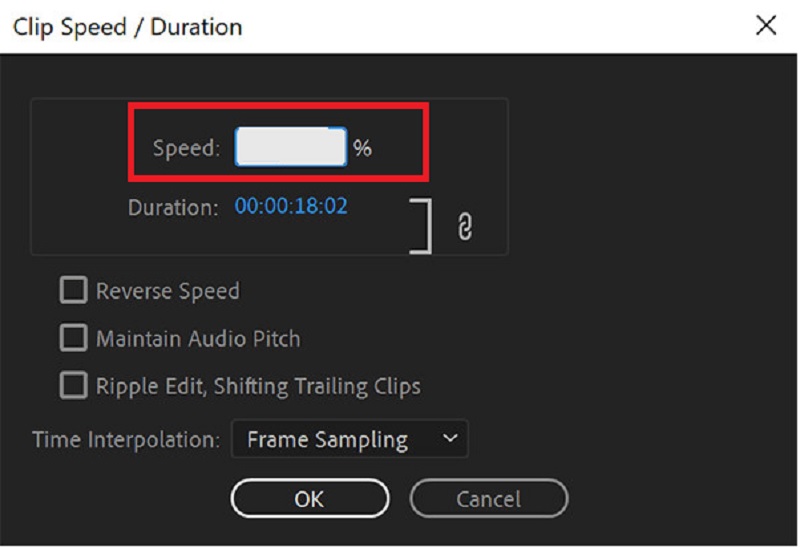
To modify the speed of a video in Premiere and so slow it down, you will need to locate the Speed/Duration option.
Step 1: To add a video to the Timeline, drag the file from your computer into the program.
Step 2: Select the Speed/Duration menu item from the context menu after right-clicking the videos.
Step 3: If you want to use Adobe Premiere to create slow-motion videos, the new window that appears gives you the option to customize the playback speed to meet your requirements. You may also view how much time has been added or subtracted.
2. Change the Frame Rate to Slow Down a Video in Premiere Pro
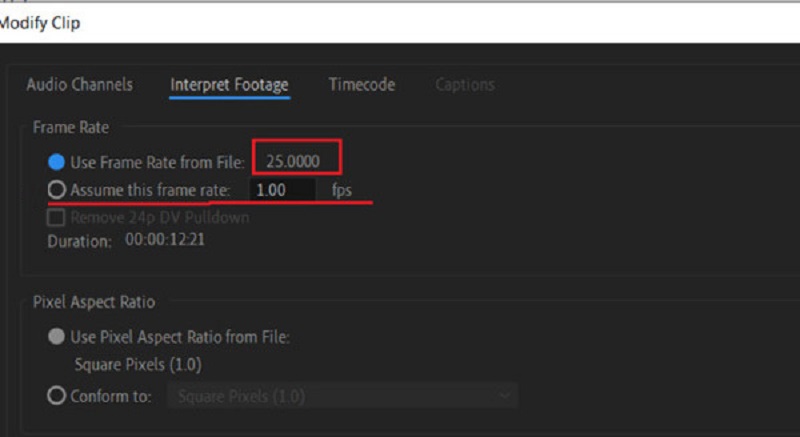
Eliminating specific frames from a video is required when adjusting the frame rate of a video to slow it down. However, the quality of the video will remain the same, so there is no need to be concerned about that. This tutorial will demonstrate how to slow down the playback of a movie in Premiere Pro by adjusting the frame rate.
Step 1: Once files have been imported into Adobe Premiere, you may begin dropping video clips into the timeline.
Step 2: After right-clicking on the clips, choose the Modify option from the context menu.
Step 3: Select the Interface Footage option, click the Assume this frame rate button, and input the appropriate value for your desired parameter. You will need to input a lower number to apply the slow-motion effect while using Adobe Premiere Pro.
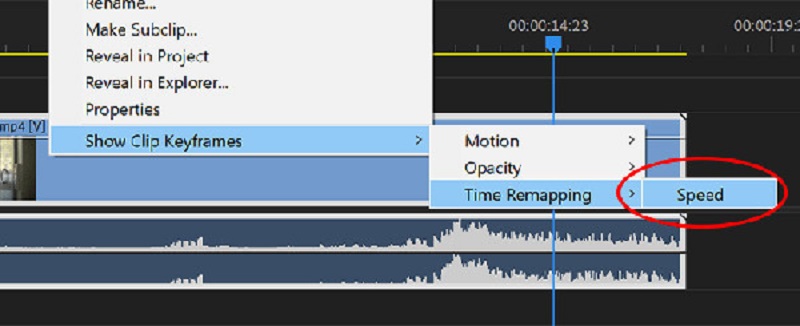
3. Change the Remapping Tool to Slow Down a Video in Premiere Pro
The remapping tool is one of the most innovative tools for producing slow-motion effects. It allows you to choose a particular video portion and then slow down that portion.
Step 1: The remapping tool is one of the most innovative tools for producing slow-motion effects. It allows you to choose a specific video portion and then slow down that portion.
Step 2: Then, you should click the option labeled Speed. Following that, you will see a new clip with a white line placed below the previous one in the sequence.
Step 3: To accelerate or decelerate the playback of movies inside Adobe Premiere, drag the lineup or down.
Part 2. Best Alternative If You Find Adobe Premiere Challenging
You may want to give Vidmore Video Converter a go if you find Adobe Premiere challenging to work with. Even after learning all of the techniques involved in creating slow-motion films using Adobe Premiere, it may be pretty challenging to get the desired results. You can also have trouble maintaining the high quality and smoothness of the original.
Now that you have this information, you can rely on Vidmore Video Converter to help you make stunning slow-motion films. You can flexibly alter the playback pace while maintaining excellent quality with only a few clicks. Plus, Vidmore guarantees that there will be no degradation in video quality. In addition, it gives you access to a wide variety of straightforward editing tools that improve the quality of your work, such as the ability to cut, merge, and trim.
Step 1: If you're using Windows or a Mac, look for an item in the menu that says Free Download, and choose that. You must set up the launcher and permit it to operate on your device to proceed.
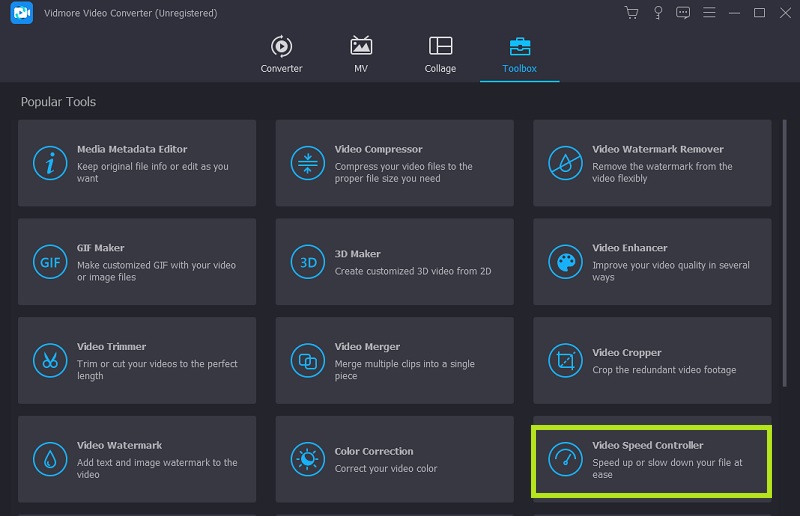
This top-notch replacement for Adobe Premiere is a no-cost program that can be installed on your computer. A video may be sped up or slowed down as desired. You may use the Video Speed Controller when it's open by clicking the Toolbox button. You may add a video to the new window by clicking the Plus button in the center of the window.
Step 2: There are now eleven speeds available for modifying a video's playback. A movie may be played back at your discretion in slow motion.
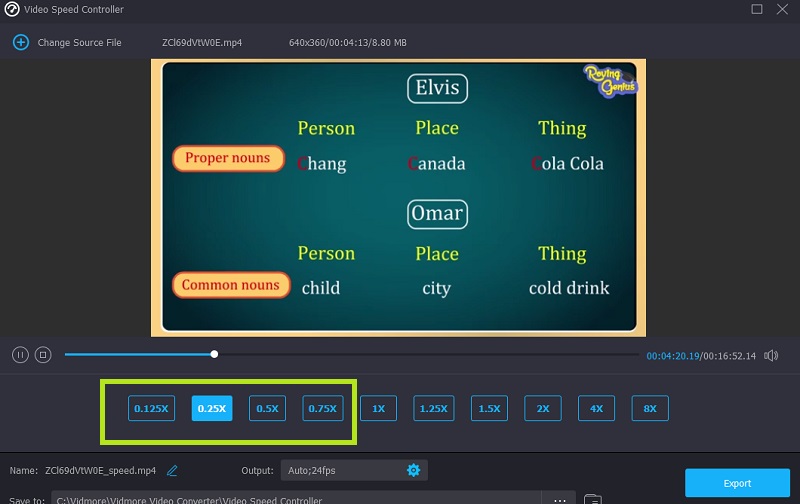
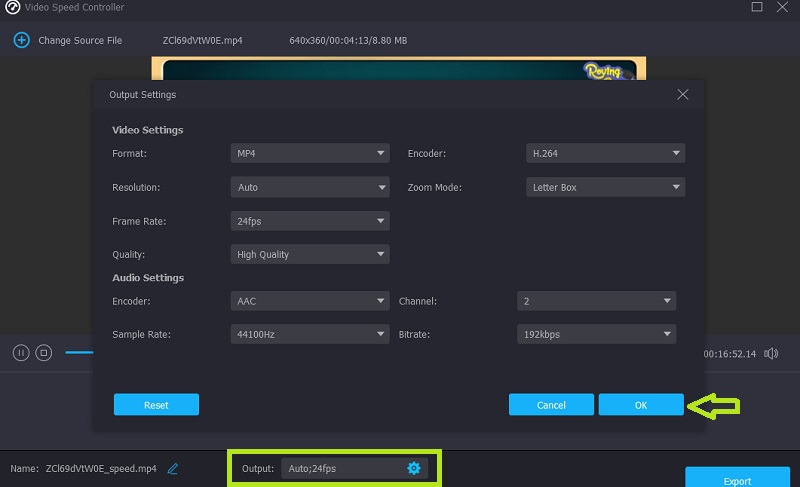
This speed controller comes with an integrated media player, which enables you to quickly evaluate the results of your modifications to the playback speed and allows you to make finer-grained adjustments. After you have obtained the frame rate that you want, go to the Output menu to choose the video format that is most suitable for your requirements. Once you have confirmed that you are pleased with the results and made any required edits, you can then hit the OK option.
Step 3: You should click the Export button when ready to export.
Part 3. FAQs on How to Add a Slow Motion in Adobe Premiere
Will applying slow-motion features in Adobe Premiere result in a loss of quality?
Yes. Using Adobe Premiere to create slow-motion effects will almost certainly result in a reduction of the frame rate, which will harm both the quality and smoothness of the movie.
What occurs when a clip is extended in Premiere Pro?
It is impossible to overwrite an adjacent clip in a sequence if you want to prolong a clip in the series by decreasing its playback speed. Instead, the clip grows until it is flush with the border of the clip that is next to it. After that, Adobe Premiere Pro will shove any leftover frames toward the end of the stretched-out clip.
What does Adobe Premiere's Optical Flow do?
The Optical Flow function of Adobe Premiere allows for more seamless transitions between speeds and improved time-remapping and frame-rate conversion.
Conclusions
This article has presented three different approaches, each with its own step-by-step instructions on how to make a slow-motion video in Adobe Premiere Pro. However, it is still challenging for novices to get the finest possible impact. Downloading the user-friendly program Vidmore Video Converter for free is your best choice if you want to slow down videos while maintaining their quality successfully.