Remove the Logo in Premiere Pro in 3 Distinct Methods
The majority of the time, when we download videos from the internet, a watermark is automatically added to the video file. It is how other people demonstrate ownership of their photographs or movies in most cases. However, there are instances when we want to relax and enjoy the film we are looking at, but we can't help but be distracted by the watermark linked with it. Is there a solution to this problem? Of course! We will walk you through how to remove watermarks from videos using Adobe Premiere Pro, along with the many options that are available to you inside this program.

Part 1. How to Remove Logo from Video in Adobe Premiere Pro
In Premiere Pro, removing a watermark from a video may be accomplished using one of three unique approaches. And without making too much of a fuss, let's go over each of them in turn.
1. The Zoom Effect
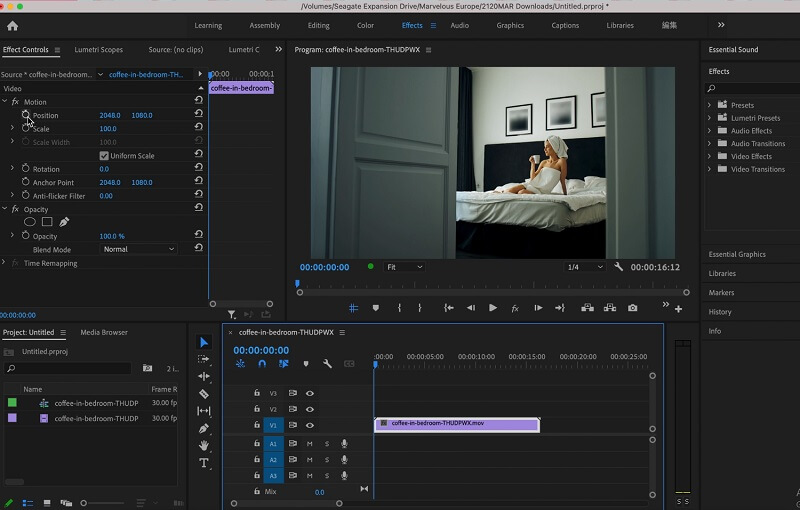
Step 1: After installing Adobe Premiere Pro on your computer after successfully downloading it from the company's website. The video you wish to edit will open when you double-click the Project Media button. After that, bring the file into the program by importing it from the hard drive. Transfer the file that is recently imported into the workspace for the Timeline.
Step 2: The Effects Control window will display whenever a movie is selected in the Timeline by the user. Make your selection under Zoom Effects on the menu. Zoom in on the video until the watermark is completely hidden outside of the video's borders and is no longer discernible in the place you want it to be hidden.
Step 3: You may now save the video by going to the File menu, selecting Export, and selecting the Media option. After that, the Export Media box will become visible. Select the location as well as the kind of file. After providing a filename, click the Render button.
2. Cropping the Watermark
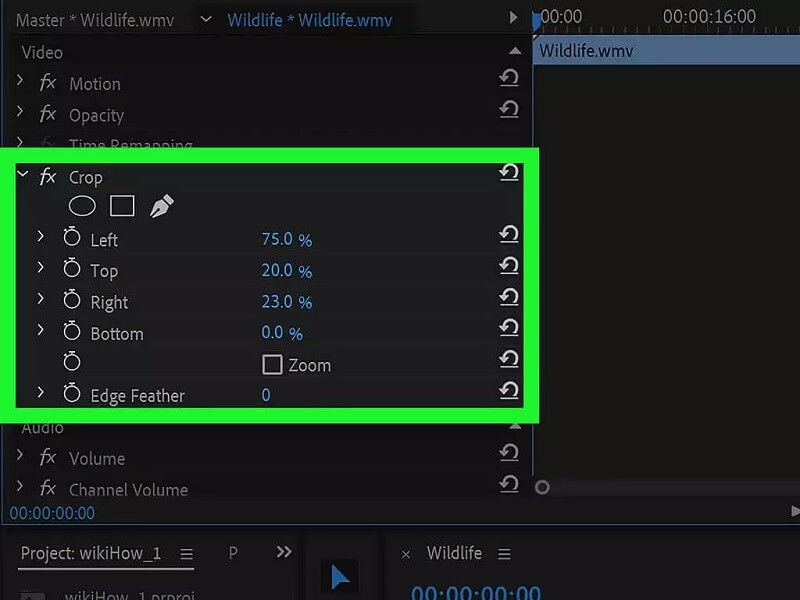
Step 1: Drag and drop the video onto the software's working area. Under the Effects tab, locate the Video Effects option. Select the Transform option from the list. Then you will encounter the crop button. You can drag it onto the Timeline. On-screen effect controls will be available for usage.
Step 2: Using the Arrow pointer, locate the Effects Control window on the left side of the screen. Utilize the arrow to choose the region you desire to remove. You may not need to clip the frame from all sides. Still, it would help if you trimmed the watermark region without upsetting the video's overall balance.
Step 3: You may alter every aspect of the movie if you so like. The percentage allows for the expansion or contraction of the region. Adjust the clip's position using the Motion option in the Effects Control Panel.
3. The Masking Effect
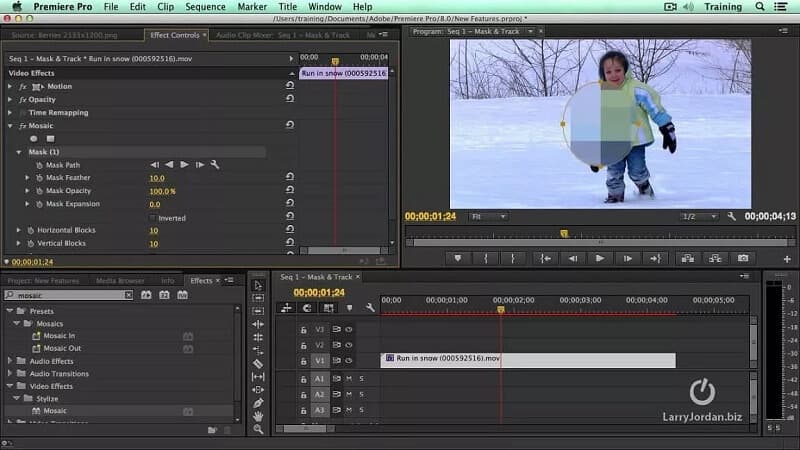
Step 1: To begin working, open a new Project and drag it into the Timeline. Now, inside the Effects Tab, locate the Median and drag it onto the video you want to edit.
Step 2: Find the Median on the Effects Control tab, where you may choose the ideal working shape. Depending on your watermark's design, you will use a circle or rectangle. Following this, it will show a chosen option on your video.
Step 3: Move and resize the borders to conceal the watermark entirely. Adjust the feather and radius values until the undesirable design is concealed. The pen tool excels for masking free-form shapes. Use the Export option to save the file in your chosen format and resolution.
Part 2. Best Alternative to Adobe Premiere Pro in Removing Watermark
We cannot deny that Adobe Premiere Pro is a fantastic multimedia editor. It has great editing tools that you can use whether you are enhancing a simple or complex file. And because of its robust editing tools, users, especially beginners, have difficulty navigating the editing tools. With that, you can try another tool called the Vidmore Video Converter. It is the best alternative tool to remove the watermark of your video. It has a virtual user interface, and the editing tools are very straightforward.
Vidmore Video Converter is like a one-stop shop because it can perform different tasks that a user requires. To know more about this watermark remover's features, you can look at the points below.
◆ It can convert images and videos into professional-grade movies.It can create collages.
◆ It supports and converts files with more than 200 types.
◆ It preserves video quality.
◆ It is user-friendly because of the straightforward interface.
◆ It removes watermarks without damaging the original quality of a video.
And if you want to remove the watermark of your video using Vidmore Video Converter, here is a detailed demonstration you can follow.
Step 1: To successfully get the Vidmore Video Converter, click the Free Download button. After that, you can now install the launcher and permit it to run. Once the software successfully runs, you may proceed with using it.
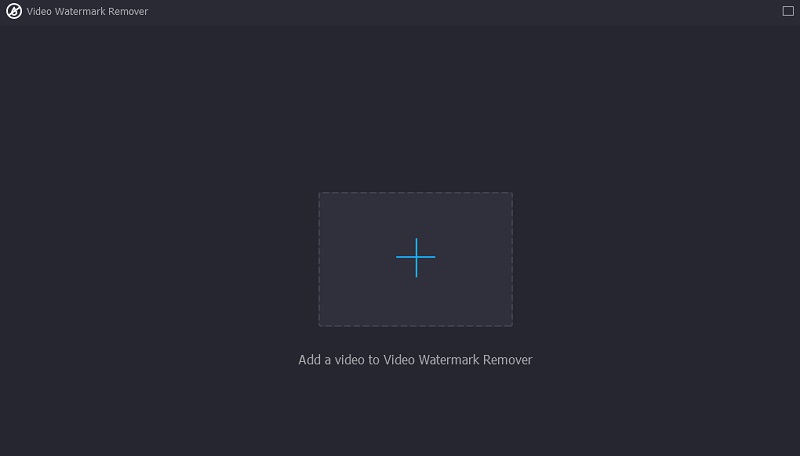
Step 2: As you see the interface of the Vidmore Video Converter, you will see the four tabs in the upper part. To see the watermark remover, proceed to the Toolbox and find the Video Watermark Remover and click it.
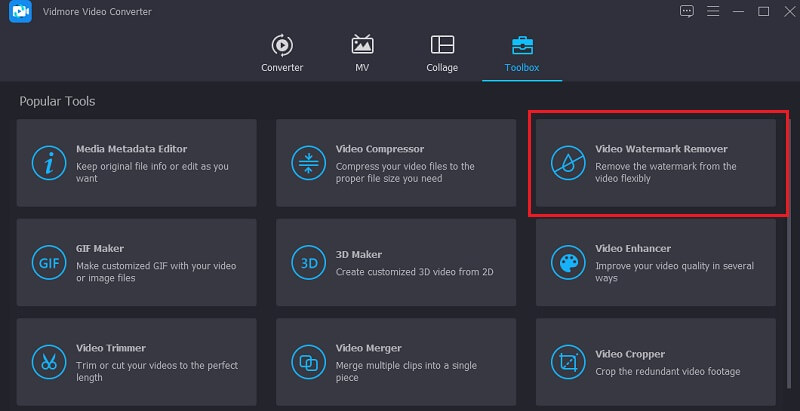
Upon clicking the Video Watermark Remover, you will see the Plus icon in the middle of the screen. Tap that and start adding your video.
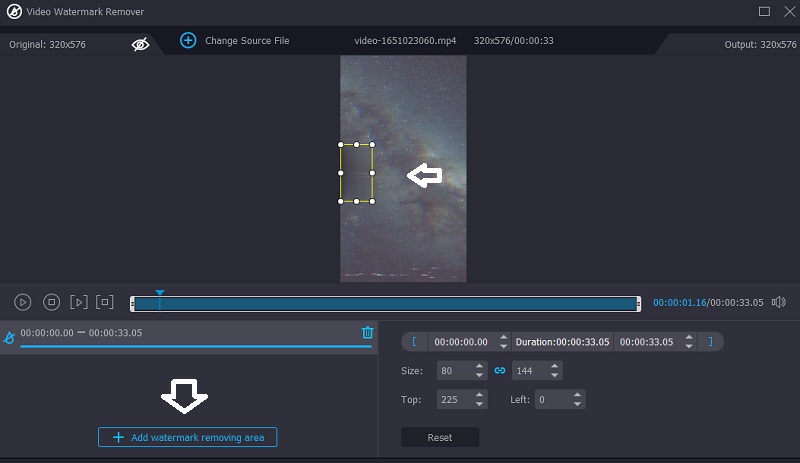
Step 3: When the video is on the main interface of the screen. You will see the Add watermark removing area. You need to click this icon to see the rectangle shape that will serve as a watermark remover. When the rectangle frame appears on the window, place it where the watermark of the video is located.
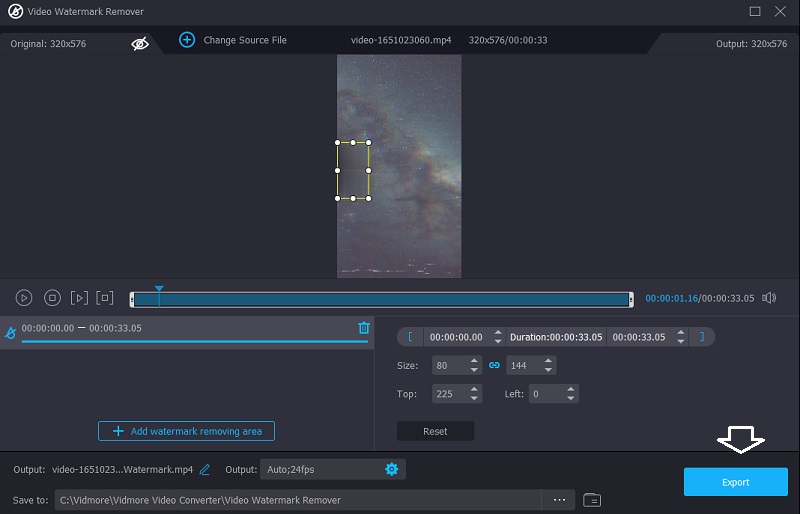
Step 4: After successfully putting the frame on the watermark and successfully seeing the video without any distraction, you may click the Export button below.
Part 3. FAQs About Removing the Watermark in Adobe Premiere Pro
What is the benefit of using the Adobe Premiere Pro?
Adobe Premiere Pro offers a significant advantage over competing for video editing software. It is one of the most effective tools for modifying music, photos, and movies. Premiere Pro enables numerous video clips to be placed on the same track. Aside from that, it is simple to add transitions to videos to make them more engaging to viewers.
What is the easiest way to remove watermarks in Adobe Premiere Pro?
The simplest and easiest way to remove the watermarks in Adobe Premiere Pro is the Zoom Effect.
Does Adobe Premiere Pro offer a free trial?
Yes, a 7-day trial of Premiere Pro is available for download. The official, complete version of the application is the free trial. It contains all the features and upgrades of the newest edition of Premiere Pro.
Conclusions
You can remove the logo in Premiere in three different ways, and they are guaranteed to help you. However, if you are a beginner and have a hard time following any of those methods, you can switch to the best alternative of the Adobe Premiere Pro, Vidmore Video Converter. This program is easy and safe to use.