How to Make a Timelapse Video - 4 Reliable Methods
Timelapse is a method to capture and export a long-time scenery video in a short video output. This method is commonly used to record the rising sun, sunset, movement of clouds, and more. If you are interested in timelapse, you are on the right page. This post will showcase various desktop and mobile applications capable of turning your footage into a timelapse video. Also, it will teach you how to timelapse a video that is easy to catch up and hassle-free. Without further ado, continue reading the following parts.

PAGE CONTENT
Part 1. Introduce Timelapse Video
Timelapse is a method where frames are captured at a much slower frequency than regular videos. These are then viewed back faster, making the effect move faster and thus lapse. For example, a timelapse video is shooted at one frame per second but played back at thirty frames per second.
Part 2. How to Make a Timelapse Video on Windows and Mac
1. Vidmore Video Converter
Nothing is more beneficial than creating a timelapse video using a program that can help you produce a high-quality one. With that, consider using Vidmore Video Converter, which enables you to create a timelapse video of various speed levels. It provides various speed levels, and you can pick one, depending on your preferred speed, which will be the outcome of your video. You can select from the higher speed levels as you create a timelapse, and the video should be faster than the original one. Do you want to know how? Without further discussion, proceed to the following step-by-step procedure to learn how to make a timelapse video using Vidmore Video Converter.
Step 1. Download and Install Vidmore Video Converter
Go to the Vidmore Video Converter's official website using your browser. Here, click the Free Download button, and a file will appear on the lower-left of your screen. Click the file to continue the installation process. After that, proceed to open the program to have complete access.
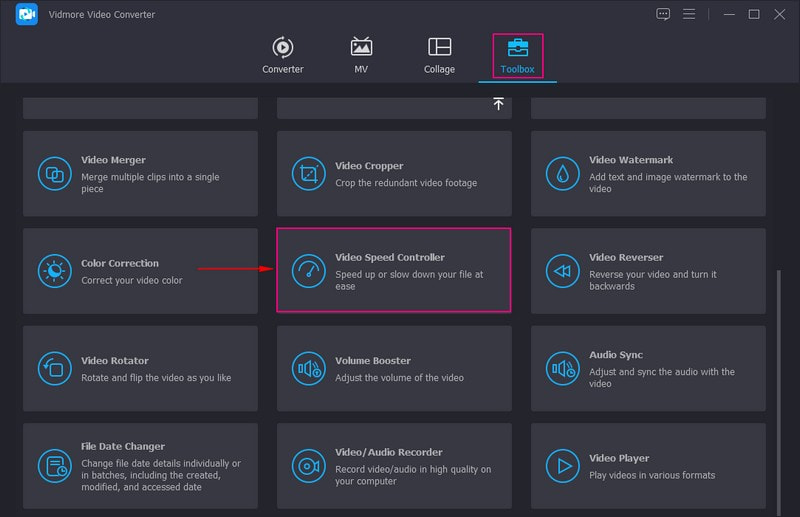
Step 2. Select Video Speed Controller
Navigate to the Toolbox tab from the top menu bar presented on the interface to access several tools. Here, select Video Speed Controller, the primary feature you will use to timelapse your video.
Step 3. Add a Video to Video Speed Controller
A new window will pop up, permitting you to import the video clip you will transform into a timelapse video. Hit the (+) icon on the center part of your screen to open your desktop folder and pick the video clip. After that, your video clip will be placed on the newly opened window, where you can control the speed of your video.

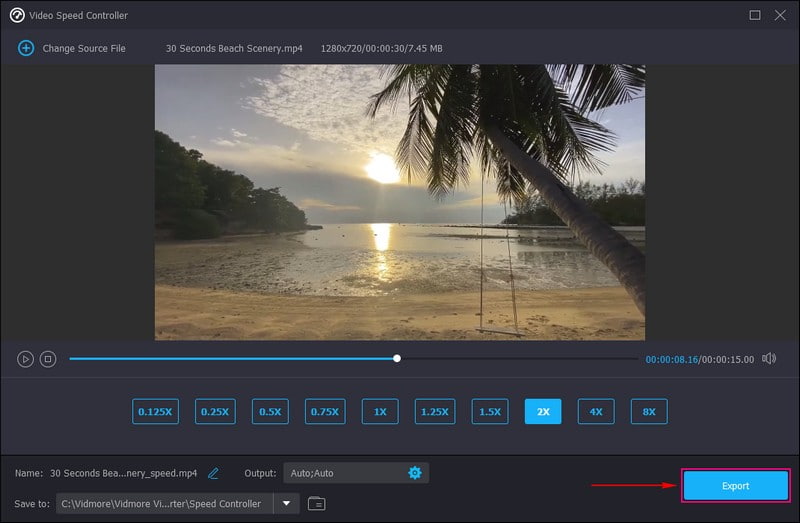
Step 4. Select Speed Level
Under the preview screen, you will see various speed levels, slower and faster speed levels. The average speed level of your video is 1×. The slower speed levels are 0.125×, 0.25×, 0.5×, and 0.75×. The faster speed levels are 1.25×, 1.5×, 2×, 4×, and 8×, which are your choice of speed levels to timelapse your video.
To make a timelapse video, you better pick a speed level of 8× rate, which equals the four frames per second video taken by mobile devices. Of course, you can preview the effect in real-time and change the speed rate according to your preference.

Step 5. Export Timelapse Video
Once satisfied with the outcome of your timelapse video, hit the Export button to save the changes, which will be saved on your desktop folder.
2. Premiere Pro
Are you searching for a program that allows you to make a timelapse using your images and recorded video? If so, you can rely on Premiere Pro, which can transform your imported numerous images and videos into timelapse video output. This program is an industry-leading video editing program that is commonly used for creating video content and more. It has creative editing options that can help you polish your videos. Are you ready to create a timelapse video using Premiere? Check the steps below!
Step 1. Launch Premiere Pro, head to the top menu bar, and click File, New, and then Project.
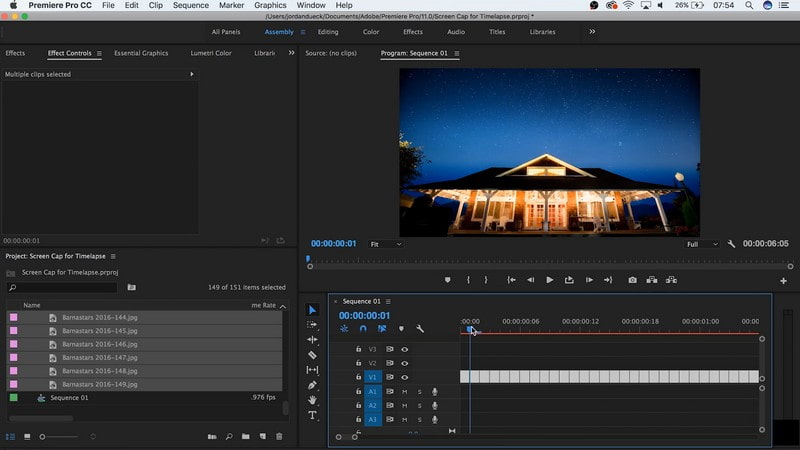
Step 2. Set the name of your work and press OK once done. In the project media option on the lower-left corner, press the icon that looks like a piece of paper with the corner folder. After that, click Sequence under Sequence Presets, hit HDV, and then HDV 1080o30. This option formats the timelapse to have 30 frames per second.
Step 3. A box labeled Sequence 01 will appear on your screen. In the media window, right-click anywhere in the blank space, and select Import. Then, click the first image you want to use. Check the box next to Image Sequence to include all like images in a sequence, and press Open.
Step 4. Bring the sequence you uploaded, and drag it to the timeline. In the pop-up window, hit the Keep Existing Settings. Right-click the footage in the timeline, and press Scale to Frame Size. Then, create any changes based on your liking. After that, click the Play button and the timelapse will begin.
Step 5. When satisfied with the timelapse, hit File, Export, and then Media, and select where you will save your created timelapse video.
Part 3. How to Timelapse a Video on iPhone
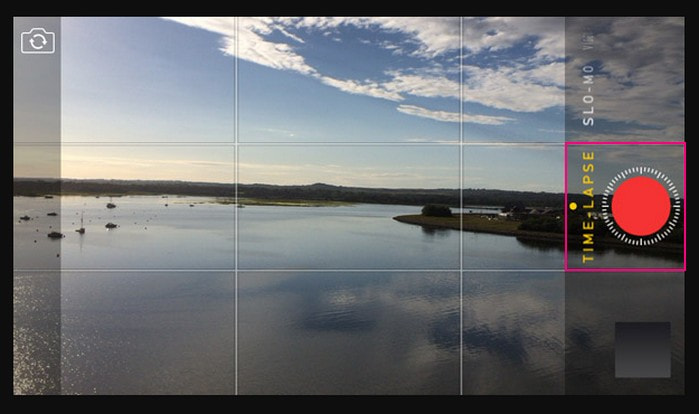
You can create a timelapse video directly on your iPhone's camera. It has a timelapse mode, which can record a video with a frame rate of one to two frames per second instead of thirty frames per second. Once you record using this mode, everything will move faster than usual. To know how to timelapse a video on iPhone, rely on the steps provided.
Step 1. Open the Camera, and select the Timelapse mode.
Step 2. Set up your phone where you want to take the scene in motion.
Step 3. Hit the Record icon to start the recording process. Once done, click the Record button again to stop the recording process. After that, you have recorded a timelapse video, which you can preview on your phone gallery.
Part 4. Android Convert Video to Timelapse
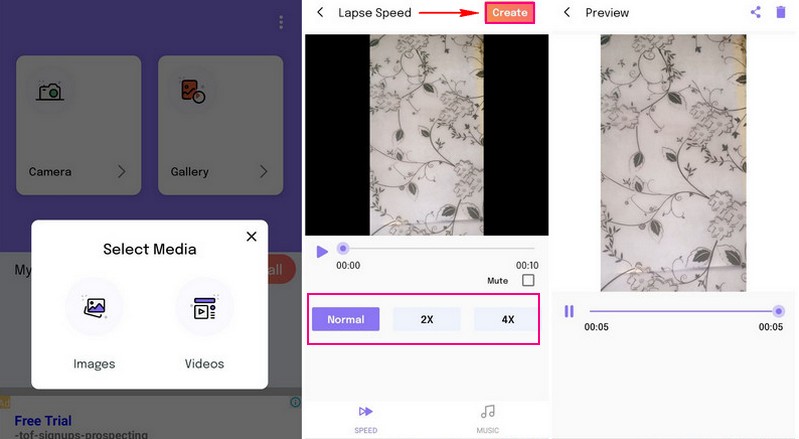
Do you want to convert your video clip to timelapse using your Android phone? If yes, we got your back. Time Lapse Video is a timelapse video maker that lets you capture your favorite moments, such as sunset, sunrise, events, and more. In addition, it has a built-in camera, where you can record a timelapse video directly on the application. Proceed to the following steps to learn how to turn a video into a timelapse hassle-free.
Step 1. Install the application using your mobile device.
Step 2. Open the application and select Gallery, and then Videos from the option. Here, select the video you want to convert to timelapse.
Step 3. Your video will be placed on the preview screen. Under the preview screen, select the speed rate, whether 2X or 4X, according to your preference.
Step 4. Once selected, tap the Create button to turn your video to a timelapse.
Part 5. FAQs about Making a Timelapse Video
How to slow down a timelapse video?
If you want to slow down your timelapse video, you can use Vidmore Video Converter. It offers slower speed rates, such as 0.125×, 0.25×, 0.5×, and 0.75×, which you can apply to your timelapse video to make it slow down.
How much faster does time lapse make a video?
Every six seconds of recording will result in 1 second of duration time-lapse footage. So if you record for 60 seconds, you will have a ten-second lapse video.
How long do you have to record a time-lapse?
The recommended timelapse video length for mobile devices is 30 minutes, which is about 10 seconds of footage.
Conclusion
This post taught you how to make a timelapse video using reliable methods and applications. Whatever devices you use, you have a guide to rely on. But if you desire to timelapse your video with various speed rates selection, we highly recommend Video Converter. It has what it takes to speed up your video according to your preference. Try it now!