How to Record a Webinar on Windows, Mac and Online (Step by Step)
Webinars are not only popular in business, but also in education, engineering, medicine and many other industries. The live webinar allows users to interact with other attendees directly. There are many benefits of recording webinars. Here’re some reasons for why you need to record a live webinar.
- You can watch the webinar recording video offline over and over again.
- Share the entire or part of webinar to social media and other promoting platforms.
- Record webinar presentations as online courses to gain larger audiences.
- Edit the webinar content for subsequent viewers.
- Viewers can still get the live feeling while watching the webinar recording.
So, if you are going to create a webinar, you can record a webinar on your computer or phone at the same time. The followings are the detailed steps to record a webinar as an attendee or host. You can get not only the professional webinar recorder software, but also an online free webinar recorder. Just read and follow the webinar recording tutorial.
PAGE CONTENT
Part 1: Best Webinar Recording Software
If you want to record a webinar from computer, you can run Vidmore Screen Recorder to record high-quality video from USB webcam cameras and camcorders. You can start, resume and stop recording webinars freely. Once you set hotkey preferences, you can record screen and take screenshots quickly. Moreover, you can add real-time text, arrow, shapes, mouse effects and more while recording a webinar.
The built-in video trimmer allows users to trim the start and end time for the webinar recording. You can extract the certain video clip from the recording file without extra tools. The captured webinar screenshot will be saved as JPG, PNG or other formats based on your need. Of course, you can save your webinar video or audio recording into popular output formats freely as well.
- Record a live webinar without time limit.
- Record any audio on your computer, as well as the voice from microphone.
- Take a screenshot of webinar of the whole screen or selected section.
- Add real-time drawing and mouse effects to your screen recording.
- Get simultaneous webcam overlay while recording with any screen size.
- Trim the webinar screen recording with custom start and end time.
- Safe, clean, lightweight and easy to use.
Part 2: How to Record a Webinar on PC
You can record a webinar on Windows 10/8.1/8/7 with audio by using Vidmore Screen Recorder. It can be your best webinar recording software to record both webcam videos and desktops in high quality. By the way, your webinar will still broadcast smoothly as usual after running the program.
Step 1: Free download, install and run Vidmore Screen Recorder. Click Video Recorder to enter into the webinar recording interface.
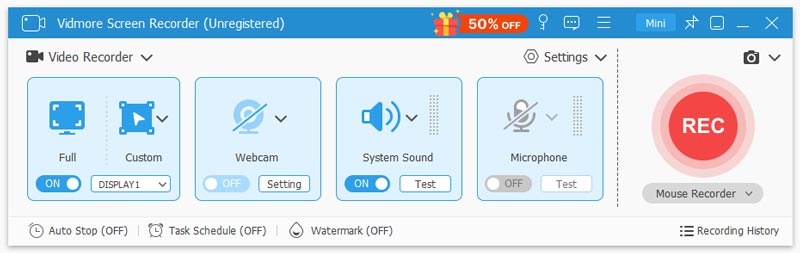
Step 2: Turn on Webcam to record a webinar on Windows. The program will detect both the built-in and external webcam automatically.
Step 3: You can turn on Display, System Sound or Microphone to record webinar content based on your need. For instance, if you want to record the outside place of webcam, you need to select the region after triggering on Display.
Step 4: Now you can record REC to start recording webinar on PC immediately. You can click the Edit option to access all editing features.
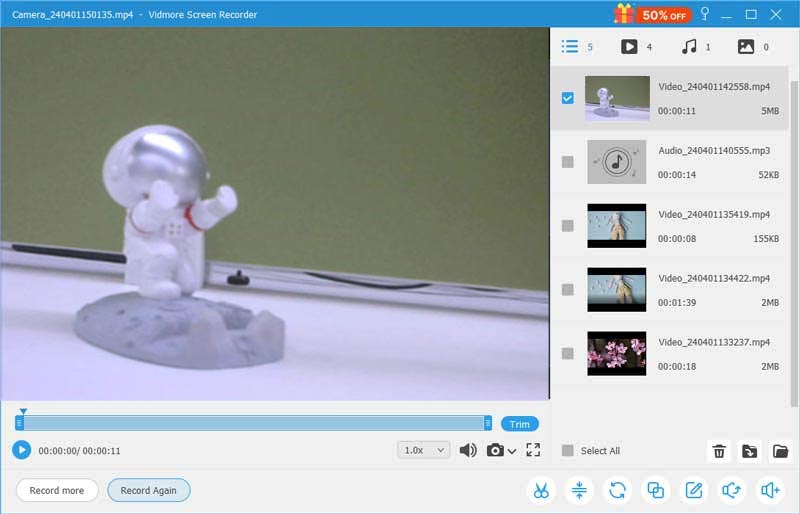
Step 5: When you stop recording, you can preview the webinar recording file directly. Extract any part of the recording to trim the webinar. Later, click Save to save the webinar recording.
Part 3: How to Record a Webinar on Mac
You can record webinar on Mac and save as MP4, AVI, MOV and other formats with Vidmore Screen Recorder easily. The webinar recording software is compatible with Mac OS X 10.10 or above. So, the most Mac users can use the program without worrying about the incompatibility problem.
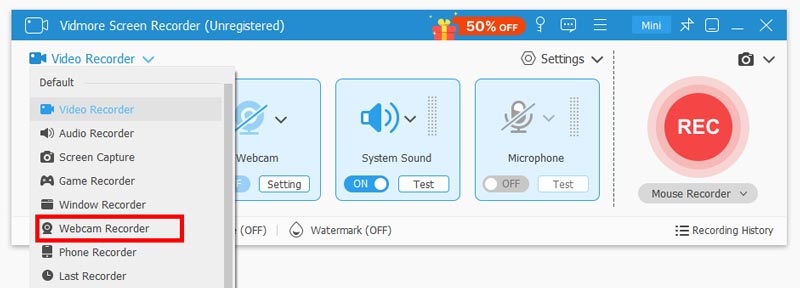
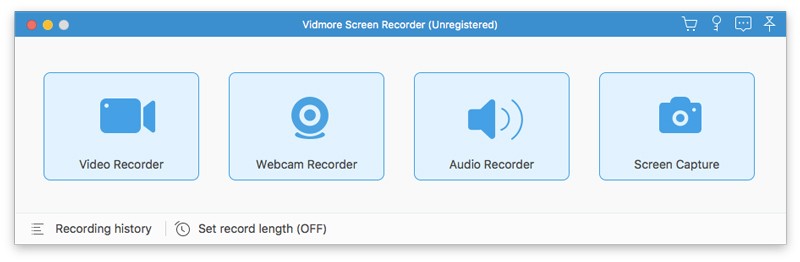
Step 1: Download the Mac version of the screen recorder software from the official site directly. Choose Webcam Recorder in the main interface.
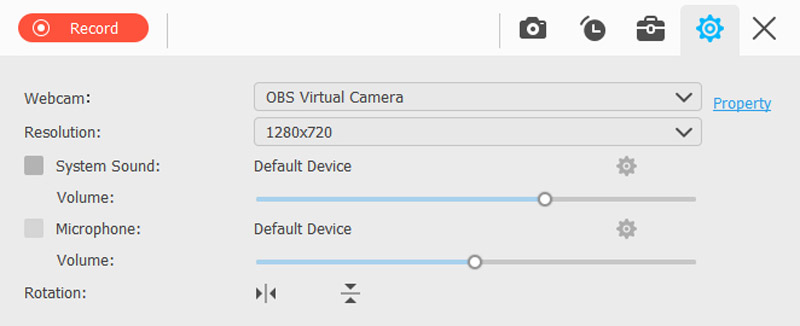
Step 2: Vidmore Screen Recorder can open the built-in camera app or connected external camera automatically. You can select the camera source from the lower left corner. Click the Microphone icon to record a webinar with voice on Mac.
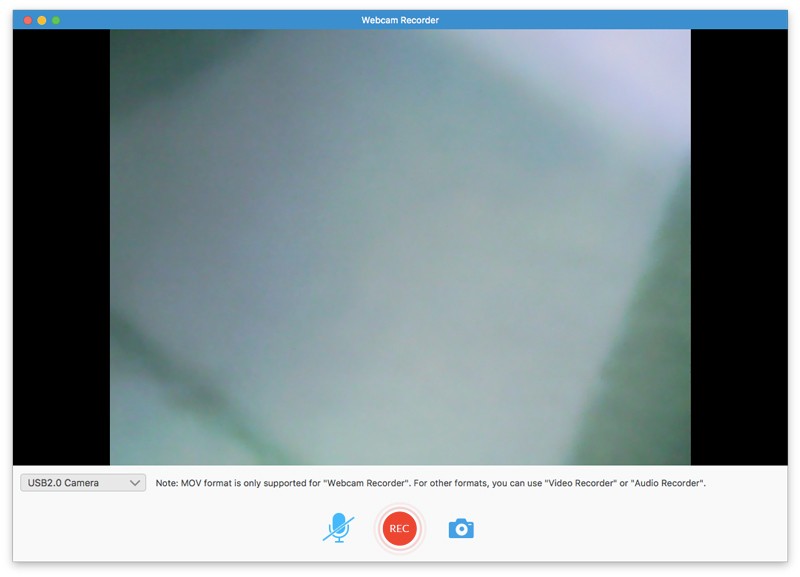
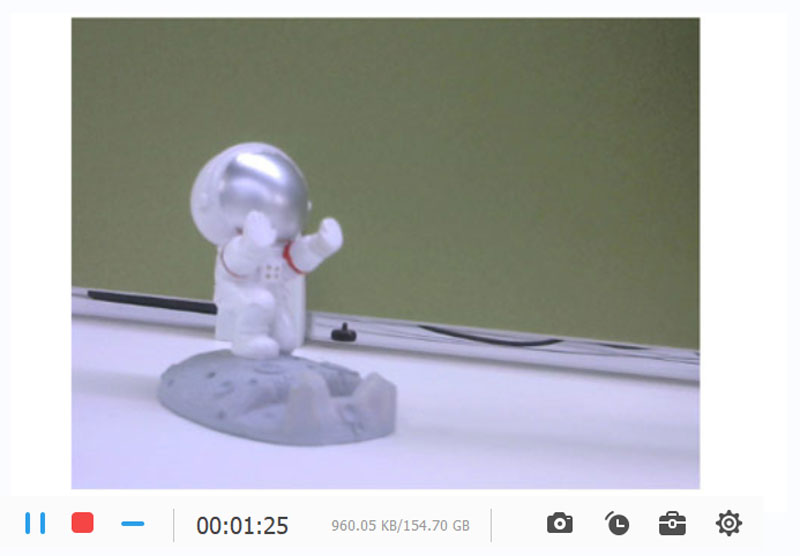
Step 3: Click REC to start recording the live webinar. You can pause and resume recording webinar on Mac freely. Click the Screenshot option to take a screen capture.
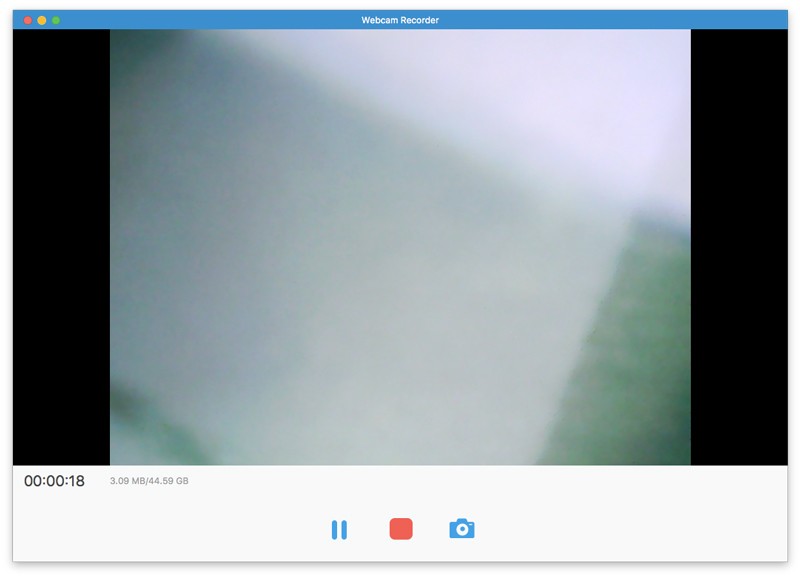
Step 4: When you stop recording live webinar on Mac, you can get the popping-up preview window immediately. Later, click Clip to clip the webinar recording video.
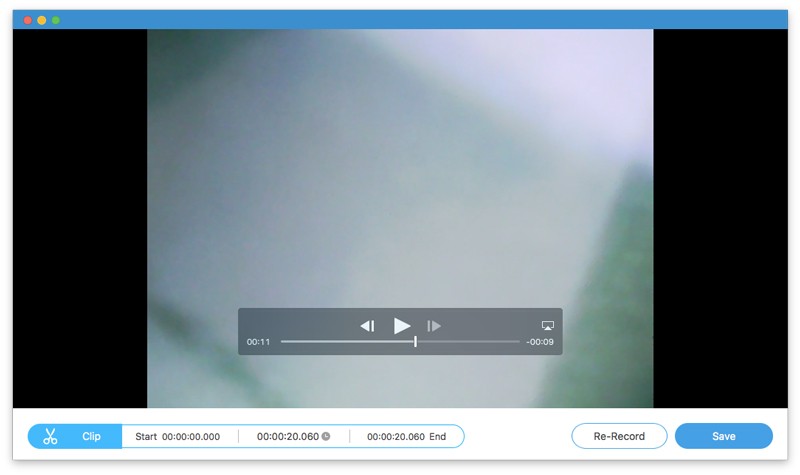
Step 5: Click Save to access the Recording History window. Here you can get the recorded webinar video as MOV format. Hover your mouse on the recording file. You can play, rename, open folder, share and delete the file within the webinar recorder.
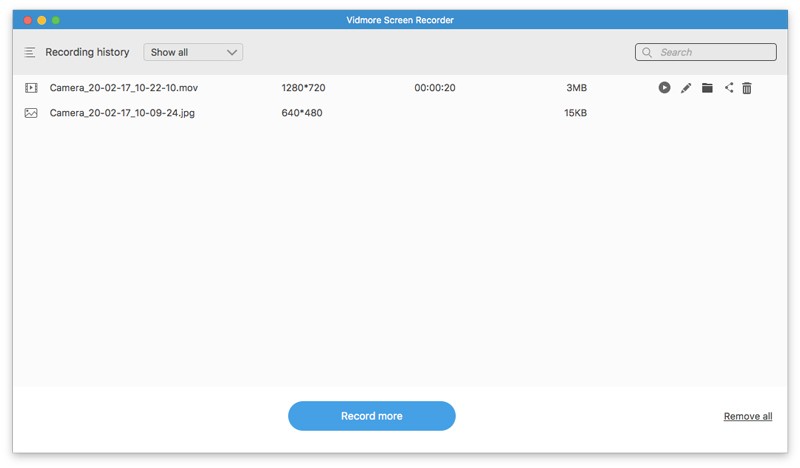
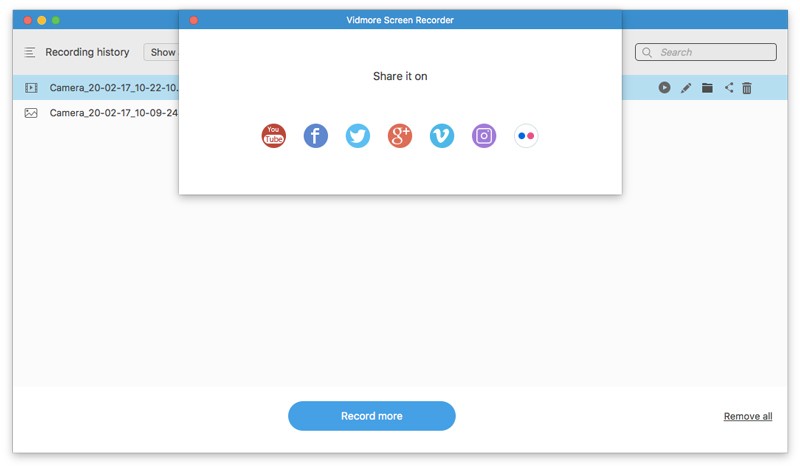
So, you can click Share to share the webinar MOV recording directly. It is also okay to select Open Folder to get the screen recording file quickly.
Part 4: How to Record a Webinar Online
Screencastify is a free Chrome extension that can record webcam, browser tab and desktop. You can record a webinar free online within the Chrome browser. Furthermore, you can share the webinar recording video to Google Drive and more within the online free webinar recorder.
Step 1: Visit the screencastify.com. Click Add to Chrome to add the webinar recording tool to Google Chrome.
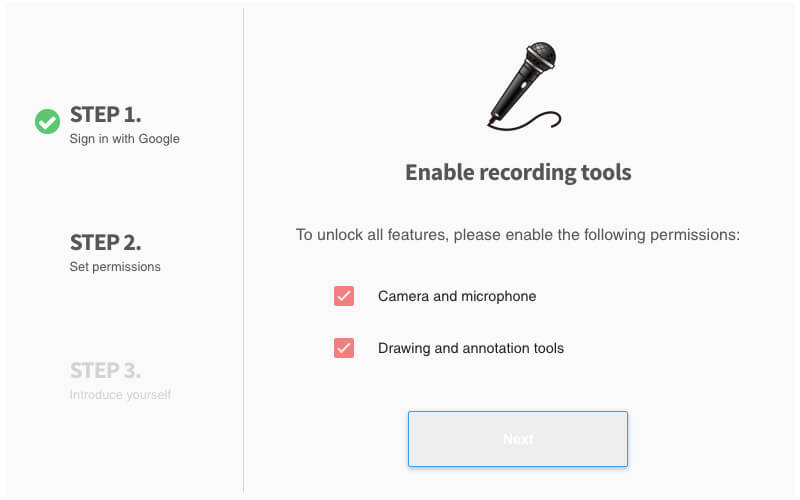
Step 2: Click the screen video recorder within Chrome. Sign into Screencastify with your Google account. Complete the setup process as it shows.
Step 3: Click the Screencastify icon on the Chrome toolbar again. Here you can select Webcam Only to record webinar content for free online only.
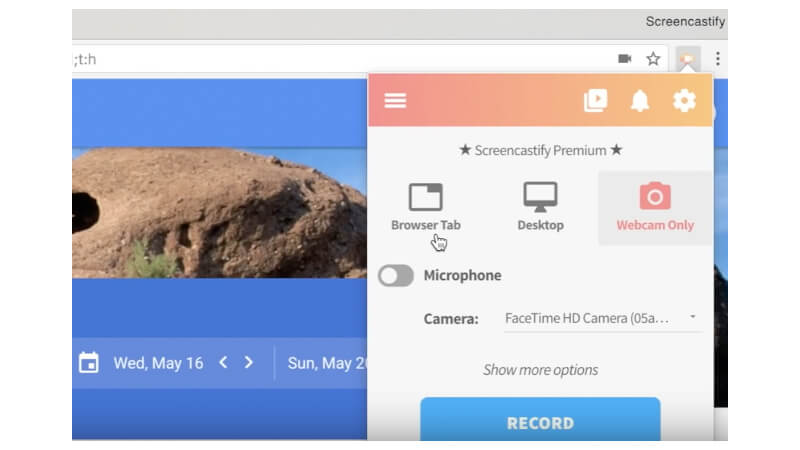
Step 4: Enable Microphone if you want to record a webinar free with sound. Select the camera you use. Later, click Record to start recording a webinar online.
Step 5: Click the Stop option on the top. Your webinar recording video will be saved to the Google Drive automatically.
Step 6: Click Copy Link or View on Drive to access the recorded webinar video recording.
Note: You can record a webinar with watermark via Screencastify free. The maximum screen recording time is 5 minutes. Otherwise, you need to upgrade to its full version to unlock all features. These are the common disadvantages of online free screen recorders.
Conclusion
That’s all to record a webinar online or offline with the above video screen recorders. It is true that you can record online webinar free with Screencastify and other free screen recorders. The problem is that you can record webinars and other live videos up to 5 minutes with the free version. There will also be a watermark attached in the output video. So if you want to record a webinar on your Windows or Mac computer for hours, you had better run Vidmore Screen Recorder to get the reliable support. Your webinar, seminar and other online courses and meetings will not be lagging. What’s more, others in the same webinar will not be notified when you record a video.