How to Take a Screenshot on Dell Computer or Laptop for Free
“I have a Dell laptop, and I need to take some screenshots, but how to do it?” Dell wins an overwhelming majority of users for several factors, like reliable devices, favorable customer support and affordable price. However, according to a recent survey, a lot of users complained that they have no idea on how to screenshot on Dell desktop and laptop. Therefore, this article will talk about the best methods to take screenshots on a Dell machine. More importantly, all methods are free to use.


Part 1: How to Screenshot on Dell with Shortcuts
The shortcuts are the easiest way to take a screenshot on Dell devices, like Chromebook. However, the designs of the keyboard for Dell computers and laptops are a bit different.
How to Screenshot on Dell with Windows XP/7
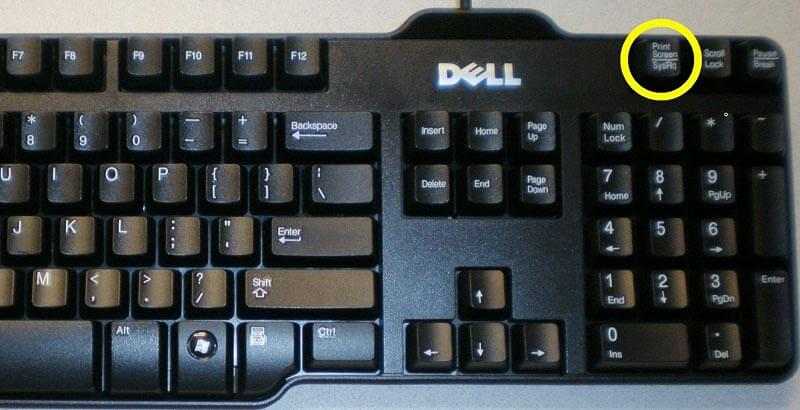
Step 1: Firstly, find and press the Print Screen key on your keyboard. It has some abbreviations, such as PrntScrn, PrntScr, PrtScrn or PrtScr. If you cannot find the Print Screen key on a Dell laptop, it is replaced by the combination of Fn + End buttons. To screenshot a window on Dell, press Alt + Print Screen keys at the same time and click on the window.
Tip: On some devices, Print Screen is combined with one of the function keys labelled F1 to F12.
Step 2: Next, open Office Word, Microsoft Paint, or 3D Paint. Press Ctrl + V keys on your keyboard to paste the screenshot.
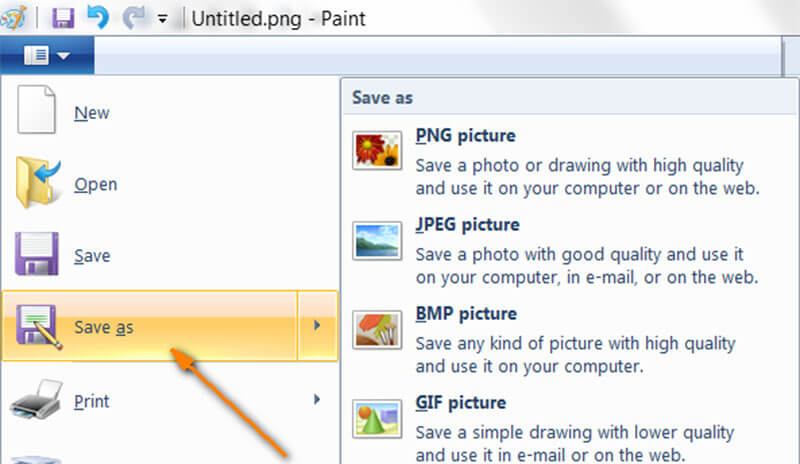
Step 3: Go to the File menu, select Save as and pick a proper picture format, such as PNG. On the save-as dialog, locate a specific folder to save the screenshot, enter a filename and click Save button.
How to Screenshot on Dell Running Windows 10/8
Step 1: Press the Win + Print Screen keys on your keyboard at the same time to screenshot on Dell computer running Windows 10/8/8.1.

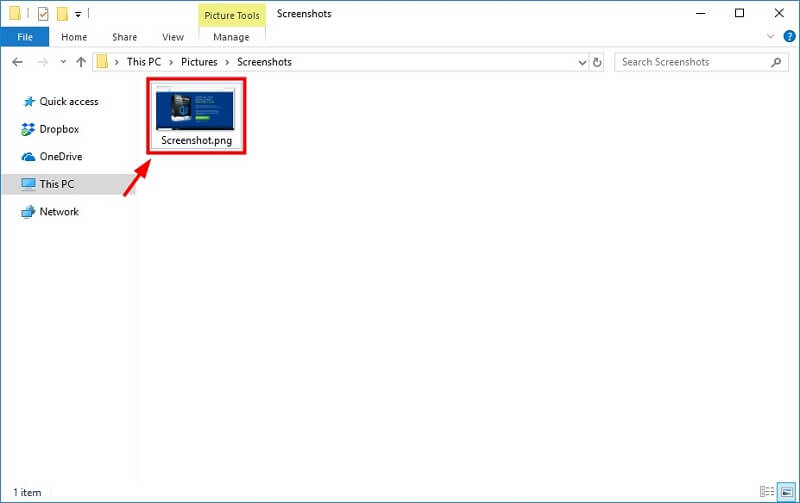
Step 2: Open a File Explorer window, and go to This PC/Pictures/Screenshots. Then you will find the screenshot as a picture file.
Part 2: Use Snipping Tool to Screenshot on Dell
It is well-known that Microsoft has introduced a Snipping Tool into Windows 7/8/10. It is available to Dell machines. It enables you to screenshot for full screen, a window, custom region or free form. Since it is pre-installed, you can use it for free as well.
Step 1: Go to the Start menu at the bottom left corner, type snip in the search bar and hit Enter key to display the built-in screenshot software on Dell. For Windows 8, search for Snipping Tool from the right side bar. Then click on it in the result list.
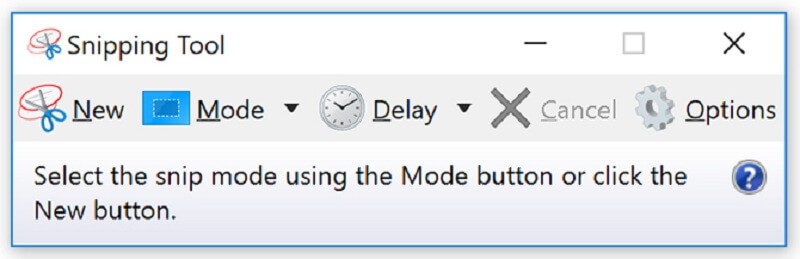
Step 2: Click the Downward icon next to New menu or Mode menu, and select what you wish to screenshot, like Window Snip. Then hit the Delay menu and select a number for countdown.
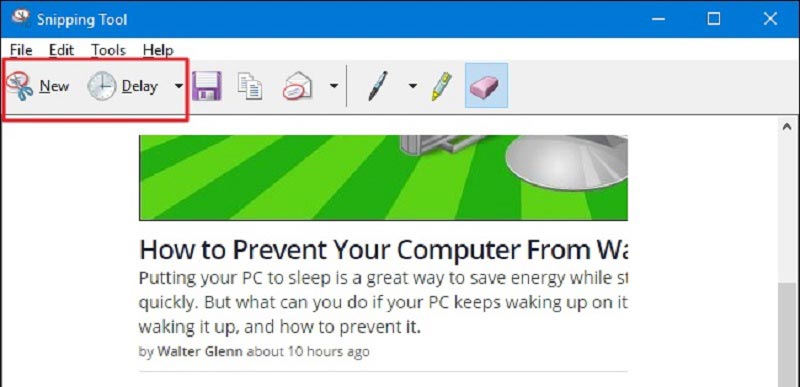
Step 3: Go to the screen you want to screenshot on Dell, or put what you want to save on your desktop. Click on the New menu on Snipping Tool, click and drag your mouse over the target region.
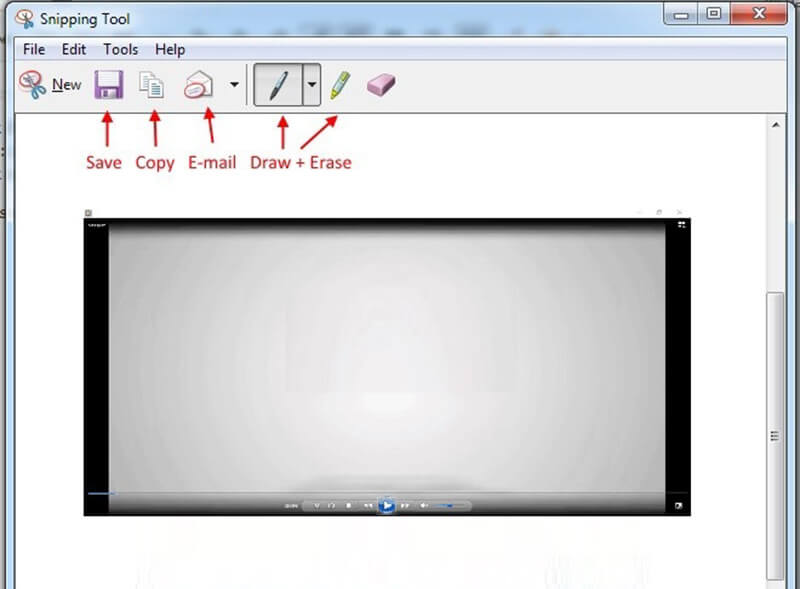
Step 4: Once you release your left mouse, the screenshot will appear in the Snipping Tool panel. Click the Save icon on the top menu bar to save it to your hard drive. Or you can save it to clipboard or send it via email.
Part 3: Best Alternative Way to Take a Screenshot on Dell for Free
If you cannot find the Print Screen key on your device, Vidmore Screen Recorder is an alternative way to screenshot on Dell computer. It can help you take a screenshot on both computer and laptop easily. Moreover, you can get extensive functions and custom options to create desired effect.
Main features of the easiest screenshot tool for Dell
- Screenshot full screen or take a partial screenshot on Dell.
- Support a wide range of image formats, like PNG, JPG, GIF, etc.
- Add customized text, shapes or paintings to screenshot.
In brief, it is the easiest way to take a screenshot on Dell computer and laptop without paying a penny.
How to Take a Screenshot on Dell
Step 1: Set up screenshot tool
Launch the easiest screenshot tool after you installed it to your Dell machine. It is compatible with Windows 10/8/8.1/7. It is totally free to use without any restriction, such as registration. Click the Menu icon and pick Preferences to bring up the Preferences dialog. Head to the Output tab from the left side. Click the Folder icon next to Location of screenshot files and set a directory to save screenshots. Then choose a proper format in Screenshot format drop-down list. Hit OK to confirm it.
Step 2: Screenshot on Dell
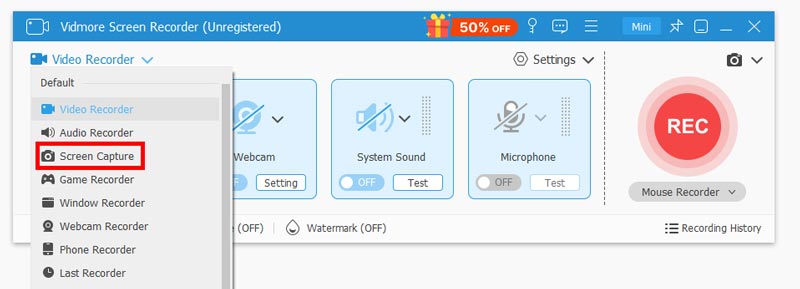
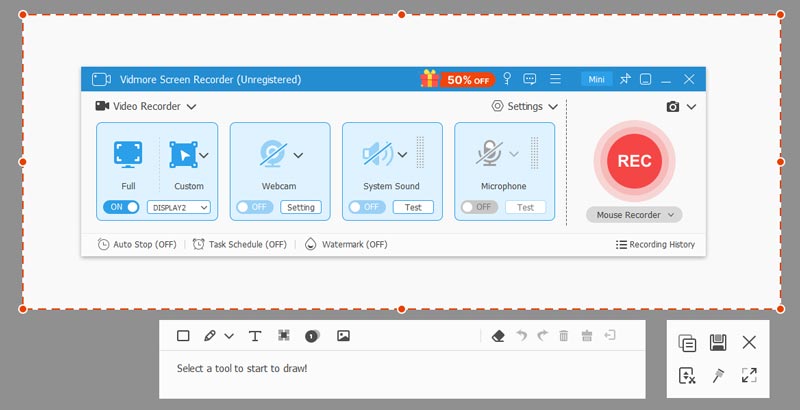
When the screen you wish to screenshot is ready, click Screen Capture in the main interface. Now, you have two options. To screenshot a window, click on it directly. If you want to screenshot a screen, click and drag your left mouse across the desired area.
Step 3: Edit and save screenshot
Let the mouse go when screenshot is done. Then the edit menu bar will pop up. Here you can edit the Dell screenshot as an image. To add annotate on it, for instance, select the text icon, set the color and other parameters, click on the right position and type in some letters. If you are satisfied with the screenshot, click the Save icon to export it based on your setting. Alternatively, select the Clipboard icon to save the Dell screenshot to your clipboard. Then you can use it in other applications.
Do not miss its video and audio recording features because this software can be the video and audio recorder for Windows.
Part 4: FAQs of Screenshot on Dell
How to take a small screenshot on Dell?
There are three ways to take a screenshot for custom region on Dell:1. Alt + Print Screen key combination lets you take a screenshot for a specific window on Dell.2. The built-in Snipping Tool can take a small rectangle or free shape screenshot on Dell.3. Third-party applications, such as Vidmore Screen Recorder, provides the function to take a small screenshot for Dell users as well.
Where do screenshots go on Dell?
After taking a screenshot on Dell, it will be saved to different location depending on your situations.1. It will go to your clipboard, if you use shortcuts.2. The Win + Print Screen combination will save screenshot to your Picture library.3. Snipping Tool allows you to save screenshot to hard drive or clipboard.
How to take a screenshot on Dell tablet?
On Dell tablet running Windows 10, hold down Win + Volume Down buttons at the same time untile your screen dims and then brightens. Then you can find the screenshot is saved as a PNG image in the Screenshots folder.
This article has shared three ways to take a screenshot on Dell computer and laptop for free. Firstly, the Print Screen is pretty convenient if you remember it. Moreover, the built-in Snipping Tool allows you take a screenshot for various purposes. If you do not like them, Vidmore Screen Recorder is a good alternative solution to save a window or a region on your desktop as a still image. Have other questions related to screenshot on Dell, please leave a message below this post.