Top 3 Audio Recording and Editing Software for Windows, Mac, and Mobile Device
There are instances when we are recording audio on our computer device, and we capture unnecessary noise. Or sometimes, there is a part of the recorded audio that we want to remove, but we don't want to take another shot anymore. Well, we have a solution for that. With the help of the audio recording and editing software for Windows, Mac, and mobile devices, you can easily take control of your audio recording without any hassle. With that, take a look at the appropriate tools you can count on for editing your recorded audio.

- Part 1. How to Edit Audio Recording on Windows/Mac
- Part 2. How to Edit Audio Recording on Phone
- Part 3. FAQs on How to Edit Audio Recording
Part 1. How to Edit Audio Recording on Windows/Mac
1. Vidmore Screen Recorder
If you recorded a part of your audio that you think you don't need anymore, you wouldn't have to retake another recording because you can just edit it. With that, you can count on the Vidmore Screen Recorder. This tool is the best screen recorder as it can record audio and video files that you cannot get. Aside from that, you won't have to think about the compatibility as it can be installed on both Mac Windows devices. With the help of professional recording features, you will no longer have to worry about the files you want to remove or the parts you want to delete because there is a cutting and trimming function that could help you. All you have to do is put the start and end time of your recorded audio instead of recording once more.
And if you want to know how to do an audio recording through the help of the Vidmore Screen Recorder on your computer device, here is a glance that you can follow.
Step 1: Install the Audio Recorder on Windows and Mac
The first thing to do is, acquire the Vidmore Screen Recorder by clicking one of the download buttons below. After that, you need to install it and wait for the tool to run.
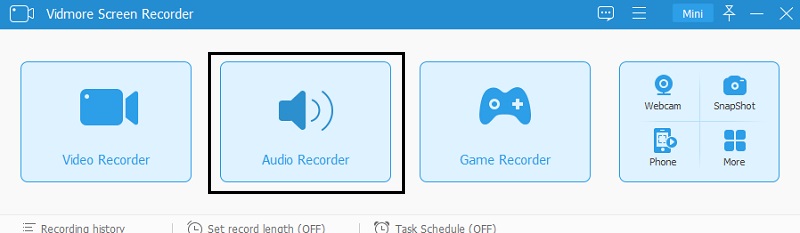
Step 2: Choose the Audio Recorder
Once the tool is up and running, you can now open the device and see the main interface. To make a pure screen recording, click the Audio Recorder button to lead you to the Audio Recording section.
Step 3: Start Recording
Once you are led on the Recording section, you can now start recording the audio that you want to get a copy of. Just turn on the System Sound and the Microphone. And finally, tap the color red REC button and wait for the audio recording to start.
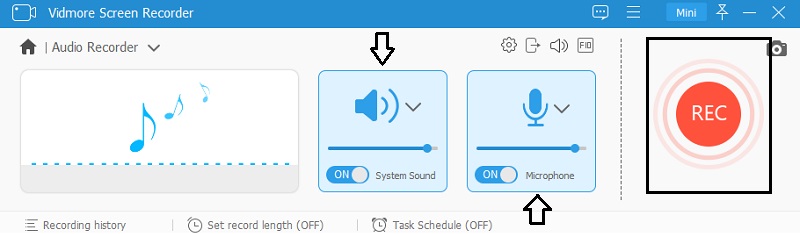
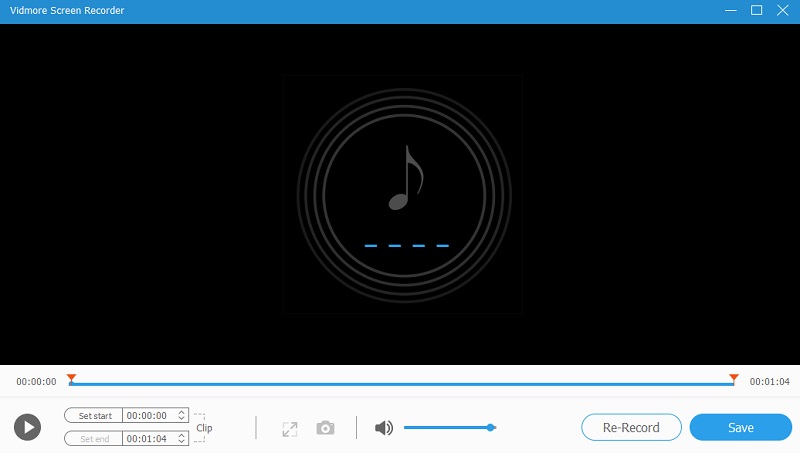
As soon as the recording starts, you can adjust the Microphone and the System Sound volume according to what you desire. Then, click the Red color button on the left side of the screen that signifies the recording to stop. After that, you can adjust the start and end time of the recorded audio if there are unwanted parts that you didn’t like.
Step 4: Save the Audio Recording
If you are not yet satisfied with the recorded audio, you can click the Re-Record button to reshoot the audio recording. On the other hand, if you have already decided on the result, click the Save button and input a name on the tool, then click the Next button. And you now have a recorded file of those audio tracks that you wish to download.
2. Vidmore Video Converter
Another fantastic tool that you can depend on to help you with your recorded audio is the Vidmore Video Converter. You may see in the brand name that it is a video editor. However, it is multi-purpose software that can edit audio and video files you wish to navigate. Another thing about this app is, it works best on both Mac and Windows devices; therefore, there will be no problem regarding the compatibility. Through the help of audio editing tools, you can easily remove the parts you want on the recorded audio due to its easy-to-use interface.
One fantastic thing about this software is that you can choose the audio format you require on your recorded file as it offers more than 200 audio and video files formats. And you can see that it is convenient due to its ability to work at its best even though there is a signal interruption on the internet.
Take a look at the given steps below for you to know how this audio editing software works.
Step 1: Get the Audio Editing for Windows and Mac
As a start-up, download the audio editing software by clicking the Download link below and installing it on your device. Once the tool is installed, launch it on your device. You can now open it as soon as it is up and running.
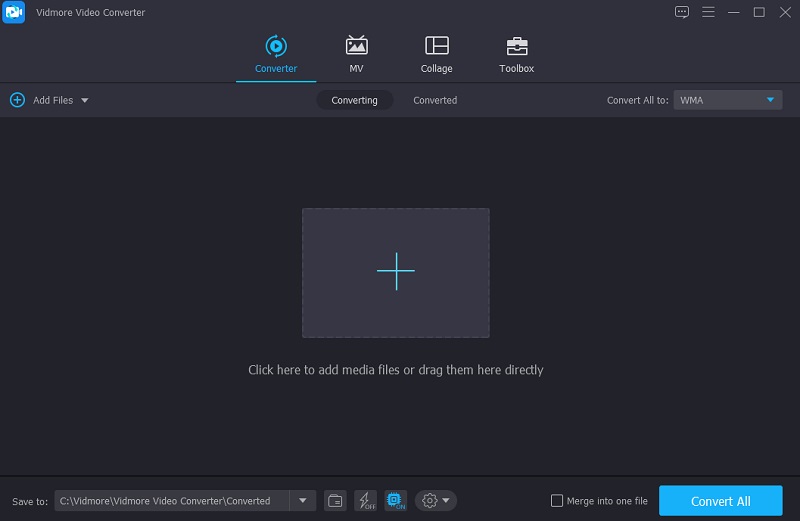
Step 2: Add Audio Recorded File
Once you open the tool, you will see the main interface, just click the Add Files on the left side, or tap the Plus icon at the center screen and add the audio recording from your Folder.
Step 3: Edit the Audio Recorded File
After adding the audio recorded file on the screen, you can now make some edits to it by clicking the Scissor icon on the left side of the screen, and it will lead you to the editing section of the screen. Then, you can cut or trim the unwanted part of your audio by moving the Left and Right cursor of the audio. Or you can also set the Start and End time by clicking the dropdown arrow on the lower part of the screen.
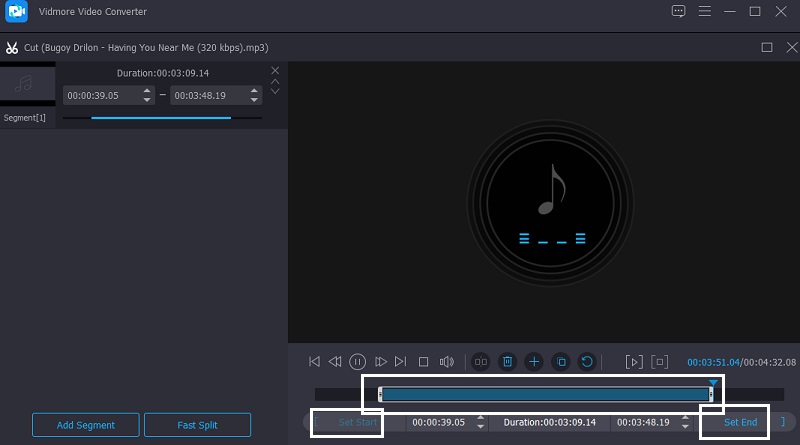
Once you are satisfied with the edited audio, you can now click the Save button below, and you will be directed to the main interface.

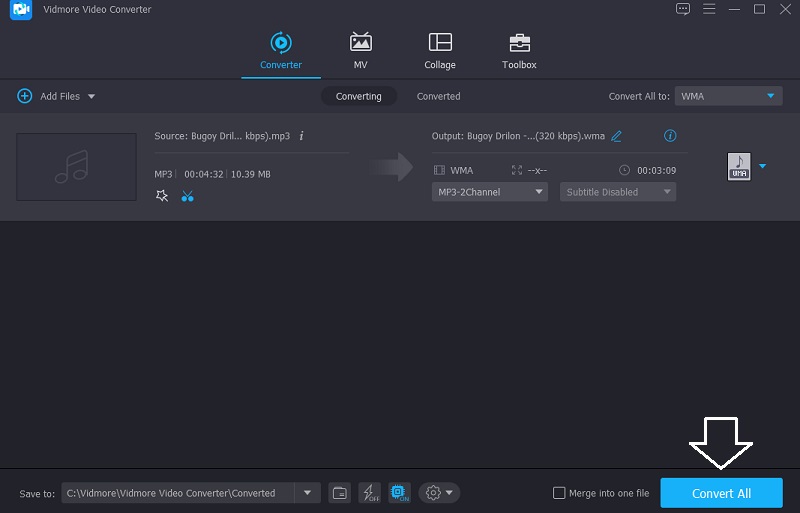
Step 4: Convert the Recorded Audio File
Once you are satisfied editing the recorded audio file, you can now convert it by clicking the Convert All button on the right lower part of the screen and waiting for the conversion process.
Part 2. How to Edit Audio Recording on Phone
If you are looking for a way to edit your recorded audio through mobile devices such as iOS, you can count on GarageBand. This app allows everyone to be like an instant DJ due to its professional editing features. There are built-in instruments such as keyboards, guitars, drums, and strings that will help you easily create music. Garageband is also used to edit audio files. All you have to do is refer to the instructions below.
Step 1: Go to the App Store and find the GarageBand and install it.
Step 2: After that, upload the audio tracks on the Timeline and pinch each of them to zoom in and out. Then, you can also move the left and right cursor of the audios to make some adjustments. By doing a hard click on the audio, there are options there that will appear. Simply choose the type of edit you will apply to your audio files.
Step 3: Once you are satisfied with the outcome of the audio you uploaded on Garageband, click the Done button to apply changes to your audio tracks.

Part 3. FAQs on How to Edit Audio Recording
How to edit audio recording on Quicktime?
Launch QuickTime Player. Then, on the Edit Menu, select Trim. Then, make any necessary changes to the yellow trim area. Click the yellow 'trim' button in the upper right corner of the window. When you've finished, click Done.
What are the audio editors for Android?
You can use the WaveEditor on Android, Mstudio, Voice PRO, and FL Studio Mobile.
What is the maximum file size that Vidmore Video Converter supports?
What is excellent about Vidmore Video Converter is, it doesn't have any file size limitation.
Conclusion
Through the help of audio recording and editing tools for Windows, Mac, and mobile devices, you can easily edit your audio recording without any hassle. But if you prefer an audio editor that can perform and edit your files professionally, you better choose the software for computer devices.