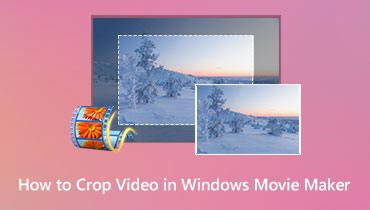
Detailed Way to Crop Video in PowerDirector + Alternative
PowerDirector is a video editing application that provides basic and advanced editing options to give your videos a professional touch. This video editor is commonly used to capture, edit, and burn video clips, which can be uploaded on different social media platforms. The crop is one of the most used editing options from this video editor. It allows you to crop your video clips and show only the portion you want to present on your frame. Without further ado, learn how the PowerDirector crop video tool works.

PAGE CONTENT
Part 1. Crop Video in PowerDirector
When searching for an application to edit your video, it should meet your expectation and your needs. It should provide numerous editing functions to edit your video further. With that, consider using PowerDirector to help edit your video outputs hassle-free. It is a video editing application that allows you to cut, refine, edit, publish, and share videos. Besides that, you can make artistic scenes and add text or graphics to a video, and it has a drag-and-drop interface.
Like any other video editing application, PowerDirector has basic editing options, including crop. It enables you to crop the video footage you uploaded quickly and hassle-free. This feature can help you remove unnecessary or distracting parts of your video clip. Also, it can help you change the dimension to fit within a specific area. With its beginner-friendly video cropper and numerous editing suite, it can help you produce the video you desire to have.
Do you want to master how to crop videos in PowerDirector? If yes, rely on the step-by-step procedure below.
Step 1. To begin with, you must download the application from the official website. After downloading, install the application by clicking the file and following the installation setups.
Step 2. Launch the application on your computer. Followed by that, you must import the video file you want to undergo the cropping process. To do that, use the drag-and-drop method to import your files to place the video in the timeline section. Once the video is added, the toolbar will automatically appear and be activated.
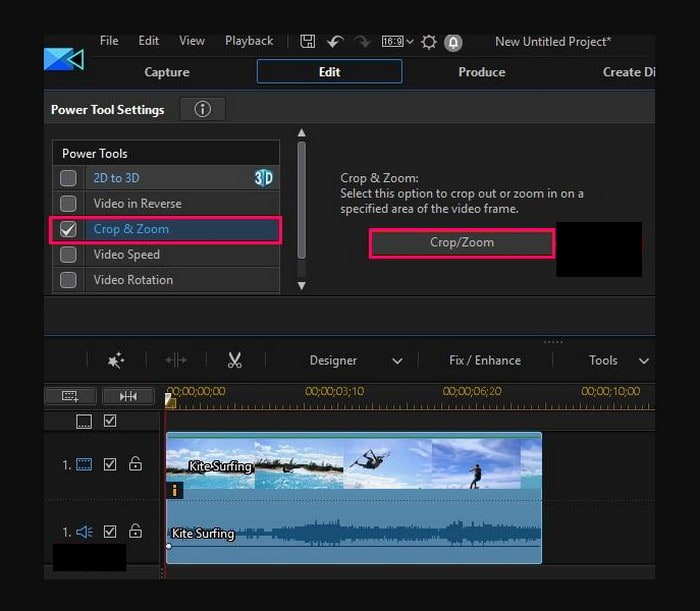
Step 3. Head to the Tools option and select Power Tools from the drop-down menu list. After that, locate and click the Crop & Zoom button; select the Crop & Zoom button on the right part of your screen to enable the crop option. Then, the Crop & Zoom window will be opened, which provides editing features and options to perform crop and zoom on the video.
Step 4. Drag the play head to your preferred position where you wish to zoom in on the video. It will immediately activate the Add Keyframe button. After that, you will see the Crop Frame button from the preview window. You can crop the window by dragging the crop points from the adjustable frame. In addition, you can modify the location of the cropped window by dragging the window from the center. When you drag the cropped window, it will leave a green tracing line.
Step 5. Once you are done cropping your video, play and view your video to confirm that it does not require further cropping. You can modify the aspect ratio from the right side of your screen. When happy with the outcome, press the OK button to save the changes.
Part 2. Pros and Cons of Using PowerDirector to Crop Videos
This part will present the advantage and disadvantages of the application. With this part, you will gain an idea of what to expect from the application once you plan to use it.
Without further discussion, learn the PowerDirector crop video’s pros and cons:
Pros:
- It has a drag-and-method, which is beneficial for easily importing video footage users would like to crop.
- Users can manually crop the video from the preview screen by dragging the pointers to the desired area.
- It enables users to select their preferred aspect ratio that can fit a specific social media platform.
Cons:
- Many advertisements appear asking users to subscribe or upgrade their application.
- Unexpected bugs appear that interrupt the users when editing their outputs.
- Sometimes, the application crashes so that users will start over again.
- It is an expensive application.
- A watermark will appear on your project for the first five seconds.
Part 3. Alternative Way to Crop Videos
Aside from the mentioned application above, numerous applications on the market can help you crop your videos. Knowing that crop is one of a video editor’s basic editing options, but it would be more advanced if it offered various cropping options. As mentioned, it should allow users to crop manually from the preview screen and input a specific number on the crop area. Besides that, it has an option where you can select your desired aspect ratio.
Did you know that Vidmore Video Converter checks all the mentioned qualifications? Indeed, Vidmore Video Converter lets users control their preferred video frame size. So, if they want to remove unwanted or distracting portions of their video, they are allowed to remove them.
Are you curious how it is done? If yes, count on the steps provided to learn how to crop video in Vidmore Video Converter.
Step 1. Download and Install Vidmore Video Converter
Download and install the application from the official website. Once installed, proceed the run the program to get started.
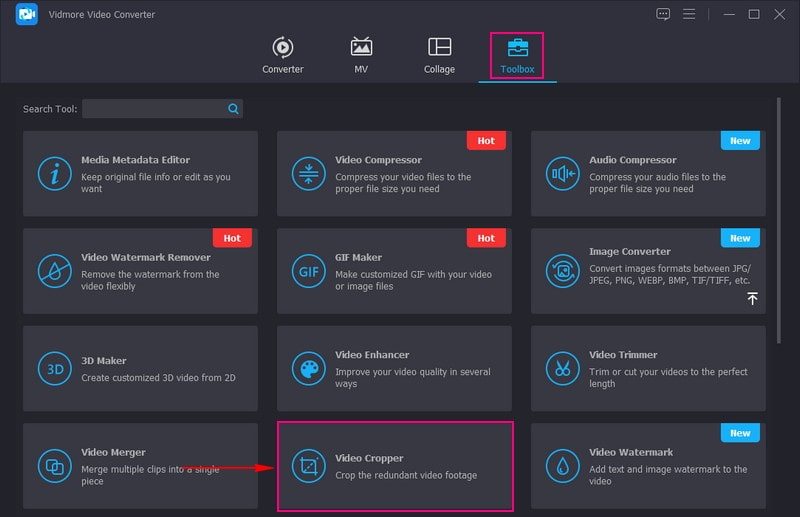
Step 2. Select Video Cropper
From the main interface, head to the Toolbox tab, where various tools are available. From here, look or search for Video Cropper, below Video Enhancer.
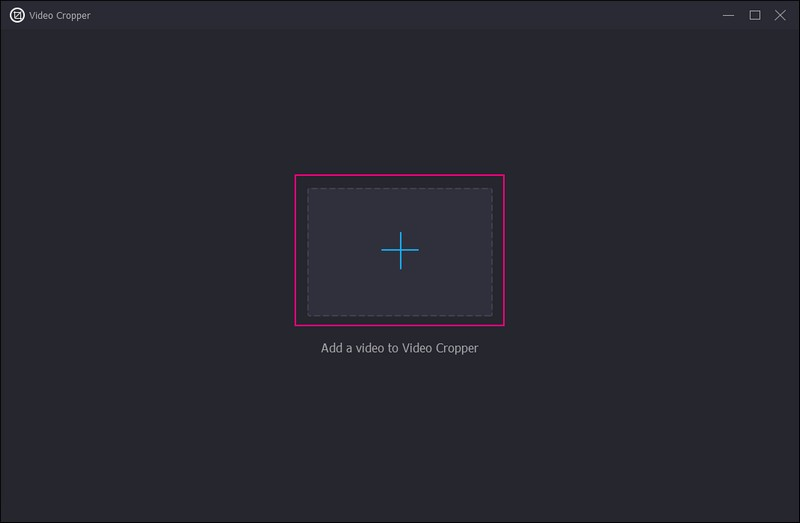
Step 3. Import a Video to Video Cropper
Press the (+) sign on the middle part of your screen from the newly opened window to import your video file. It will automatically open your desktop folder and select the video you want to undergo the cropping process.
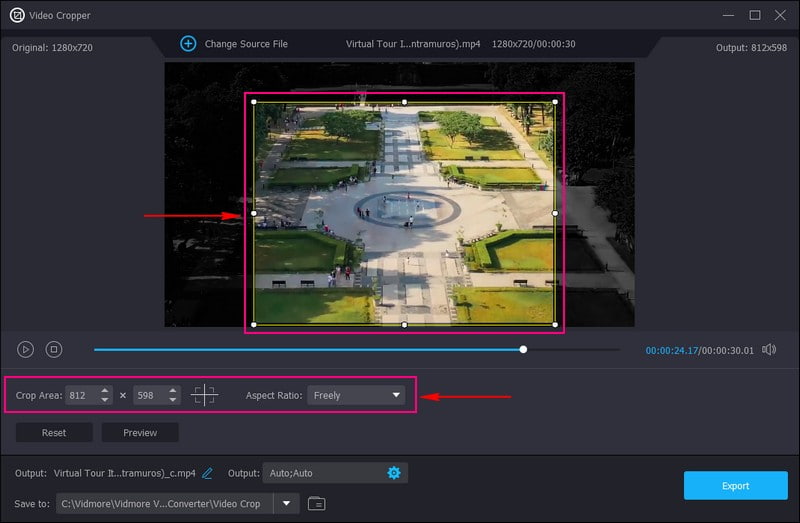
Step 4. Crop Your Video
You are now directed to the main cropping section, where your video is playing on the preview screen. Let us dive into cropping your video footage: you can crop manually, set a specific crop area, or select an aspect ratio.
If you want to crop manually, head to the preview screen, and drag the adjustable frame from your desired area. If you want to input a specific number to crop your video, go to Crop Area, and do your thing. Lastly, select your preferred size from the drop-down menu list if you prefer to change your Aspect Ratio to crop your video.
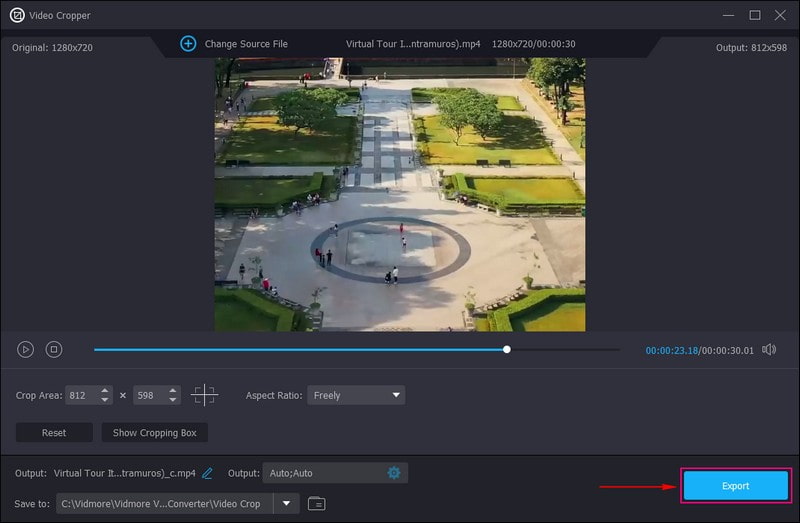
Step 5. Export Cropped Video File
If you wish to watch the video before exporting, hit the Preview button, and it will play the cropped video. Once satisfied with the outcome, click the Export button to save your cropped video file to your desktop folder.
Part 4. FAQs about Cropping Videos in PowerDirector
What is the aspect ratio of PowerDirector?
The aspect ratio available for the video is 4:3 or 16:9. To change the aspect ratio, press Edit and then Aspect Ratio, and choose your desired aspect ratio from the list.
Does cropping a video reduce quality?
When a video undergoes a cropping process, it involves re-encoding, which results cause a downgrade of quality.
Does cropping a video reduce the size?
When you crop a video, you can remove unwanted parts from your frame. You can change the video’s dimension to fit it within a specific area.
Conclusion
After reading this post, you have mastered how to crop a video in CyberLink PowerDirector. But, if you wish to access software that offers various options to crop video, feel free to use Vidmore Video Converter. Besides that, it offers numerous editing options that can help you produce stunning videos.