Best Guides on How to Crop a Video on Mac Without iMovie and QuickTime
Cropping a video is one of the editing functions that an editor must master. Now, if you are an aspiring video editor who uses a Mac, and want to work as a professional, then you cannot rely on the usual tools that your computer has. We know how useful the built-in tools in the Mac, such tools as QuickTime and iMovie. However, relying on better solutions should be evident if you want to level up your video editing skills. For this reason, we have gathered three great tools alternatively to your usual apps to give solutions on how to crop a video on a Mac issue. We are confident that by the end of this post, you will be a better video editor than your current state. So, what are you waiting for? Let’s get this exciting tutorial started!

PAGE CONTENT
Part 1. The Best Way to Crop Videos on Mac
If you are looking for the best video cropping tool that you can use on your Mac, then you should see the ultimate cropping tool of Vidmore Video Converter. Yes, it is a video converter, but it contains the best tools within its powerful toolbox, and the video cropper is one of them. Make way, for you will have the easiest yet most professional tool to resize video on Mac. Imagine how free it will be to crop your videos to your desired size, for this tool provides you with several ways to do so. You may crop the video area by following a standard size, applying a needed aspect ratio, or dragging the slider and quickly removing the video parts you want to eliminate.
Furthermore, this Vidmore Video Converter enables you to customize your output by providing various presets to tweak. Therefore, cropping your clip may give you your desired touch of its format, quality, resolution, framerate, and many more. And for the exportation process? You will be surprised at how swiftly this tool exports your videos since it uses advanced hardware and GPU acceleration technologies. Hence, to cut your excitement in using it, here are the steps to crop video on Mac.
- The best video converter with the best video cropping tools.
- Rich with powerful tools and features for Mac and Windows.
- Support more than 200 formats without losing quality transformation.
- The most accelerated and secured software for your Mac.
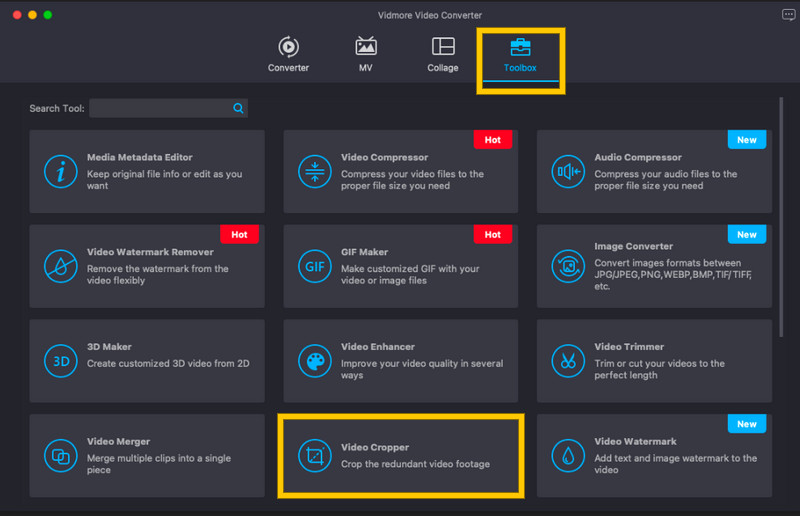
Step 1. Before anything else, download and install this fantastic tool on your Mac by clicking the download buttons above. After the installation, launch it and go to the Toolbox menu to open the Video Cropper tool. Now, to upload your video file hit the Plus icon that you will see on the new window.
Step 2. When the video is uploaded, you may start navigating this tool on your MacBook to change the aspect ratio of the clip. You may crop your video by adjusting the yellow adjusting bar at the preview for faster optimization. Otherwise, if you need to follow a specific size, you can type in the size in the Crop Area section.
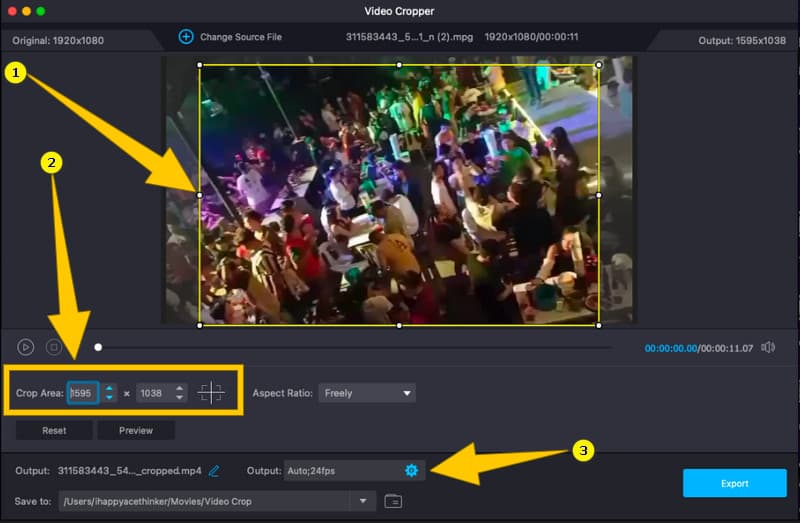
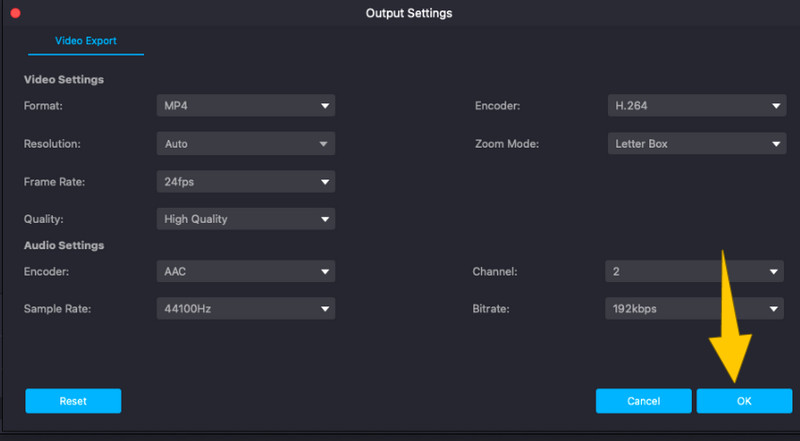
Step 3. After cropping the video, you have the option to customize your output. Access the Coggle icon in the Output section and tweak the given presets on the new window.
Step 4. Finally, to apply the changes you have made to your video, hit the Export button. Then, wait a couple of seconds until the exportation process finishes, and check your video afterward.

Pros
- You can use it with other video editing tasks.
- It is a flexible tool that you can use not only on Mac but on Windows as well.
- It crops videos in several ways.
- It can crop multiple videos simultaneously.
- It is simple and easy to use.
Cons
- It is not a completely free tool, although it offers a free trial version.
Part 2. Other Two Ways to Crop Videos on Mac
Besides the amazing software we presented above, here are the other great cropping tools you can enjoy professionally on your Mac.
1. VLC Media Player
VLC Media Player is one of the players with many functionalities you can enjoy on Mac. This free and open-source software can allow you to crop your videos professionally. When it comes to video cropping, the VLC helps you to do it effortlessly and rapidly. Aside from that, this media player lets you use it flexibly, giving you other features you can enjoy even on different OS. However, other than video cropping, utilizing this VLC Media Player can be complicated, especially if it is your first time. Thus, here are the instructions to follow in resizing your video on Mac with VLC.
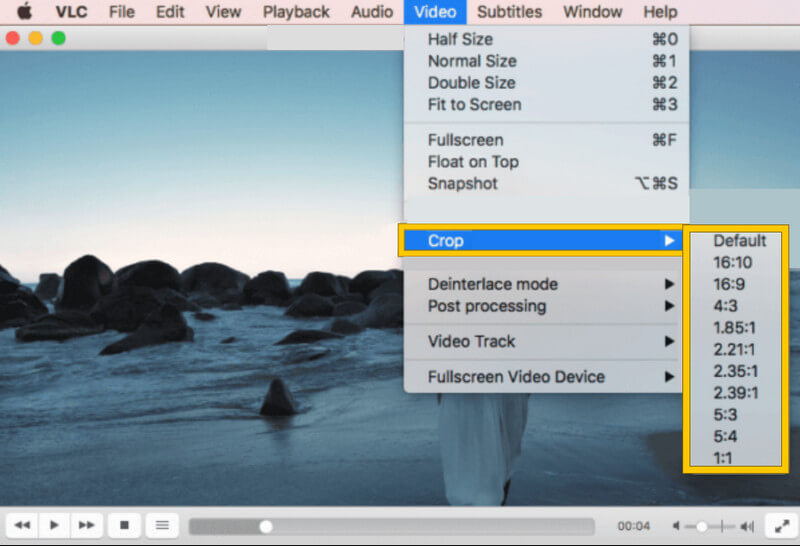
Step 1. Launch VLC on your Mac, and open the video file you want to crop.
Step 2. While the video is playing, hit the Video menu from the ribbons on top. Then, choose the Crop selection, and select an aspect ratio you want to apply to your video.
Step 3. After that, you can save your cropped video by clicking the File menu and selecting Save.
Pros
- It is entirely free software.
- It comes with a lot of tools for video editing.
- No watermarks and annoying ads, even though it is free.
Cons
- Only the video cropping procedure is easy.
- It consumes a high battery.
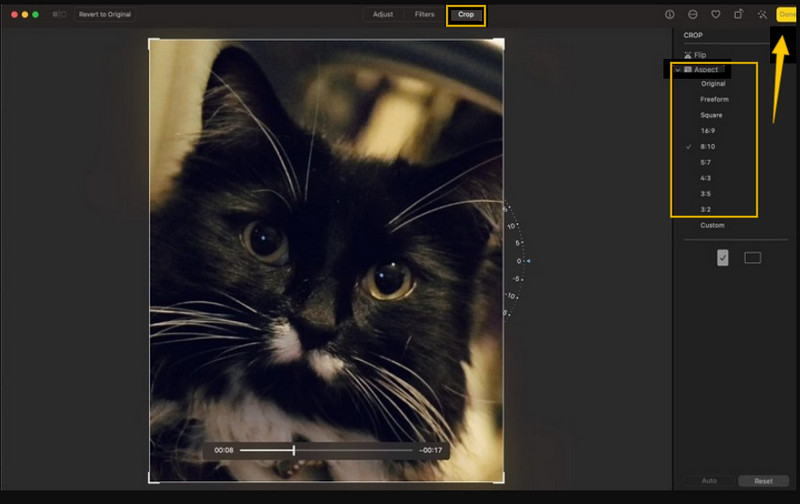
2. Photos App
Another great way to modify the video’s aspect ratio on MacBook Pro is through the Photos App. Yes, your built-in app that showcases your files comes with editing tools where a video cropper is included. However, this app can only provide you with the basic tools, limiting it to becoming professional software for this agenda. Nevertheless, the output produced by Photos App has a quality that you will surely accept more than beyond. Therefore, here are the steps to follow in using this tool for your video.
Step 1. Launch your Photos app on your Mac, and then open the video you need to crop.
Step 2. Once the video is uploaded, click the Edit button, and choose the Crop selection.
Step 3. Now go to the Aspect section, and crop your video by adjusting the handlebar or choosing among the Aspect Ratios. Then, hit the Done button once you’re done cropping. And that is how you resize video on Mac.
Pros
- It is a built-in tool on Mac.
- It restores large files, so it can also work with large videos.
- Easy and free to use.
Cons
- The tools within this app are very basic.
- The availability of video editing tools depends on your Mac version.
Part 3. Questions Frequently Asked about Video Cropping
Can I crop a video without affecting the file’s resolution?
Yes. As a matter of fact, cropping a video should now affect its resolution. However, if you want a better video resolution, use Vidmore Video Converter.
How to crop a video in iMovie on Mac?
To crop a video on Mac, you just need to click the cropping tool after importing the video. Then, adjust the cropping bar and save it after.
Will I have the same file size after cropping my video?
No, you must have a smaller video file after cropping it.
Conclusion
As mentioned previously, you can now proficiently crop videos on Mac with the help of the guidelines we presented above. Make sure to utilize them. After all, the Photos App is already on your Mac. But, to have a professional-like output, use Vidmore Video Converter.