Ways to Enhance Video Using DaVinci Resolve Color Correction Tool
Do you want to apply color correction to all clips DaVinci Resolve? Then this post applies to you. For editors, DaVinci Resolve has become a people’s choice. It is worth utilizing because of its powerful color tools and a powerful non-linear editing system, audio suite, and node-based image compositing. In this way, enhancing a video's color is easy. In addition, other than Davinci Resolve, you will also discover the most excellent alternative way to correct the color of your video that you can try and which is more suitable for every user. So, if you want to make your video the best and get a significant impact on the viewers, read this informative article.
PAGE CONTENT
Part 1: What is DaVinci Resolve Color Correction
DaVinci Resolve Color Correction Tool is the best way to improve the color of your video. We all know that we prefer high-color quality for our videos. In that case, this color correction tool is the right option. It has the capability to make your videos more entertaining and pleasing to watch. In addition to that, Davinci has more color correction options that it can offer, so you don’t need to look for another software. Furthermore, there are numerous tools available. Maybe you frequently become overwhelmed, especially if you are entirely new to DaVinci Resolve and have no idea how it operates. Also, being familiar with the color terminology you see in front of the interface is essential. So, let’s proceed to the color terms that you must familiarize when using this application.
HUE
It is the term for the spectrum colors referred by the name of the color, such as blue, red, green, orange, yellow, violet, yellow, etc.
SATURATION
It is about defining the intensity and brilliance of the color.
LUMA
It is the shade or the brightness of Hue.
CONTRAST
It is the difference between darker and lighter areas of a photo/video. Increasing contrast on a video/image will also increase the difference between dark and light areas. Dark will become darker, and light will become lighter.
EXPOSURE
It is the amount of light allowed to hit the camera sensor while capturing a photo or a video.
WHITE BALANCE
It balances the color temperature in your video/image. You can manually change the white balance by changing the temperature value or using the eye-dropper tool.
LUT
It means “Look Up Table.” It holds a set of numbers that was looked up by the application you use to change the colors of an image or a video.
These are the color terms you need to familiarize yourself with, especially in correcting your video's color.
Part 2: Best Way to Color Correct in DaVinci
Regarding correcting the color of your video, DaVinci Resolve is one of the standard downloadable software you can utilize. It offers exceptional quality and improves your video, which is impossible with other applications. Its massive internal color space can manage different luminance colors, and patented DaVinci algorithms are used to process photos at full 32-bit float quality with GPU acceleration. This way, you can produce an incomparable video and image.
Furthermore, DaVinci Resolve has more key features you can experience besides fixing the color of your video. It offers a Fusion Module feature. With the Fusion module, you may quickly create titles, visual effects, animations, and other compositions. These compositions will then be used in the editing modules. Hundreds of different Resolve FX filters are available, including ones for lighting effects, blurring, picture restoration, beauty, styling, and the generation of subtitles using the built-in closed captioning tool.
Another feature you can encounter in this application is the Video Editing feature. The Edit and Cut modules include everything you need to edit your movies, including overlays, speed tweaks, dynamic zoom, picture stabilization, and more. Using the modules, you may analyze your adjustments and simultaneously apply filters to several clips. This application is also available on both Mac and Windows. However, DaVinci Resolve has more interface options, making it complicated to understand. It has advanced tools that are not understandable for beginners. So, if you belong to those non-professional users, you must study this application first to get an idea.
Use the steps below to do basic color correction using DaVinci Resolve.
Step 1: Download DaVinci Resolve on your Windows or Mac. Proceed to the installation process and run the application.
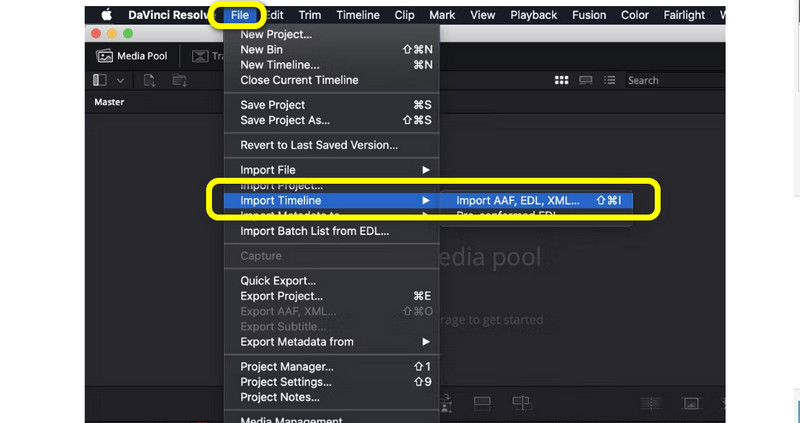
Step 2: Go to File > Import Timeline button to attach the video you want to edit. Note that you have exported your timeline from another software, such as an EDL, AAF, or XML file.
Step 3: After inserting a video, you will see the six categories from the interface, such as Viewer, Color Timeline, Node, Scopes, Effects, and Color Wheels.
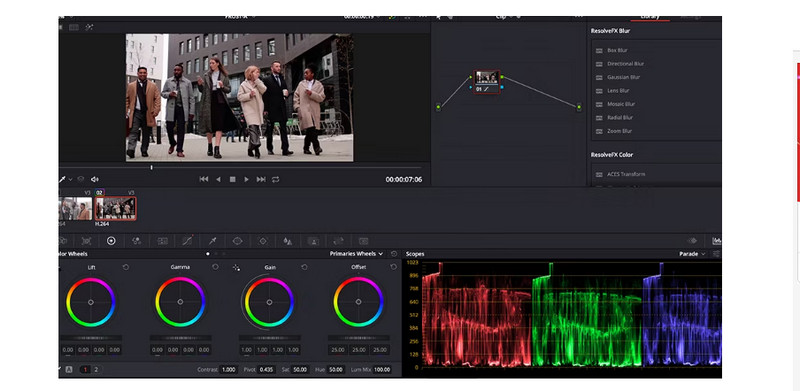
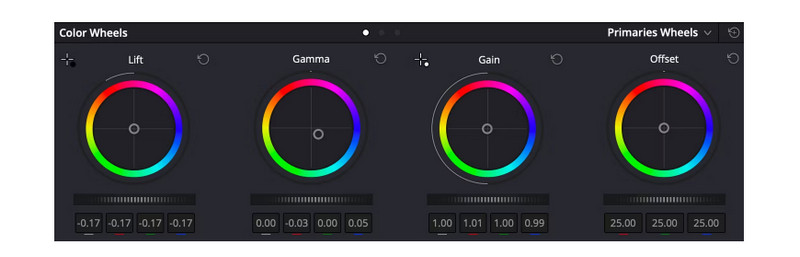
Step 4: On the Color Wheels, it enables you to change the video's color. By adjusting the sliders, you can adjust the Lift, Gamma, Gain, and Offset options based on your preference.
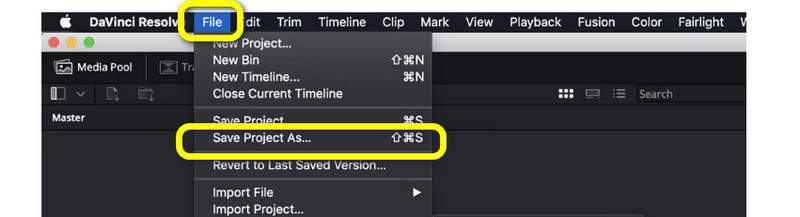
Step 5: When done correcting your video's color, navigate to the File > Save Project as button to export your edited video.
Part 3: Exceptional Alternative to DaVinci Resolve
The abovementioned method is undeniably challenging and hard to understand. The application itself is too advanced for beginners. So, in this part, we will give you the best alternative to DaVinci Resolve. If you want to Color Correct your videos to be more accessible, use Vidmore Video Converter. It offers a Color Correction tool that enables you to enhance the color of your video. This tool lets you adjust your video’s brightness, contrast, hue, and saturation. It also has an understandable interface, which is suitable for beginners. In addition, Vidmore is accessible on both Windows and Mac, making it convenient for everyone. Use the complete guides below to correct the color of your video quickly.
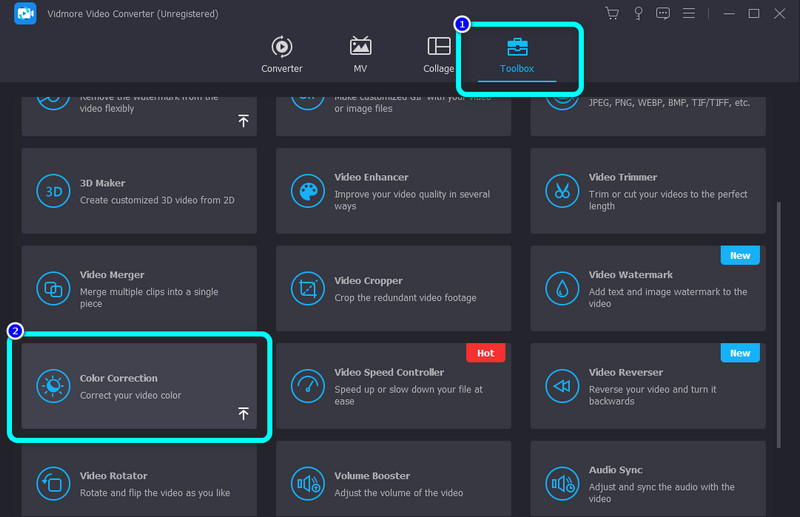
Step 1: Click the download button below to download the Vidmore Video Converter on your Mac or Windows. Run the application after you install it.
Step 2: Select the Toolbox panel. Scroll a little and click the Color Correction Tool.
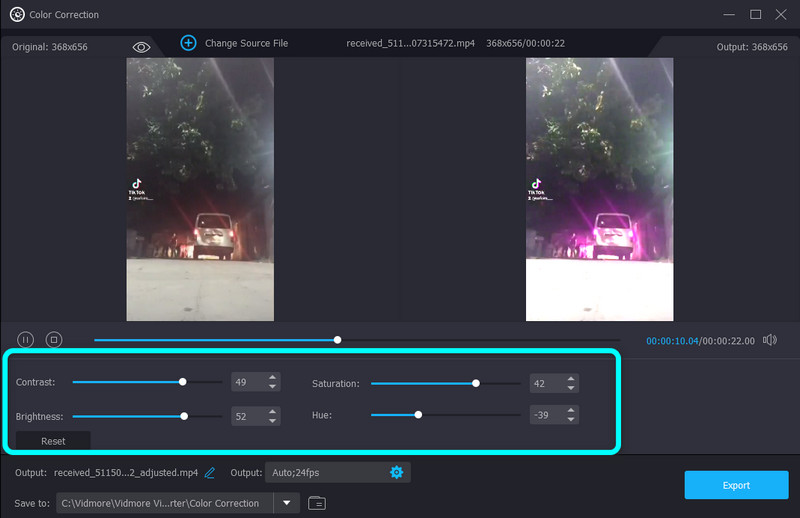
Step 3: Click the Plus icon. The folder will pop up on your screen, and pick the video you want to edit.
Step 4: Afterward, you can adjust your video’s saturation, brightness, contrast, and hue by adjusting the sliders.
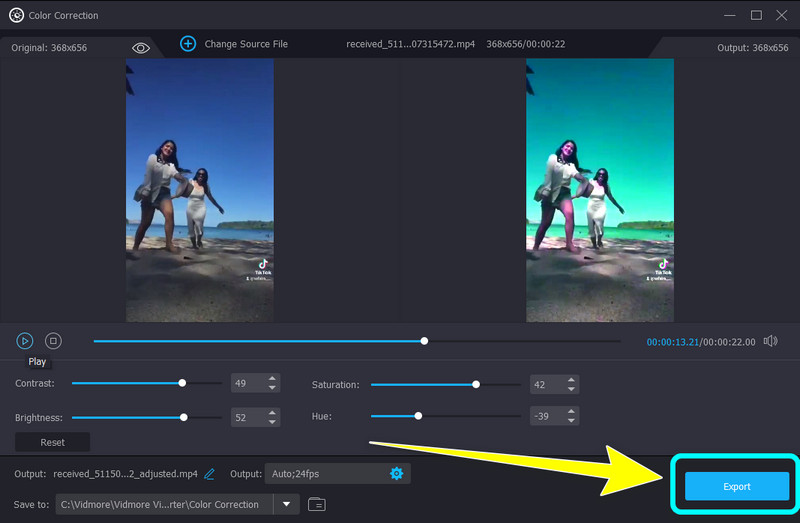
Step 5: To save your final video, select the Export button on the lower left of the interface.
Part 4: FAQs about How to Color Correct on DaVinci Resolve
1. What is the difference between color grading and color correcting?
Color Correcting is similar to editing your images more naturally. It fixes the color issue of your image/videos and makes them more realistic. Its goal is to clean and clean. Color correcting is done for documentaries and reality shows. In terms of Color Grading, it is like adding a filter on your images/videos. It adds emotions and atmosphere by coloring the images/videos.
2. Is DaVinci Resolve free?
Yes. You can download and install the BETA version for free. It provides tools for editing your images and videos. Also, it supports 4K UHD resolution.
3. What is the difference between DaVinci Resolve Studio and DaVinci Resolve 16?
DaVinci Resolve 16 is the BETA version you can download on the website of Black Magic Design. On the other hand, DaVinci Resolve Studio is the premium version. It offers more features than DaVinci Resolve 16.
Conclusion
And there you go! You have learned how to color correct in DaVinci Resolve. If this application is giving you a hard time editing your video color, you can use Vidmore Video Converter. This application can offer much easier methods to fix the color of your video.