3 Methods on How to Make Slow Motion in Final Cut Pro X
Final Cut Pro is an advanced video editing program exclusive to Mac computers. This software allows for extensive video and audio editing, color grading, closed captioning, and more. As with similar editing and distribution programs, Final Cut Pro provides all that is required. Because of one of its tools' ability to modify the video's pace, this piece of software is also fantastic for producing slow-motion films. In order to get the desired effect of slow motion, you will need to. Keep reading if you want to learn all there is to know about how Final Cut Pro's slow motion.

- Part 1. Final Cut Pro Slow Motion Tutorial
- Part 2. Best Alternative to Slow Down a Video
- Part 3. FAQs on How to Apply Final Cut Pro's Slow Motion in Smooth Way
Part 1. Final Cut Pro Slow Motion Tutorial
1. Slow Down a Video Using Retime Preset
You may access the retiming tools through the 'Retime menu option.'
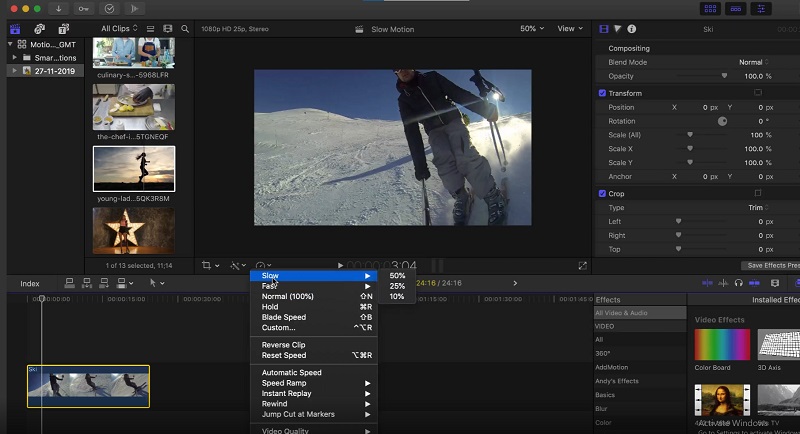
Step 1: Locate the clip you wish to modify and click on it when it appears in the Timeline. Either click on the Speed Meter symbol shown in the viewer window or use the Command key with the letter R on your keyboard to enter the Retime menu.
Step 2: You may access a menu that drops down from the top of your clip by pressing the Command and R keys on your keyboard. Adjusting the speed percentages found under each option is required to change the clip's timing.
Step 3: When you apply this effect to a clip, it will shorten the clip if you speed it up, but it will make the clip longer if you slow it down. The different speeds will each result in a different total running time for the video.
2. Slow Down a Video Using Slow Motion Settings
You also can add custom speed settings to your clips, giving you complete control over the speed effects that are applied to them.
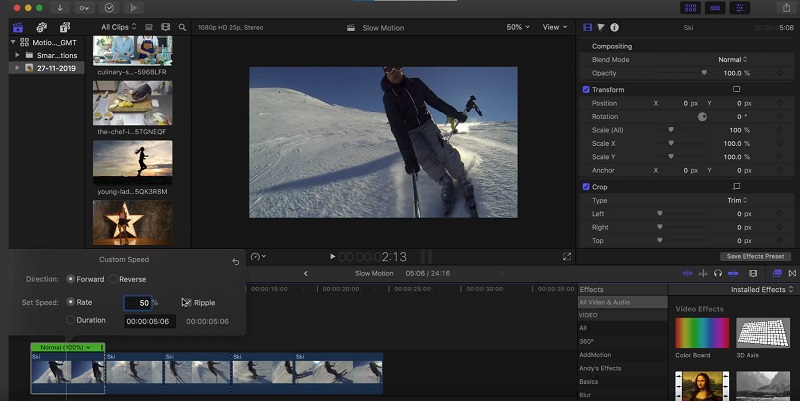
Step 1: Choose the Retime option from the pop-up menu. After that, choose Custom from the list of available choices or press the Control, Option, and R keys simultaneously. Then, under the box labeled Custom Speed, you will have the opportunity to choose the new parameters for your clip. You can decrease or increase the proportion of your clip being played or manually type in a new length. It will result in the pace being decreased or increased to meet the setting.
Step 2: You may choose to tick or uncheck the Ripple box. If the Ripple box is ticked, it indicates that the clip's duration will adjust by the changes you make to the speed settings. If the box is unchecked, the video will continue to play at the same pace but at the same duration as before.
Step 3: You have undoubtedly noticed that in addition to playing the tape usually, you also have the option to play it in reverse. Choose this option if you want the video to play backward at the pace you have set it to, regardless of how fast or slow it is.
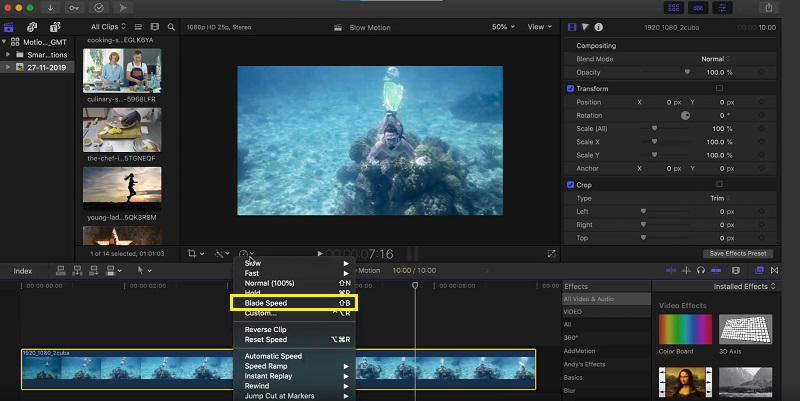
3. Slow Down a Video Using Blade Speed
You may chop up the clip's speed and have varied speeds throughout without splitting the clip into several portions by using the Blade Speed feature. This function enables you to cut up the speed of the clip.
Step 1: Move the playhead to the point in the clip where you wish the speed to alter. Pick Blade Speed or Shift + B from the Retime menu to change the reload speed. After moving the Playhead to where you want the speed to alter, press the Blade Speed button again.
Step 2: Navigate your mouse to the top and click on the Speed bar. Choose Custom from the list of options.
Step 3: Pick a different speed from the drop-down menu for that portion of your clip. Repeat this process with each segment of the Blade you have built.
Part 2. Best Alternative to Slow Down a Video
Let's face it: Final Cut Pro is a highly challenging piece of software to operate if you want to produce a slow-motion movie. Because of this, many people are making the transition to Vidmore Video Converter. Worrying about obtaining this program is unnecessary since it can be obtained for free on both Windows and Mac operating systems and may be used by anybody. It gives you access to various tools, each of which may edit your movie in a manner comparable to Final Cut Pro. One of these tools is called a Video Speed Controller. It allows users to create slow-motion films by modifying the speed at which a regular speed video is played back. In contrast to Final Cut Pro, this program is easy to use, and it does not need a significant amount of time to become proficient with each tool. Additionally, it supports various video formats, which means that you won't have difficulty searching for the finest program to convert the specific video format you need to convert. Now that you know how fantastic the Vidmore Video Converter is, let's go into the processes involved in utilizing this program to create a slow-motion effect.
Step 1: Installing the slow-motion video software requires you first to download the appropriate version of the program for your computer's operating system. Then follow the on-screen directions to install the program after downloading it. After the program installation is finished, you can start using it.
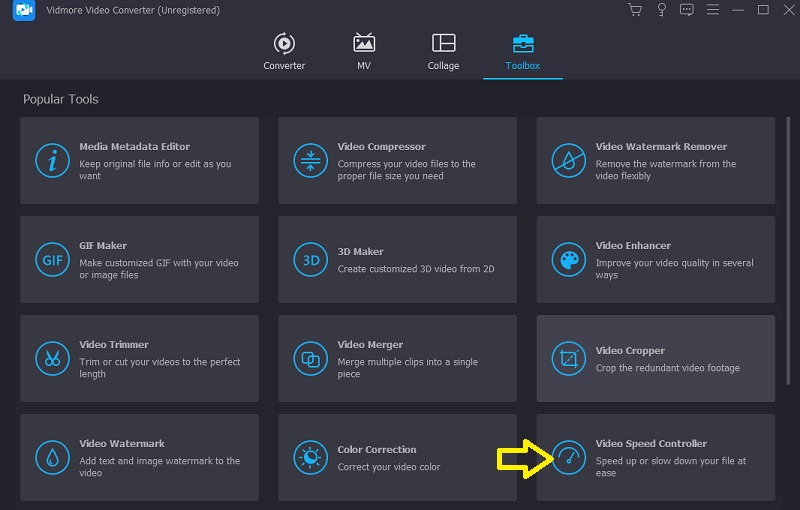
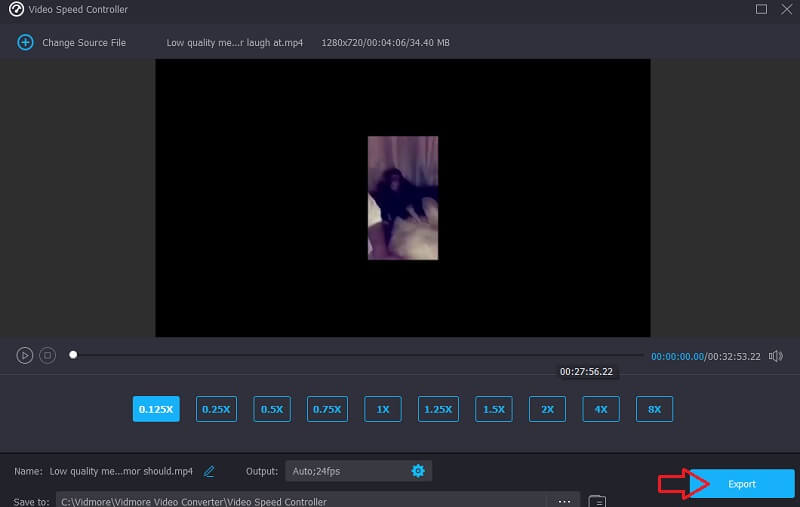
Step 2: To proceed, choose the Video Speed Controller option from the drop-down menu when you click the Toolbox tab. To import your video, click the Plus sign in the window's center.
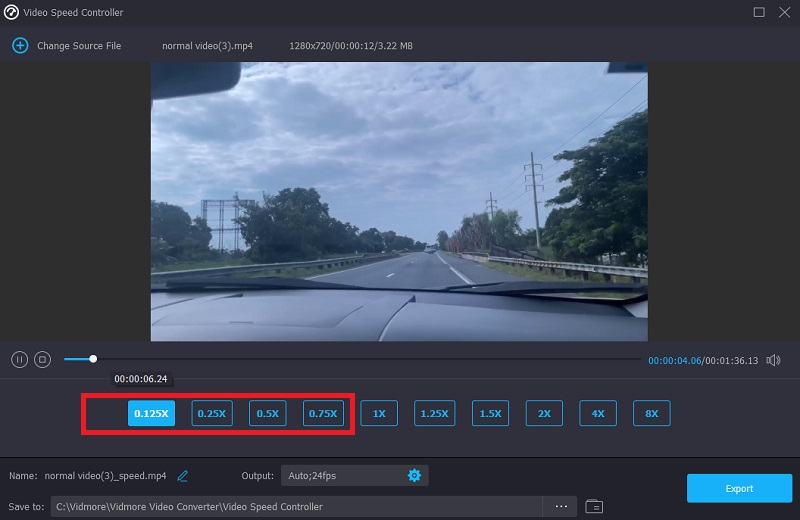
After the file has been loaded, a new window will appear. Inside that window will be many choices for reducing the speed of your movie. When adding the slow-mo effect to your video, you can select 0.75X, 0.5X, 0.25X, or 0.125X.
Step 3: You are now able to fine-tune the quality of your video by making adjustments to its format, resolution, frame rate, and other factors. It is possible even if you are content with the overall speed of your movie. If you so wish, you can also rename the video output.
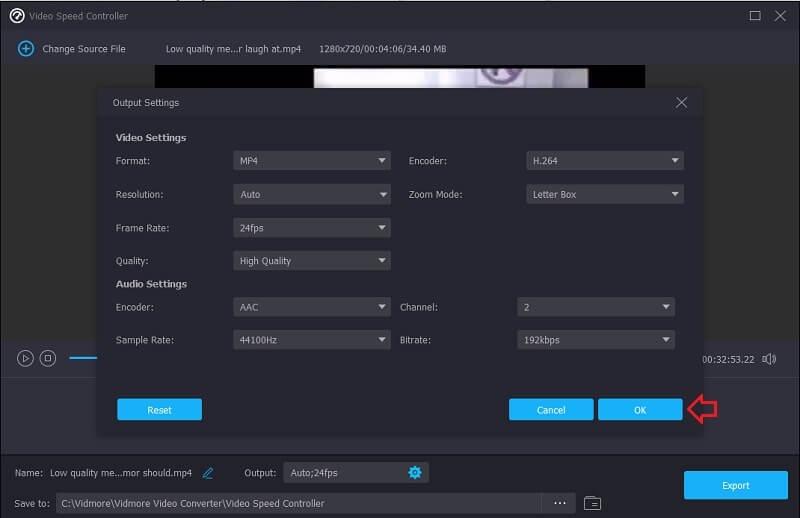
You may save your work by going to the File menu, choosing Export, and then selecting a spot on your computer's file system to store it.
Part 3. FAQs on How to Apply Final Cut Pro's Slow Motion in Smooth Way
Can I add speed transitions in Final Cut Pro?
Final Cut Pro allows you to switch between high-speed takes seamlessly. But you can't include any cuts or fades between the forward- and backward-playing sections.
Do you have to pay to use Final Cut Pro?
You get access to Final Cut Pro's trial version for ninety days. However, after that, you will be required to upgrade to the premium plan to continue using it.
What is the downfall of Final Cut Pro?
The user interface of Final Cut Pro is more challenging to comprehend, and the program has a tendency to damage your file if it isn't saved correctly. It might result in the loss of all of your hard work. It is recommended that you carry out this task once every five minutes to safeguard the integrity of your work and prevent it from being corrupted.
Conclusions
How to make a slow motion in Final Cut Pro X? You may refer to the post above. However, suppose you are familiar with Final Cut Pro. In that case, the interface might be challenging to understand, particularly if you are starting. Now that everything is done, you may use the Vidmore Video Converter. Everyone should choose this option since it is the most time and labor-saving option.