Walkthrough How to Cut Video in PowerPoint for Windows and Mac
PowerPoint is indeed an outstanding tool to make presentations. It has a plethora of visual aid tools to deliver an interactive, participative, and improvisational presentation. This program also supports adding multimedia content that will arouse the spectator's attention and improve their focus. You can attach content like videos, audio, and images for an impactful visual aid.
With this in mind, you would like to include a video in your presentation to catch the audience's attention. However, it so happened that the video you want to upload is lengthy due to the irrelevant parts of the video. The good thing is that PowerPoint comes with an inbuilt trimmer you can use to cut videos into smaller chunks. Here, we'll show you how to trim a video in PowerPoint and recommend a feasible program to help you get this done in no time.

- Part 1. Best Way to Trim Video for PowerPoint
- Part 2. How to Trim Videos in PowerPoint on Macintosh/Windows
- Part 3. FAQs on Trimming Video for PowerPoint
Part 1. Best Way to Trim Video for PowerPoint
Before we go straight to the process of how to cut videos in PowerPoint, allow us to introduce a great alternative to do it. Vidmore Video Converter is a multi-feature desktop tool that helps you cut videos in multiple practical ways. It can trim lengthy introductions, cut out unwanted parts of the video using the split feature, and effortlessly trim the start/end of a video.
What's more, the tool is infused with video editing tools. It enables you to crop videos, rotate, add watermarks and subtitles, adjust primary effects, and apply filters. Undoubtedly, it is a valuable program that could generate elegant and eye-catching videos. See the guide below to trim video for PowerPoint using this excellent program.
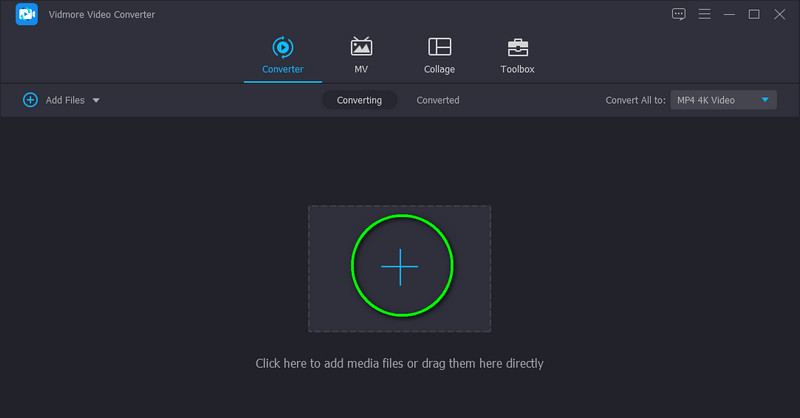
Step 1. Launch Vidmore Video Converter
First and foremost, get the app by clicking the Free Download button designed for your computer OS. Once you get the installer for your computer, install and run it to see the working interface of the tool.
Step 2. Import a video file
This time, import a video to the software. To do this, hit the Plus symbol in the main interface. It will open a folder to find and load the video you want to cut. You can also click the Spacebar to launch your folder and upload a media file or drag and drop the video track.
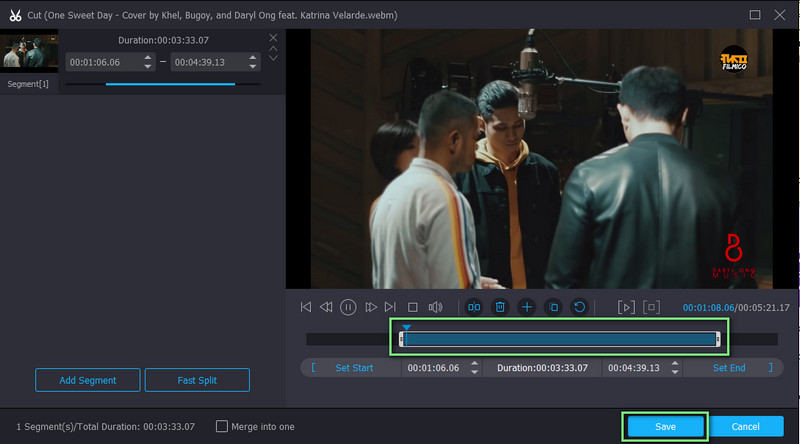
Step 3. Trim the selected video
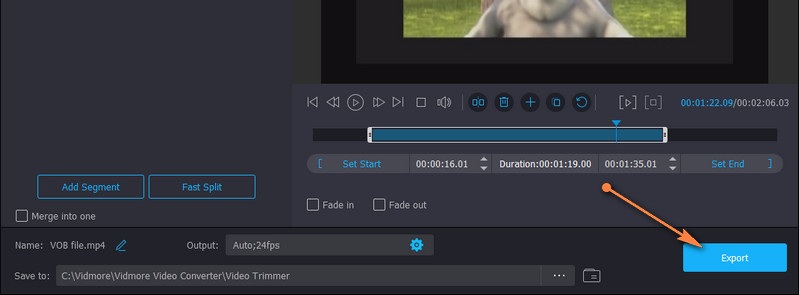
After loading the video clip, click the Cut button attributed with the video's thumbnail. It shall bring you to the editing interface for cutting. You can select a range using the slider on the progress bar to trim the start/end of the video. To trim in the middle of the video, click the Fast Split button to cut the video into pieces. Then select and delete the unwanted video parts. Preview the video and hit Save at the bottom right corner once satisfied with the results.
Step 4. Save the trimmed video
This time, go back to the Converter tab and choose a file format for the video. Simply unfold the Profile menu, then pick a video format and quality. Then, hit the Convert All button to finish the process. Once done, you will receive the playback from the folder that will pop up.
Part 2. How to Trim Videos in PowerPoint on Mac/Windows
As we know, Microsoft PowerPoint is available on Mac and Windows PC. In line with this, the PowerPoint features, functions, and interface are almost the same. Therefore, regardless of your OS, you can trim videos in PowerPoint on Mac or Windows. The steps to trim videos in PowerPoint on Mac and Windows are as follow:
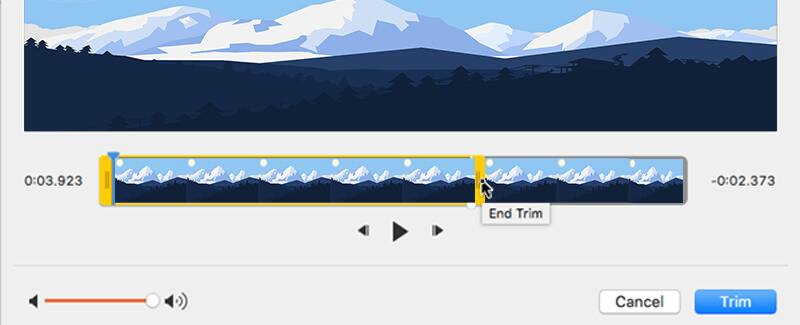
Trim Video in PowerPoint on Mac:
Step 1. First, ensure that you have PowerPoint installed on your Macintosh computer. Now, open a new presentation and insert the video you wish to cut.
Step 2. After uploading the video, the Video Format and Playback will display on the ribbon. Next, navigate to the Playback tab and select the Trim Video option. A dialog box will pop up showing the video editor.
Step 3. Hit the Play button to check the video playback and decide which part you wish to trim from the video. After that, drag the Nudge Forward and Nudge Backward buttons to select a range to cut.
Step 4. Lastly, click the Trim button to confirm the cutting and save the project or presentation.
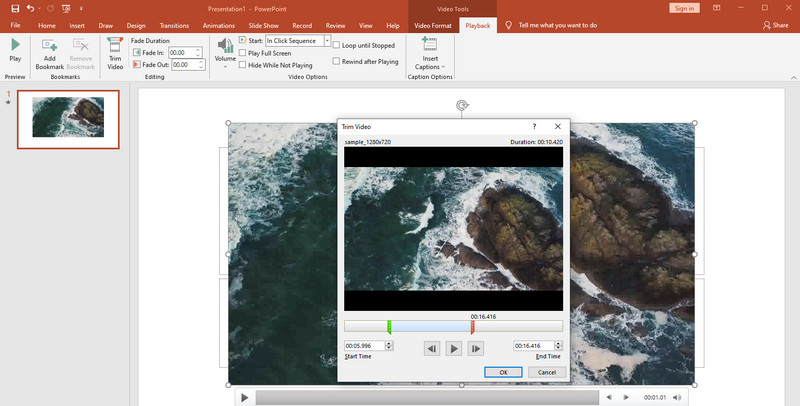
Trim Video in PowerPoint on Windows:
Step 1. Similarly, make sure that the PowerPoint application is already installed on your Windows PC. Then, launch it and start with a PowerPoint slideshow.
Step 2. Load the video into the slideshow and click the Playback tab on the ribbon. From here, click on the Trim Video option, and it will display a dialog box for you to cut the video.
Step 3. Now, decide which part you want to cut by playing the video. Hit the Pause button and drag the green handles to select the start point. On the other hand, move the red handle to set the ending point.
Step 4. Once done, play the video again and see if you like the results. If you do, hit OK to confirm the cutting and save the trimmed video.
Further Reading:
3 Simple Ways to Trim a Video in Windows 10/8/7/XP/Vista
Useful Skill How to Record a PowerPoint Presentation
Part 3. FAQs on Trimming Video for PowerPoint
How to save a trimmed video in PowerPoint?
If you wish to insert or save a video in your PowerPoint presentation, you can do it like how you would typically embed multimedia files. Go to the Insert tab on the ribbon. Click the Video option and browse through your folder. Locate the trimmed video you want to save in PowerPoint and select it to upload.
How to trim the middle of a video in PowerPoint?
Apparently, the cutting tool for PowerPoint is fundamental. You can only delete the start and end points. You can learn to cut or trim in the middle of the video using the Vidmore Video Converter. Simply split the video into desired segments and delete the middle segments of the video. Save the video, and you are done.
Can I crop a video in PowerPoint?
Yes. Cropping video is almost the same as cropping a picture in PowerPoint. Once you have inserted a video, double-click on the clip and go to the Video format on the ribbon. Now, hit the Crop button, and the aspect ratio will appear. Select the part of the frame you wish to show, then hit the Crop button again to apply the changes.
Conclusion
This guidepost showed you how to trim a video in PowerPoint and use a great alternative that offers more valuable functions for video trimming. Either method is guaranteed to help you cut videos in a simple manner. However, the thing with PowerPoint is that there is only one cutting method. Unlike Vidmore, you can utilize different cutting ways to help you achieve your desired video output. Still, it boils down to your personal preferences. If you wish to cut directly in PowerPoint, then go with it. Meanwhile, suppose you want to cut using a tool with various cutting options. In that case, Vidmore Video Converter is the recommended solution.