All Information About Mac Screenshot Shortcuts - How to Use
When we watch TV and see a wonderful frame and want to capture it and share it with our friends, we need the screenshot function to help us. Sometimes, we need to take a screenshot of what we're doing on the computer to mark which button to click or to delineate the area where an action is to be performed. The developers of Mac computers recognized the need for screenshots early on, so they built them into the system. In order to make it easier for us to call them up when we have an urgent task, the developers designed the screenshot window to be opened by a shortcut key so that we only have to press the button on the keyboard to start selecting the area to take a screenshot of. In this article, we will introduce you to three Mac screenshot shortcuts with images to help you locate them. You will also see here some points to keep in mind when doing so, as well as one of the best third-party screenshot tools. With this guide, you'll be ready to capture great moments on your Mac screen.

PAGE CONTENT
Part 1. Three Mac Screenshot Shortcuts
First, let's get to the bottom line: Which Mac screenshot shortcuts are available, and where are these keys located on our keyboard? Each can help you capture the real screen, a specific part of the screen, or a specific window.
Entire Screen
If you wish to take a screenshot of the entire Mac computer screen, press Shift, Command, and the number 3 on your keyboard simultaneously.
When the screenshot is complete, its thumbnail will be displayed in the corner of the screen. You can edit the screenshot by clicking on the thumbnail. If you don't, the screenshot will be automatically saved on your desktop. You can also use some third-party photo editing software to enhance and modify the resulting screenshots.

Partial Screen
Sometimes, we may not want the other person to see the content of other areas on our computer. In that case, we just need to select the target part when taking a screenshot instead of using the full-screen macOS screenshot shortcut. There is only one button for the screenshot part of the area that is different from the full screen: the number keys.
To customize the screenshot range, we need to press the Shift, Command, and number 4 buttons on the keyboard simultaneously.
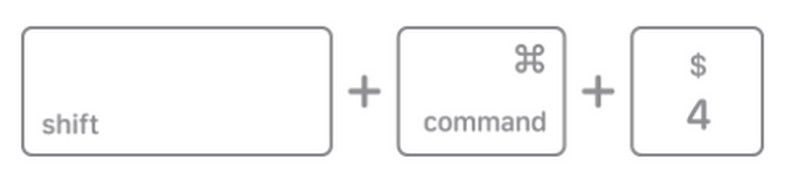
Once we press this shortcut, a crosshair will appear on the screen. We need to drag it to select the area of the screen we want to capture. If you want to move the selection, hold down the Space bar and move the crosshair. To cancel the screenshot and exit the Selected Area state, press the Esc key. You can also hold down the Shift key to adjust the extent of the box if you find that the width and height are not sufficient when you select the area. Once you have finished selecting the box, release the mouse, and the screenshot will be completed automatically.
Specific Window
Another Mac screenshot keyboard shortcut to take when we only want to capture the contents within a particular window. If we just select the range manually, it's just a pain in the ass. Some windows have curved corners, and using crosshair to frame them tends to cause asymmetry between the two sides or distortion of the image corners. Capturing a specific window directly avoids this.
First, we need to open the window we want to capture. Then, we have to press Shift, Command, the number 4, and the Space bar button on the keyboard simultaneously. Once this is done, our mouse cursor will turn into a camera-shaped icon. Attach it to the target window and click on it, and the screenshot will be taken automatically. If you want to exit this state, press the Esc button.

Some windows may appear shadowed when taking a screenshot. If you want to avoid this, press the Option key while taking a screenshot. Similarly, thumbnails of screenshots will appear in the corners of the screen. You can click on it to start cropping and editing.
After we take a screenshot, the default Mac system image will be saved to the desktop and will be in the form of a date. You can change the save path of the screenshot in the system or drag it to another folder.
Part 2. Bonus Part for Mac Screenshot Shortcuts
Mac Screenshot with Touch Bar
If your device's model is a MacBook Pro, you can try evoking the Touch Bar on your computer to take a screenshot.
To use this Mac screenshot tool, here is what you need to do.
Step 1. Open the Apple menu at the top left corner. From the options, choose System Preferences.
Step 2. Choose Keyboard within the System Preference window.
Step 3. Find Customize Control Strip at the bottom of the screen. Then, you will see the customization options of the Touch Bar.
Step 4. Now, you can choose to add several tools and shortcuts to the Toolbar. Find the camera shape button named Screenshot. Drag it to the bottom of the screen. Then choose Done to keep the change.
Step 5. You can use the Screenshot app directly from the Toolbar. Once you open it, you can choose from the screenshot range and start capturing images.

Screenshot on Mac with Preview
Another Mac screenshot tool is Preview. This app can work with all sorts of image files and add text, shapes, annotations, etc., to the screen.
Here is what you need to do to take a screenshot on Mac with the Preview app.
Step 1. Open the Applications folder, and choose Preview.
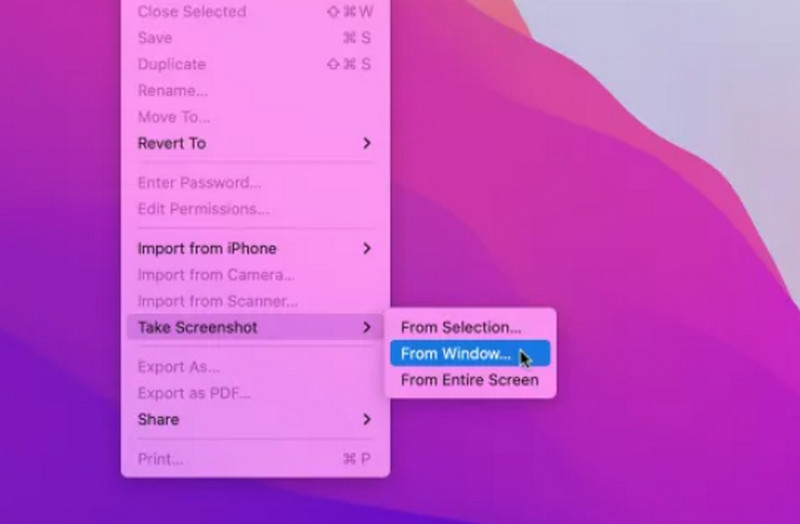
Step 2. To capture the entire screen, click File > Screenshot > From Entire Screen. You will then see a ten-second countdown. Make sure your screen is ready to take a screenshot before the countdown ends.
Step 3. To capture a part of the screen, click File > Screenshot > From Selection. Then, use the pointer to select the area you need to capture and then release.
Step 4. If you need to screenshot only a single window, click Choose File > Screenshot > From Window. Then, select the window you want to capture.
Mac Screenshot with the Best Mac Screen Recorder Software
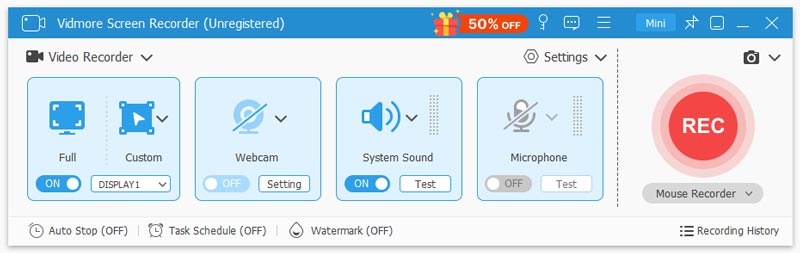
Although Mac computers come with a screenshot tool, they are relatively single-function and don't have any good image editing tools. If you want a more comprehensive service, we recommend trying a third-party screen recording software, Vidmore Screen Recorder. You can choose to capture the entire screen or a specific window. In addition to still images, you can also use it to record video or audio, including content from webcam, online meetings, and cool gaming action. Vidmore Screen Recorder records the screen without any lag and guarantees that the quality of the image will not be lost. Before exporting your work, you can also use its full set of editing tools to enhance the quality and modify the size of the screen.
Part 3. FAQs of Mac Screenshot Shortcuts
What is the fastest way to access screenshots on a Mac?
Generally, screenshots are automatically saved on the desktop. If you change the save path, you can also use Finder to find its current location.
How do I paste a screenshot on my Mac?
After taking a screenshot, you can open the document in which you wish to paste the image and then press Command and V on your keyboard. Of course, you can also select Edit > Paste directly from the menu.
How do we take screenshots on Apple?
You can press the side button and the Volume Up button at the same time and then release them very quickly. After that, the screenshot thumbnail will appear in the corner of the screen. You can click on it to preview the effect and manipulate it using the included image editor.
Conclusion
In this article, we introduce three Mac screenshot shortcuts and explain exactly how they are used. You can refer to the images we've provided to see what they look like on your keyboard and follow the notes in the guide to preview and edit the screenshot. In addition to the tools that come with the system, you can also use professional third-party screen recording tools like Vidmore Screen Recorder.