Discover How to Snip on Windows + the Alternatives
Windows Snipping Tool is an excellent feature of most Windows devices and can be used to make images of the device's screen. This post will tackle all the necessary information about the snipping tool; it includes its shortcuts and the step-by-step procedure for using it. Besides that, you will find out excellent snipping tool alternatives. With that, you will have another option of capturing a computer screen. Learn about the Windows Snipping tool by reading the following parts.

PAGE CONTENT
Before writing, how we test software for posts:
Disclaimer: All the content on our website is written by humans in our editorial team. Before writing, we do deep research about this tool. Then, it takes us 1-2 days to test it. We test this tool from main functions, limitation, how to use it, etc. To make our test more comprehensive, we also view review websites, like G2, Trustpilot, etc., to gather real users’ experiences for reference.
Part 1. Review the Windows Snipping Tool
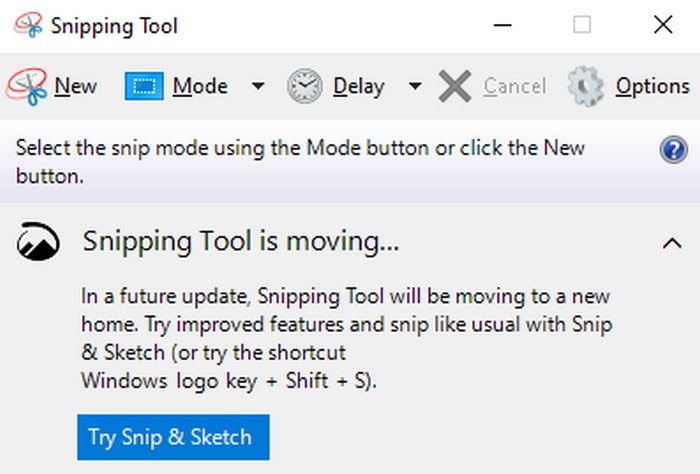
Windows Snipping Tool is a built-in screenshot capture utility in the Windows operating system. It offers a convenient method to capture and save screenshots of selected areas or parts of your screen. Here is a review of the Windows Snipping Tool:
Ease of Use
The Snipping Tool is straightforward, making it accessible to all novice or experienced users. It has a beginner-friendly interface with minimalistic options, enabling users to capture screenshots without complicated settings.
Capture Options
The Snipping Tool provides numerous capture functionalities to suit different screenshot needs. Users can select from four capture modes: Free-form Snip captures irregular-shaped selections; Windows Snip captures a specific window; Rectangular Snip captures rectangular selections; and Full-screen Snip captures the entire screen. This versatility allows users to capture specific areas or entire screens as needed.
Annotation Tools
When a screenshot is captured, the Snipping Tool offers basic annotation tools to improve or enhance the screenshot. Users can use the highlighter, pen, and eraser tools to draw and emphasize specific parts of the screenshot. However, the annotation tools could be more functional than dedicated image editing applications.
Save and Share Options
The Snipping Tool enables users to save the captured screenshots in several formats, such as JPEG, PNG, MHTML, and GIF. In addition, users can directly email the captured screenshot or copy it to the clipboard for easy sharing and further editing.
Limitation
While the Snipping Tool is helpful for basic screenshot capturing, it has some limitations. It lacks advanced features in dedicated screenshot tools, like scrolling capture, delayed capture, or advanced editing functionalities. Besides that, the Snipping Tool is unavailable in the latest Windows 10 versions and has been replaced by the Snip & Sketch tool, providing more advanced capture and editing functionality.
Overall, the Windows Snipping Tool is an excellent built-in utility for capturing and saving screenshots on Windows systems. It is beginner-friendly, provides different capture modes, and offers sharing options and basic annotation. However, for more advanced screenshot needs, users might want to use third-party screenshot applications that provide additional features and functionalities.
How to Use Windows Snipping Tool
Do you want to learn how to snip on Windows? If yes, we got your back. This section will present a step-by-step process to capture your screen using the built-in screenshot functionality of your Windows device.
Step 1. Click the Start button and search for Snipping Tool; click on the application in the search results. When the Snipping Tool opens, hit the New button in the tool's window, and a drop-down menu will appear on your screen with four capture modes. You can select from Free-form Snip, Window Snip, Rectangular Snip, and Full-Screen Snip. Choose the mode that suits your screenshot needs.
Step 2. After picking your preferred capture mode, your screen will freeze, and a selection box will appear on the right-bottom of your screen. Use the mouse to drag, choose the area you wish to capture, and release the mouse button to complete the capture.
Step 3. When the screenshot is captured, the Snipping Tool Window will open with the captured screenshot. You can use the available annotation functionalities, like highlighter, pen, or eraser, to draw or highlight parts of the screenshot.
Step 4. Hit the File menu in the Snipping Tool Window. From the menu options, choose Save As to save the screenshot to a specific location on your desktop. Select a file format, whether JPEG, PNG, MHTML, and GIF, and enter a name for the file. Alternatively, you can choose Copy to copy the screenshot to the clipboard for pasting it into other documents or applications. The Snipping Tool also offers an option to directly email the screenshot by choosing Send Snip from the File menu.
Windows Snipping Tool Shortcuts
The Windows Snipping Tool provides keyboard shortcuts to improve your screenshot capture experience. These shortcuts can help you navigate the tool efficiently and quickly. Here are some common Windows Snipping Tool Shortcuts:
| Keyboard Shortcuts | Function |
| Ctrl + PrtScn | Capture the entire screen and open the Snipping Tool. |
| Alt + N | Make a new screenshot with the last selected capture mode without re-opening the Snipping Tool Window. |
| Alt + M | Select a capture mode: Free-form Snip, Window Snip, Rectangular Snip, and Full-Screen Snip directly from the keyboard without using the mouse. |
| Ctrl + C | Copy the screenshot to the clipboard to paste into other documents or applications. |
| Copy the screenshot to the clipboard to paste into other documents or applications. | Save the captured screenshot. |
| Alt + T | Show or hide the thumbnail of the most recent screenshot. |
| Alt + D | Delay the screenshot capture by a few seconds. It is useful when you must capture tooltips or menus that disappear quickly. |
| Alt + F | Open the File menu to save, send, or print the captured screenshot. |
| Alt + A | Open the Edit menu to access annotation tools like highlighter, pen, and eraser to edit the captured screenshot further. |
| Alt + H /td> | Open the Help menu to access details about using the Snipping Tool. |
Part 2. Windows Snipping Tool Alternatives
1. Vidmore Screen Recorder
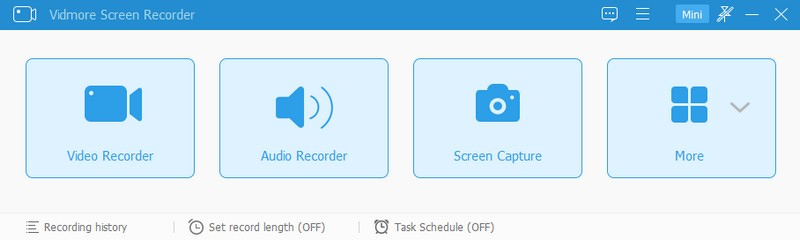
If you prefer to use a tool to help you capture any part of your screen, count on Vidmore Screen Recorder. This program is a convenient and easy-to-use recording tool that lets you record high-definition audio and video and take screenshots whenever you like. You can record computer screens, online lectures, exciting gameplay, webcam videos, favorite music, or take a screenshot.
Vidmore Screen Recorder has a built-in Screen Capture feature, allowing you to take screenshots. You can take a screenshot of the whole screen or any area or part of your screen as you like or need. After taking a screenshot, a rectangle shape will appear on your screen, offering annotation options. You can apply a box, circle, line, arrows, draw anything, erasers, incorporate text, put a number, and more according to your desire and need. Besides that, you can copy the screenshot and paste it into other applications or documents. You can also save your captured screenshot directly in your local folder. Indeed, Vidmore Screen Recorder can help you record your screen and take a screenshot whenever you like without limitation.
Pros:
- It is easy to use and recommended for first-time and professional users.
- Record or screenshot full-screen or select the area you want.
- Add shapes, texts, and arrows to your recording or screenshot.
- Available on Mac and Windows operating systems.
Cons:
- Avail of the paid version to access the program entirely.
2. FastStone Capture
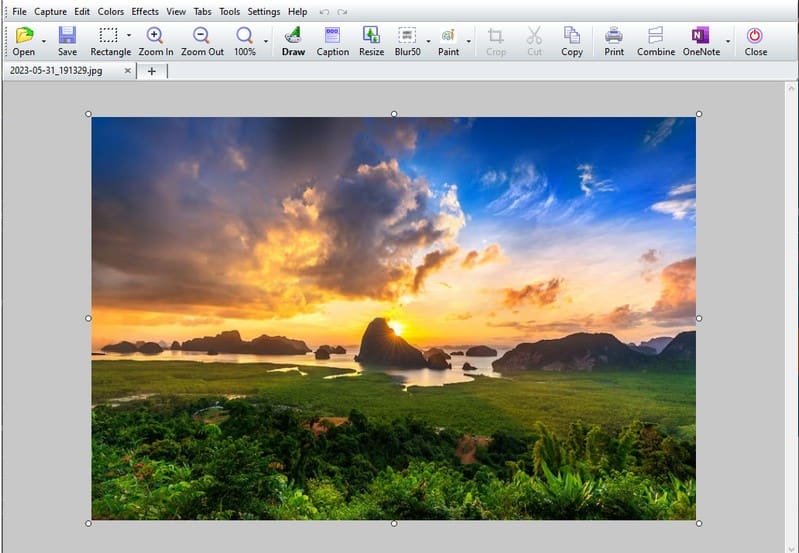
There is a Window snipping application called FastStone, one of the leading screenshot applications for Windows. It has a free trial version that lasts for thirty days. Portable versions of FastStone are also available, which you can use on a USB drive. When using this tool, you can take screenshots of your current window and any other area of the screen you choose. After that, you can edit your captured screenshot using its editing options. Some editing options are drawing shapes, incorporating texts, numbers, arrows, lines, highlights, inserting images, resizing the captured screenshot, and more. Besides that, you can share your work with social networks you like and copy the output to the web directly.
Pros:
- It has a free version that lasts for thirty days.
- Users can capture the entire screen or select a specific part.
- It offers annotation options, like shapes, highlighters, texts, numbers, etc.
Cons:
- Subscribe to the paid version to use the program's functionalities.
Part 3. FAQs about Windows Snipping Tool
What format is Snipping Tool Image?
The Windows Snipping Tool stores image files, such as JPEG, PNG, GIF, MHTML, or e-mail.
How does Snipping Tool delay work?
Launch the Snipping Tool application, and click the arrow button next to Delay to take a screenshot of a delay. You can select a delay of up to five seconds. It is an excellent option for capturing images of objects that reappear.
Why is the Snipping Tool not working on Windows 11?
If Snipping Tool is not working on your Windows 11 device, restart the application. Press Ctrl + Shift + Esc to run the Task Manager. In the Process tab, select the Snipping Tool and click the End Task button at the top.
Does the Snipping Tool automatically save?
Users can save screenshots at once by clicking the Windows and PrintScr keys. It will automatically take the screenshot and save it under the Screenshots folder in their user profile's Pictures folder.
Why can't I take a screenshot on Windows 11?
There are several reasons why the print screen is not working on Windows 11. Some of the most common causes include keyboard settings, which your keyboard settings may have changed. It causes the print screen function to stop working. Besides that, outdated or missing drivers can cause the print screen function to stop working.
Conclusion
This post taught you how to snip on Windows using the built-in screenshot tool. While the built-in Windows Snipping Tool performs the job, some want a different method. However, there are many other options available for you. This post introduced a tool to help you capture your screen with editing functionalities. But if you prefer to use a tool that can record and screenshot simultaneously, rely on Vidmore Screen Recorder. You can record high-definition audio and video and take screenshots whenever you like.