
How to Fix Shaky Video for A Better Viewing Experience
Capturing your best moment in life in a video is satisfying, not until you watch it and discover that the result is shaky. This type of result can only lead to a dissatisfying viewing experience. If you are wondering if there's a solution to reduce the shakiness of the video, then the answer is yes. There are various tools you can rely on to achieve your result. Thankfully, this post has multiple solutions to effectively stabilize shaky videos. You will also get more insight into why some videos are getting wobbly. To learn all the possible solutions to solve your concern without further ado, start reading everything from this guidepost.

PAGE CONTENT
Part 1. Why Some Video Turns Shaky
The main reason why your video turns shaky is because of the process of capturing your moment. If you are just taking a video using your hand, there's a higher chance that the video can become shaky. With that, it is best to consider using a tripod so the camera can stay still from the beginning to the end.
Looking for the best way to fix your shaky video? You have to read the following sections of this article.
Part 2. Best AI Tool to Stabilize Shaky Video
Do you want to learn how to fix a shaky video using an AI-powered tool? If so, we would like to introduce 123APPS. This tool has a simple process that can help you stabilize your shaky video instantly. It also has a simple layout for quicker navigation. In addition, you can access more enjoyable features to improve your video file. It has a video cropper, speed controller, trimmer, volume adjuster, and more. The only drawback is having a fast internet connection to utilize the tool. To start fixing your shaky video, use the instructions below.
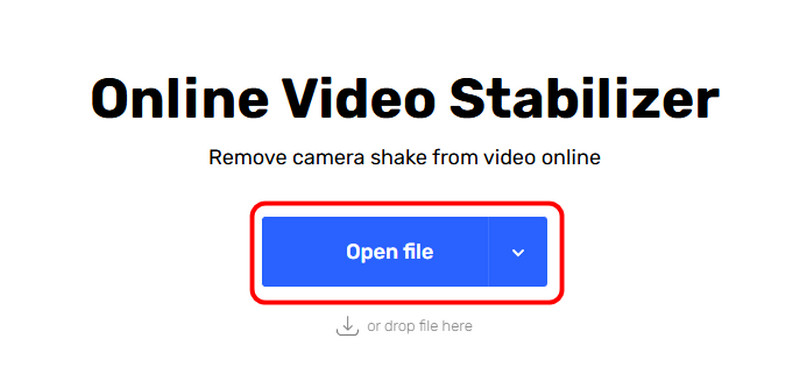
Step 1. Open your browser, visit the 123APPS website, and use its Video Stabilizer feature. Then, click the Open File option to start uploading your shaky video.
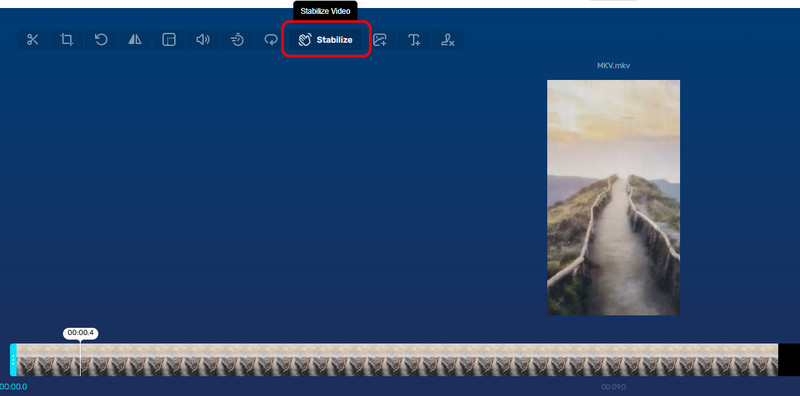
Step 2. From the tool's interface, click the Stabilize Video option to start fixing your shaky video.
Step 3. For the final process, tick Save to download the stabilized video to your device.

Using this online method, you can stabilize your shaky video instantly. But always ensure that you use a fast internet connection for smooth performance.
Part 3. Stabilize Shaky Video on Premiere Pro
Are you looking for an advanced method of stabilizing your video on your desktop? Then, you must access Adobe Premiere Pro. This professional-grade video editing software can help you stabilize your video perfectly and smoothly. It can also let you adjust the stabilization setting based on your needs. It is powerful because the program can ensure you get a high-quality video afterward. It can also provide various features. You can , crop, adjust video color, and more. However, since the tool is advanced, only skilled users can operate it. Premiere Pro is also resource-intensive. You must have a high-spec computer to manage it. See the methods below to learn how to stabilize video in Premiere Pro.
Step 1. Download and install Adobe Premiere Pro on your computer. After that, add the shaky video you want to fix and put it in the Timeline section.
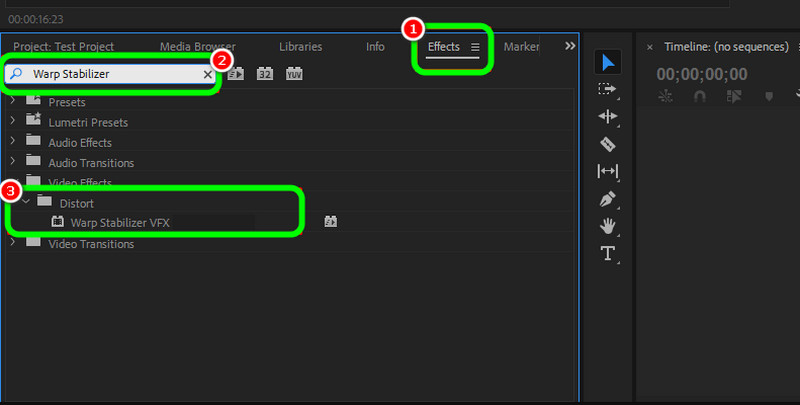
Step 2. Once done, search the Effects section for the Warp Stabilizer. Then, you can proceed to the next step.
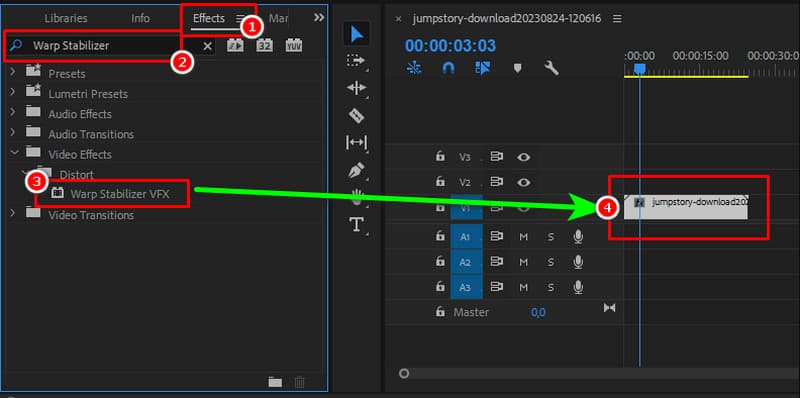
Step 3. Click and drag the Warp Stabilizer VFX to the video into your timeline. Then, start adjusting the stabilization settings based on your needs.
If you are satisfied with the result, you can now save your stabilized video.
This method is perfect for professional users. It can help them reduce the shakiness of the video smoothly while providing satisfying quality. The only drawback here is that it is not suitable for all users. Its subscription plan is also pricey.
Part 4. Fix Shaky Video on Mac
If you are using Mac, access iMovie to fix your shaky video. With the program's stabilizer feature, you can reduce the shakiness level of the video. What's good about the software is it has a simple user interface. With that, you can access all the needed functions without any struggle. The only downside of the editor is it lacks advanced editing features for improving your video output. But still, if your focus is to stabilize video on Mac, check the steps below.
Step 1. The first thing to do is import the shaky video to iMovie. Then, insert it into the Timeline section.

Step 2. Afterward, navigate to the Preview section's upper part and navigate to the Stabilize Shaky Video option. You can now start stabilizing your shaky video by adjusting the slider.
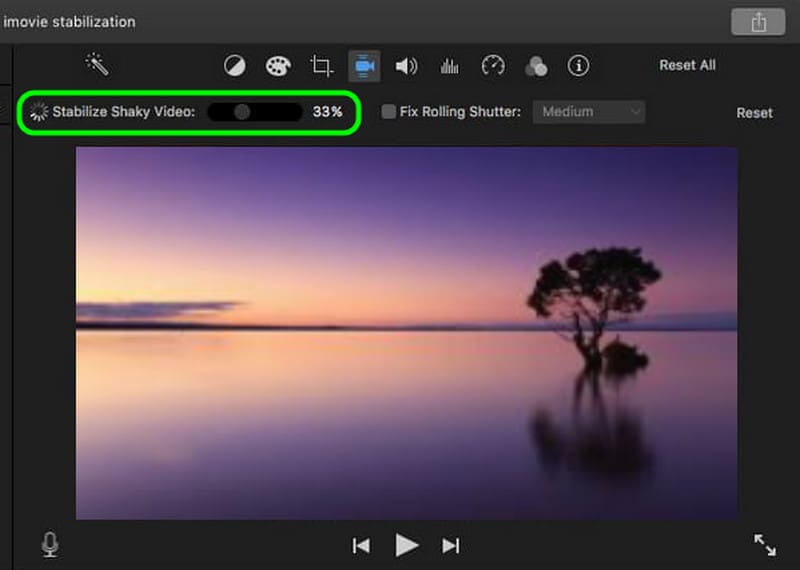
Step 3. After the process, click the Save symbol to export your final video.

You can use this method on your Mac to stabilize your shaky video. The best part is that you don't have to download it since it is among the Mac's pre-built software. The only drawback is that it lacks advanced features to tweak videos professionally. And iMovie may not work due to some problems.
Part 5. Simple Method to Stabilize Video on iPhonec
How to stabilize video on an iPhone? If you want to fix the shaky clips on your iPhone, you can download the CapCut app. This app has a Stabilizer feature that can assist you in dealing with your videos. You can also get a fast procedure to save more time during the process. The only problem here is it inserts its watermark when using the free version. Follow the instructions below to start solving your problem.
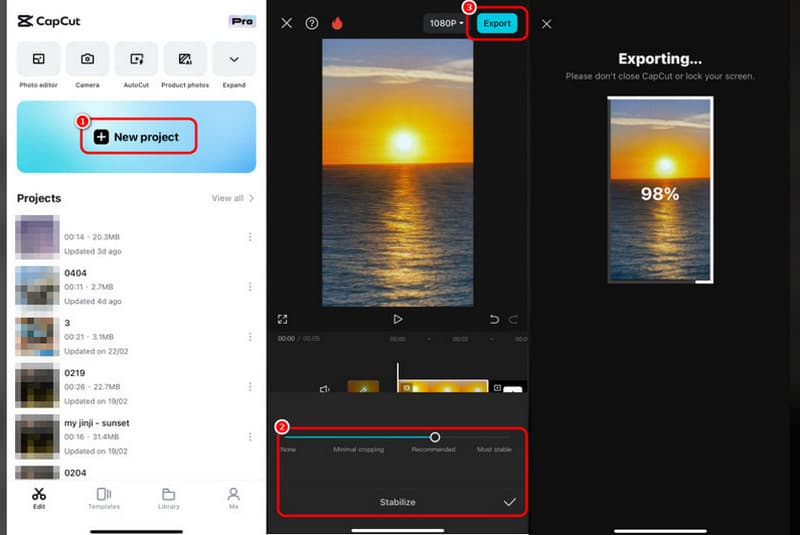
Step 1. After you access the CapCut app, launch it and press the New Project to add the shaky video from your Photos app.
Step 2. After that, proceed to the lower interface and hit the Stabilize feature. With that, you can use the slider to stabilize your video based on your preferences.
Step 3. Once done, press the Export button above to save your fixed video.
These instructions allow you to get the desired results using an iPhone device. So, access the app to have a smooth video-stabilizing process.
Part 6. Bonus: Best Video Repair Software
Do you have a damaged or corrupted video file that you want to open? Well, the best thing to do is to repair it to have a better and smoother video playback. In that case, we would like to introduce Vidmore Video Fix software. This program is perfect for fixing various video issues, such as blurry, pixelated, frozen, corrupted, damaged, and more. Plus, the process of fixing the video is quick and straightforward. It can also ensure excellent video quality for a better experience. It can also deal with various video formats, such as MP4, MKV, AVI, M4V, WMV, FLV, and more. If you want to learn more about the software, see more details below, along with the simple procedure of repairing your unplayable video.
More Features
• It can support hundreds of video formats.
• It has a fast video repair procedure.
• The software can offer its Preview feature to check the final output.
• The program can support 8K content for better video playback.
Step 1. Access Vidmore Video Fix on your Mac or Windows computers. After you launch it, start with the procedure.
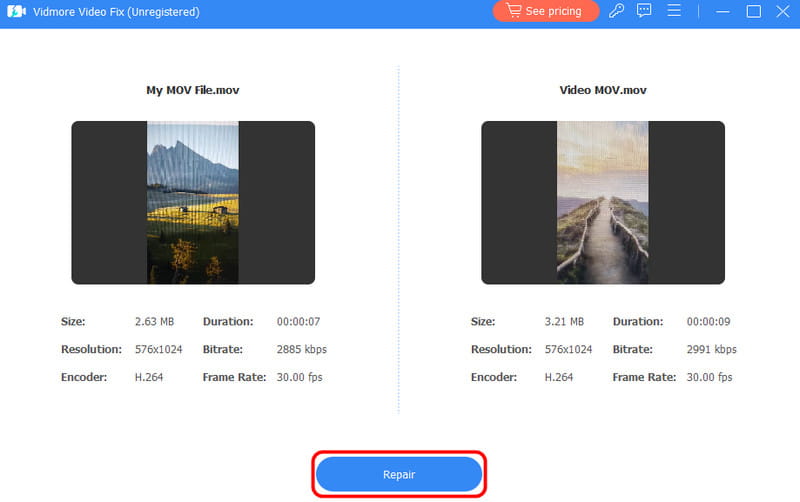
Step 2. Now, hit the Red + to insert the damaged video file. Then, attach the sample video by clicking the Blue + option.
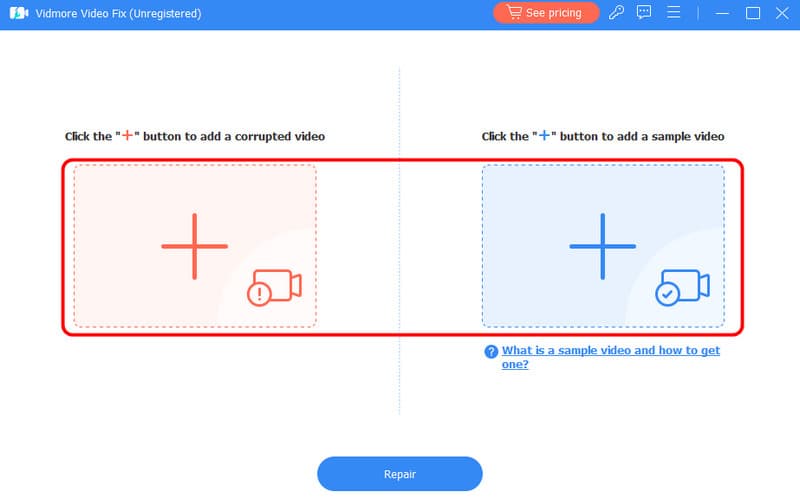
Step 3. After inserting the two video files, click Repair to fix the damaged video.
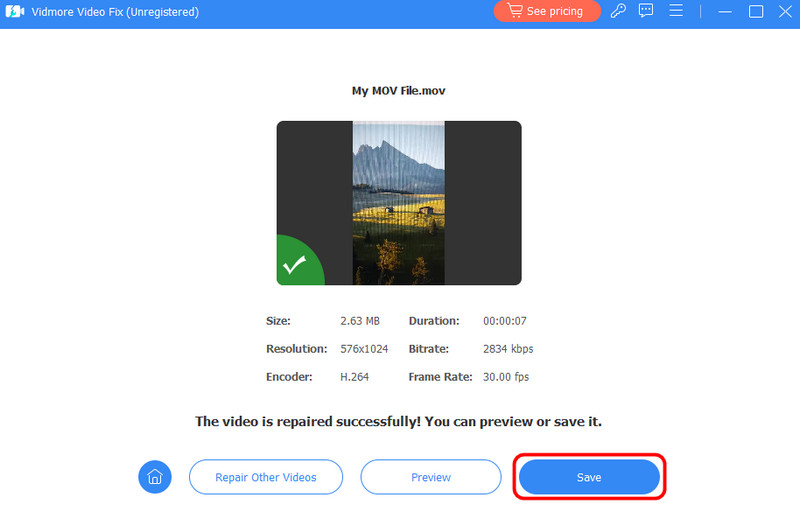
Step 4. When the final result appears, tap Save to download the fixed video on your computer.
If you want a smooth video repair process, use this instruction to get your preferred result. It can even fix various video issues, making it an exceptional program for all users.
Conclusion
To effectively stabilize shaky videos, you can use all the methods mentioned in this tutorial. With that, you can watch your video without any disturbance. Also, if you want to use a simple tool that can repair your damaged video satisfactorily, we suggest using Vidmore Video Fix. This program has what it takes to fix your videos, making it an ideal video repair software for users.