How to Fix Overexposed Film or Videos: Three Best Solutions to Utilize on PC
Having a video with an over-saturated and exposed is normal. In fact, even professional videographers experience this circumstance. This inevitable occurrence is often the result of a hardware glitch or a shooting environment. However, regardless of the reason your video has this problem, you will surely solve it breezily now. It is because you are about to learn excellent ways how to fix an overexposed film or video. Therefore, without further adieu, let’s get this started.

PAGE CONTENT
Part 1. How to Fix an Overexposed Video Efficiently
The first efficient software to fix your video is Vidmore Video Converter. This program allows you to easily obtain the perfect resolution and saturation for your overexposed video. Furthermore, it is infused with advanced neural AI network technology responsible for fixing and enhancing videos without compromising the quality. In addition, this tool provides you with several ways to fix your videos. While fixing the overexposed video, you can also improve the resolution, quality, framerate, and more. On top of that, this Vidmore Video Converter is the most anticipated software for amateur users since it has the most user-friendly interface you will surely love.
- Workable on over 200 plus formats, including MKV, AVI, MP4, WebM, and so on.
- Suit your Mac and Windows computer smoothly.
- Seemingly high quality of outputs it produces.
- Easy fixing process using its built-in settings.
How to Fix Overexposed Video
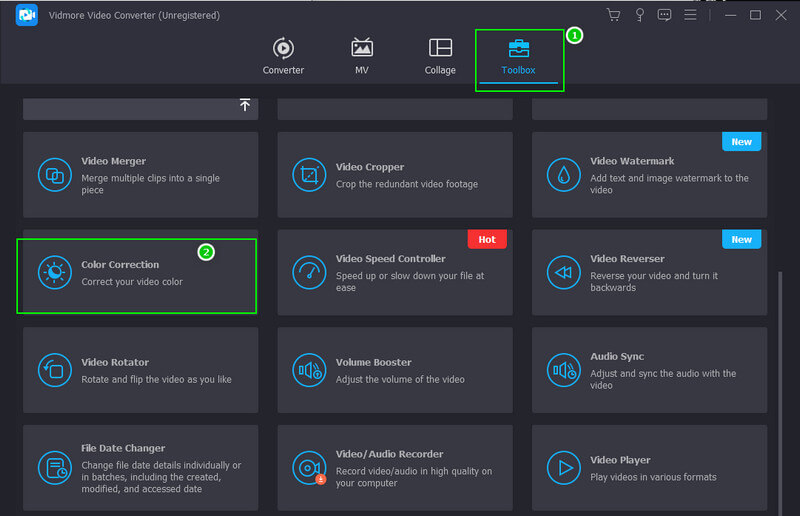
Step 1. Begin by installing this program after hitting the download buttons presented above. Now launch the tool after installing it. Then, go to the Toolbox menu that is on the top part of the interface, and select the Color Correction tool. Then, proceed to the importation process of the video by hitting the Add icon at the center of the new window.
Step 2. Upon the importation of the video, you may start navigating the adjustment settings located under the preview section. Start with the brightness, then followed by the contrast, then the saturation. Control them until you get the fixation that you need for your video.
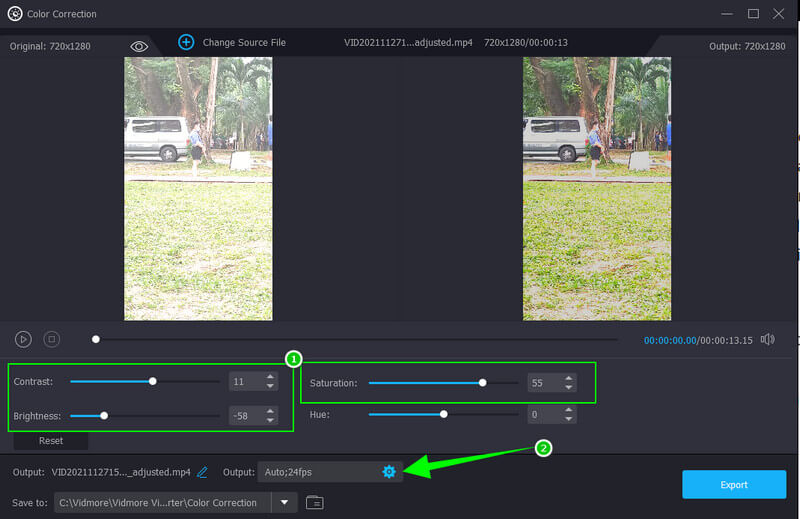
Step 3. This time, if you wish to enhance the video output, then click the Coggle icon located under the exposure settings. Now adjust the provided presets in the popped-up window. Feel free to modify the format, quality, and resolution according to your preference. Then, hit the OK tab to implement the changes.

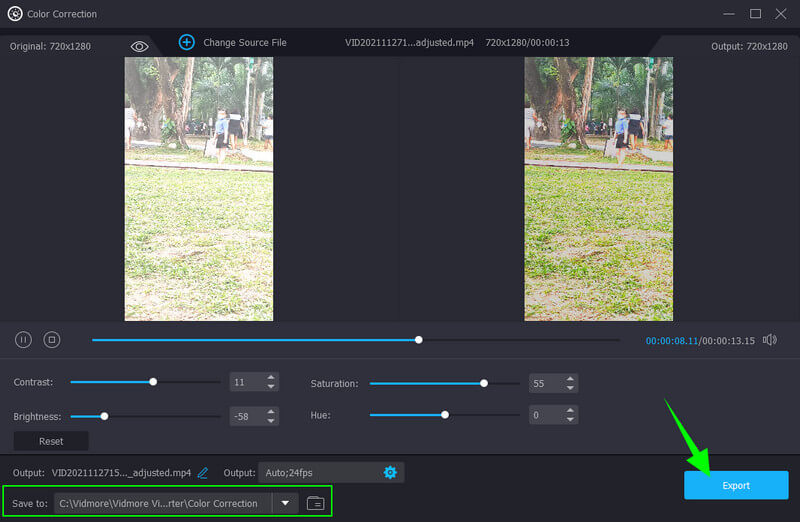
Step 4. After that, you can set a destination file when by going to the Save To section. Otherwise, hit the Export button, which is at the bottom part of the interface, wait for the exportation process to finish, and check the output after.
Part 2. How to Mend an Overexposed Video in Premiere Pro
Before we take a sneak peek at how to fix overexposed video in Premiere Pro, allow us to give an overview of this popular program. Adobe Premiere Pro is a multi-platform video editing software. When it comes to fixing a super expose video, this tool uses advanced technology that helps its Lumetri color panel to exceed the expected video fixation. However, this said, Lumetri will still let you adjust manually to attain the perfect vibrant for your video. However, we won't deny the scoops that say something about the complexity of this tool, resulting in a challenging utilization for beginners. Nevertheless, Adobe Premiere Pro lets you have a good color grading functionality using its basic features to use. Hence, below are the guidelines that you can follow in ther answer to how to fix overexposed video in Premiere Pro.
Step 1. Launch the tool on your desktop, and import a video file that you need to fix. How? Go to the File menu, then hit the Import File selection. Then, after successfully importing the video, drag it to the Timeline to start working.
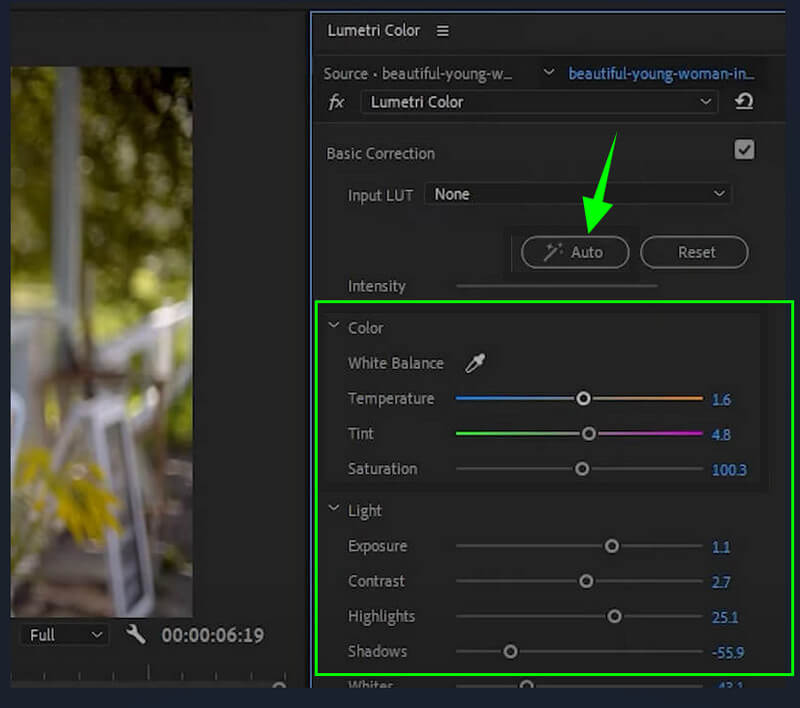
Step 2. After that, access the Lumetri Color panel by hitting hit the Windows tab at the upper part of the interface. Then, a new small window will appear where you will find the panel.
Step 3. This time, start adjusting the Lumetri Color panel. You can hit the Auto tab if you want to. Then, adjust the color and light setting options that will help you lower the overexposed video. Once done, proceed to save and export the video.
Part 3. How to Correct Overexposed Video in iMovie
Now, we have encountered some people who ask why my video is overexposed in iMovie. We will see that they will find the answer inversely by looking at the guidelines below. But before that, allow us to give this brief description of iMovie. We must acknowledge the fact that one of the good features iMovie has is its color mending tool. It has advanced settings that customize the video’s brightness, exposure, saturation, and contrast. In addition, iMovie also provides adjustments where you can modify the color gains, enhancement options, and auto-denoise options. However, this software is only workable on Mac, which makes long faces for Windows users. Still, here are the steps on how to fix overexposed videos in iMovie.
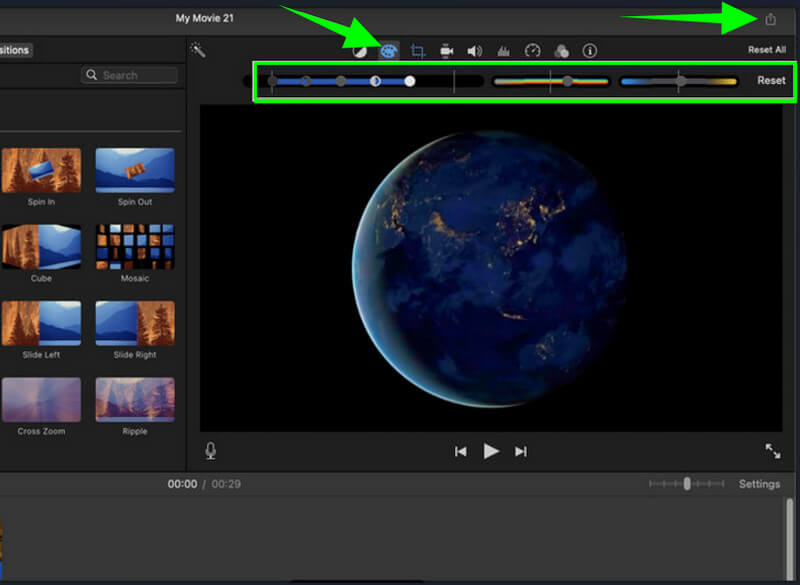
Step 1. Launch the iMovie on your Mac, and hit the Import Media Files selection to get the video file in the interface. Once done, drag the video into the Timeline to begin working on it.
Step 2. Then, right-click the video you uploaded in the Timeline and select the Show Inspector tab from the selections. After that, click the Color Corrector symbol on top of the preview and adjust the options under it.
Step 3. After getting the desired settings to fix your video, you can start exporting it. To do so, just hit the Export symbol on the upper right corner of the interface.
Part 4. FAQs about Fixing Overexposed Video
What necessary adjustments to apply to overexposed video?
It is essential to adjust brightness, contrast, and saturation for the overexposed video.
Can I fix the overexposed video without affecting the quality?
Yes, you can. With the best video editors we have here for you, most especially the Vidmore Video Converter, you can guarantee a lossless amendment of output.
Does compressing the fixed, overexposed video lessen the quality?
Yes. Because compressing a video will mean shrinking the elements that it contains. This results in a lowering of the quality.
Conclusion
This article is an excellent guide to fixing overexposed videos. Premiere Pro and iMovie are, without a doubt, excellent at this task. However, this Vidmore Video Converter also showed high competency that surpassed the two popular programs. In addition, its features and tools are also impressive, which makes more users grab it.