9 Ways to Enhance Audio on iPhone Videos for Better Sound
Have you ever recorded a great video on your iPhone, only to realize the audio sounds muffled or too quiet? It’s a common frustration, and no matter how good the visuals are, poor sound can take away the impact of a video. It’s important to take note that factors like background noise, wind, or distance from the mic can easily affect the audio quality. That’s why enhancing your video’s sound is just as important as perfecting the visuals.
In this article, we’ve gathered nine simple and effective ways to enhance audio on iPhone videos, helping you make your recordings sound clearer, louder, and more professional. Moreover, don’t miss the chance to discover a tool that can help you improve your iPhone video. So what are you waiting for? Scroll down to learn more!

PAGE CONTENT
Part 1. 9 Solutions to Improve iPhone Video Audio
If you’re wondering why your iPhone videos sound muffled, windy, muted, or shaky, then the problem does not only lie in the iPhone system. It could be due to how the video was recorded. So, in order to enhance audio on iPhone video, here are some ways you can improve your iPhone video audio:
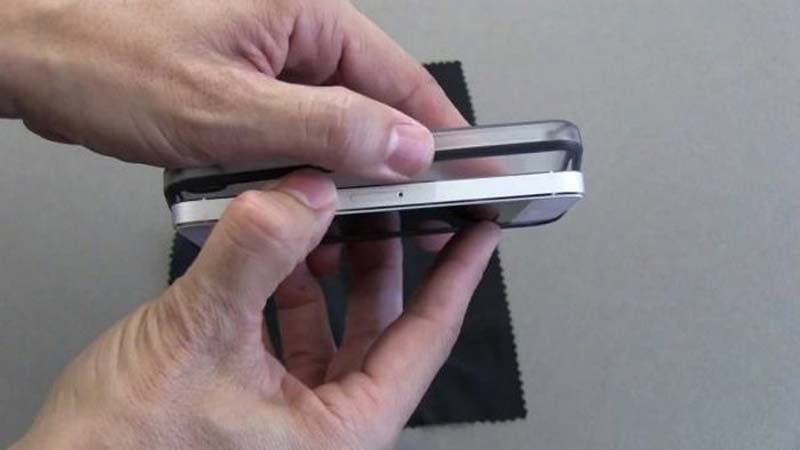
Solution 1: Check if the Microphone Is Covered
Before recording, make sure your hand or phone case isn’t blocking the iPhone’s microphone holes. Many users accidentally cover the mics, especially when recording in landscape mode. Use a case with proper cutouts to avoid muffled or distorted sound.
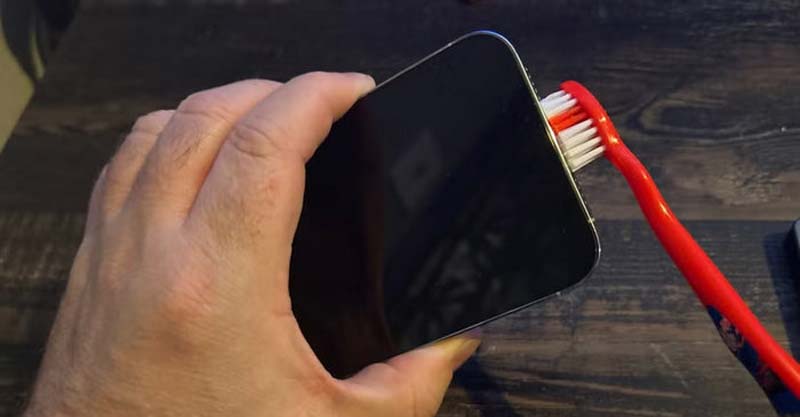
Solution 2: Clean the Microphone Vents
Dust and lint can easily clog your iPhone’s tiny microphone holes, causing weak or unclear audio. Gently clean the vents using a soft-bristled brush or microfiber cloth. If needed, lightly wipe the area with a 70% isopropyl alcohol solution, but avoid inserting anything sharp into the holes.
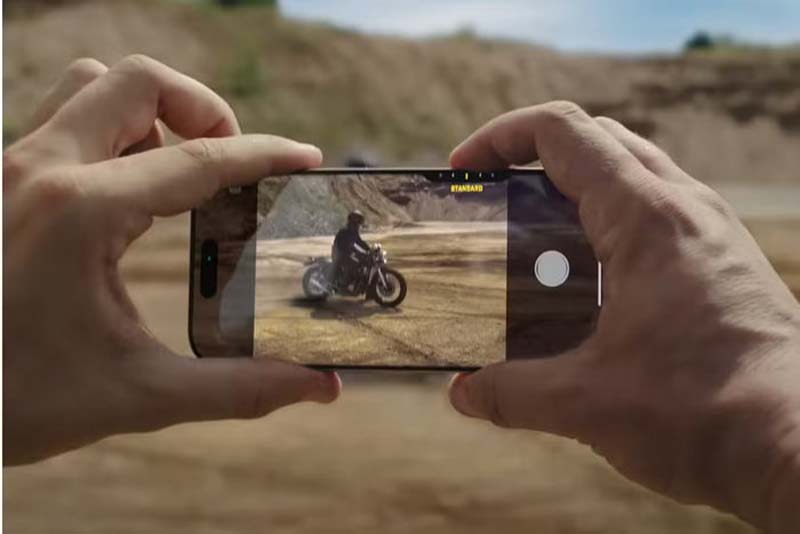
Solution 3: Hold Your iPhone Properly While Recording
How you hold your phone affects how well it captures sound. When shooting in landscape mode, avoid covering the microphones near the charging port. Keep your hands slightly away from the mic openings to allow sound to travel directly toward the phone.
Solution 4: Pause Background Audio Playback
If you’re using iOS 18 or later, background audio playback may interfere with your recording. This feature switches your video’s sound to mono and lowers clarity. For better results, pause any music or app audio before recording or disable Allow Audio Playback in your camera settings.
Solution 5: Use the iPhone 16’s Audio Mix Feature
For users with an iPhone 16 or 16 Pro, Apple introduced the Audio Mix feature that lets you fine-tune recorded sound in the Photos app. Choose from modes like In-Frame, Studio, and Cinematic to balance vocals, minimize noise, or create a more immersive sound similar to movie audio.
Solution 6: Enable Wind Noise Reduction
Outdoor recordings can easily be ruined by wind interference. On newer iPhones, go to the camera settings and enable Wind Noise Reduction. This setting automatically filters out wind distortion for clearer outdoor audio.
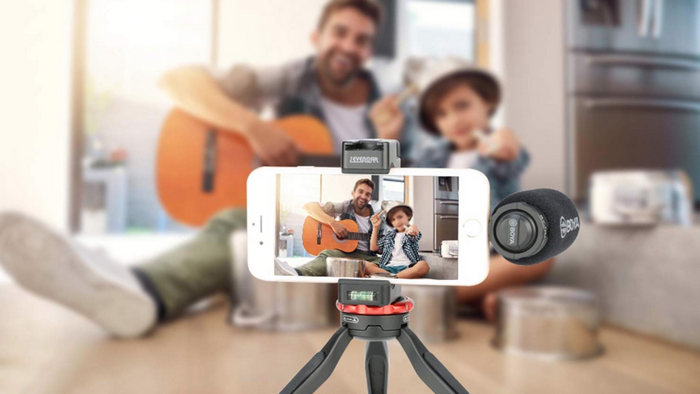
Solution 7: Use an External Microphone
For the best audio quality, consider using an external mic. Wired Lightning or USB-C mics are affordable options for casual recordings, while wireless systems like the Hollyland Lark M2 or DJI Mic 2 provide professional-grade clarity and flexibility for vlogging or interviews.
Solution 8: Add a Wind Screen or Pop Filter
When recording outdoors, use a wind screen to block harsh wind sounds. If you’re improvising, even placing your iPhone in a clean sock can reduce popping sounds, just make sure the fabric doesn’t block the mic entirely.
Solution 9: Edit and Enhance Audio After Recording
If your video is already recorded but the audio needs improvement, you can use editing tools like iMovie, GarageBand, or third-party apps such as Vidmore Video Editor. These allow you to reduce noise, boost volume, and balance sound levels for a cleaner final result.
By being mindful of all these things, you can be able to enhance your audio on iPhone video and achieve a more improved sound with your iPhone video.
Part 2. Bonus: How to Improve iPhone Video with Vidmore Video Converter
If you follow any of the solutions above and your iPhone video still sounds bad, it’s better to use an audio-video enhancer tool. One of the best tools for this is the Vidmore Video Converter tool. This is an all-in-one audio and video tool that allows users to perform various tasks, including enhancing audio-video.
With the Vidmore Video Converter tool, you can able to enhance your audio on iPhone by boosting the volume if it sounds muted or low. You can also add delays to your audio if the sound does not match the tempo or the vide in the video. Moreover, the tool has a very simple and intuitive interface that would make it easy for all users to use it.
Main Features:
- Boost or lower the audio volume of a video.
- Adjust audio delay to fix sync issues.
- Replace or add a new audio track.
- Trim or cut unwanted parts of the audio.
- Remove background noise for clearer sound.
- Supports a wide range of audio and video formats.
How to Enhance Audio on iPhone Video with Vidmore Video Converter:
Step 1. First, you need to download and install the Vidmore Video Converter on your device.
Step 2. Next, launch the tool and click the Add Files button to add the iPhone video that you want to enhance.

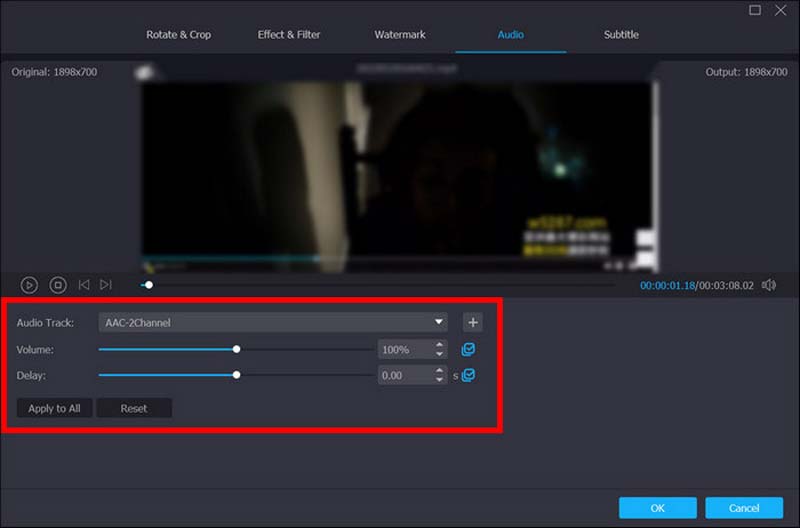
Step 3. Now, click on the Edit button to open a new window. From there, you can adjust the audio’s volume and its delay to match the video’s tempo.
Step 4. Once you’re done, just click the Convert all button to download the video with the enhanced sound.
Vidmore Video Converter is indeed a great tool to enhance audio on iPhone videos. Imagine rerecording a video and still getting the same result, frustrating, right? With this tool, you’re just a click away from easily resolving the issue.
Part 3. FAQs on How to Enhance Audio on iPhone Video
How can I make my iPhone video sound louder?
You can make your iPhone video sound louder by adjusting the volume during recording or enhancing it afterward using tools like Vidmore Video Converter. This tool lets you boost volume levels, reduce background noise, and balance the overall audio for a clearer result.
Does cleaning the iPhone microphone really improve audio quality?
Yes. Dust or debris can block sound waves from entering the mic, resulting in muffled or distorted recordings. Gently clean the mic using a soft brush or compressed air to enhance the audio on the iPhone video.
Can background noise be removed from iPhone videos?
Yes. You can use the noise reduction feature in editing apps or use Vidmore Video Converter’s Video Enhancer to automatically minimize unwanted background sounds.
Conclusion
Enhancing audio on an iPhone video is easier than you think. With the tips shared above, you can make your videos clearer, louder, and more professional. And if you want even better results, try using Vidmore Video Converter. And now that everything is within your reach, there’s no reason for you to settle for poor iPhone video and audio. Try this now!