Know-How to Fix OBS Audio Delay and The Precautions to Avoid
OBS stands for Open Broadcaster Software. This application is a freeware solution for offline recorded video and live streaming. OBS is available for both Mac and Windows. This program can combine audio, video, and broadcast applications. Aside from that, it can correct out-of-sync audio.
And if you are wondering how to avoid OBS audio delay, you should read this post to determine what precautions you should take. Aside from Open Broadcaster Software, we have also prepared a list of the most recommended tools for you to use. Have a glance at the details provided below.

- Part 1. Why is OBS Audio Out of Sync?
- Part 2. Precautions to Avoid OBS Audio Delay
- Part 3. Best Alternative to OBS
- Part 4. Best Audio Delay Editor
- Part 5. FAQs About OBS Audio Delay
Part 1. Why is OBS Audio Out of Sync?
There are times when we are watching a movie on the OBS, and the audio doesn't match the video playing. Of course, as a result, we will not be able to enjoy the fullness of the movie. You may be wondering what the reason why we are experiencing an audio delay in OBS is. There could be a variety of reasons why your computer is having trouble with this process, but one thing to look for is that all of your sound devices are configured to either 48 kHz or 44.1 kHz, which are the two sample rates that OBS supports. Aside from that, audio delay can occur when using HDMI. But the reasons are usually an issue causing video processing lag or a sync problem in your broadcasting program, which we'll consider next.
Part 2. Precautions to Avoid OBS Audio Delay
To avoid the audio of the OBS being out of sync, here are some precautions that you need to keep in mind. First, determine your sample rate in the Audio Settings tab of OBS and ensure that everything else lines up in your computer's sound options menu. Then you must identify the audio source that is out of sync. It entails muting channels in the audio mixer until you can determine which source is the primary offender. Or you can also try to record a short clip on OBS for you to see if there is any problem.
Part 3. Best Alternative to OBS
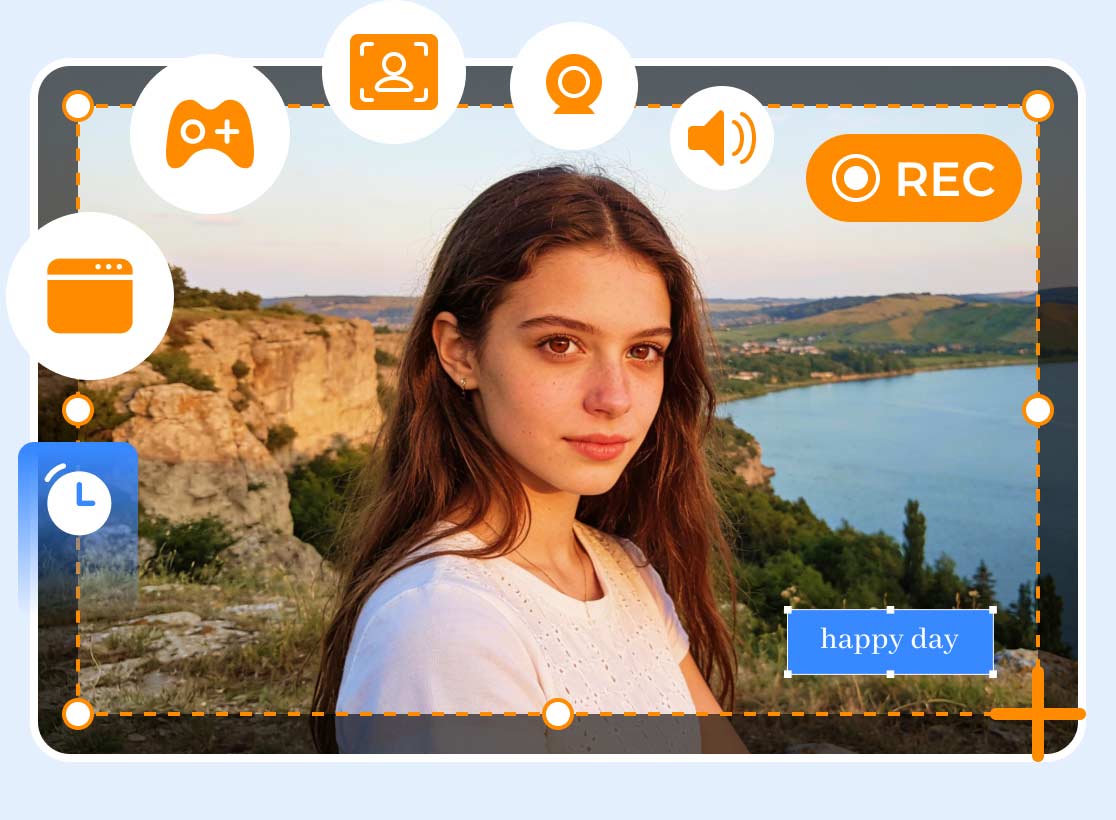
If we are to consider the tools that can quickly help you record a video on your computer device, you can go on Vidmore Screen Recorder. This tool is the most recommended screen recorder because of its user-friendly interface. That is why users are not having a hard time recording both audio and video that they desire. Aside from that, you will not have a problem regarding compatibility because it is available on both Mac and Windows devices. With the help of easy-to-use recording tools, there will never be a problem in editing the unwanted parts of your recorded clips. You just have to fix the start and end times of the recorded video, and everything will work after that. Here is a simple illustration of how to make a recording on Vidmore Screen Recorder.
Step 1: Install the Screen Recorder
The first step is to obtain the Vidmore Screen Recorder by clicking one of the download buttons below. Then you must install it and wait for the tool to run.
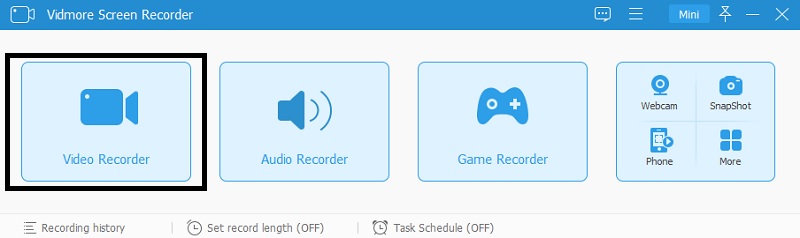
Step 2: Go to the Video Recorder
Once the program is up, open it, and it will display the tool's main interface. To record only the screen, click the Video Recorder button to take you to the Video Recording section.
Step 3: Start Recording
Once you are in the Recording section, you can begin recording the audio you want to keep a copy of. Enable the System Sound and the Microphone. And then, activate the Webcam and select the size of the screen you want to include in the recording. Finally, press the color red REC button to begin the audio recording.
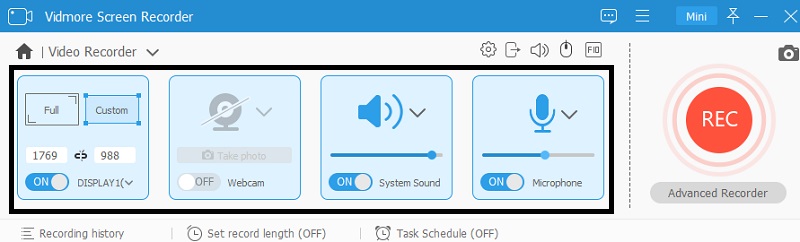
Once the recording begins, you can control the level of the Microphone and the System Sound to your liking. Then, on the left of the screen, click the Red color button to stop the recording.
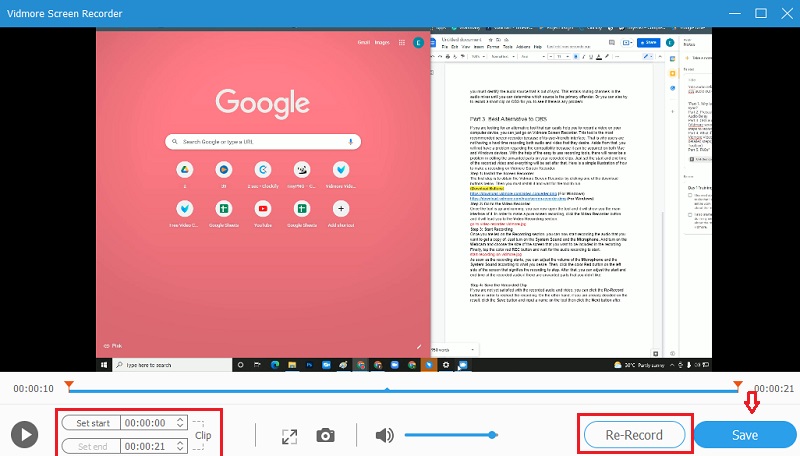
Step 4: Save the Recorded Clip
After that, if there are any unwanted parts of the recorded audio that you don't like, you can fix the start and end times. If you are not satisfied with the recorded audio and video, you can reshoot the recording by clicking the Re-Record button. If you are already satisfied with the outcome, click the Save button and give the tool a name before clicking the Next button.
Part 4. Best Audio Delay Editor
Have you already saved the clip you recorded on your screen recorder and found out that the video is out of sync? Vidmore Video Converter is always here to help. It is multi-purpose software that allows you to edit audio and video easily. It is because of the friendly interface that is on the program. You will not have a hard time removing the unwanted or unnecessary parts of your recorded clip by the cutting and trimming tool. Vidmore Video Converter is also compatible with Windows and Mac. That is why if your audio and video are out of sync, all you have to do is a few clicks to adjust the audio delay. And if you want to know how this tool works to enjoy your recorded clips better, here is a simple guide below.
Step 1: Install the Vidmore Video Converter
Before proceeding, you must first obtain the tool by clicking one of the Download buttons listed below and installing it on your device. After that, you should be able to operate the tool on your device.
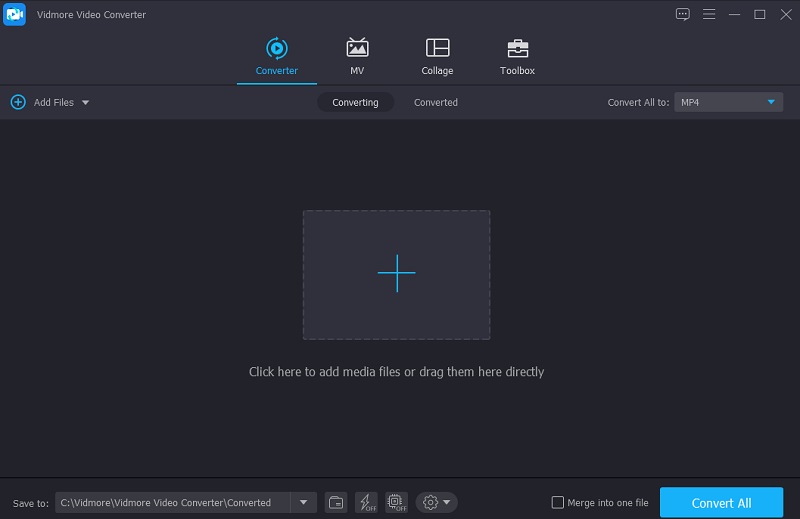
Step 2: Upload the Recorded Video on the Timeline
Once the program runs on your device, begin attaching the recorded file to the Timeline by clicking the Add Files button in the upper left corner of the screen or simply the Plus symbol in the tool's central interface.
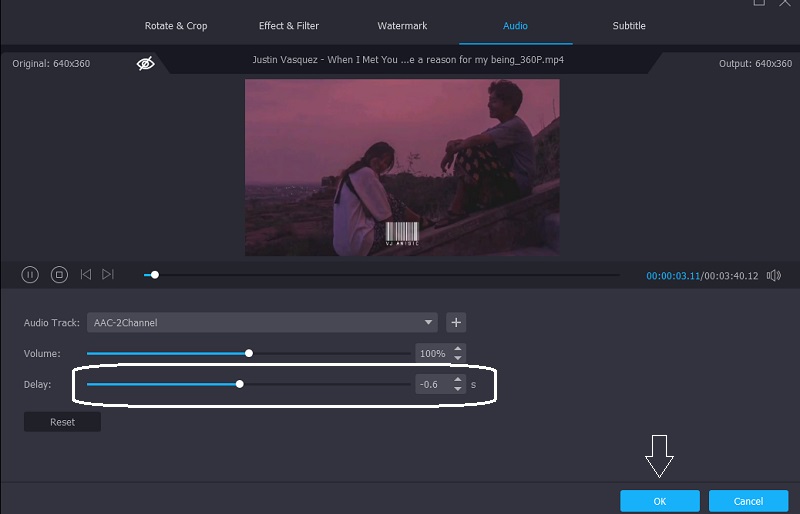
Step 3: Correct the Audio and Video Sync Issues.
Then, to correct the audio and video sync issues. Select the editing icon, which a Star represents. Once you've reached the editing section, click the Audio tab to access the audio settings.
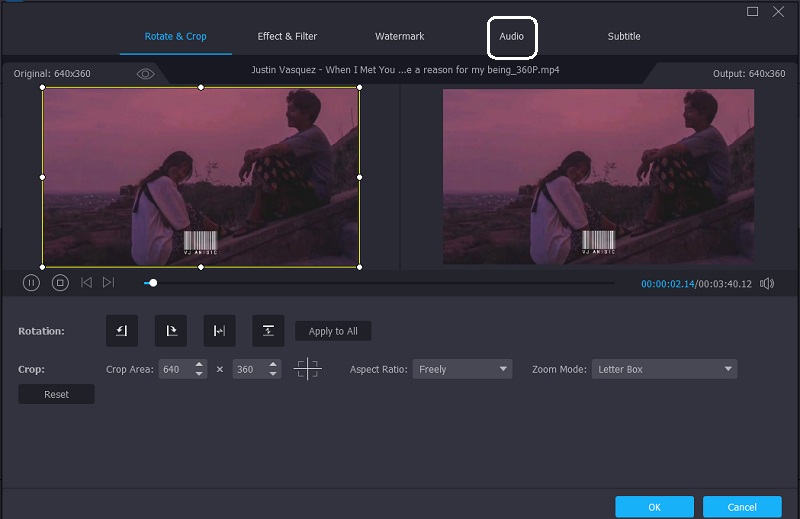
You can adjust the audio delay by dragging the Delay slider when you're in the audio settings. Adjust it until the sound is in sync with the video. If you are finished, press the OK button.
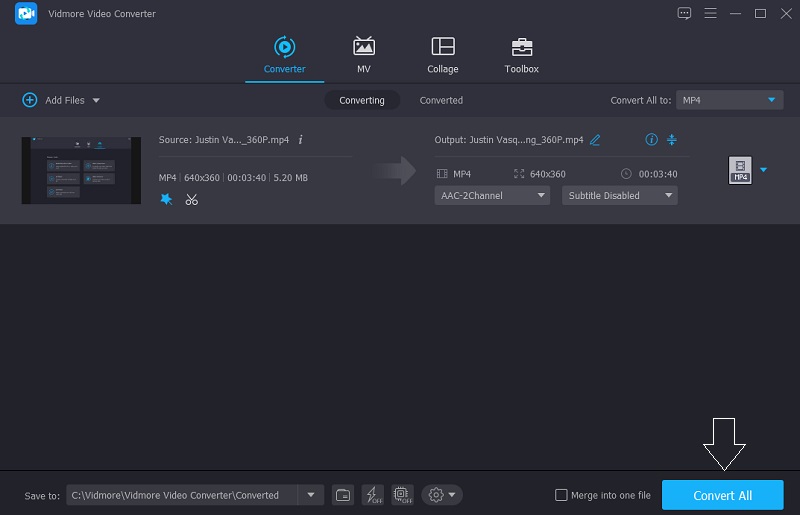
Step 4: Convert the Recorded Files
After completing the steps outlined above, you can now proceed with the conversion process. Click the Convert All button and then wait for your recorded file to convert.
Part 5. FAQs About OBS Audio Delay
How do I correct audio delay in OBS?
Connect an audio source or a microphone. Any audio source, including videos, can be subjected to an audio delay. In the mixer,' click the cog next to an audio source. In the 'advanced audio properties,' you can set a delay for all audio sources. Configure an audio delay. And you're finished!
Is it possible to separate audio from video in OBS?
Yes, OBS Studio can record up to six distinct audio tracks.
Could OBS save through MP3 format?
BS does not record to MP3, but rather to AAC.
Conclusion:
We cannot deny the fact there is no perfect software. That is why OBS is sometimes faulty when the audio and video are out of the sink. And as an alternative to fix OBS audio out of sync, we have listed the most recommended easy-to-use tools above that you can count. Just choose which one you prefer.