Fantastic Solutions on How to Add Watermarks in Bluebeam
With all the media we can access online, intellectual property is a crucial matter we need to deal with. Because, truth be told, no one loves to see their works stolen! Thankfully, one of the feasible ways you can prevent yourself from media theft is by attaching a watermark to your files. With this, your audience would know who owns the picture, and it also makes your files appear more like a pro.
To cut all the suspense, stay on this post that will guide you on adding watermarks to your image files with the Bluebeam add watermark application. One thing is guaranteed, you will never wish to upload your files without watermarks ever again.

PAGE CONTENT
Part 1. How to Add Watermark in Bluebeam
Bluebeam Revu is a software application commonly used in the construction, architecture, and manufacturing industries. This tool works as a plugin for AutoCAD, where you can bring your blueprint projects to the next level. Besides, it lets you annotate, markup, and curate PDF files. This is the reason for being one of the best choices for technical work. Besides, Bluebeam Revu works wonders when you want to lay a watermark on your work because it comes with preloaded stamps. So, without further ado, follow the simple guide we made beneath on how to insert watermark in Bluebeam.
Step 1: Head to the Tool section at the top of your screen. Afterward, select the Stamp until you can access the preloaded icons like Draft, Released, Approved text, and so on. However, if you wish to put your logo, scroll down the selections and click Create Stamp.

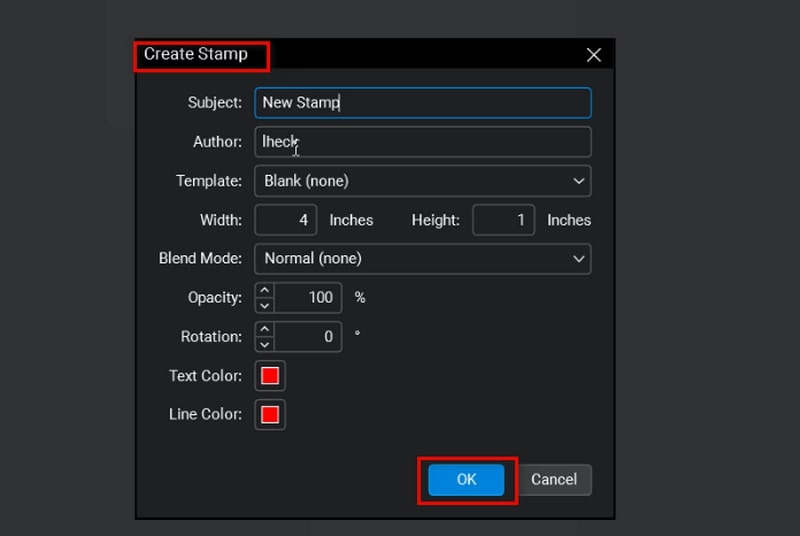
Step 2: Once the dialog box appears, fill in the preliminary requirements you need, such as the name, width, height, and opacity for the stamp that you are about to render. Then hit the OK button to proceed to the next window.
Step 3: To import the watermark, click Tools > Markup > Image > From File. When your computer folder appears, select your target image. From there, edit your watermark according to your preferences by adding text and other details.

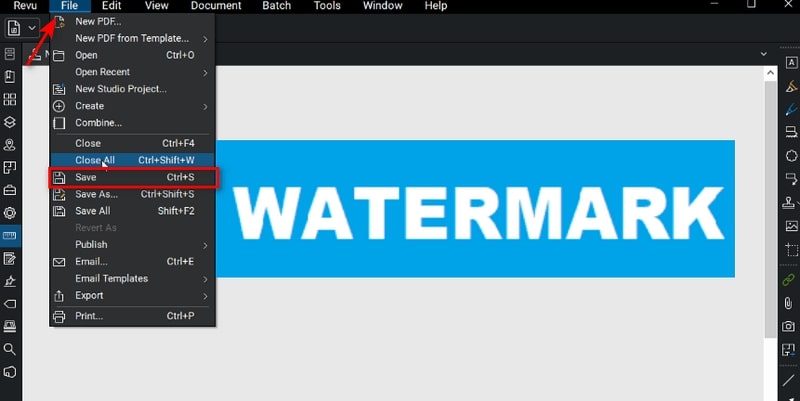
Step 4: Finally, to save your stamp, drop down the File tab and click Save. Now, your watermark is added to the list of selections, and it will appear on the Stamp list. Select the stamp, and it should now appear on your PDF file.
Part 2. Can you Remove the Watermark in Bluebeam
Just as laying on a watermark on Bluebeam is trouble-free, removing your watermark should also give you no pain while using the program. Suppose you add watermark in Bluebeamand you wish to change or delete it. Well then, here are the practical steps you can go after.
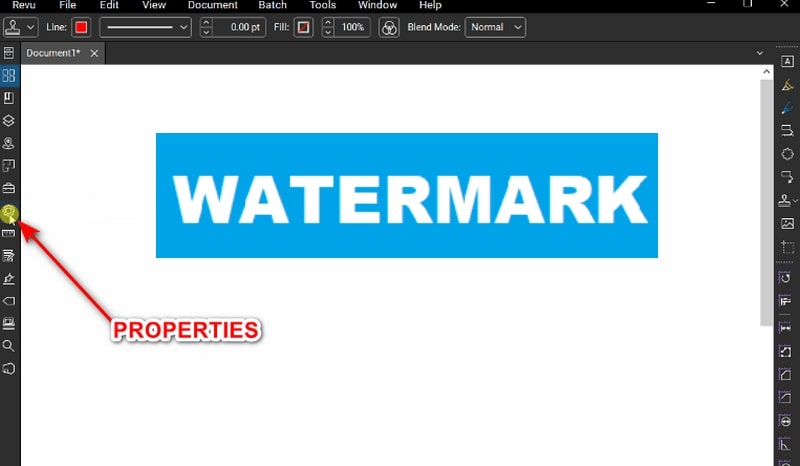
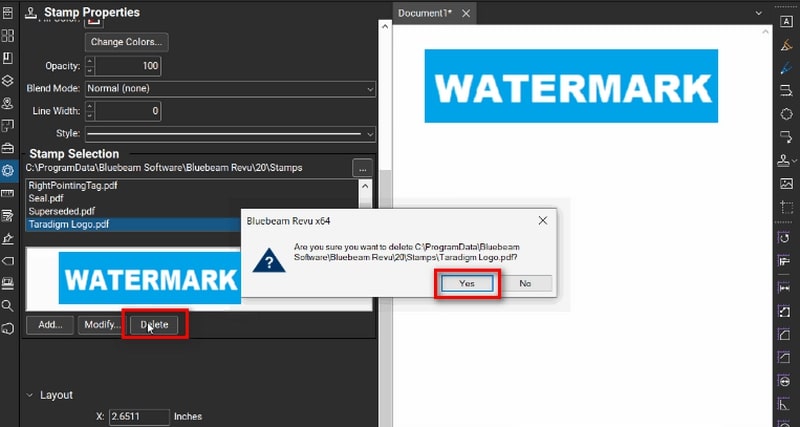
Step 1: On the left side of the panel, click the Properties icon to access the Stamp Properties panel.
Step 2: Next, scroll down the panel until you reach the Stamp Selection box and select the stamp name you added earlier.
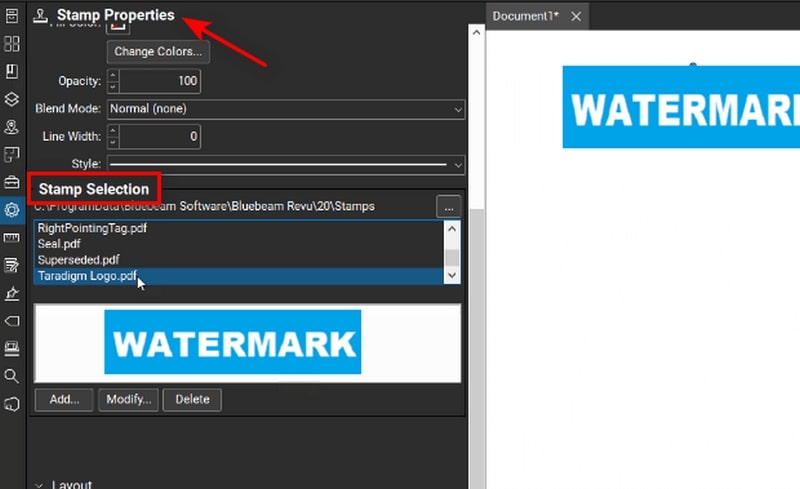
Step 3: Finally, hit the Delete button. After that, you should see the stamp removed from your file.
Bonus: Best Image Watermark Remover Online
Keep in mind that if your files are already impressed with watermarks before loading them on the Bluebeam software, no built-in tool can erase them. That’s why here’s another best solution we can offer you. Geared with the power of AI technology, Vidmore Free Watermark Remover Online is your one-stop solution for undoing watermarks on your photos. This web-based application offers multiple tool selections to erase unwanted and pesky date stamps, logos, stickers, and the like quickly and without a trace.
Moreover, Vidmore Free Watermark Remover Online does the job with a crisp over multiple watermarks on a single photo. Plus, the quality of your file remains unaltered despite having done the process online. But above all, tons of users across ages prefer this tool as it requires zero to minimal computer proficiency to maneuver it. Therefore, if you want this program’s close-to-perfection results, read the detailed guide below and follow along.
Step 1: Upload the Picture
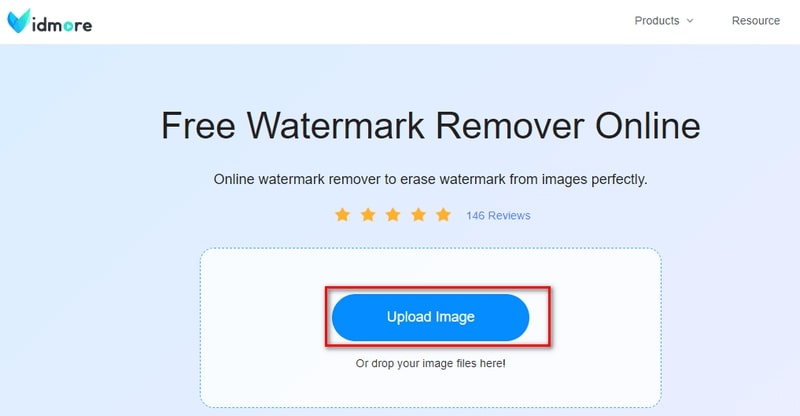
First, access the Vidmore Free Watermark Remover Online site on your most convenient search engine. Upon landing on the main page, hit the Upload Image button in the center. Afterward, choose your image file from your computer’s folder directory and click Open. Otherwise, you can use the drag-and-drop function for a faster upload process.
Step 2: Remove Watermarks with Tools
Once the image file loads on the screen, you can see some tools you can use to remove watermarks at the upper part of the screen. Depending on your liking, you can utilize the Polygon, Lasso, and Brush tools. You should see a red highlight covering the objects you wish to remove as you drag your mouse. If you have dragged the wrong object, select the Undo icon.
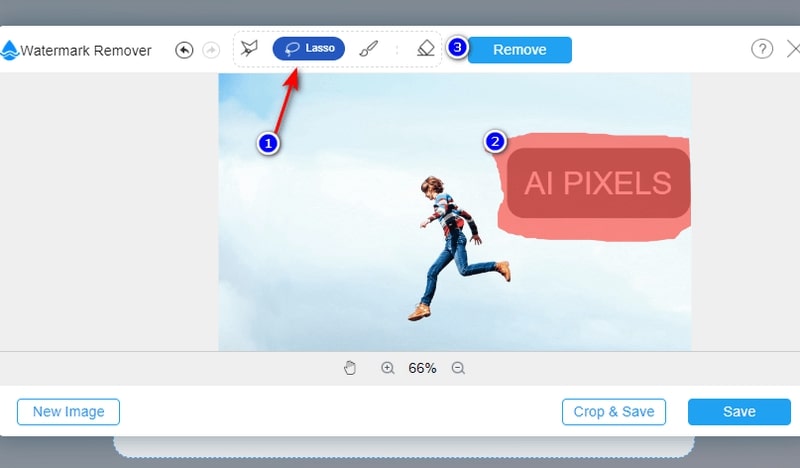
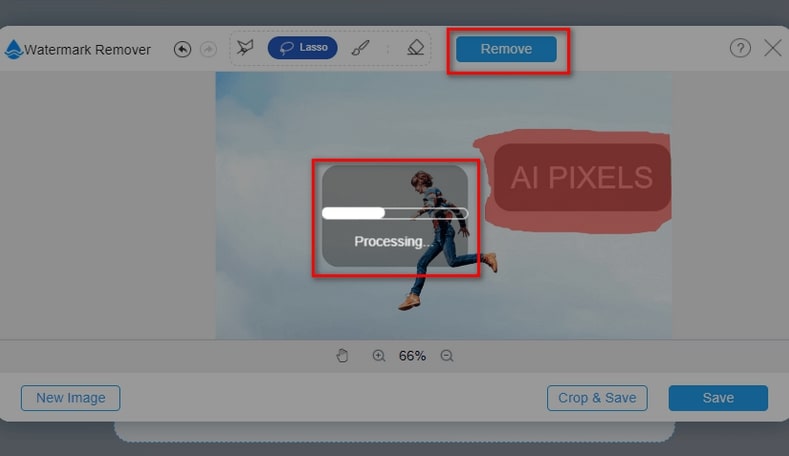
Step 3: Watermark Remove
When ready, select the Remove button for the tool to process your image. The process may take quite some time, depending on the objects you are erasing and your internet connection’s strength.
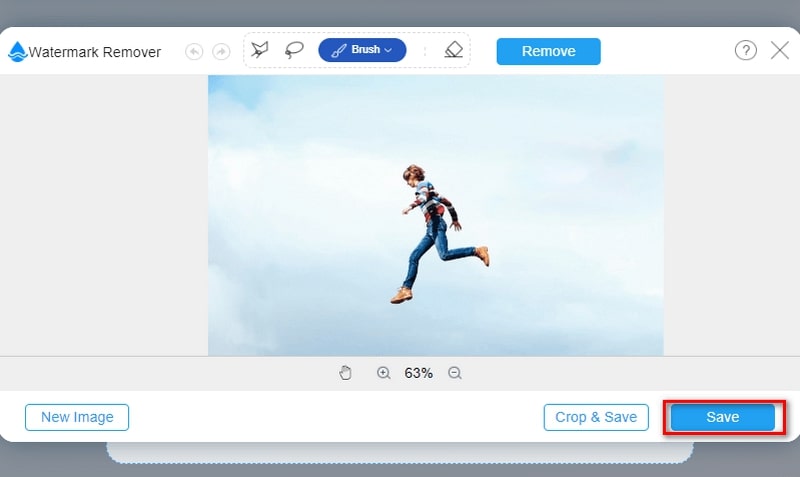
Step 4: Download image result
If satisfied with the result, you may click the Save button to locate your new image on your computer. If there are still objects you wish to remove, use the “Brush” tool and adjust the size for accuracy.
Part 3. Frequently Asked Questions
Do I have to pay to use the Bluebeam watermark editor?
Yes. After the 30-day free trial, Bluebeam offers three pricing plans which fit various users with different purposes for using the program. It comes with a Basic plan for $240, a Core plan for $300, and a Complete plan for $400
How many devices can I use for my Bluebeam Revu subscription?
Whether you have the Bluebeam Revu software for your PC or the cloud software, you can use it on a maximum of five devices.
Can I make my digital signature using Bluebeam Revu?
Definitely, yes! Not only that this tool will allow you to add watermarks to your pictures, one of the hallmarks of Bluebeam Revu is its ability to render e-signature in two ways. You can use their transparency tool to manipulate signatures on paper to make them look digitally rendered. Besides that, you can click Document > Signature > Sign Document on the program and manually create your signature using the mouse.
Conclusion
And that wraps up our walkthrough relating to Bluebeam add watermark. There are occasions when attaching a watermark is necessary and times when you have to remove it. But with the software we provided you above, you should pull off both without hassle.