Full Guide on How to Enlarge an Image to Print Without Losing Quality
Before the printing process begins, there are some factors you would want to consider to avoid any undesirable results. One of these is pixelated photos, usually when enlarging a photo. Perhaps you are hoping that preparing a print file is just a piece of cake but discovered that resizing is a big affair to handle. Hopefully, it is the case when printing.
But, if the photo is small and appears blurry, you may need to do some workarounds. Today, we will share with you ways you may employ to enlarge photos and make them appear clear and sharp when printed. Without further discussion, follow the tutorial below to learn how to enlarge and print a picture with excellent quality.


Part 1. Tutorial How to Enlarge a Picture for Printing in Photoshop
Photoshop is probably the tool you will think of when dealing with photo issues. It can handle blurry, pixelated, and damaged pictures restoring them to a nice-looking appearance. With Photoshop, you can change the dimension of the photo, precisely the width, and height. Therefore, users may enlarge the photo, improving its quality. In addition, it comes with a Preserve Details feature to prevent the loss of quality when resizing a photo to a large scale.
Aside from that, you can also sharpen blurry photos with this tool. You can take advantage of its Unsharp Mask feature and adjust the values for amount, radius, and threshold. You can play around to generate the desired outcome. Above all, it provides a real-time preview to help you see the changes instantly. Cutting the chase, check out the guidelines on how to enlarge a picture before printing.
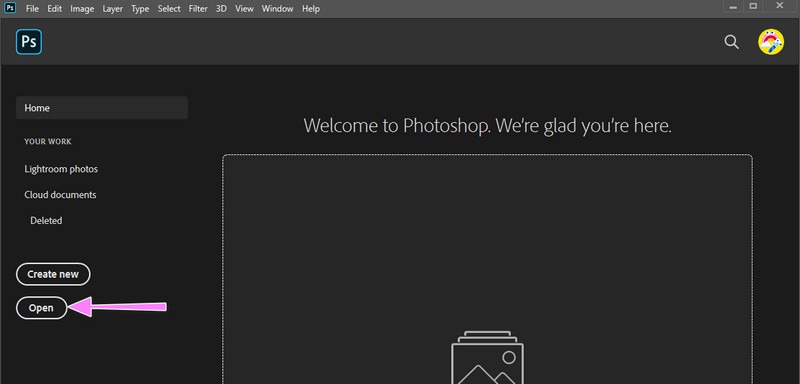
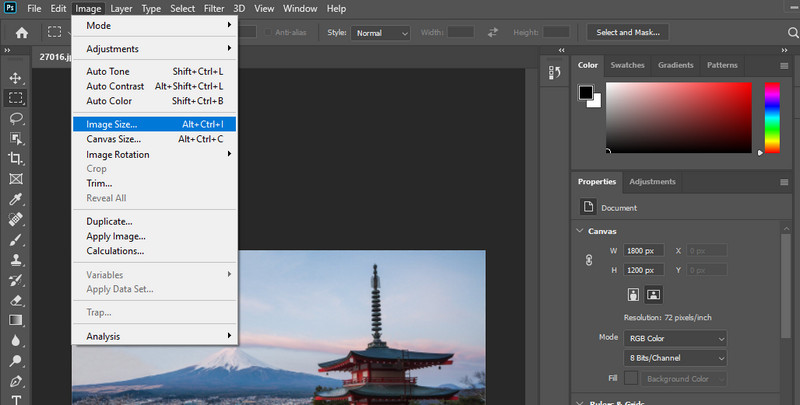
Step 1. First and foremost, acquire the program on your computer and launch it. Then, add the photo you wish to edit with the tool. From the main interface, hit Open and choose your target photo.
Step 2. After uploading the picture, you should arrive at the program’s editing interface. Now, navigate to Image on the top menu and select Image Size. There will be a dialog box that will appear afterward.
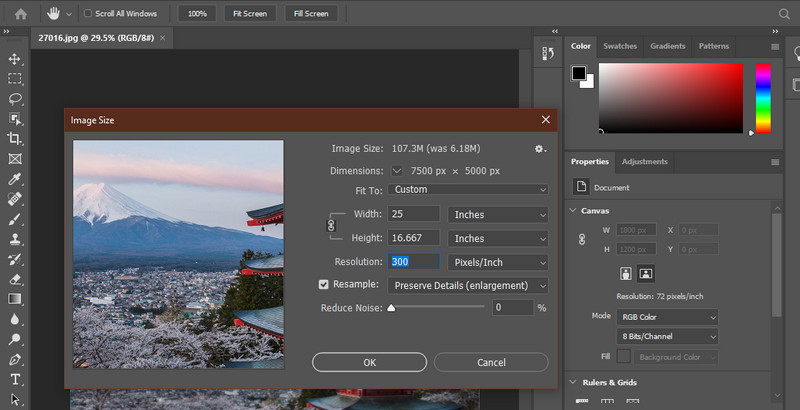
Step 3. Next, adjust the dimension or the Width and Height values to your desired standards. Then, set the resolution value to 300 if it is not yet at 300 DPI. Right after, check the Resample option and choose Preserve Details. You can preview the details or pixelated areas right away. Once done, hit the OK button to confirm the changes.
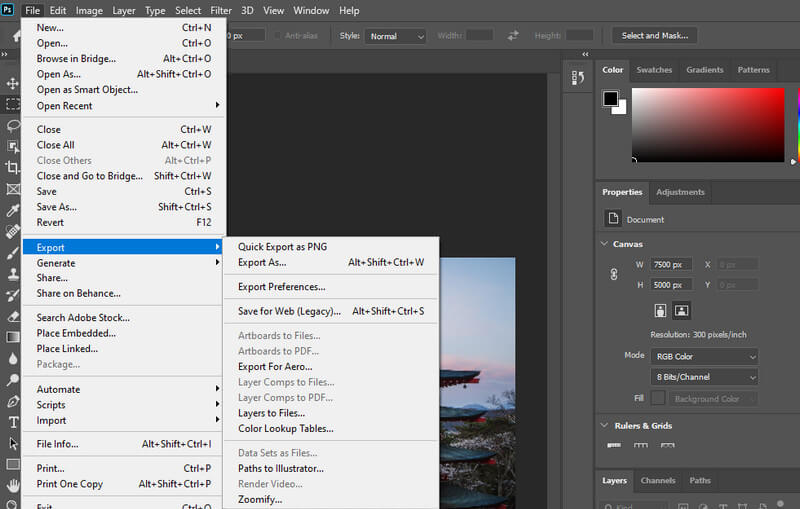
Step 4. Finally, go to File and Export. As you hover over this option, you will have options to export it as a PNG or other formats. You now learned how to enlarge a picture for printing in Photoshop.
Part 2. Guide How to Enlarge a Picture for Printing without Photoshop
1. Vidmore Free Image Upscaler Online
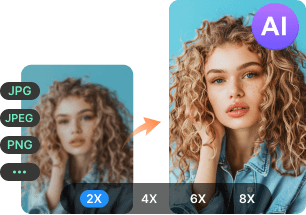
You can also try Vidmore Free Image Upscaler Online to increase image quality. It can help you refine the distribution of colors and restore distorted photos to higher picture resolution. The program uses an artificial intelligence generative technology that restores and enhances photos automatically. Furthermore, you can get four results and enlarge photos for printing with the standard quality and resolution.
There are magnification factors, including 2X, 4X, 6X, and 8X to make your photo look fantastic. This free online tool is compatible with various browsers, like Safari, Chrome, Edge, Firefox, etc. Hence, whatever browser you are using, you can access the program. If you wish to utilize this tool and want to learn how to enlarge a picture for printing online, refer to the instructions below.
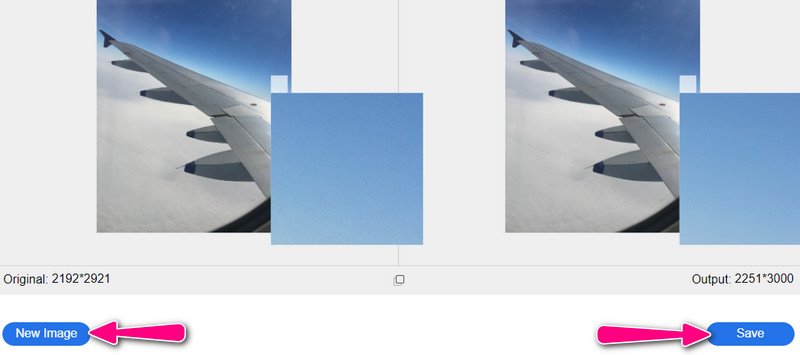
Step 1. Open Vidmore Free Image Upscaler Online’s website using a browser you commonly use. Then, hit the Upload Image button to launch your file folder. Next, double-click on your target photo to upload.
Try Image Upscaler Now!
- Improve photo quality.
- Enlarge picture to 2X, 4X, 6X, 8X.
- Restore old image, unblur photo, etc.
Step 2. When the photo is uploaded, the program will automatically upscale the photo by a 2X magnification factor. If unsatisfied, choose your magnification factor available and check the changes by hovering your mouse cursor over the image.

Step 3. After processing the photo, tick the Save button to download it on your computer. If you like to process another photo, smash the New Image button at the bottom left corner.
2. Let’s Enhance
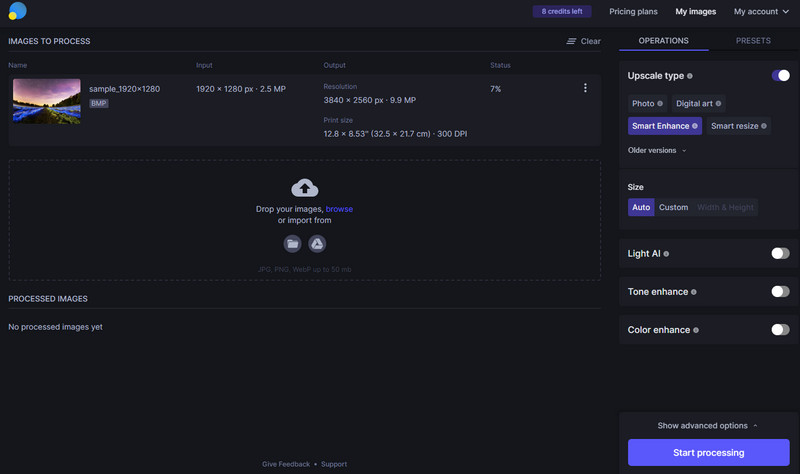
Improving and enhancing photos are made easy with Let’s Enhance’s Image Super-Resolution technology. Apart from that, the program has Smart HDR and color enhancement to improve the overall appearance of your photo and make it suitable for printing. On the other hand, here is how to enlarge a picture for printing without losing quality using this tool.
Step 1. Access the program and upload the picture with low resolution.
Step 2. From the processing option, you will see different tools for improving photos. You can select the Smart Enhance and edit properties to your preferences.
Step 3. Lastly, hit the Start processing photo to confirm the changes.
3. AI Sharpener Scaling
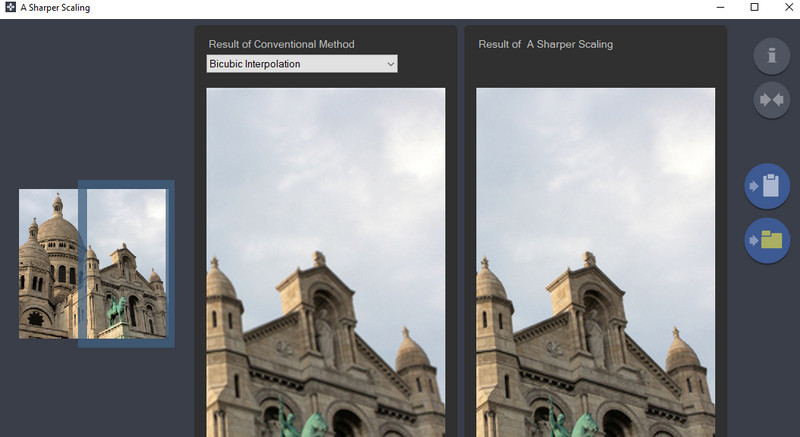
AI Sharpener Scaling is a free program you can use on your Windows PC. It supports versions from Windows Vista to the latest Windows 10. Due to its high-quality scaling technology, it is possible to enlarge photos up to 400% while keeping the photo quality. See the guidelines below on how to enlarge pictures for printing on Windows 10.
Step 1. Go to the program’s official page and download it. Right after, launch it on your computer.
Step 2. Upload a photo, and the scaling options will appear. Now, you can change the Target Size and Scaling to your standards.
Step 3. Finally, hit the Image Setup button at the bottom right corner, and you will see the photo's before and after.
4. GIMP
Lastly, we have GIMP. This photo is the rival of Photoshop regarding photo editing tools and features. The only difference is you can access the full service of GIMP for free. Above all, the program is compatible with all platforms, including Windows, Mac, Linux, etc. You can learn how to enlarge a scanned photo for printing by following the steps below.
Step 1. Install and launch GIMP on your device.
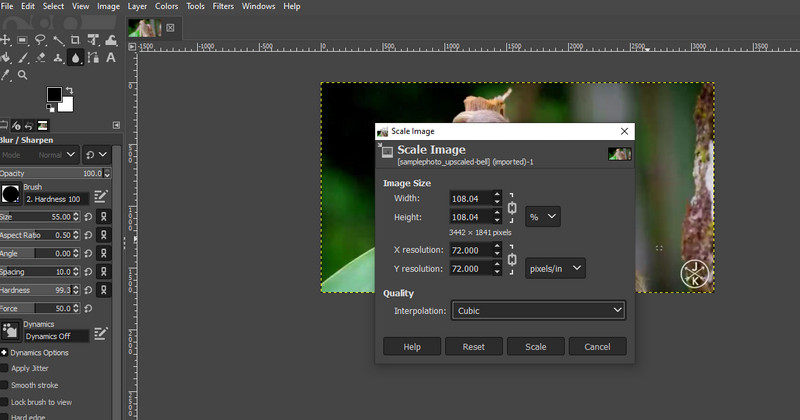
Step 2. Now, navigate to Image > Scale Image. Then the scale image dialog box will appear.
Step 3. Next, key in the new values for Width and Height to enlarge the photo. Under Quality, select Sinc from the drop-down menu of Interpolation.
Step 4. To begin the process, hit the Scale button.
Part 3. FAQs About Enlarging a Photo for Printing
What resolution do I need for good print quality?
The recommended resolution for printing is a minimum of 300 DPI. Images displayed on the internet have 72 DPI for computer monitors but are not suitable for good print quality.
What do you mean by upscaling?
Upscaling is the process of making images larger by stretching them. This process results in pixelated photos. Luckily, through AI image upscaling, enlarging photos while maintaining the quality is possible.
What is the difference between traditional and AI image upscaling?
Traditional upscaling simply means a manual operation of modifying photos. On the other hand, AI upscaling lets you enhance photos with less human intervention.
Conclusion
In most printing shops, Photoshop is their primary program for enlarging photos. Yes, the program is effective. However, Photoshop takes patience and time to learn. That is why if you wish to learn how to enlarge a picture for printing with easy-to-use programs, check out the alternatives discussed above.