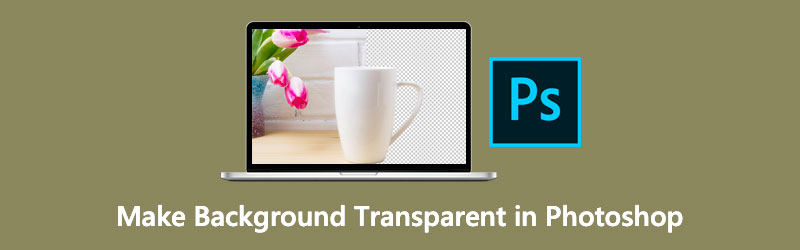
Follow These Efficient Ways in Removing Image Background Using Adobe Photoshop
Indeed, you know how people emphasize the aesthetic value of what they post on media. Whether promoting a business product, changing display profile, or uploading “instagrammable” photos, for sure, a photo editor is a must-have. From the various options in the market, Photoshop by Adobe is the commonly used offline tool to put on the spirit of creativity.
That being said, one of the editing activities is removing the background images. It is essential to help users modify their pictures either for professional or for fun. For example, a photographer may change the model's background from plain solid color to a fancy one or vice versa. If you do not know how to make the background transparent in Photoshop, stay tuned until the end.
- Part 1. How to Make Background Transparent in Photoshop
- Part 2. Best Alternative to Photoshop on Making Background Transparent
- Part 3: FAQs About Making Image Background Transparent
Part 1. How to Make Background Transparent in Photoshop
If there are hundreds of ways to cook an egg, there are various ways to make the image background transparent in Adobe Photoshop. Do not worry. Provided below is the simplified way to do it.
Step 1: After launching Adobe Photoshop, drop down the file at the top of the interface and click Open. After clicking Open, the tool will direct you to the computer folder and select the image you want to background remove.
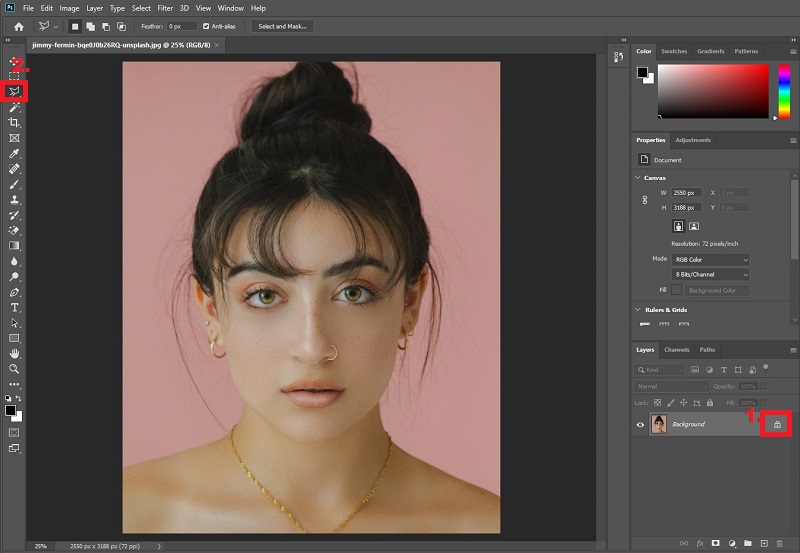
Step 2: On the layer section seen at the left side of the interface, make sure that your photo is not locked. To unlock the image, simply tick the locked icon.
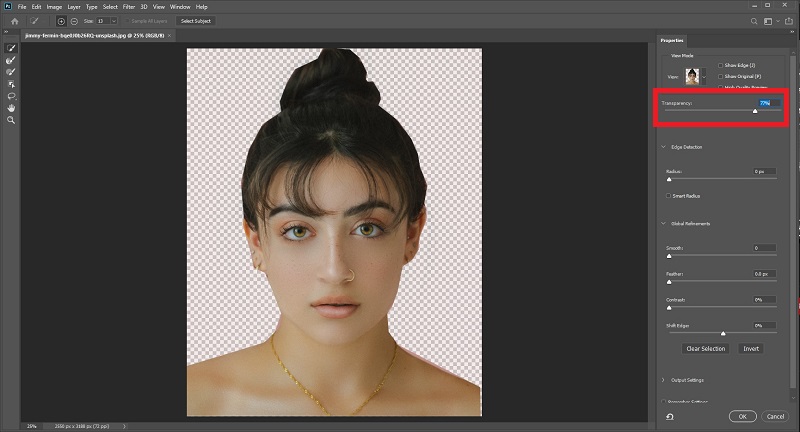
Step 3: On the left side, the third icon, right-click your mouse, and change it to the Polygonal Lasso Tool. Trace the subject you want to retain from end to end. After that, the picture will be selected, right-click your mouse and hit Select Inverse.
Step 4: After selecting inverse, the tool will choose the image's background. From your keyboard, hit Delete, and the background will become transparent. There you have it! After that, type on your keyboard Ctrl+Shift+S to save the output on your computer folder.
Part 2. Best Alternative to Photoshop on Making Background Transparent
Especially if you are a beginner, you may find that making an image background transparent in photoshop is challenging because of the various controls and tweaking you need to master. If that is the case, the following alternative tool is right for you. Vidmore Background Remover Online is an excellent tool for having a transparent background for your images instantly and with lossless quality. It uses artificial intelligence (AI), which recognize portrait from the background. Therefore, in just one upload, you want to have already the final output or just minor editing.
Guess what? The Vidmore Background Remover is free of charge! Unlike the other software in the market, you can only use them for a limited time and requires you to upgrade after. Vidmore Background Remover Online does not require you to sign up before using it. That way, you can be assured that this site is 100% safe (without hidden motives).
To use this fantastic background remover, follow the simple steps shown below.
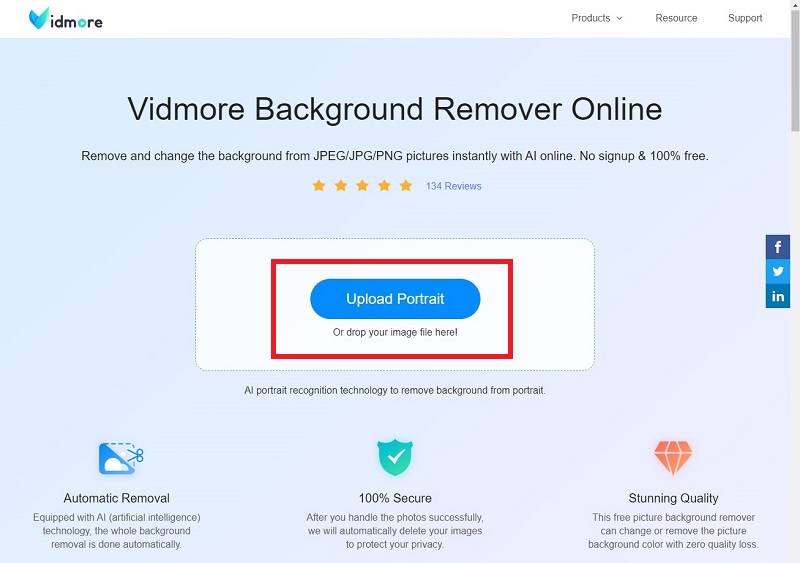
Step 1: Load Vidmore Background Remover Site
On your favorite search engine, click the link above to load the site directly.
On your favorite search engine, click the link above to load the site directly.
Step 2: Upload File to Transparent Background
In the main interface of the tool, hit Upload Portrait. When a pop-up window appears, pick an image that you want to make its background transparent. While the picture is being uploaded, the tool will process the image and automatically detect the background completely. If not, it is retaining some. As you can see below, the background is not completely removed, but worry not and see the magic.
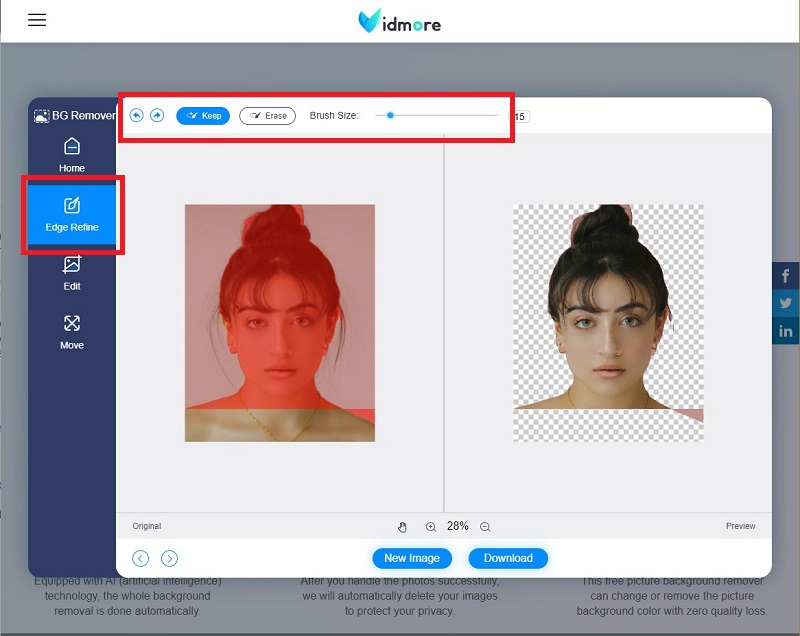
Step 3: Refine the Edge of the Image
After your file has been uploaded and processed, continue editing your image. At the top of the tool’s interface, you will see the Keep, Erase and Brush Size toolbar in the Edge Refine section. When you click the Keep button, it means that the part of the image highlighted with red color is to be retained. When you click erase, it means the other way around. Just adjust the Brush Size accordingly depending on the part you want to keep or erase.
While navigating these tools, you do not have to be anxious if you do the wrong thing. Your editing area is on the left side of the main interface, while the right side shows you the image as the output.
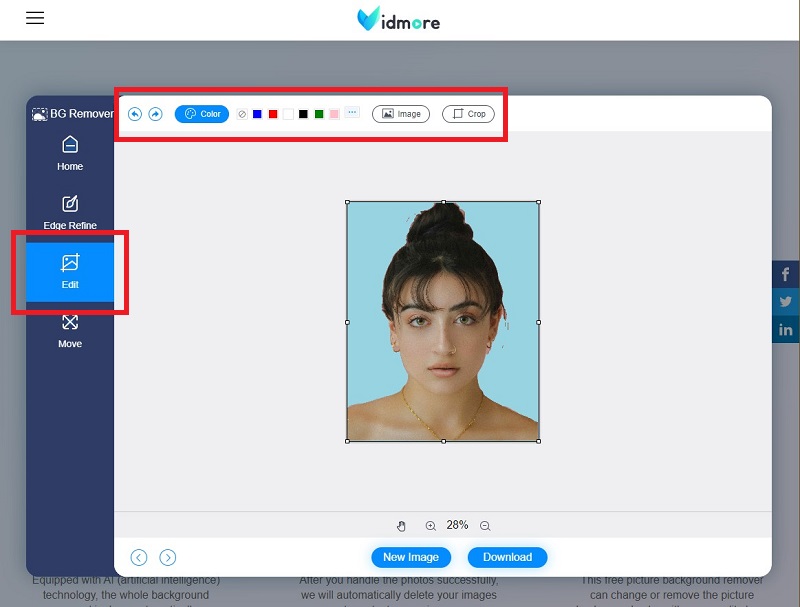
Step 4: Change Background Color (Optional)
If you opt for a transparent background, you can stop at step 3 already and download your image. However, if you need to change the background images of your photos, you may do so using this tool. To do this, move from the Edit section under the Edge Refine. Click Color at the top of the toolbar and change the background according to your preferences. If you want to add another image background, click the Image button and upload your new background. Lastly, you may also click Crop and adjust the size of your photo.
Step 5: Adjust the Image Position (Optional)
If you want to free transform your image, from the Edit section down to the Move section. You can flip and rotate the subject in your image in this setting. When you're already satisfied with the work, click Download.

Further Reading:
3 Simple Ways to Take A Screenshot in Minecraft (2020)
How to Convert WebP to GIF - 5 Ways You Can Freely Use
Part 3. FAQs About Making Image Background Transparent
What is the benefit of using Vidmore Background Remover Online?
First of all, this is a web-based tool. In that case, you can make your image background transparent without any further need to install offline software on your device. As we all know, downloadable tools take much space on your storage. Secondly, it has an excellent user interface. Vidmore Background Remover is easy to navigate, even if you are not tech-savvy. Lastly, it is safe and cost-free.
Will the quality of my images become pixelated after removing the background using Vidmore Background Remover?
No. Vidmore Background Remover can retain the quality of your images from the moment you upload, edit, and download your files.
What file extension should I use in saving my image after the background has been removed in Photoshop?
You should save your files in PNG format. In most cases, when the image is saved in a .jpeg file extension, the images tend to have a white background. Using the .png, you can be assured that the picture is transparent.
Conclusion
There you have it! To make your image have a transparent background is just easy as 1,2,3. If you are still unsure whether you can pull off using Photoshop, you are free to try other tools like the Vidmore Background Remover. If you find this article helpful, kindly share it with your friends to learn how to make the image background transparent.