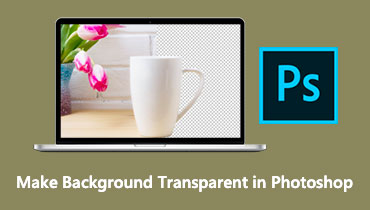
Beyond the Visual Aid: Remove Background Picture Using PowerPoint
PowerPoint is a program that every student, business marketer, and lecturer considers a must-have. Developed by the Microsoft Team, it is best for making a digital visual aid or a presentation. They consist of slides where text, pictures, animations, and transition effects are added.
While the previous activity is the primary purpose of PowerPoint, there may be times that your presentation needs a bit of editing for your images, such as removing the background of the picture. By removing the background, you can make your slides more appealing and less crowded for your audience.
In this guidepost, we will walk you through a straightforward way to make a picture background transparent in PowerPoint.

- Part 1. How To Make A Picture Background Transparent In PowerPoint
- Part 2. Tips How to Make A Picture Background Transparent Online
- Part 3. FAQs about Creating Transparent Image in PowerPoint
Part 1. How To Make A Picture Background Transparent In PowerPoint
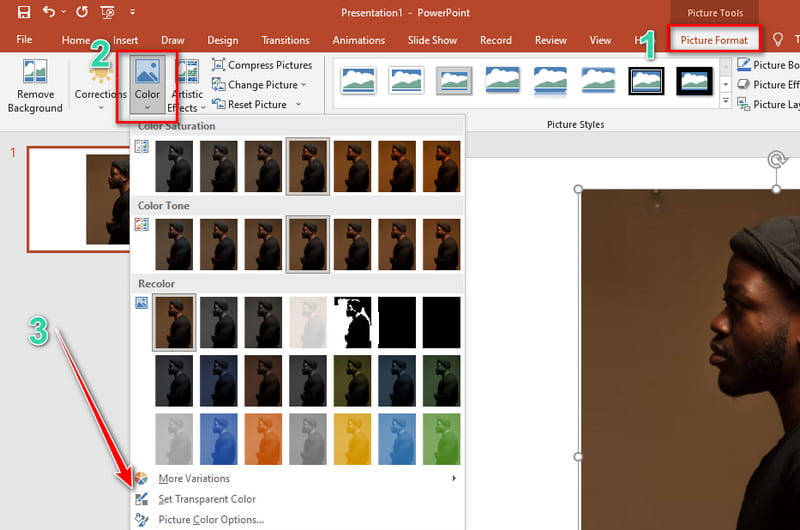
Removing your background picture in a PowerPoint presentation can be done in two ways, depending on the picture's composition. If your image has a solid plain color and is relatively different from the foreground, you can easily background remove it through the Set Transparent Color tool. As a quick guide: Select the Image and go to Picture Format > Color > Set Transparent Correction. Then click the background of your image, and it will become transparent.
But suppose that your image consists of complicated elements. Do not worry, because this next tool can make the job done. To find out how, follow the steps indicated below.
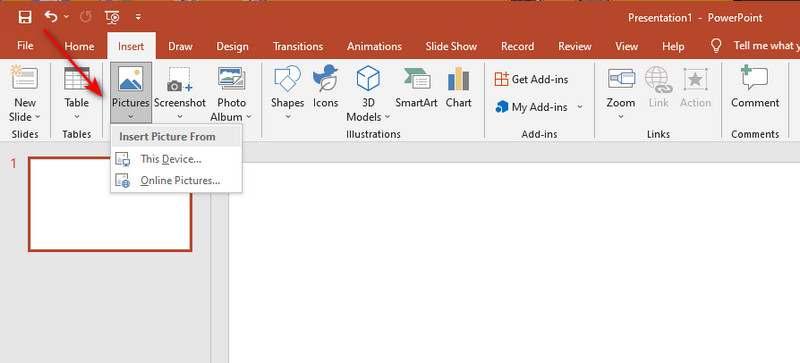
Step 1: First, you need to import your image file into PowerPoint. Tick the Insert tab and select the Picture in the ribbon to do this. If your file is on your computer, hit This Device. After selecting the image, you should see it in the slide area.
Step 2: Next, you have to click the image. By doing that, the Picture Format in the tab section will appear, and select it. Then, you will see the Remove Background command and tick it.
Step 3: After ticking the Remove Background, you should see a magenta color covering some area of your image. This is because the tool assumes it as the part you want to remove. To correct this and have a precise foreground to retain, hit the Mark Areas to Keep button and start tracking your subject. Meanwhile, select the Mark Areas to Remove button if you want to do it the other way.
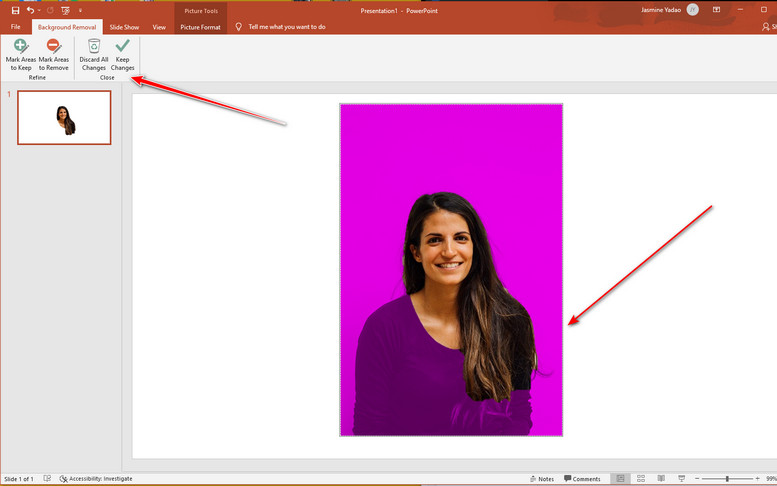
Step 4: Lastly, make sure that all background areas are highlighted. When all is set, hit the Keep Changes button, and you should see the picture become transparent.
Part 2. Tips How to Make A Picture Background Transparent Online
As the name suggests, Vidmore Background Remover Online is one of the most sought-tool by many to create a transparent image background. It has a user-friendly interface that anyone could easily navigate, especially beginners. As promising as it is, Vidmore Background Remover Online offers more than what is required because it’s integrated with artificial intelligence or AI technology. These robots can execute typical tasks that people do- in terms of this matter, they analyze the image, detect the background, and erase it automatically. In short, in just a blink of an eye, you can have your final output without extra clicks.
Another notable feature this online tool possesses is you can modify the background. Whether you want to spice up the image by changing the background color or layering a new background picture, this is possible with Vidmore Background remover Online. On the other hand, it provides a preview panel where you can see the output of your picture while working on the editing panel.
Without further ado, here is the detailed guide on how to create a transparent background using a web-based program:
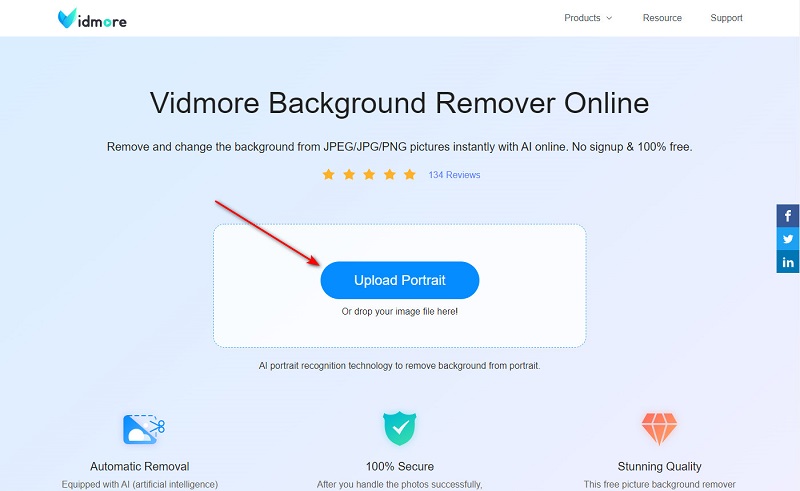
Step 1: Access Vidmore background Remover Online Page
First things first, open your search engine on your computer and type the program's name. After that, hit Enter.
Step 2: Import the Image to Edit
Next, hit the Upload Photo button on the center of the interface. When your computer folder pops up, scan through your files, select the image, and hit Open. Wait for a moment as the program processes your image. When the output appears, it is already in the transparent background.
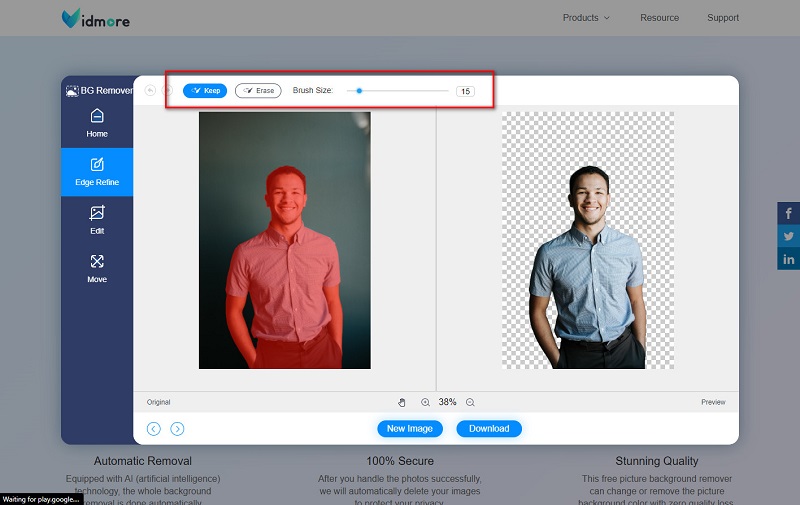
Step 3: Modify the Picture
For a more precise cutout, adjust the Brush Size of the tool depending on the area you want to Erase or Keep. Take note that the highlighted area in your image will be retained.
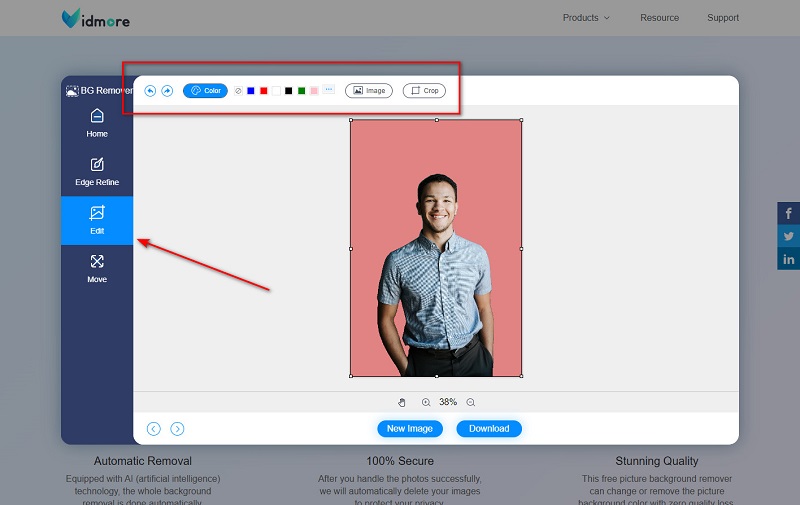
Step 4: Add New Background
On the other hand, you can proceed to the Edit section if you want to modify the background. From there, you have the option to change the color or add a picture that will serve as a new layer.
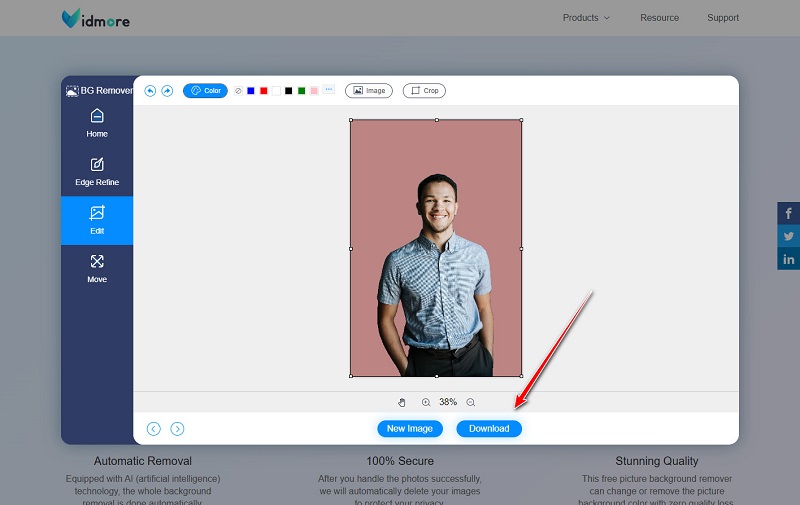
Step 5: Save the Output
Finally, when you're satisfied with the work, hit the Download button to save it on your device. If you want to do other work, click New Image and repeat the process.
Further Reading:
How to Make Transparent PNG Images Online and For Free
Remove Your Image Background Using Inkscape (Instant & Free)
Part 3. FAQs about Creating Transparent Image in PowerPoint
Can I save my picture from PowerPoint?
Absolutely, yes! In order to save your edited picture from the PowerPoint, select the picture in the slide area and press Ctrl+Shift+S on your keyboard. When the pop-up window appears, change the type of the format depending on your purpose. If you want a transparent background, select PNG and then hit Save.
How can I edit a vector file on PowerPoint Presentation?
Editing vector files in PowerPoint is possible. Before importing it on the slide area, make sure that the format is either in AI, EPS, or SVG. After that, hit right-click and ungroup the photo because a vector file is usually a composition of shapes. From that, try to edit the picture by moving, rotating, and resizing them.
Can I crop pictures in PowerPoint?
Definitely, yes! As stated, you can use Powerpoint Presentation for basic editing, and cropping the picture is one of them. To do this, select the picture hit right-click > Crop. Then adjust the edges of your image to cut the area you want to remove.
Conclusion
Though tons of offline and online programs can make your image background transparent, we believe these two highly efficient tools are your best bets. To recap, knowing how to make an image background transparent in PowerPoint can be two ways.
But here’s the thing, if you need to add another background picture for your image, you may have a slight struggle to do it on PowerPoint. On the other hand, installing an offline program will be pretty hectic and time-consuming. In that case, Vidmore Background Remover Online is what we advise for you. So what are you waiting for? Test the tools for yourself and be thrilled.