Sharpen Images in Photoshop: Best Methods to Clear Up Blurry Photos
Nobody wants to share blurry photos with their friends. Also, you will not post a photo unless it is of good quality. Unless you want to be bashed, you will do it anyway. Therefore, many are looking for ways to clear up blurry photos. Photoshop is a popular and professional photo editing tool most users run into for fixing photo imperfections.
This article guide will teach you how to sharpen a blurry image in Photoshop. This program provides various methods to clear blurry photos for everybody's information. On that note, we will tackle some of them. Additionally, you will discover alternatives for a quick and straightforward approach to clearing up grainy photos.

Part 1. How to Sharpen an Image in Photoshop
There are several ways to sharpen images in Photoshop. Photoshop offers different filters that can help you sharpen images. It depends on your needs and what filter you are going to employ. Here, we will discuss two of the most commonly used filters to brighten and sharpen an image in Photoshop:
1. Use Unsharp Mask
With the Unsharp Mask filter, you can get great image sharpening results. This is best suited for making the in-focus subject or area in the photo look sharper. It does not work in a way that sharpens everything. As stated, the main goal of this filter is to sharpen an image area and make it stand out. Anyhow, here is a step-by-step tutorial on how to sharpen an image in Photoshop:
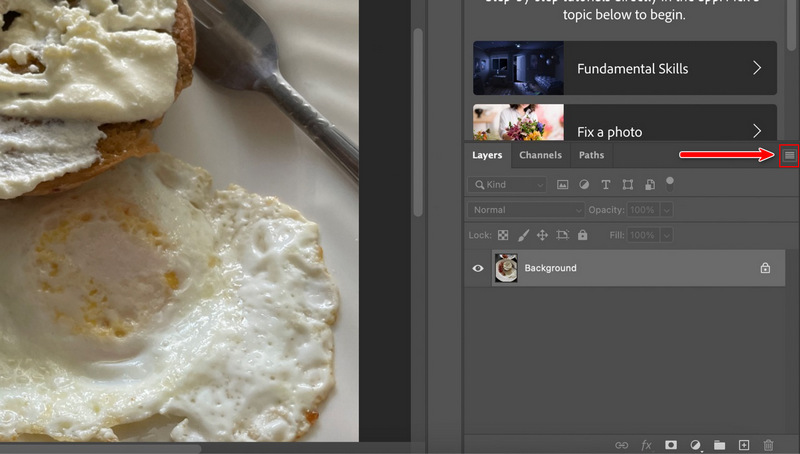
Step 1. First, launch your Photoshop and open the image you wish to sharpen. You can begin by converting the image to a smart object so that you can apply an unsharp mask. Go to the Layers panel and tick on the menu icon that looks like three-lateral bars on the top right portion of the panel.
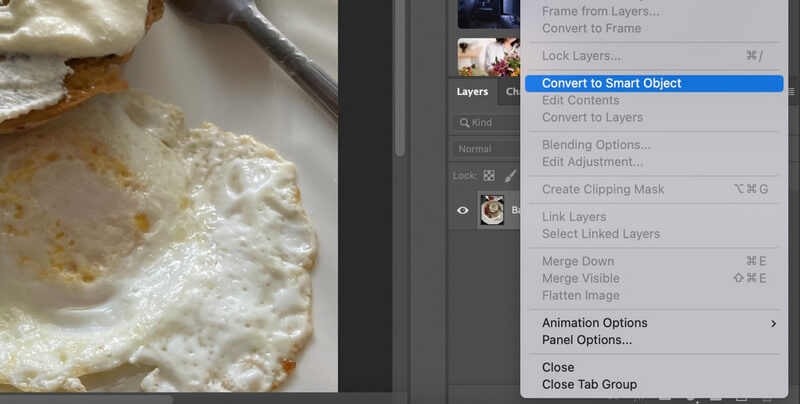
Step 2. Then, a list of options will appear. From here, select the option that says Convert to Smart Object. In the bottom right corner of the image, you will see a smart object icon which indicates that the image is now inside a smart object.
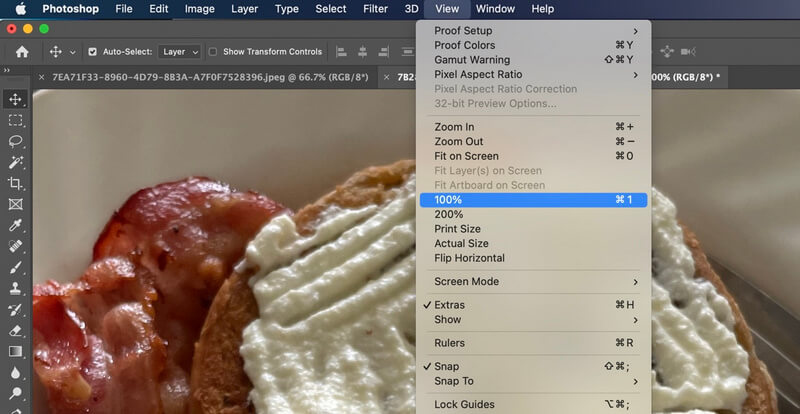
Step 3. This time, zoom in to 100% to give you the most accurate view of the photo’s pixel. Then, hold the spacebar on your keyboard and drag it to the center area of your subject.
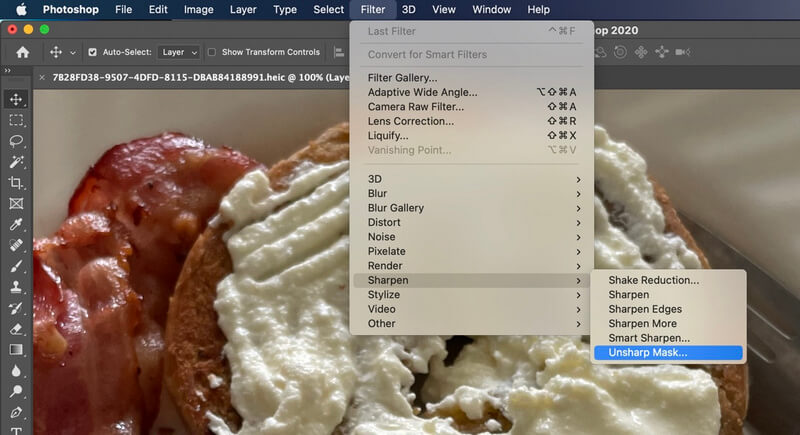
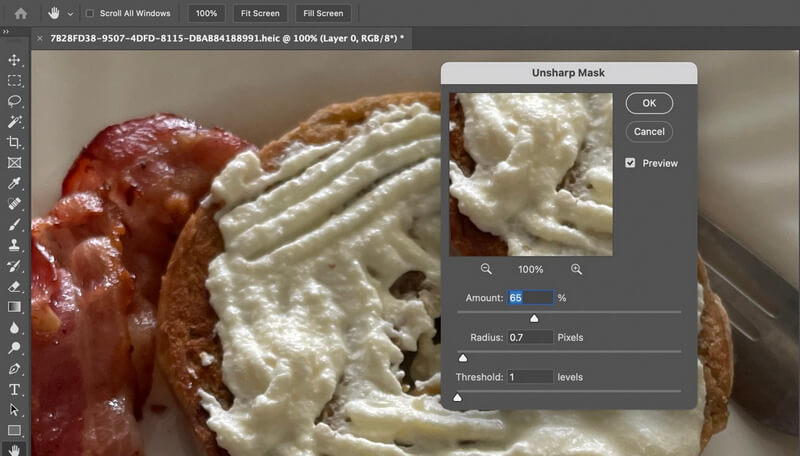
Step 4. In the Menu bar, select the Filter option. Choose Sharpen, followed by the Unsharp Mask filter. Afterward, the Unsharp Mask window will pop up. This operation will give you different options for sharpening along with the preview. On the other hand, you may toggle the Unsharp Mask preview on and off by ticking its checkbox.
Step 5. Now, play around with the Amount, Radius, and Threshold values. You may adjust the values by keying in the amount or moving the sliders. There are recommended values depending on the picture's size or purpose.
The Amount values between 50% - 70% are best for smaller images or Email/Web and 150% - 200% for high-resolution images fitted for printing images. Meanwhile, you can set the Radius to 0.5 and 0.7 pixels for Email/Web and 1 to 2 pixels for printing. For the Threshold, Adobe suggests a value between 2 and 20 levels. Hit OK to save the changes.
Step 6. At the color default, the color is affected in the sharpening process. On the other hand, you can prevent color shifting by accessing the blending options. Double-click on the Blending Options, and a dialog box will appear. Next, set the blend mode to Luminosity from Normal. Tick OK to save the setting. That is how Photoshop sharpens an image using the Unsharp Mask filter.

2. Use High Pass Filter
The High Pass filter is also an effective technique for sharpening a photo. It works by looking for edges in the photo and highlighting them. In other words, it ignores that area of a photo that is not an edge. Combined with the blending mode, you will get excellent image-sharpening results. Follow the steps below to learn how to sharpen an image in Photoshop:
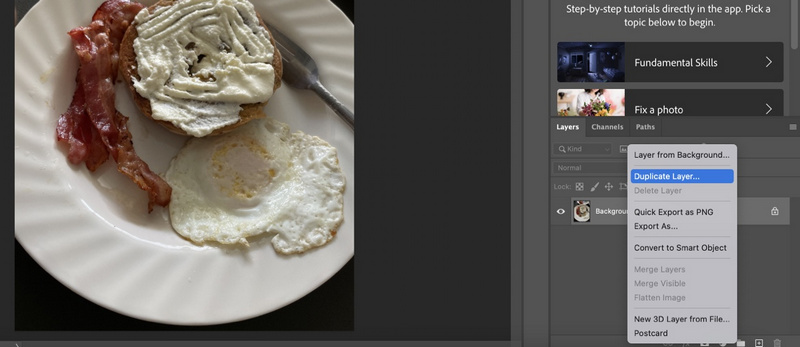
Step 1. On your Photoshop, load the image you wish to sharpen. Now, duplicate the background layer. Press Ctrl + J on Windows or Command + J on Mac. You should see a duplicate photo in the Layers panel. You may also right-click on the Background layer and select the Duplicate Layer option.
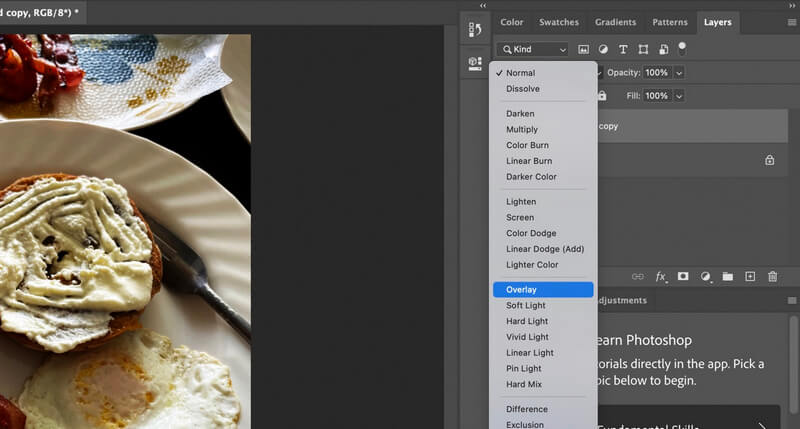
Step 2. Next, change the blend mode of the duplicate layer from Normal to Overlay. This action will turn all the non-edge areas into neutral gray while the natural gray areas are ignored. There will be no sharpening of the natural gray areas.
Step 3. Now, apply the High Pass filter to the duplicate layer of your photo. Navigate to the Menu bar and tick Filter. From the list of options, hover over Other and select High Pass.
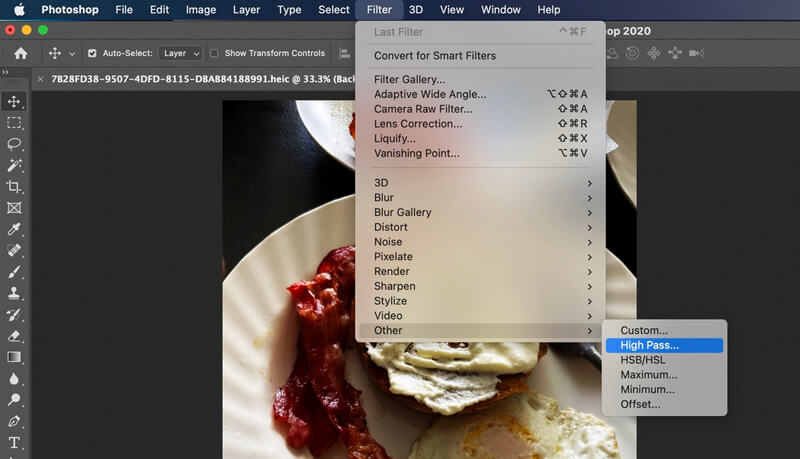
Step 4. On the High Pass dialog box, play around with the Radius values. Set it somewhere around 2 and 5 pixels. You can also drag the slider to set the amount of sharpening to the image. In most cases, lower values work well. Tick OK if you are delighted with the results.
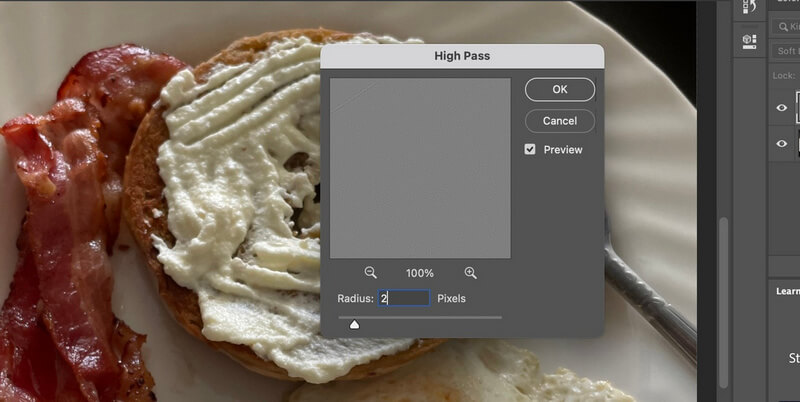
Step 5. You may also adjust the amount of sharpening by changing the blend mode. You can choose between Soft Light and Hard Light blending options or reduce the opacity instead.
Part 2. Easiest Way to Sharpen an Image Instead of Photoshop
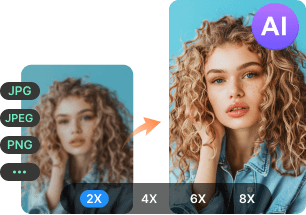
Photoshop is indeed an excellent tool if you are a professional photo editor. However, if you only wish for a simple image sharpening without tweaking many settings, Vidmore Free Image Upscaler Online is your best option. Using this program, you can get four sharpening results. It comes with 2X, 4X, 8X, and 8X upscale factors. It is guaranteed fast because it is infused with AI technology for a better and faster upscaling process. On the other hand, follow the brief and easy guide below to sharpen images in Photoshop alternative:
Step 1. First, visit the program’s main website using a browser. Then, hit the Upload Image from the home page.
Try Image Upscaler Now!
- Improve photo quality.
- Enlarge picture to 2X, 4X, 6X, 8X.
- Restore old image, unblur photo, etc.
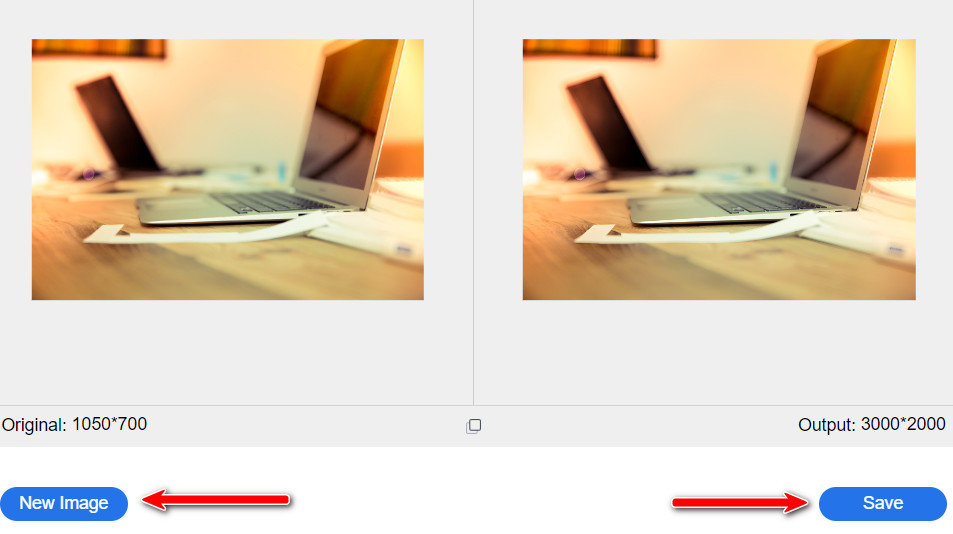
Step 2. At the default magnification, your photo will be upscaled by 2X. Hover over the image to see the details. Meanwhile, you can adjust by ticking the radio button of the upscale factors.

Step 3. Once satisfied with the outcome, hit the Save button to download a copy of the sharpened photo. To process another image, hit the New Image button at the bottom left corner of the interface.
Part 3. FAQs About Sharpening an Image
Can I sharpen a selective area?
Yes, you can also do that in Photoshop. Use a selection tool to draw a selection on the area of a photo you wish to sharpen. Then, apply the filter to refine the selected area(s).
Is it possible to fix blurry photos?
Yes. The Unsharp Mask filter works best to fix blurry photos. You can follow the values above depending on the purpose you will use the photo. Also, do not forget to change the blend mode.
Can you upscale photos in Photoshop?
You can activate Photoshop's Enable Preserve Details 2.0 Upscale feature. As an alternative, try to reduce the noise to upscale a photo.
Conclusion
Blurry or damaged photos are inevitable. On the good side, you can address this problem. Through how to sharpen an image in Photoshop tutorial, it is possible to repair blurry or damaged photos. When choosing the right tool, usability is king. Hence, we recommend an easy method if you find Photoshop challenging to navigate. Nevertheless, both methods are guaranteed to be practical and incredibly effective.