How to Add Transitions in Premiere Pro to Enhance Video Flow
Transitions in video editing are like special tricks that help your video flow smoothly from one part to another. In Premiere Pro, you can use these transitions to make your videos look better and keep your viewers interested. It makes everything feel connected and exciting and more enjoyable to watch. So, adding transitions in Premiere Pro is like adding charm to your video story. Do you want to learn how?
This write-up will present a detailed guide on how to add transitions in Premiere Pro. Let us get started on your journey to making smoother and exciting videos!

PAGE CONTENT
Part 1. How to Add Transitions in Premiere
Premiere Pro is a leading video editing program that helps make your videos look smooth and professional. One cool thing it can do is add transitions. Adding transitions in Premiere Pro is like giving your video a special touch, making it smoother and captivating.
This guide will walk you through using Premiere Pro to add these transitions to your videos effortlessly. Whether you want to create a professional-looking project or make your home videos more engaging. Below are the steps on how to add transitions in Premiere Pro:
Step 1. Start by opening your project or making a new one if you still need one. Head to the top menu bar and select the File option.
From there, choose Import videos. A display will pop up where you can find and pick the video clips you want to use. Click Open once you have found them.
Step 2. In the area where you see all your imported clips, pick one you want to start with. Right-click on it. When you right-click, you will see some options. Choose Create a New Sequence from the clip. After that, drag all the clips you plan to use into the new sequence.
If you did not create a sequence using the first method, do not worry. You can drag a clip straight onto the timeline at the bottom, and a sequence will be made for you.
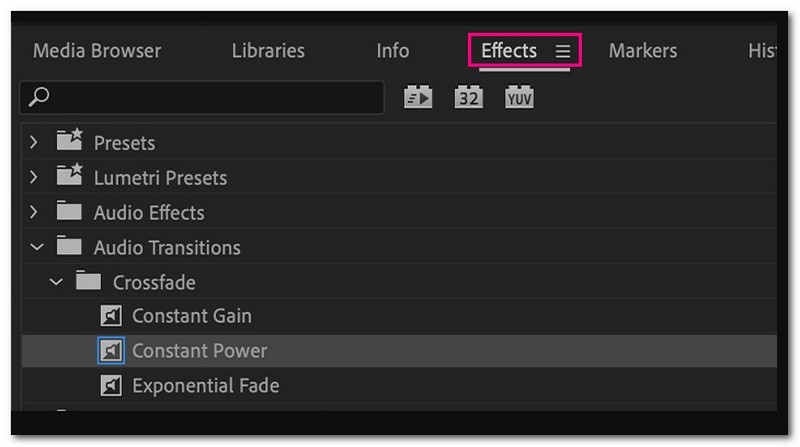
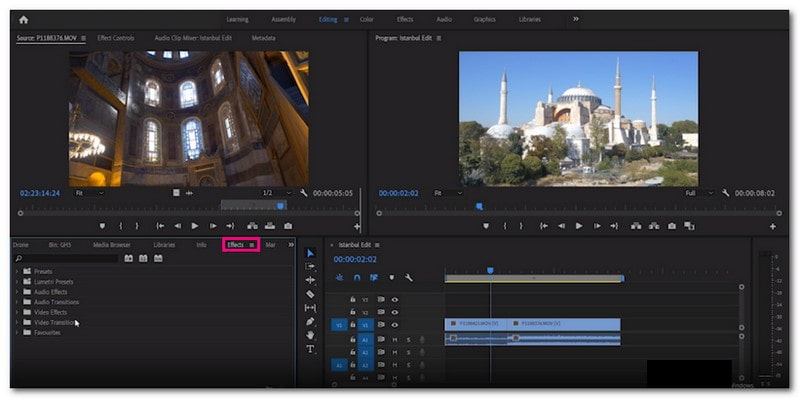
Step 3. Look at the top of the screen again and click on Window. Scroll down a bit and click on Effects if it does not already have a checkmark next to it. After doing that, you will see a new tab called Effects in the area where your clips are listed. Click on it, and that is where all the effects live.
If you are working with the video clips, click on Video transitions in the Effects panel. If you have audio clips, click on Audio Transitions. Inside these categories, you can click on the little arrow next to each one to see more options.
Step 4. Go to the Effects panel again. Choose Video Transitions if you are working with video clips or Audio Transitions for audio clips. Look through the categories and pick the transition you like the most.
To add the transition to your timeline, drag it and drop it at the beginning or end of the clip where you want it to happen.
Step 5. Lastly, play your video to see how the transition looks before you finalize it.
Part 2. How to Edit Video in Premiere With Transitions
Step 1. Before you start, ensure you have all your video clips ready. Then, open Adobe Premiere Pro and start a new project. Name your project and choose where to save it on your computer.
Step 2. Click on File at the top, choose Import, and select your video files. Drag your video clips onto the timeline in the order you want them to appear in your final video. It sets up the sequence of your video.
Step 3. Click on Window at the top, then look for Transitions in the menu and click on it. It opens a panel with various transitions you can use.
In the Transition panel, you will see different transition effects like fades, wipes, etc. These are your tools for making your video smoother and more attractive. Click on one you like, and you will see a preview of how it looks.
Step 4. You can control how long the transition lasts by dragging the edges on the timeline. It lets you decide how smoothly your video changes from one clip to the next.
Before finalizing your video, play it to see how the transition looks. You can always return to the Transition panel to make changes. Pick a different one or modify the settings.
Step 5. Ensure to save your project once you are satisfied with your video and the transition you have added.
Part 3. Excellent Premiere Pro Transitions You Must Try
Adobe Premiere Transitions are video tricks that make your clips change from one to the next smoothly and interestingly. They come in different styles, like gentle fades, quick cuts, or sliding movements. To get to know them, read the following parts.
- Dissolve Transitions
- Cut Transitions
- Slide Transitions
- Zoom Transitions
- Wipe Transitions
- Crossfade Transitions
- Iris Transitions
- Push and Pull Transitions
- Luma Fade Transitions
- Glitch Transitions
Remember that the best transition to your project depends on the style and tone you want to convey. Please choose the one that suits your video's mood and style to make it more captivating and engaging for your viewers.
Part 4. Alternative to Premiere Pro
Are you looking for an alternative to Adobe Premiere Pro for video tasks? Have you ever heard of Vidmore Video Converter? It is an excellent choice for those who want a straightforward way to enhance their videos.
Vidmore Video Converter is a versatile video helper that can be your go-to for editing video projects. You can convert your video files to different formats that work better for your needs. It makes it more compatible with various devices or platforms. It is known for its speedy conversion and can handle multiple video files simultaneously. It can save you a lot of time when working on larger projects.
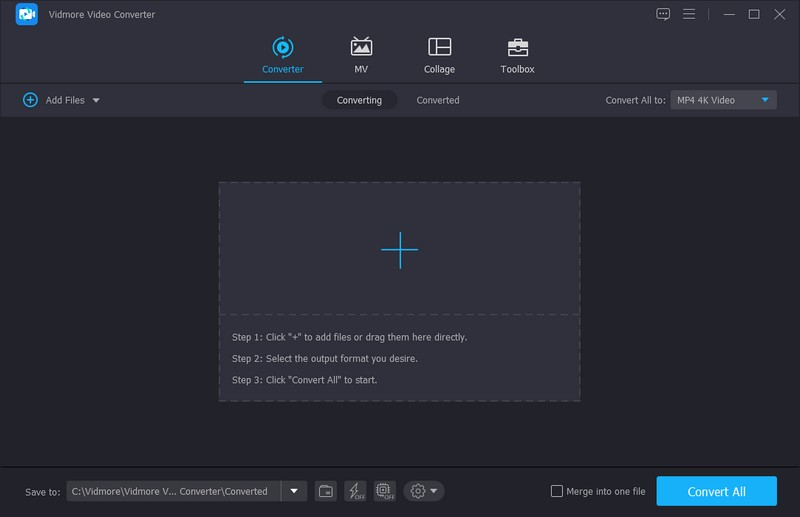
Moreover, It provides basic editing tools, such as trimming, cropping, adding watermarks, and changing video settings. If your video looks dull or shaky, it can upscale the resolution, remove background noise, and stabilize shaky footage. So, if you are looking for a more straightforward tool to handle basic video tasks, Vidmore Video Converter is the best solution.
Part 5. FAQs about Adding Transition in Premiere Pro
What is the most common transition in Premiere Pro?
The most common transition in Premiere Pro is called Cross Dissolve. It is like a gentle fade-out of one scene and a fade-in of the next.
How do I fade out the video in Premiere Pro?
First, open your project. Select the video clip you want to fade. Access the Effects panel. Then, drag Cross Dissolve from Video Transitions onto the clip. Change the fade duration by dragging the transition edges. Once done, preview your video to check the fade effect.
Why can't I add transitions in Premiere Pro?
Ensure you have two video clips in your timeline. Transitions go between two clips, so you need at least two clips. Check if you are in the Editing workspace. You may not see the suitable options for adding transitions if you are in a different workspace. In addition, ensure your video clips overlap. Sometimes, issues with your project file can cause problems. Try making a new project and see if you can add transitions.
How to import transitions in Premiere Pro?
Locate the transitions you want to use. Launch the software and open your project. Go to Window and then Effects to open the Effects panel. Right-click in the Effects panel, choose Import Presets and select your transition files. Click on the transitions you want to use in the Effects panel. Then, drag and drop the selected transitions onto your timeline clips.
Are there free Premiere Pro transitions?
Yes, there are free transitions available for Premiere Pro. You can find these transitions on various websites and online communities. Other video editors often create and share them; you can download and use them without cost. Ensure to download from trusted sources to ensure they work well with your Premiere Pro software.
Conclusion
Video transitions in Premiere Pro make your videos smoother and more enjoyable. They help you go from one scene to another without jarring jumps. So, use them wisely to make your videos look fantastic and keep your viewers glued to the screen.
And if you want to make your videos even more stunning, consider using Vidmore Video Converter. It allows you to change your video's format and do extraordinary things. So, please give it a go and take your video editing to the next level!