A Walkthrough Guide to Adjust Video Resolution Easily
Do you have a video you want to increase the resolution? In contrast, do you have a video you want to reduce the resolution?
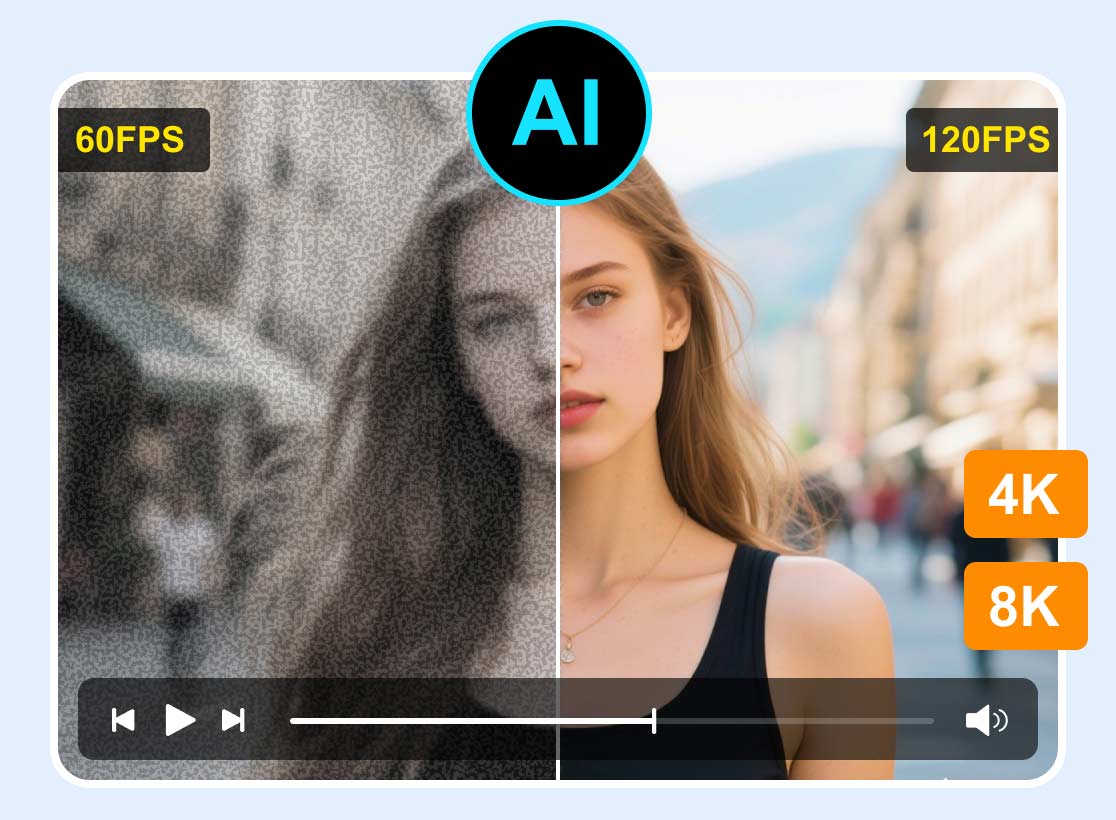
Video resolution is the number of pixels that are incorporated in each frame of an image or video. A clearer, crisper, and more realistic video has higher pixels that produce a high-resolution one. With that, it will provide a good-quality video and better viewing experience than you wish to have. Inversely, lower numbers of pixels produce a low-resolution video that displays a not-so-good appearance on the screen.
This post will present details regarding resolution: how to increase and lower video resolution. It will help you accomplish your task, whether you are planning to increase or reduce the resolution of your video. To learn how to convert video to lower resolution and higher resolution, proceed with reading.
PAGE CONTENT
Part 1. How to Increase Video Resolution
Suppose you plan to use a program to increase video resolution. In that case, you can count on VidHex Video Enhancer. This program can work and does not require you to connect to an internet connection to accomplish your task. This program has a user-friendly interface that is easy to use and master. You can easily understand how the program works, whether a beginner or a professional. This program can upscale your video’s resolution and select a resolution based on your preference. Are you ready to upscale 1080P to 4K or convert 480P to 1080P? If so, proceed to the following instructional guide presented.
• It can upscale video resolution with high quality.
• It has numerous AI models for different upscaling needs.
• It supports various media file formats.
• It is capable of batch conversion.
Step 1. Download and Install VidHex Video Enhancer
Download and install the program on your desktop to have complete access. After the installation procedure, launch the program to get started.
Step 2. Upload the Video
Once you open the program, you are directed to (+) icon to open your desktop folder, and select one video you want to upscale or convert. After that, your video will be uploaded to the editing section.

Step 3. Upscale the Video Resolution
Choose an AI model from the right list based on your video type. Click the gear icon next to the Export Now button to adjust output format, video encoder, bitrate, and target resolution from 720P to 4K. At last, hit the exporting button to receive the result.

Part 2. How to Lower Video Resolution
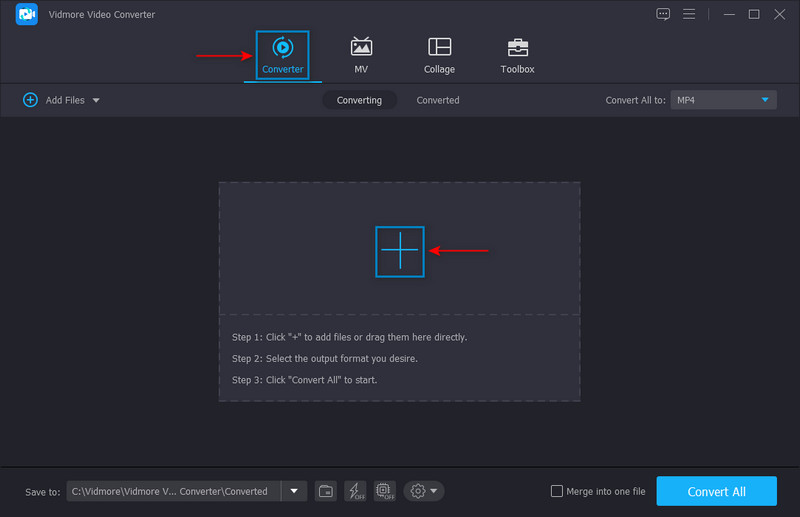
1. Best Way to Reduce Video Resolution with Vidmore Video Converter
If you have a higher-resolution video that you want to lower the video resolution, Vidmore Video Converter can help you.
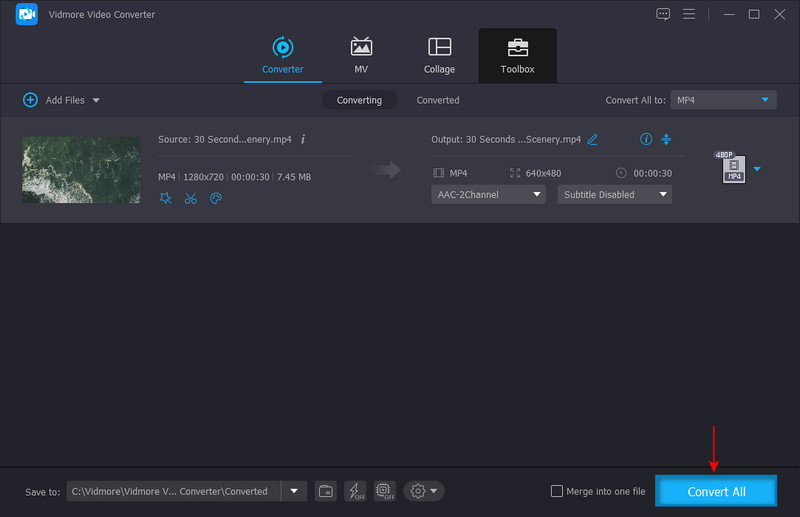
Step 1. Open the program, click the (+) icon on the Converter tab, and select a video you want to lower the resolution.
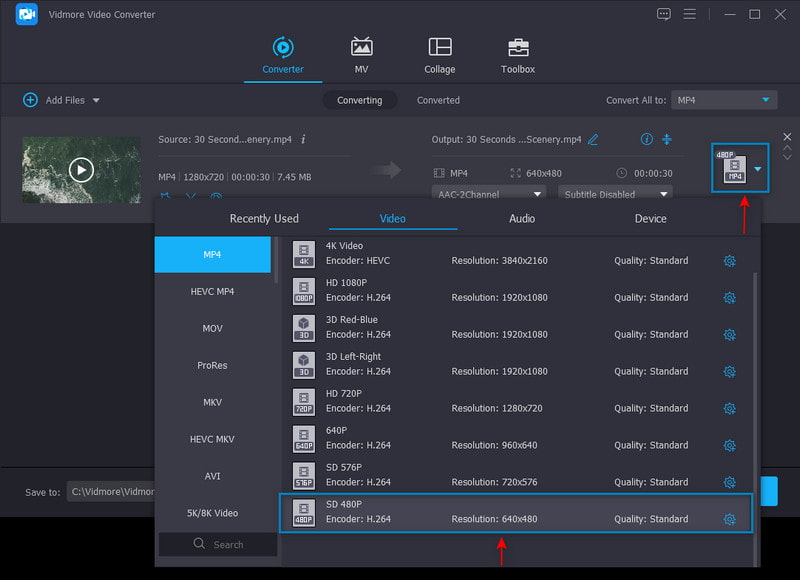
Step 2. When the video is added to the converter section, head to the drop-down menu and select format and resolution from the list. Select a lower resolution from the applied list to accomplish your goal. For instance, select SD 480P as it is the lower resolution on the list.
Step 3. Once settled, click the Convert All button to save your lower video resolution to your desktop file successfully.
2. How to Change 4K to 1080p in Premiere
Adobe Premiere is one of the most popular and leading video editing programs you can access. It has numerous built-in features and editing tools for creating content and films, editing videos, and enhancing audio and image. It can perform various video processing tasks, including downscaling a 4K video to 1080P. To learn how to change 4K to 1080P in Premiere, follow the steps below.
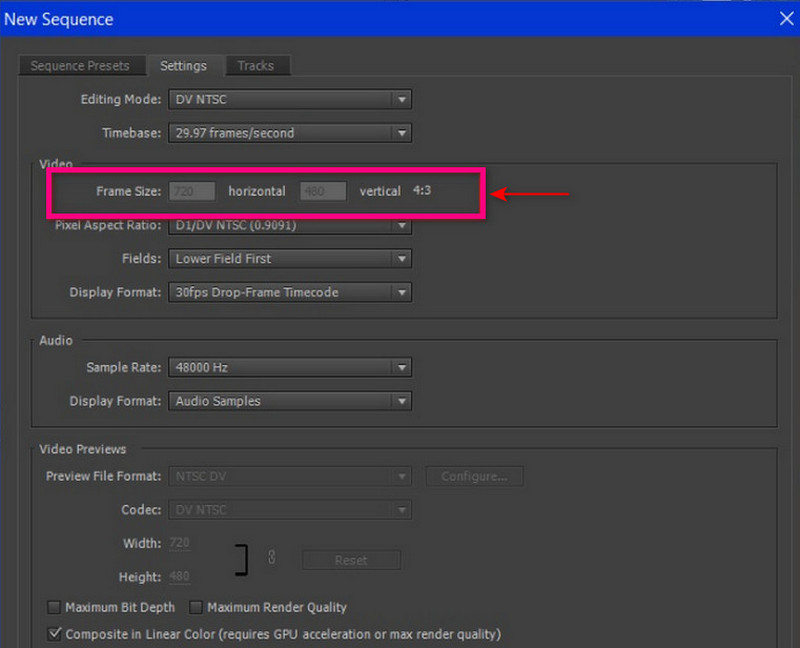
Step 1. Open the program on your desktop. Drag and drop the video clip into the media box, and from the media box, drag the video clip to the timeline. The program will automatically create a video sequence on your video clip. Ensure that you select the auto-generated sequence from the main menu bar. From the toolbar, hit the Sequence option and then Sequence Settings.
Step 2. A newly opened window will appear on your screen. Click the Frame Size from the Video applied list. Next, set 1920 under horizontal and 1028 under vertical. Once settled, hit the OK button to apply the changes.
Step 3. When you are done, hit the File in the menu bar, Export, and then Media. The output settings window will appear on your screen. From there, set the parameters for your video output. Once settled, hit the Export button to save your project to your desktop.
3. How to Reduce Video Resolution on Android
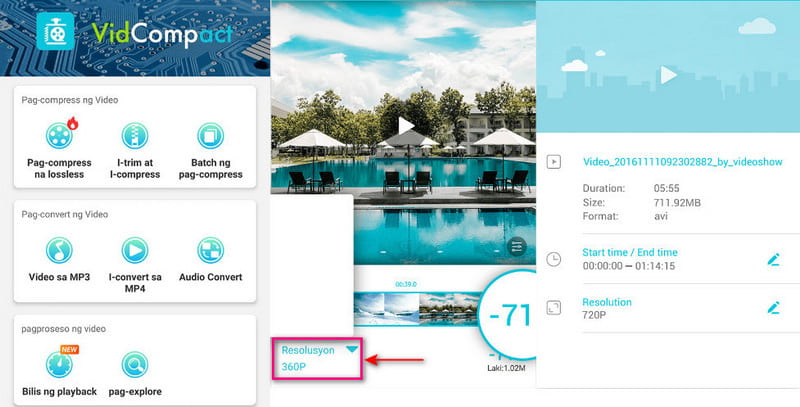
If you prefer to reduce the video resolution using of your video using your Android phone, you can use VidCompact. This mobile application is an audio and video converter, compressor, and trimmer. It can save a lot of storage space on your device once you reduce the resolution of your video. It has numerous editing functions such as video editing, stabilizing, changing audio frequency, etc. If you want to learn how to reduce video resolution on Android, rely on the steps given.
Step 1. Click the Trim & Compress button from the main interface of the application. Next, select a video from your gallery you want to reduce the video resolution.
Step 2. Once your video is uploaded, select a resolution from the resolution section.
Step 3. When done, click the Save icon on the upper part of your screen. Next, click Save Gallery. After that, your reduced-resolution video will be saved to your phone gallery.
4. How to Reduce Resolution of Video on iPhone
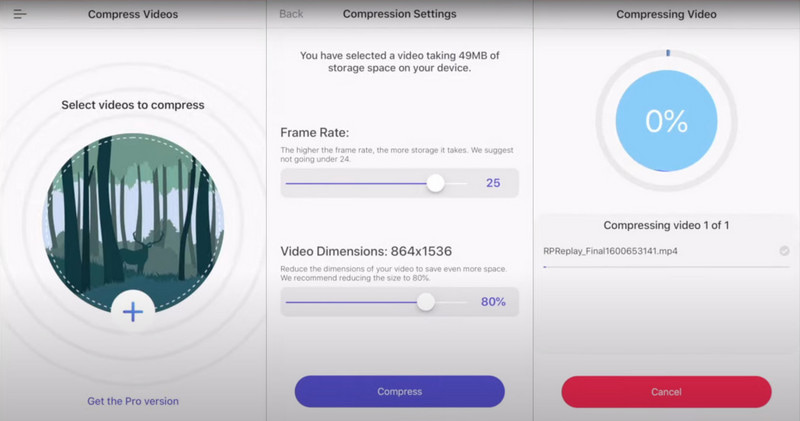
If you prefer to reduce the resolution of your video using your iPhone device, count on Compress Videos & Resize Video. This mobile application compresses video files that can maintain good-quality output. Also, it has editing functions such as crop, cut, merge, and split. On top of that, it has numerous resolutions available that you can choose from. Proceed to the steps to learn how to reduce resolution of video on iPhone.
Step 1. Download and Install Compress Video & Resizer Video on App Store. After that, open the application to get started.
Step 2. Once the application is opened, click the (+) icon in the middle. Next, open the folder where your video is placed, select it, and click Next. After that, it will lead you to the Compression Settings. From the settings, reduce the frame rate to 24 and ensure that the video dimensions are not lower than 80%.
Step 3. Once done, click the Compress, and your video will have a lower resolution and size than the original size.
Part 3. FAQs about Changing Video Resolution
How do I convert HD video to low resolution?
Visit VEED.IO - Compress Video Online on your browsers. Next, click the Choose Video button, Upload Video File, and your video will be placed in the editing section. Select your desired quality and resolution from your screen’s Compress Your Video options. Once done, click the Compress Video button.
What is 480P, 720P, and 1080P?
480P, 720P, and 1080P are resolutions that signify the number of horizontal lines from the upper and lower part of the video.
What is the best resolution for a video?
1080 or commonly called high-definition, has 1920 × 1080 pixels. It is the standard for a clearer and crisper high-definition video that does not break your storage space.
Conclusion
We change the resolution of a particular video to produce a high-quality output that fits into our device. Increasing the video resolution is a method to enlarge a lower-resolution video to fit on higher-definition screens and monitors. In contrast, you reduce the video resolution to be compatible with any device. This post provided methods to change video resolution using various applications. With this post, you do not have to look up on the internet to select the best application you can use. If you want the best application to change the resolution of your video, rely on VidHex Video Enhancer. It is capable of increasing and reducing the resolution of your video.