Quick Ways How to Stabilize Video Using Video Stabilizers Tools
Have you ever shot a video that was shaky when you watched it? And because of that, you thought of ways to remove the shakiness of your video. What is the best way to remove it? To answer your question, the best way to remove video shakiness is to use video stabilizer applications.
Shaky footage can have a substantial negative impact or provide a terrible viewing experience to your viewers. When your video is shaky, viewers may feel dizzy or distracted while watching. But when you stabilize a video, you will produce the cleaner and smoother-looking video you wish to have. It will remove unwanted camera movements, which can help you produce stable video footage. This post will share some video stabilization applications you can use. Other than that, it will present instructional steps you can follow. What are you waiting for? Proceed to the following parts.

PAGE CONTENT
Part 1. How to Stabilize Video Using Vidmore Video Converter
Vidmore Video Converter is a very easy-to-use video editing program that enables you to make professional videos. This program can work and does not require you to connect to an internet connection to accomplish your goal. It is compatible with Mac and Windows, so you can easily access this program using your desktop. On top of that, it has numerous built-in features, such as a converter, ready-made themes, collage makers, and additional tools.
Vidmore Video Converter has a built-in tool that can help you enhance video quality using the following four key features. One of these four key features can help you stabilize shaky videos but can only be applied for videos with whole frame moves.
Here are the instructional steps to reduce video shaking using the best video stabilizer software:
Step 1. Download and Install Vidmore Video Converter
Download and Install the program to your desktop to have full access. Once the installation process is done, launch the program to begin the process.
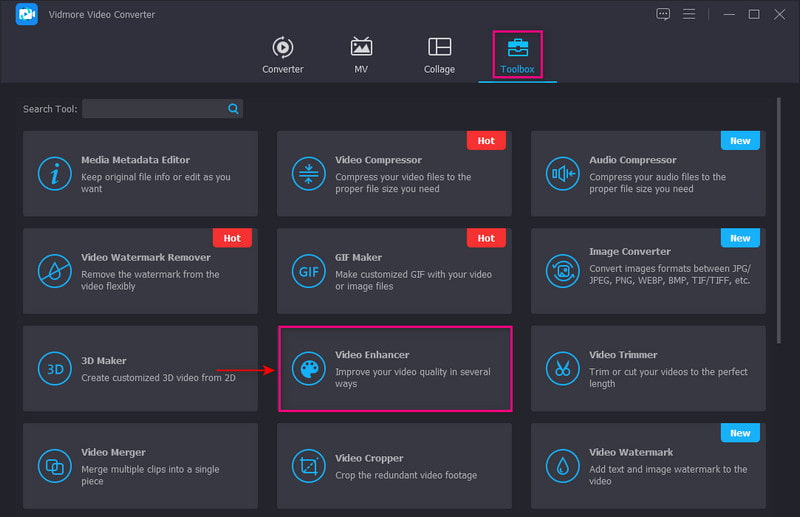
Step 2. Choose Video Enhancer
When the program is opened, navigate to the Toolbox tab, and search for Video Enhancer from the section.
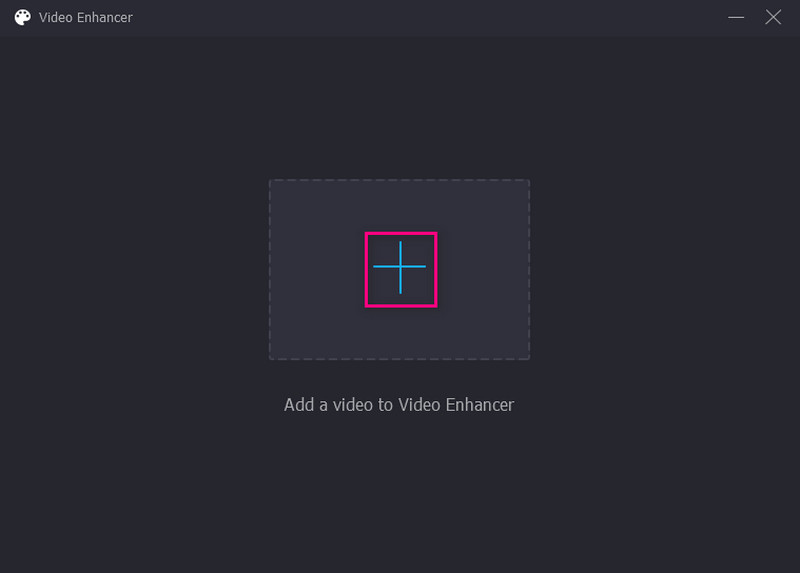
Step 3. Upload a Video to Video Enhancer
Hit the (+) icon presented in the center of your screen. It will open your desktop folder and select the video you want to undergo to reduce the video-shakiness process.
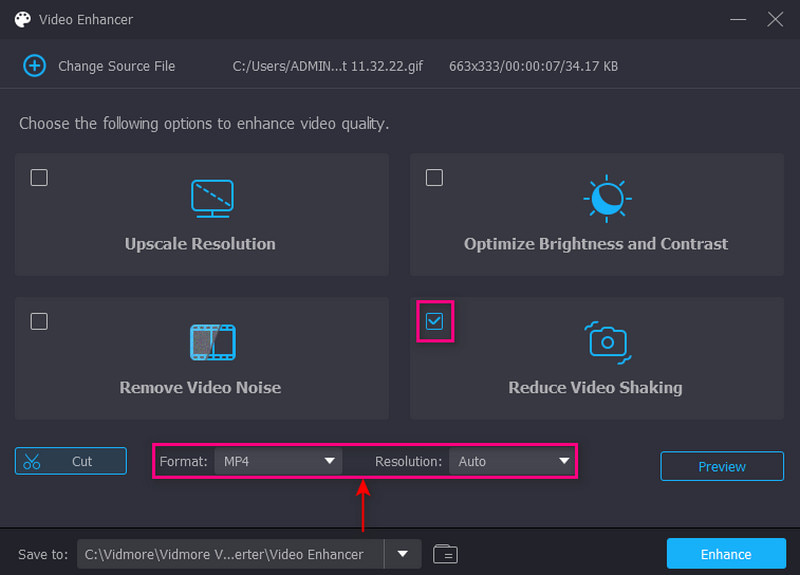
Step 4. Reduce Video Shaking
Once you upload the video, a new window with the following options to enhance video quality will appear on your screen. These options are Upscale Resolution, Remove Video Noise, Optimize Brightness and Contrast, and Reduce Video Shaking. From these four key features, put a checkmark on the small box beside the Reduce Video Shaking option. It is the primary feature of stabilizing shaky videos.
Additionally, Click the Format drop-down list to select your preferred output format. Also, click the Resolution drop-down list and select the compatible resolution with your device.
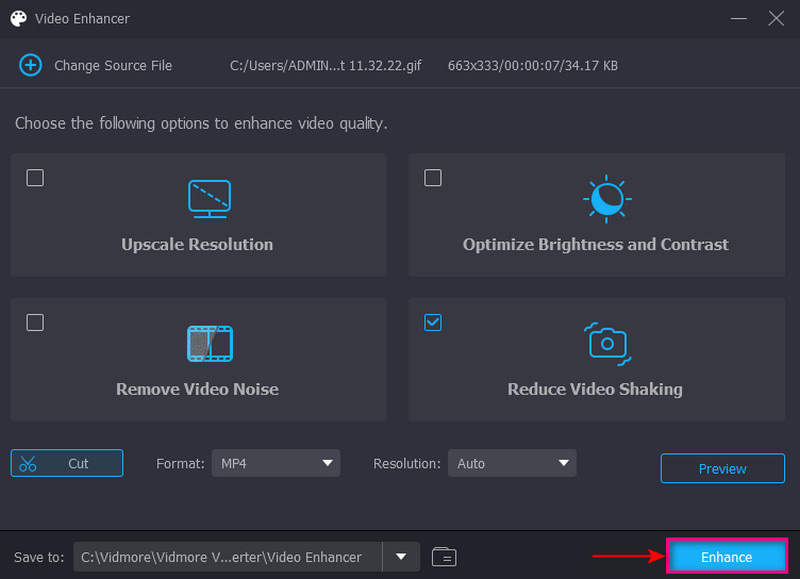
Step 5. Save Stabilize Video
Once done, click the Enhance button on the lower right part of your screen. After that, your stabilized video output will be saved directly to your desktop folder.
Part 2. How to Stabilize Video in Premiere
Adobe Premiere Pro is an industry-leading video editing program for creating professional video projects. It can edit footage from any file format, detects edits automatically, and access numerous high-quality stock audio options. Therewithal, it is capable of stabilizing video using the Warp Stabilizer option. This option lets you choose whether to remove camera movements or reduce video shakiness. This program can fix unwanted camera shakes, producing fine-tuning footage you wish to have.
Below are instructional steps on how to stabilize video in Premiere:
Step 1. First and foremost, open the application on your desktop device, and proceed to import your video clips. Select the video clip you want to undergo the video-stabilizing procedure.
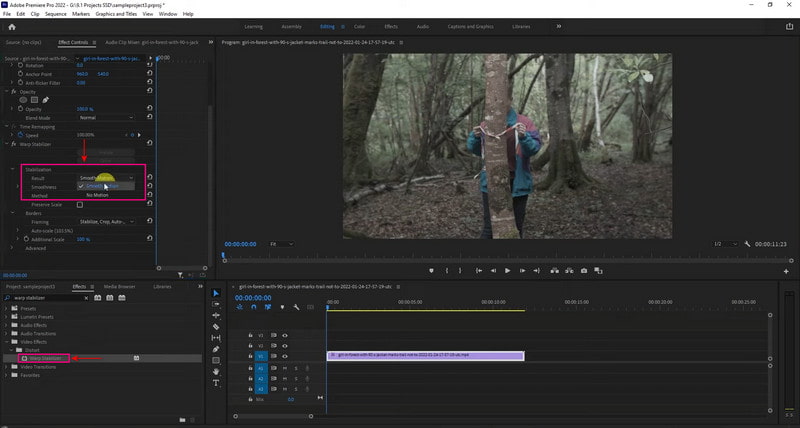
Step 2. Next, add the video clip to the Timeline and proceed to the Effects workspace. From there, head to the Effects panel. Open the Video Effects folder and proceed to the Distort button. After that, scroll down, look for Warp Stabilizer, and double-click on it. Alternatively, under Video Effects, search Warp, and you will find the Warp Stabilizer option. Once settled, the program will analyze your video clip for the Stabilization process.
Step 3. Modify the video clip’s Smoothness parameter to change the Stabilization amount.
Step 4. Head to the Stabilization, Result, and No motion option. It will create a stationary camera effect with no movements. Or choose Smooth Motion if you only want to reduce the shakiness of the video. Once done, hit the Analyze button to assess your video film.
Part 3. iMovie Video Stabilization
Mac, iPad, or iPhone users can quickly fix unwanted video shakiness using iMovie. This application can stabilize a video clip using an iPhone or Mac.
If you are an iPhone user, it would be easy to stabilize your video, as the whole process is automatic. However, you cannot control how much the effect is applied or how your video clip will look. The application can automatically stabilize the video clip but only achieves intermediate results. If you are a Mac user, it lets you fix the camera shakes and correct the image distortion caused by camera movement. The iMovie’s built-in Stabilize Shaky Video feature crops the clip to create a stable video. With this application, you can quickly stabilize your shaky video hassle-free and offer advanced features you can use.
Refer to the steps to learn how the iPhone video stabilizer uses iMovie.
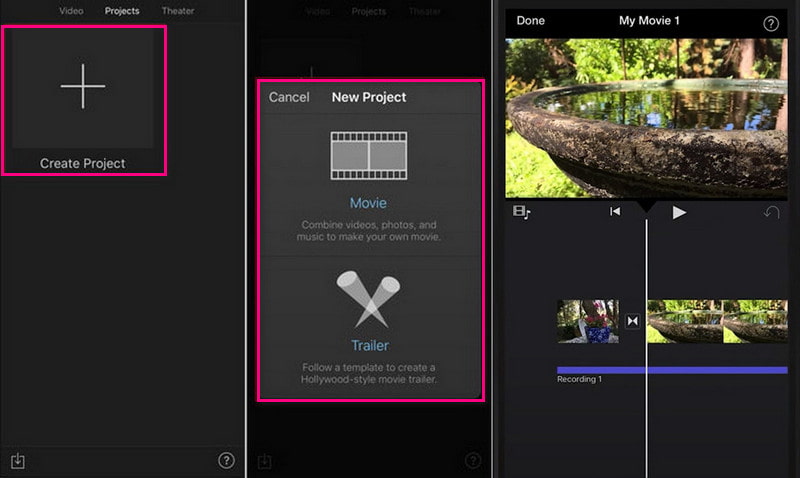
Step 1. Open the application on your mobile device. Once the application is opened, create a new project and import the video clip into the application.
Step 2. Next, hit the File menu, and choose the Analyze for Stabilization button. It will analyze the video clip, and once done, it will place your video clip into the timeline section.
Step 3. Once the video clip is displayed, a Gear icon will appear on your screen. Click the icon, select Clip Adjustments, then the Smooth clip motion feature. This feature will help you to make your footage stable as possible.
Below is the process of how iMovie video stabilization works:
Step 1. Launch the program on your desktop device. Click the New Project button on your screen to start a new project. Import the video clip you want to undergo the video-stabilizing process. Once the video clip is uploaded, drag it into the timeline section.
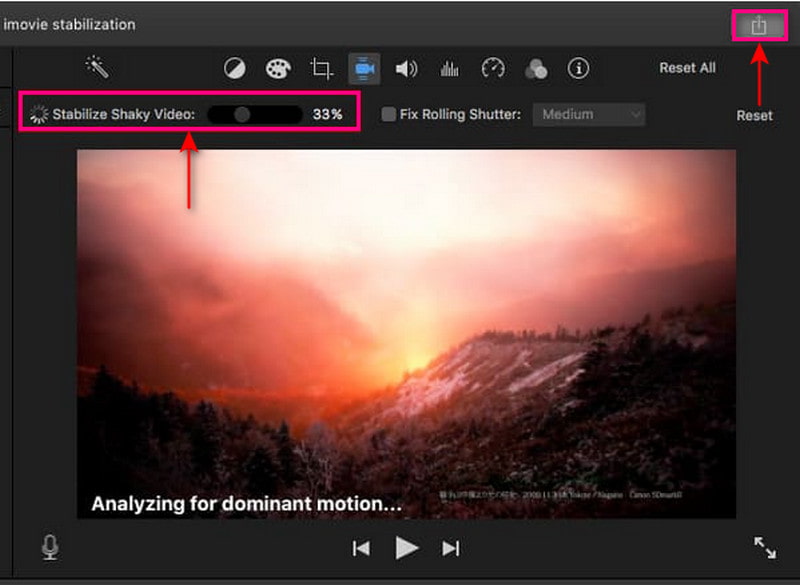
Step 2. Click the clip you want to stabilize from the timeline, then click the Stabilization button above the preview screen. From the button, select Stabilize Shaky Video checkbox. The clip will be analyzed and stabilized, and the activity indicator will replace the checkbox until the process is ongoing.
Step 3. Once done, play the video clip to preview stabilization effects. When satisfied with the changes, click the Save button on your screen’s upper right corner. It will export your stabilized video to your desktop.
Note:
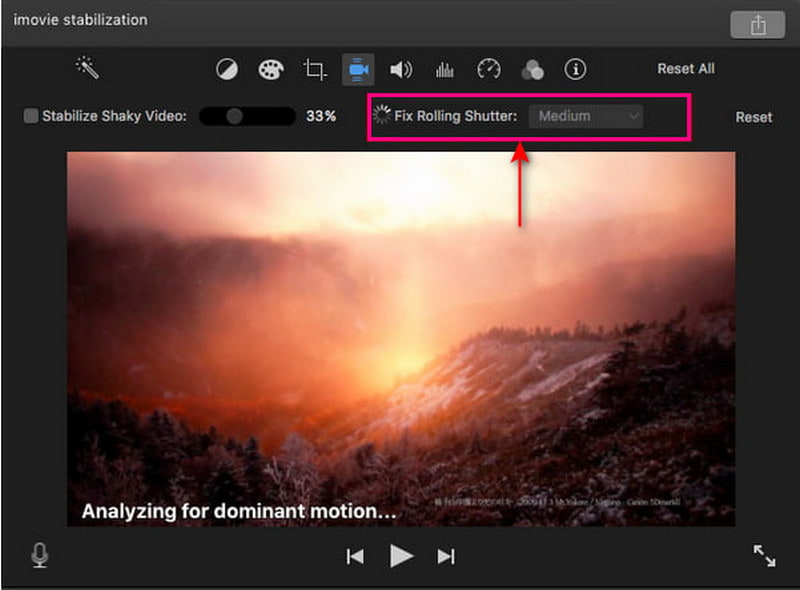
This program’s stabilization offers additional features to reduce rolling shutter distortion to your video clip. Click the Fix Rolling Shutter checkbox under the Stabilization controls to accomplish that.
Part 4. Fix Shaky Video After Effects
After Effects is a video editing platform that enables users to incorporate motion animations, compositing, graphics, and visual effects into their videos. It has many built-in features, including layer creation, masking, and video manipulation. These features can help you accomplish your ideal visual effects goals. This program can quickly stabilize your shaky footage with a few clicks and an easy process. The Warp Stabilizer is the primary method to fix unsteady video. Also, it permits you to adjust the effects parameters and showcases how it works.
Proceed to the steps below to learn how to fix shaky video After Effects:
Step 1. Launch the program on your desktop device; start a new project once the program is opened. To do that, click the File button above the screen, then New, and then New Project. From there, add the shaky video you want to undergo the stabilizing process.
Step 2. Once your shaky video is placed on the screen, create a new composition to accomplish your task. To do that, click your file, and drag it to the window’s bottom where the New Composition is located.
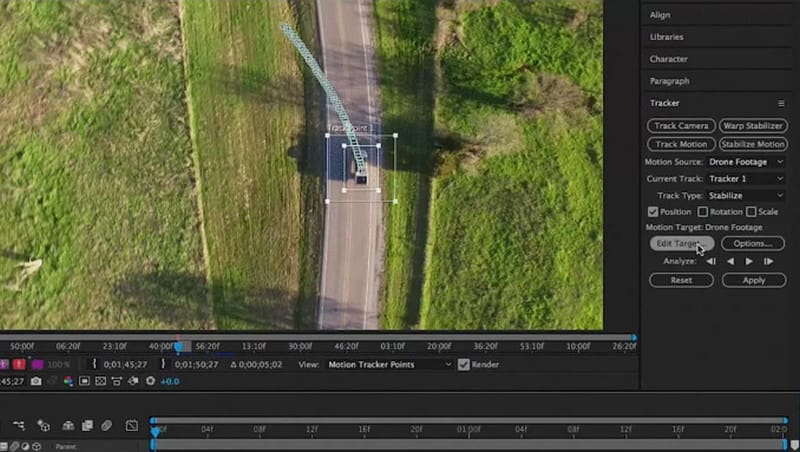
Step 3. Head to the Animation button and select the Stabilize Motion button from the list to stabilize your video. After that, it will bring you to another sub-heading, the Warp Stabilizer. The Warp Stabilizer lets you adjust the effects and motions you want to incorporate into your video. Next, a blue ribbon will appear on your screen and stay on your screen until the procedure is ongoing. It will change from a blue ribbon to an orange, disappearing after the process.
Step 4. To save the stabilized video, look for the Composition tab and select the Make Movie button. It will save your video into a movie and will be placed on your preferred folder destination.
Part 5. Video Stabilizer Online
Online Converter is a web-based tool that can stabilize shaky video footage. It is a video stabilization tool capable of reducing shakiness to a particular extent and producing a fixed video. Other than that, it ensures that your shaky video will turn out smoother and more stable compared to before. This online tool supports many video file formats, such as MP4, AVI, FLV, MOV, 3GP, MKV, etc.
Below is the process of how a video stabilizer works using Online Converter:
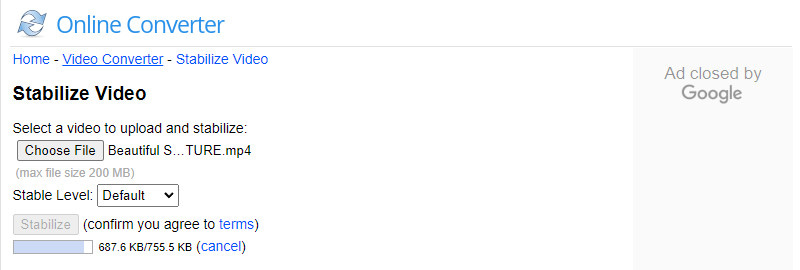
Step 1. Visit the Online Converter - Stabilize Video’s official website on your browser. Next, click the Choose File button on your screen to upload your shaky video to the platform.
Step 2. Select whether Minimum, A Little, Default, Much, and Maximum from the Stable Level option to stabilize your video.
Step 3. Once settled, click the Stabilize button to proceed with the process. Depending on your internet connection, it will take minutes to stabilize your video. Afterward, it will bring you to another section; click the Download Now button to save your stabilized video to your desktop folder.
Part 6. FAQs about Stabilize Videos
What is the importance of video stabilization?
It reduces the unwanted shakes and jitters presented in a video without influencing moving objects or intentional camera movements.
Can VLC stabilize video?
VLC’s Video Stabilizer feature enables users to adjust the amount of stabilization using a slider control. Depending on the amount of stabilization effect applied, it will zoom in on a video.
How do you make a video look more stable?
Use video stabilizer equipment when shooting videos around when you use a phone or camera to stabilize it. In addition, you can fix the video shakiness in post-production using a stabilization program which can help you reduce video shakiness.
Conclusion
Above are some video stabilizer applications you can access using different devices. It will help you remove the shaking from your video by following the various ways provided. These are excellent stabilizers that can stabilize your videos with ease and hassle-free. But if you are looking for the best video stabilizer software, you can rely on Vidmore Video Converter. Besides that, it can reduce video shaking, and it offers almost all the editing tools you need in video editing.