How to Edit to Improve Video Quality by Vidmore Video Converter [7 Aspects]
Video is increasingly playing the important role in life or job.
However, nobody expects to watch poor quality videos on TV or smartphone.
What happens when the video is low video resolution, too dark or shaky, full of white spots, getting uncomfortable transitions, possessing unharmonious ratio, etc.?
No doubt you will give up the videos watching if you are watcher, or gaining less views if you are a video sharer.
To improve the video quality is the solution.
This guide is the detailed manual guide for beginner to improve video quality with the enhancement software from Vidmore.

- Step 1. Make basic editing
- Step 2. Crop video to get rid of letterbox
- Step 3. Adjust brightness, contrast, hue and saturation
- Step 4. Improve video resolution
- Step 5. Remove video noise
- Step 6. Reduce video shaking
- Step 7. Output H.265 codec
Vidmore is the easy-to-use but powerful video enhancement software for Windows 11/10/8/7 and Mac users.
It provides you the basic editing features to make your own video without professional skills. Plus, its advanced features will brighten your video files with enhancement features.
- Upscale resolution up to 4K, H.265/HEVC, etc.
- Remove video noise, and reduce video shaking.
- Adjust video effects automatically.
- Enhance MP4, MOV, MKV, 3GP, FLV, SWF, MTS/M2TS, VOB, DVD, etc.
- Edit video effects like rotate, mirror, crop, clip, merge, watermark, etc.
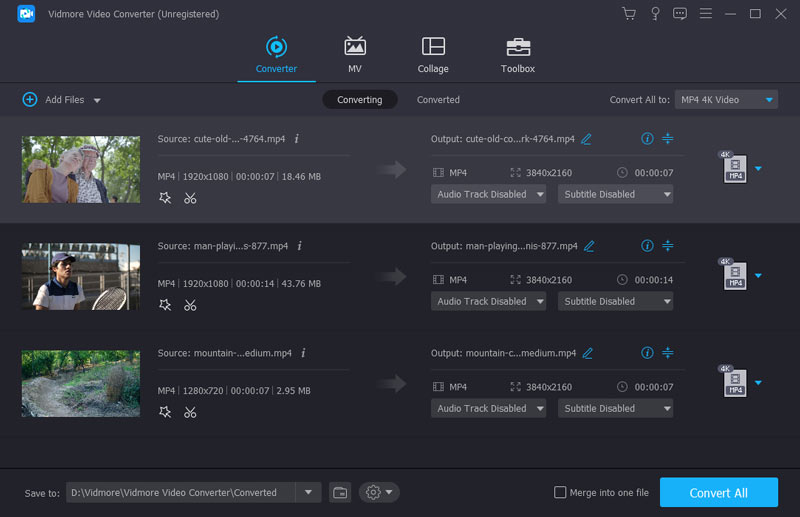
Before you follow the following steps to enhance your video quality, you should free download this software on your computer, install and run it immediately.
After that, click “Add File” to import the video that you want to improve quality.
Step 1. Make basic editing
To get a good quality, video content is also very important, apart from the video effects. So make sure you have done the content smoothly.
Here, what you can do as following:
Rotate/mirror sideways videos
When your video is recorded with the mobile phone, it may become sideways, which will be not comfortable to watch it for computer users.
Step 1. Navigate the main interface of Video Converter Ultimate, click “Edit” button.
Step 2. Find the rotate options on the right side, where you can flip or rotate directly.
Select the video file from the left video list, and click the rotate or flip option to start to rotate your video.
You can preview the effects from the preview window and click “Apply” to confirm the changes you made.
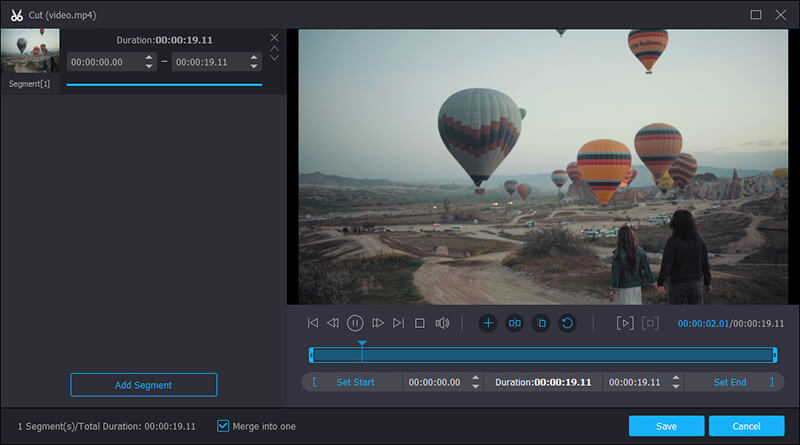
Clip and merge video collections
Vlog is the increasing video styles to record and share video life. When you get a long video recording, try to clip the unwanted files, and insert short opening or ending film to get a good quality video.
Step 1. Still in the main interface, click “Clip” option to enter the clip interface.
Step 2. Adjust the blue processing bar to decide the starting and ending point, and click the clip buttons to start to add a clip or split video into parts. Click “OK” to save the changes and back to the main interface.
Step 3. In the main interface, click the upward arrow and downward arrow to adjust the video order, tick the box before the video clips and click “Merge into one file” to combine all the video clips in order.
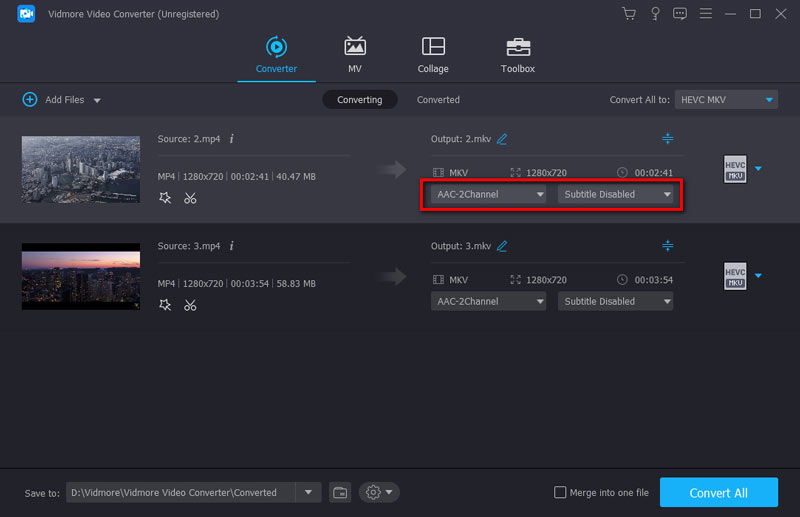
Add video subtitle and background audio
Have you put the matched subtitle or background narration on your video file? Get a video with unsynchronized subtitle or narration?
Do not worry, and add the matched subtitle and background audio track now.
Step 1. After loading files to this software, you will find the green plus buttons in the middle, where gives you the options and add or change subtitle and background audio track.
Step 2. Click the green plus button to start on the left side, and select or add one or more audio tracks to this video file.
Step 3. Navigate the green plus button on the right side and select or add SRT, SSA or ASS subtitle.
The first step is applying the basic editing features to create a video file with the good quality. For more advanced effects applied into your video, just read the next step.
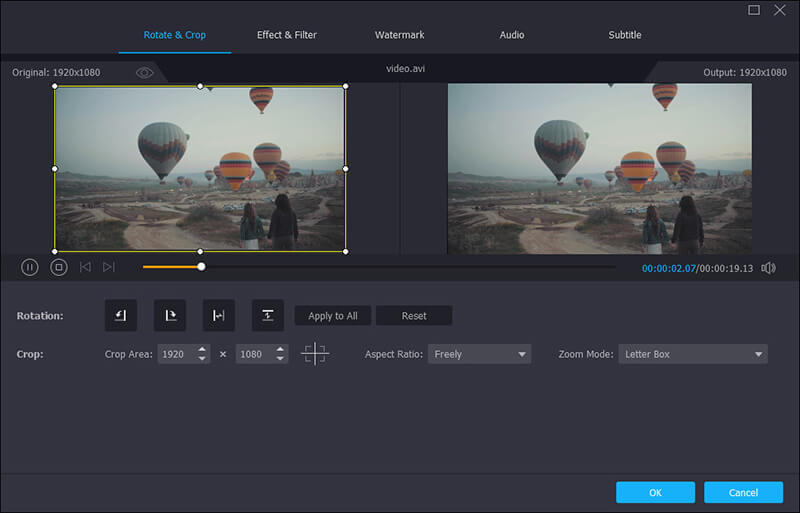
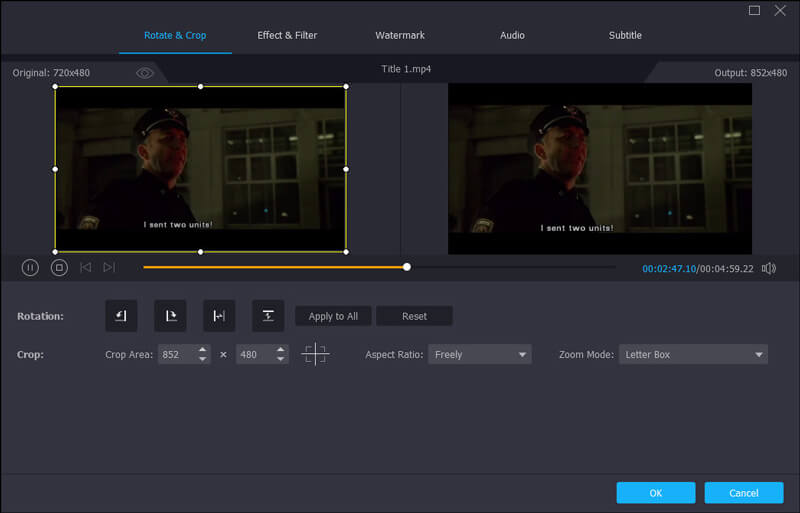
Step 2. Crop video to get rid of letterbox
One thing you may notice that there are annoyed black edges in your recorded video with the mobile phone. When your video file is like this, just crop your video file to get rid of the letterbox.
Step 1. After adding files to this software, click “Edit” button and navigate the “Crop” tab.
Step 2. You are able to adjust the border frame with mouse, or set the value to adjust the crop area and position.
Vidmore Video Converter also gives you the option to set the zoom mode to cut the black edges in your video file.
Step 3. Adjust brightness, contrast, hue and saturation
Light is one of the keys of a good quality video. You can see the amazing bright effects in a video or film. However, the unharmonious color effects of a video file will destroy the video file itself.
You can adjust the brightness, contrast, hue and saturation with Vidmore Video Converter.
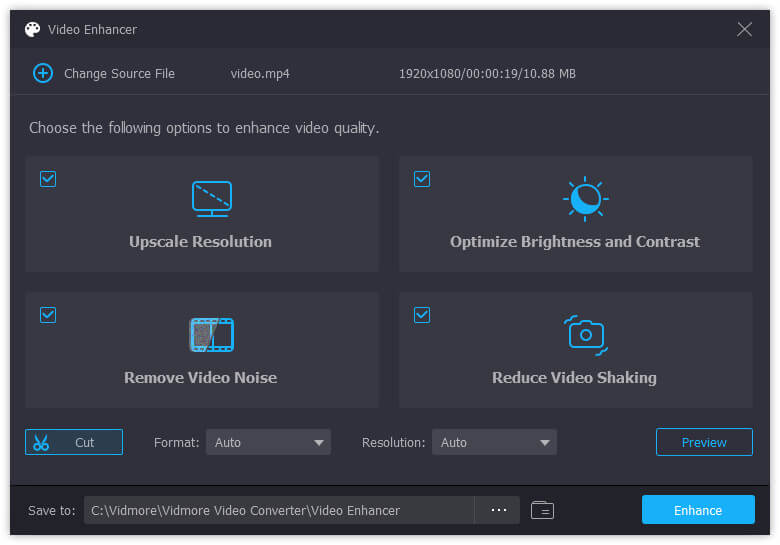
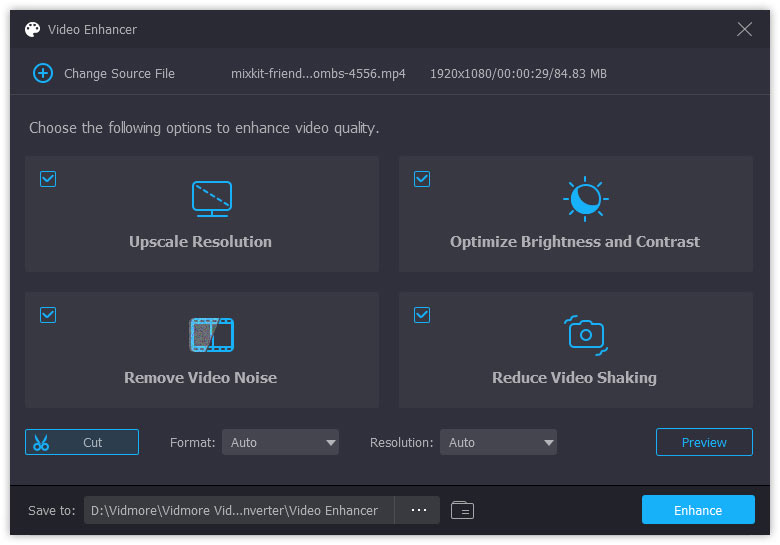
Step 1. After loading files into this software, click the “Enhance” function, where you could let this program adjust the brightness, contrast, hue and saturation automatically in one click by ticking “Optimize brightness and contrast”.
Step 2. Alternatively, if you are skilled of color effect adjustment in the video filed, you are given the option o adjust the contrast, saturation, brightness and hue.
Plus, it gives you the option to adjust the audio volume and deinterlacing the video file before converting, which seems to be more humanely to provide you with more features.

Step 4. Improve video resolution
It comes to be very common to download a lower resolution video and get a video recording from your phone camera. However, whether you want to use the video for sharing online or watching at the weekend, the lower resolution video is not a good idea. Getting the video resolution improved will be the solution.
Again, Vidmore Video Converter helps.
Step 1. Once again, after adding the files into this software, click the “Enhance” feature.
Step 2. Tick the option of “Upscale resolution”, where will automatically upscale your lower resolution video into higher resolution to get a superb video file.
Step 5. Remove video noise
White lines or dots, and color degradation in a video file will undoubtedly affect the playback. We call the annoyed white dots are video noise, and should remove the video noise to get the video quality.
Vidmore video Converter will do you the great favor to remove the video noise and improve your video quality.
Step 1. After adding the video file into this tool on your computer and click the “Enhance” function.
Step 2. Tick “Remove video noise” option to diminish and remove the unwanted artifacts of your video file.
Step 6. Reduce video shaking
Some vlog video files you can find are shaking because they may be recorded while moving. Moreover, some sport video files you will notice that they are recorded shakenly.
The shaking effects of the video file will greatly affect the video quality. For reducing video shaking and getting a good quality, Vidmore Video Converter will do you exactly.
Step 1. Just click “Enhance” button in the main interface of this software after adding the video files.
Step 2. Tick “Reduce video shaking” to adjust the whole frame movement to stabilize your shaking video file.

Step 7. Output H.265 codec
4K is the super high resolution, which will brings you super clear vision. So when you want to create a good quality, do not forget to output H. 265 codec, which highly supports 4K resolution.
Vidmore Video Converter can output the video file with H.264 and H.265 codec.
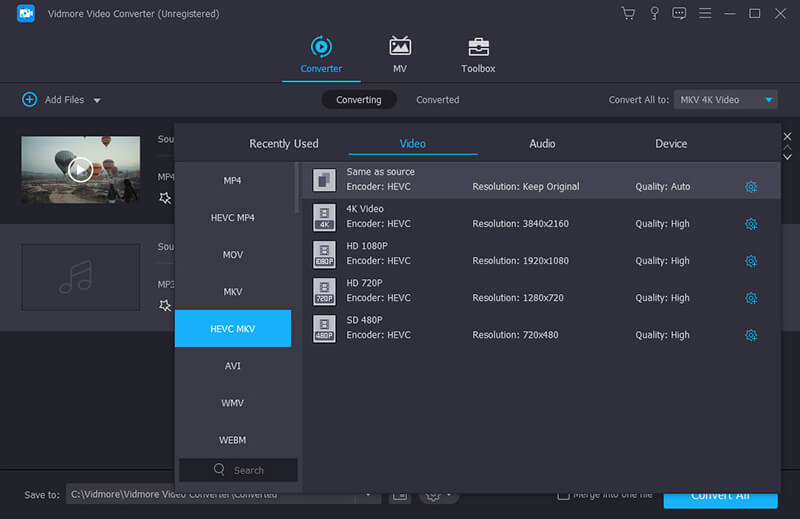
Step 1. Still run Video Converter on your computer, after adding this file to this utility and making all the effects prepared well, you should select the output file. Click the dropdown list of “Profile”, and you can see the various output formats. Type “H.265”, and it will display the formats supporting H.265 codec, and confirm the output formats you want to save with H.265 codec.
Step 2. Click “Convert” to start to save the video file as other formats with H.265 codec.
Conclusion
In this page, we mainly talk about how to improve video quality. We gather the most common 7 steps you can do to edit your video for higher quality and better effects, and the 7-step guide is very easy for everyone to follow. Without any professional skills, you just need Vidmore Video Converter to help you complete the whole process.
Video Tips
-
Improve Video Quality
-
Trim Video
-
Crop Video