What Is Xbox Game DVR and How to Use It on Xbox and Windows 10
There are oceans of gameplay recording applications for PCs and game consoles. Xbox Game DVR is one of the best game recorder developed by Microsoft. According to a recent survey, many users have not used this feature, partly because they do not understand how-to.
Therefore, this article will share a complete guide for this utility. No matter game players or Windows 10 users should read this guide carefully in order to master the Game DVR functionality on Xbox and Windows 10.
- Part 1: What Is Xbox Game DVR?
- Part 2: How to Use Game DVR on Xbox One
- Part 3: How to Use Game DVR on Windows 10
- Part 4: Best Alternative to Xbox Game DVR
- Part 5: FAQs of Xbox Game DVR
Part 1: What Is Xbox Game DVR?
The Game DVR feature was originally a part of the Xbox apps. It has the capacity to record video of your gameplay automatically in the background. After the gameplay, a video recording file will be saved. If you do not want to save it, Game DVR discard the video and continues game recording. In another word, you can play games on Xbox or Xbox One normally, and then decide to save the last five minutes of gameplay or not.
The downside is that Game DVR takes some system resources though it works in the background. So, it may interrupt your game experience on both console and Windows 10. If you do not care about gameplay recording, we suggest you to disable this feature since it noticeably slows your game performance.
On Windows 10, Game Bar is the graphical interface of the Game DVR feature. So, you can set and use the gameplay recording feature intuitively. Unlike Xbox, Game DVR feature is enabled on Windows 10 by default.
Part 2: How to Use Game DVR on Xbox One
Before recording gameplay with Game DVR on Xbox One, there are something you need to know:
- Once you turn on the Game DVR feature, the last five minutes of your gameplay will be recorded automatically.
- If you record a game manually and save it to Xbox One’s internal storage, you can produce a video up to 10 minutes depending on the resolution and available space.
- By connecting an external hard drive, you can record gameplay up to an hour continuously.
- Xbox One allows you to record gameplay in 720p or 1080p depending on your settings. For Xbox One X, the screen lets you capture at 4K.
- After gameplay recording, you can upload it to your social media account, OneDrive, or Xbox mobile app on iOS and Android.
- Xbox Game DVR also provides several video editing features, such as effect, trim and text.
How to Set Game DVR on Xbox One
Step 1: Press the Xbox button on your controller to open the Guide screen. Go to the System tab and select the All settings option.
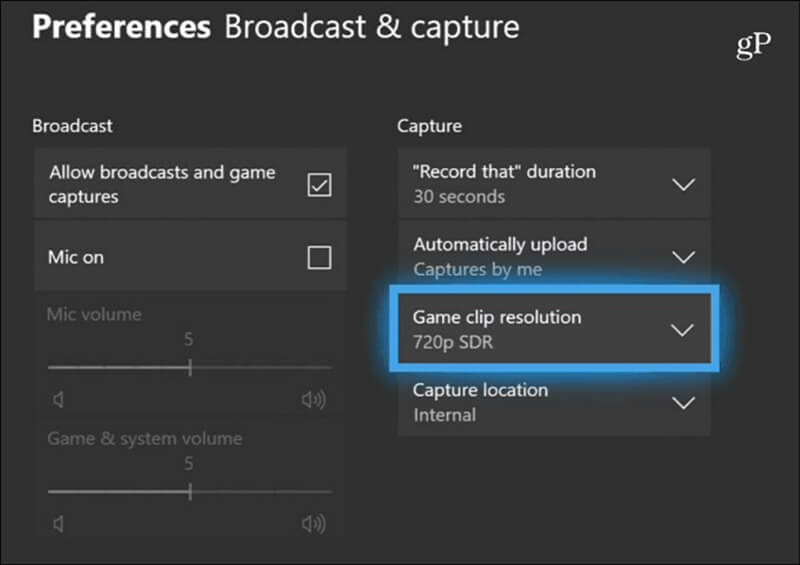
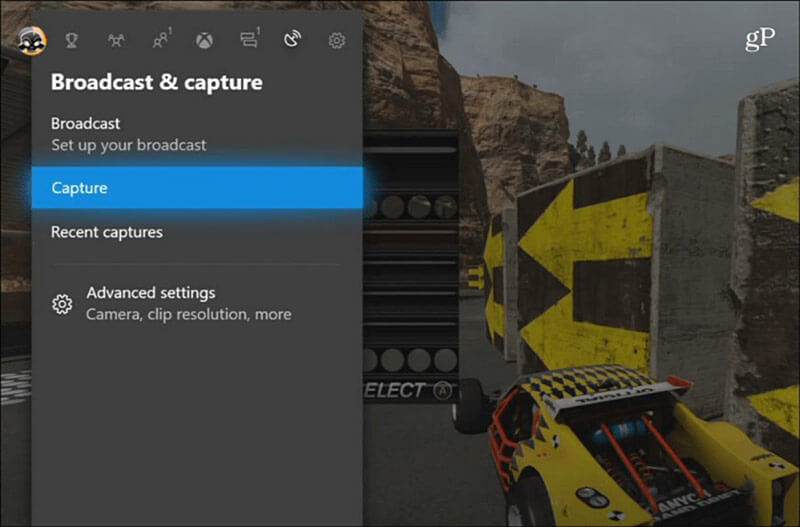
Step 2: Scroll down to the Preferences section and choose Broadcast & capture to display all options of Game DVR on Xbox One.
Step 3: Press the Game clip resolution option and select your favorite resolution. Then navigate to Capture location and select Internal. If you have connected an external drive to your Xbox One for saving gameplay recordings, select External. Customize other options based on your preferences.
How to Record, Edit and View Gameplay on Xbox One
Step 1: While you are playing a game on Xbox One, press the Xbox button on your controller. Then select the Capture option on the popup menu bar.
Step 2: Now, you have several options, such as Record from now, which is used to record your gameplay from now on. When you are done recording, press the Xbox button to display the Guide and press X to stop recording.
Step 3: To view your gameplay recordings, press Xbox button, select Recent captures. Choose a game clip to open it. If you want to share it, choose the Share option under the clip. Now, you can share the gameplay on Twitter, OneDrive or via Message.
Step 4: The Upload Studio app is used to edit your gameplay clips on Xbox One. You can get this app from Microsoft Store for free.
Note: Now, you can access the saved game recordings on your Windows 10. Open Xbox app, select Game DVR from the toolbar, and choose On Xbox Live to display all gameplay clips.
Part 3: How to Use Game DVR on Windows 10
Microsoft has transplanted the Xbox Game DVR feature into Windows 10. By default, this feature is enabled. When you play a game on PC, the Game Bar interface will pop up. Generally speaking, you can enable or disable Game DVR, set it up, and use this feature on Windows 10.
How to Enable or Disable Xbox Game DVR on Windows 10
Step 1: Click and open the Start menu at the bottom left corner and hit the Settings menu with a gear icon.
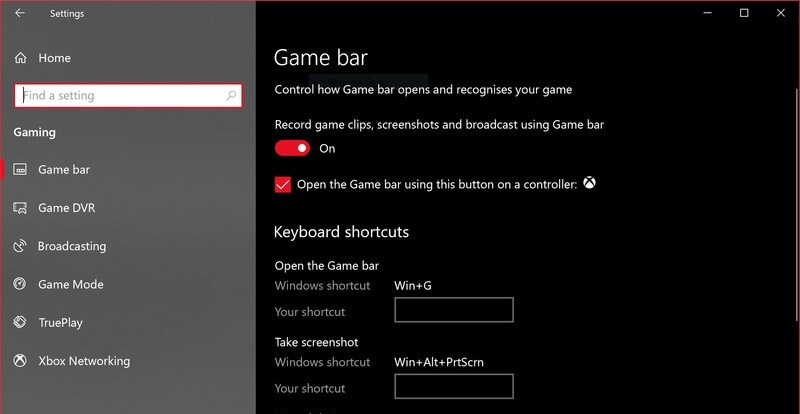
Step 2: Choose Gaming in the menu bar and select Game Bar, which is the GUI of Xbox Game DVR. To enable Game Bar, toggle on the switch under Record game clips, screenshots and broadcasting using Game bar. If you want to disable this feature, turn the switch off.
How to Configure Xbox Game DVR in Settings
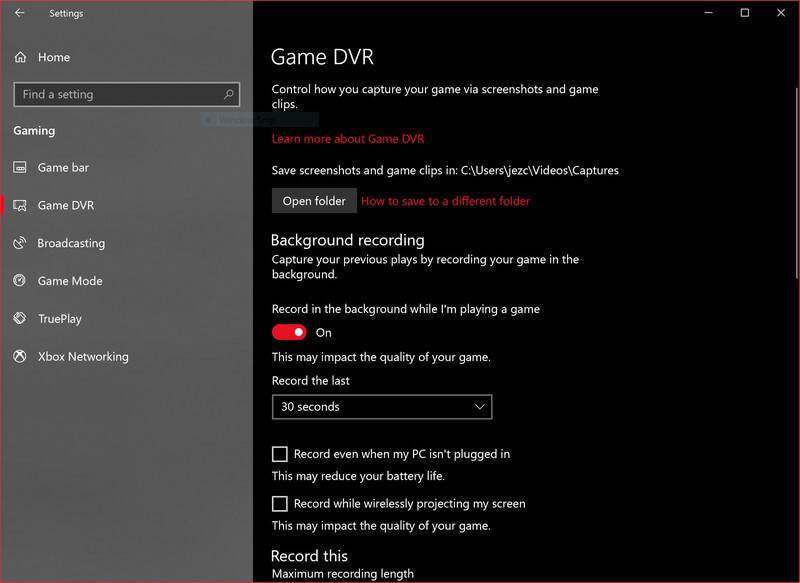
Step 1: Open the Settings window in Start menu, select Gaming and go to Game DVR.
Step 2: Click the Open folder button and set the destination folder to store the gameplay clips. Then decide whether to record gameplay in the background.
Step 3: If you enable the Game DVR feature, it will work automatically. However, you can determine the length of the game recording in the dropdown option under Record the last. Then you can find other custom options related to audio, video quality, cursor and more.
How to Set Game Bar before Gameplay Recording
Step 1: To get more custom options on Game Bar, press the Windows + G keys on your keyboard to open the Game DVR interface.
Step 2: Click the Settings button with a gear icon to open the Settings dialog. Here you can reset the options involved with shortcuts, capture, broadcast, and more.
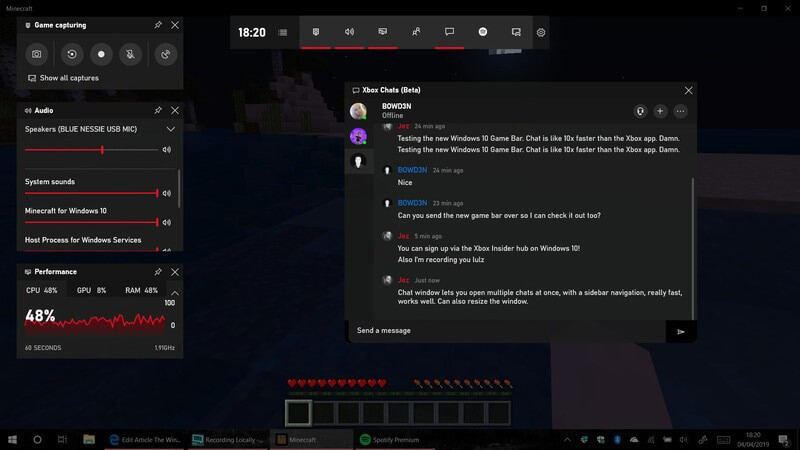
Step 3: On the left-hand column, you can modify the System sounds and other options related to Audio.
How to Record Gameplay with Xbox Game DVR

Step 1: Start your gameplay and press Windows + G keys if the Game DVR interface does not pop up automatically.
Step 2: Press the Start Recording button and check Yes, this is a game when prompted. Then press the Record button with a circle icon to start recording.
Step 3: To add your reaction to the gameplay recording, enable the Microphone icon on the Game DVR bar, permit the access and adjust the volume.
Step 4: When your gaming is done, click the Stop Recording button on Game Bar. The game recording will go to your video library or the destination you set.
Note: During game recording, you can make screenshots with the Screenshot button on Game Bar.
Part 4: Best Alternative to Xbox Game DVR
Though Xbox Game DVR is the native way to record gameplay on Windows 10, it is not the best option due to downsides. The complicated setting is the biggest complain, not to mention that you cannot find all settings in a single screen. Plus, you cannot add your face into the gameplay recordings using Xbox Game DVR. From this point, we recommend Vidmore Screen Recorder.
- Capture gameplay on Windows 10 without enabling Game DVR.
- Offer extensive custom options for advanced users.
- Not interrupt your gameplay while recording.
- Use hotkeys and buttons to control the gameplay recording.
- Overlay your face and voice to game recording through webcam.
In brief, it is the best alternative of Xbox Game DVR to capture games on Windows 10/8/7 and Mac OS X. We use Windows 10 as the example to show you how it works.
How to Capture Game on Windows 10 without Game DVR
Step 1: Install Screen Recorder
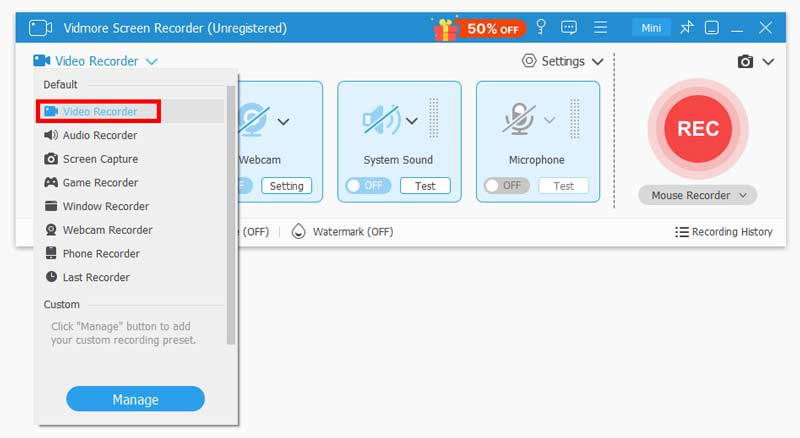
Before recording your gameplay, install the best alternative to Xbox Game DVR to your computer. Then launch it and select Video Recorder to open the game recorder window.
Step 2: Capture game in one click
There are four sections on the window, Display, Webcam, System Sound and Microphone.
Display: Capture everything happens on your desktop including gameplay.
Webcam: Add your face and reaction to the video recording through your webcam.
System Sound: Record sound on your computer, such as game sound.
Microphone: Record your voice through microphone and add it to the gameplay recording.
Turn on Display and set the recording area based on your game. The Full option will capture entire screen and Custom allows you to set it manually. Then enable System Sound. To overlay your face and voice on the game clip, turn on Webcam and Microphone; otherwise, disable them.
Play your game and hit the REC button on the best alternative to Xbox Game DVR to start recording it.
Tip: For advanced users, click the Settings icon to open the Preferences dialog, and customize the options.

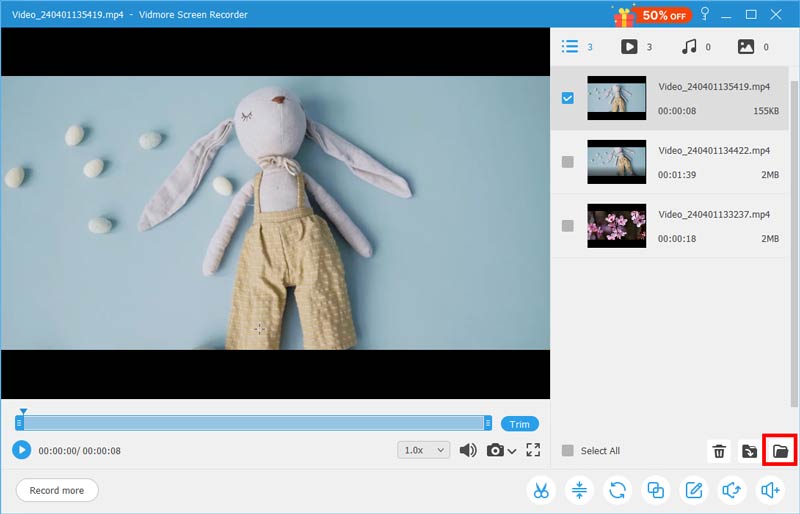
Step 3: Save game recording
Once gameplay is done, click the Stop icon to enter the Preview window. Here you can view the game clip with the built-in media player. The Clip tool lets you remove unwanted frames. If you are satisfied with the game clip, hit the Save button. Set the destination location and export it to your hard drive.
Part 5: FAQs of Xbox Game DVR
Does Xbox One record 60fps?
Yes, the in-built Game DVR feature can help you capture gameplay footage at 60fps on Xbox One and Xbox One X. In fact, this is available to record gameplay on Windows 10 using the Game DVR feature.
Does Game DVR affect performance?
The Game DVR feature is enabled on both Windows 10 and Xbox One. However, many people asked how to disable this feature since it can interfere with your game performance. Though it works in the background, game recording requires some GPU power.
How do I record last 30 minutes on my computer?
The Game DVR allows you to record last 10 minutes to 15 seconds of your gameplay. If you want to record longer gameplay, you have to try a third-party game recorder, such as Vidmore Screen Recorder. Alternatively, Xbox Game DVR allows you to record a game up to 4 hours without using the manually recording feature.
Conclusion
This guide has talked about one of the most useful features on Xbox and Windows 10, Game DVR. Originally, this feature was developed for Microsoft’s game console. Now, you can use it on Windows 10 for game recording and screen capturing. Based on the sharing above, you should understand how to use this feature on Xbox One and Windows 10. Vidmore Screen Recorder, on the other hand, is the best alternative to Xbox Game DVR. If you have other problems, please write down below.
Record & Edit
-
Record Game
-
Improve Video Quality
-
Trim Video with